Unsupported browser
This site was designed for modern browsers and tested with Internet Explorer version 10 and later.
It may not look or work correctly on your browser.
- Presentations

How to Create a PowerPoint Presentation From a PPT Template
- Bahasa Indonesia
Creating a presentation from scratch can be time-consuming and complicated. Even when you try your best, the presentation design may not turn out how you want. This is why using a premium template is beneficial.
This article covers how to create a PowerPoint presentation from a quality PPT template. In addition, we’ll also look at some top premium PowerPoint presentation templates.
Download Our Free PDF eBook on Making Great Presentations
We also have the perfect complement to use alongside a professional presentation template. Download our Free eBook: The Complete Guide to Making Great Presentations , which will help you write, design, and deliver the perfect presentation.

What Is a PowerPoint Template?
PowerPoint is a popular presentation software by Microsoft. You can use PowerPoint for business and personal purposes. Presentations are a great way to use words to create an impact. For example, if you show the benefits of a product or service or present data, a presentation can make it more memorable.
A PowerPoint template is like a blueprint for your presentation. Templates typically contain slide layouts, colors, fonts, effects, and background styles. In addition, some templates come with illustrations and infographics. These tools make your presentation more visually interesting and can help you explain an important topic.
Your Preparation
Most of the work while creating a business presentation occurs before you fire up PowerPoint.
When creating a presentation, you want to achieve an objective. For example, you might need to present the results of your department for the last quarter in the form of a presentation to your colleagues. Or, you could be seeking funding and looking to impress potential investors with your business pitch presentation . Know what your presentation is aiming to communicate and accomplish.
Getting the Content Right
Everything begins with the content you'll put in the presentation to achieve your objective. Ideally, it's brief and crystal-clear. Typically, the less content (by sticking to key facts and figures), the more digestible your presentation is.

To save time, revising content while you're still preparing it (such as in Word or any other text processor) is much smarter than making content changes while designing.
Once you feel confident about your content preparation, it's time to design your presentation in PowerPoint.
Designing Your Presentation
For our tutorial, we'll be using the Business PPT template . Then, we'll show you how to use the template to customize slides for your business presentation.

Before starting any template you download, look at the initial requirements in an accompanying text file or their online description. For example, not having the correct font installed might mess up the layout of the template slides.
Getting Started
First, let's duplicate the theme. You can achieve this by right-clicking on the .pptx file and clicking Copy in the menu. You can copy and paste the file and rename the new document.
Instead of directly editing the template, we'll be copying slides that we'll use in our new document from the original theme file. This way, we're not editing the template source in which you would need to delete or hide slides you don't use.
Now let's review how to edit this PowerPoint template for your presentation:
How to Create a PowerPoint Presentation from a PPT Template
Are you ready to start creating your presentation?
Let's get started:
1. Choose a Template
The first step in how to create a PowerPoint presentation is to choose a template. The template featured in this section is the Business PowerPoint Presentation . This template comes with 50 unique PowerPoint slides. Easily add an image to the template by dragging and dropping an image of your choice into the picture placeholder.
2. Create an Outline
Creating an outline before working on your presentation is a great way to organize your thoughts. When creating a presentation, you want the audience to be clear, consistent, and organized.
Also, when you create an outline, it can help you make sure that you've got the best message. You can also use an outline to choose where you want your images or other multimedia. Also, they can help you see if you missed a topic or point.
3. The Basics

To learn the basics, let's start with slide seven. As you can see, there are a few components on the slide that we can change according to our needs. At first sight, we notice the following components available to us:
- footer text
I'd advise you to always look at the available components in a slide design as you're glancing over the different slides within a theme. This has a few benefits:
- You can identify how your content can fit the deck's structure.
- You can decide on the components you like (or dislike).
- You'll notice a pattern in the slide designs.
Now that we understand the components we can change to suit our needs, let's move ahead and start designing.
4. Removing Slide Components

For this example, I'll be making a simple slide to introduce the topic of this presentation. I've decided I don't need a footer or paragraph text underneath the title.
To remove the text, simply click on each Text Box and use the Delete key to remove the components from the slide.
To delete multiple words, highlight the words and then press Delete on your keyboard. If you want to add them again, you can use the top toolbar to insert text boxes, images, and other assets such as shapes and graphs.
5. Use the Slide Master

But wait! You might notice that you can't click on certain components within the slide. For example, you can't change the footer. This is because it's set in a Master Slide .
The easiest way to explain a Master Slide is to think of a boilerplate which forms the foundation for your slide designs.
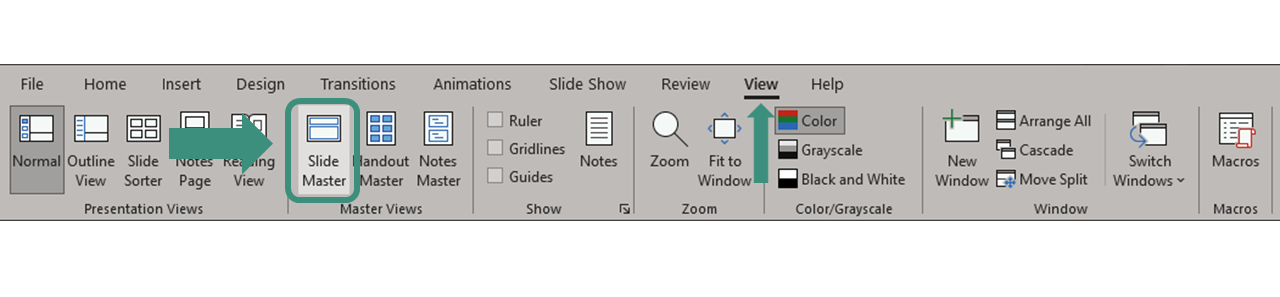
The slide master tool lets you edit the layout from a single slide. This makes it easy to edit the layout of multiple slides at once. To access the slide master tool, click on the View tab.
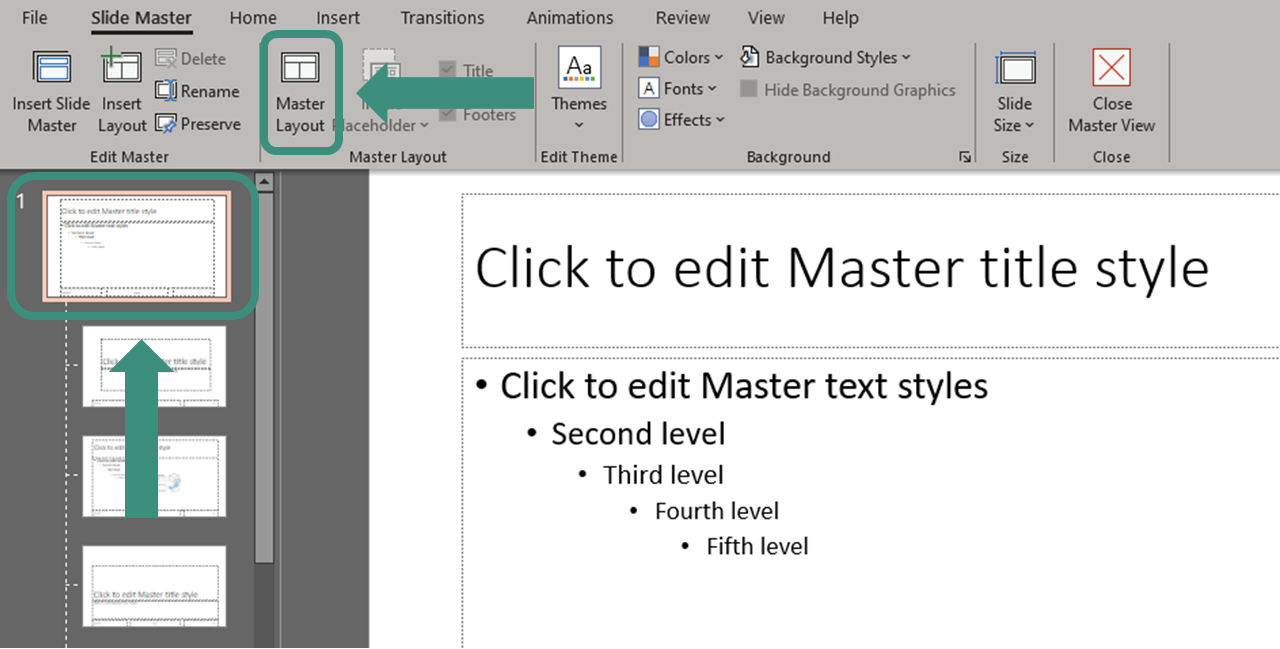
Next, click on the Slide Master icon. This opens up the tool. The large slide is the slide that you make edits to. The small slides under the large slide is the group that'll be edited when you edit the large slide.
This is normal, as a master slide can have a Master Layout . Master slides use a master layout used in a group of master slides.
Let's access the master layout by looking at our master slide overview in the left panel and scrolling all the way up until we see the slide on top of the group. This is the slide that contains the master layout.
In this slide, you can change the footer. You'll also notice the child master slides updating as you change this. Click the Close Master button in the top toolbar to save your changes.
You'll notice that the elements you couldn't edit have been updated and changed in the deck design.
For more information about the Slide Master tool, read this in-depth article:

6. How to Add Animation

If you want to add something fun to your presentation, you can add animation. First, however, you need to know how to edit PowerPoint templates to add animation. For this illustration, we'll switch to slide two.
First, click on the Animations tab above the toolbar. When you click on this tab, you’ll see the different effects, such as:
- the green Entrance Effects
- the yellow Emphasis Effects
- the red Exit Effects
Next, click on the object that you want to animate. Then, choose the animations from the effects options that you want to use.
For more information about PowerPoint animation, read these articles:

7. Add an Image
You can use two methods to add an image to a presentation template.
The first method is using picture placeholders. A good premium template has picture placeholders in the template.
For example, slide one of the Business PowerPoint Presentation templates has a picture placeholder in the middle of the slide.

For example, you can find unlimited stock photos on Envato Elements. Download them to your device quickly and easily.
Download a photo you'd like to use and drag the image into the slide. Of course, essential to notice is that the picture is high enough in resolution (as a general rule, never aim for an image that's got less than 1600 pixels in width, or the quality might be poor).
You may need to adjust the image size and position.
The second method is to click on the Insert tab above the toolbar.
Next, click on the Pictures button in the toolbar. When you click on this button, a menu appears. Choose the correct option depending on where your image file is located. Your image appears on your slide. Adjust the image as needed.

8. Image Transparency

First, click on the image. Next, click on the Picture Format tab above the toolbar. You'll see a Transparency button in the toolbar. When you click on this button, a Transparency menu appears. Choose the option that you want.
You can easily change the transparency of an image to increase the legibility of the text on top of the picture.
Let's add some finishing touches. Click on the title to change its text, remove the placeholder logo using backspace, and drag in your company's logo. Should you have any issues with the formatting, double-click on the image.
9. Fitting Images

In the top toolbar under the Picture Format tab, there's a Crop button with a dropdown next to it. When you click on the dropdown menu, there's a Fit option and a Fill option. The fit option helps you fit an image within a constrained box. The Fill option is useful to cover a constrained box (for example, when using a background image).
10. Images Within Shapes

The final tricky part is updating images within a shape. Let's look at slide 23.
When you click on the graphic on the right, you'll notice it's a shape that's got multiple areas. You can double-click on the image placeholders within the shape to open a menu to select the image you'd like to add to the shape.
With that, we're all set to complete this slide!
11. Final Tips
As you notice, navigating through a theme design is very easy.
It would be best if you remembered that there's a distinction between your slide design, which uses placeholders, and recurring components , which you can't edit directly in the slide but can change in the corresponding Master Slide . If you can't access an item in the original master slide, a parent Master Slide uses a Master Layout . Multiple slides use the master layout. This allows for a consistent design across multiple presentation files.
As a quick overview, the ideal process to edit a template is the following:
- Copy and the original template into a new working document you'll save separately.
- Make edits to each slide you work with. Start with placeholders, then change the corresponding Master Slide if needed. Of course, you can add and remove text, images, and charts.
- You might notice that your changes to the Master Slide affects your other slides, which is good as you only need to update the placeholders, saving time.
- Do a final check if everything looks solid, and you're all set!
The Top Source for Premium PowerPoint Templates (With Unlimited Use)
Envato Elements is a great place to find the top premium PowerPoint templates. To gain access to premium templates, you must pay a low monthly fee to become a subscriber. Once you become a subscriber, you’ll gain access to more than just premium PowerPoint templates . You’ll have access to images, fonts, audio, and more.
Explore Premium Presentation Templates

Using a premium PowerPoint template saves you time because you aren’t creating a presentation from scratch when you use a premium template. In addition, if you use a premium template, you start with a great base. This means that all you need to do is add images and text.
Every template is made by a professional to look impressive and stylish. As a result, you’ll stand out among your peers who created their own or used a free template.
If you’re creative and like to customize your presentation with a premium template, you can still make as many customizations as much as you want. A good premium template is entirely editable.
Best Five PowerPoint Presentation Templates from Envato Elements
Here are some of the top PowerPoint templates from Envato Elements:
1. Creature PowerPoint

Creature is a multipurpose presentation with a versatile design. There are over fifty unique slides that you can use to create a PowerPoint for any topic you have.
This template also comes with charts, graphs, and icons. These elements add visual interest to your presentation.
2. Everlux PowerPoint Presentation

This presentation template is a professional presentation with a portfolio to showcase your work if you’re a creator. For example, you’ll have over 40 unique total slides when you create a PowerPoint with this template.
Easily add an image to this template by dragging and dropping an image of your choice by dragging and dropping it into the picture placeholder.
3. Kanal PowerPoint Template

This template has a minimal design that can work for any presentation topic. With this template, you’ll have 68 custom slides to use when creating a PowerPoint presentation. Plus, it's got animation and transitions, adding some interest to your presentation.
4. VERA PowerPoint Template

When creating a PowerPoint, you must consider what kind of presentation you want. This template is excellent for Creatives. This template comes with 55 creatives slides. It also comes with 50 premade color schemes.
5. Style Multipurpose PowerPoint Template

Style Multipurpose PowerPoint Template is a multipurpose presentation template. It comes with 4000 total slides making it easy to create a PowerPoint presentation. Easily add an image of your choice to this template by dragging and dropping the image into a picture placeholder.
Grab This eBook on Making Great Presentations (Free Download)
We've got just the right complement to a professional PowerPoint template that'll help you learn the complete process of how to write, design, and deliver great presentations.
Download The Complete Guide to Making Great Presentations now for FREE with a subscription to the Tuts+ Business Newsletter. Get your ideas formed into a powerful presentation that'll move your audience.

More Top PowerPoint Templates
Haven’t found a template that suits your needs? Check these articles out for more templates.

Download a Premium PowerPoint Template Today!
You've just learned how to edit a PowerPoint template and how to create a PowerPoint presentation using a template.
Once you start with a premium template , it isn’t hard to create a presentation. Next time you need to create a presentation, try using a premium template. Gain access to thousands of premium PowerPoint templates and digital assets by signing up for Envato Elements today!
Editor's Note: This tutorial was originally published in 2016 by Sven Lenaerts . It's been completely redone to make it accurate and up to date.

- PRO Courses Guides New Tech Help Pro Expert Videos About wikiHow Pro Upgrade Sign In
- EDIT Edit this Article
- EXPLORE Tech Help Pro About Us Random Article Quizzes Request a New Article Community Dashboard This Or That Game Happiness Hub Popular Categories Arts and Entertainment Artwork Books Movies Computers and Electronics Computers Phone Skills Technology Hacks Health Men's Health Mental Health Women's Health Relationships Dating Love Relationship Issues Hobbies and Crafts Crafts Drawing Games Education & Communication Communication Skills Personal Development Studying Personal Care and Style Fashion Hair Care Personal Hygiene Youth Personal Care School Stuff Dating All Categories Arts and Entertainment Finance and Business Home and Garden Relationship Quizzes Cars & Other Vehicles Food and Entertaining Personal Care and Style Sports and Fitness Computers and Electronics Health Pets and Animals Travel Education & Communication Hobbies and Crafts Philosophy and Religion Work World Family Life Holidays and Traditions Relationships Youth
- Browse Articles
- Learn Something New
- Quizzes Hot
- Happiness Hub
- This Or That Game
- Train Your Brain
- Explore More
- Support wikiHow
- About wikiHow
- Log in / Sign up
- Computers and Electronics
- Presentation Software
- PowerPoint Presentations
Simple Steps to Make a PowerPoint Presentation
Last Updated: July 23, 2024 Fact Checked
Creating a New PowerPoint
Creating the title slide, adding a new slide, adding content to slides, adding transitions, testing and saving your presentation.
This article was co-authored by wikiHow staff writer, Darlene Antonelli, MA . Darlene Antonelli is a Technology Writer and Editor for wikiHow. Darlene has experience teaching college courses, writing technology-related articles, and working hands-on in the technology field. She earned an MA in Writing from Rowan University in 2012 and wrote her thesis on online communities and the personalities curated in such communities. This article has been fact-checked, ensuring the accuracy of any cited facts and confirming the authority of its sources. This article has been viewed 4,342,454 times. Learn more...
Do you want to have your data in a slide show? If you have Microsoft 365, you can use PowerPoint! PowerPoint is a program that's part of the Microsoft Office suite (which you have to pay for) and is available for both Windows and Mac computers. This wikiHow teaches you how to create your own Microsoft PowerPoint presentation on a computer.
How to Make a PowerPoint Presentation
- Open the PowerPoint app, select a template and theme, then like “Create.”
- Click the text box to add your title and subtitle to create your title slide.
- Click the “Insert” tab, then “New Slide” to add another slide.
- Choose the type of slide you want to add, then add text and pictures.
- Rearrange slides by dragging them up or down in the preview box.
Things You Should Know
- Templates make it easy to create vibrant presentations no matter your skill level.
- When adding photos, you can adjust their sizes by clicking and dragging in or out from their corners.
- You can add animated transitions between slides or to individual elements like bullet points and blocks of text.

- If you don't have a Microsoft Office 365 subscription, you can use the website instead of the desktop app. Go to https://powerpoint.office.com/ to use the website version.
- You can also use the mobile app to make presentations, though it's easier to do this on a computer, which has a larger screen, a mouse, and a keyboard.

- If you don't want to use a template, just click the Blank option in the upper-left side of the page and skip to the next part.

- Skip this step if your selected template has no themes available.

- If you're creating a PowerPoint presentation for which an elaborate title slide has been requested, ignore this step.

- You can change the font and size of text used from the Home tab that's in the orange ribbon at the top of the window.

- You can also just leave this box blank if you like.

- You can also click and drag in or out one of a text box's corners to shrink or enlarge the text box.

- On a Mac, you'll click the Home tab instead. [1] X Research source

- Clicking the white slide-shaped box above this option will result in a new text slide being inserted.

- Title Slide
- Title and Content
- Section Header
- Two Content
- Content with Caption
- Picture with Caption

- Naturally, the title slide should be the first slide in your presentation, meaning that it should be the top slide in the left-hand column.

- Skip this step and the next two steps if your selected slide uses a template that doesn't have text boxes in it.

- Text boxes in PowerPoint will automatically format the bulk of your text for you (e.g., adding bullet points) based on the context of the content itself.
- You can add notes that the Presentation will not include (but you'll still be able to see them on your screen) by clicking Notes at the bottom of the slide.

- You can change the font of the selected text by clicking the current font's name and then clicking your preferred font.
- If you want to change the size of the text, click the numbered drop-down box and then click a larger or smaller number based on whether you want to enlarge or shrink the text.
- You can also change the color, bolding, italicization, underlining, and so on from here.

- Photos in particular can be enlarged or shrunk by clicking and dragging out or in one of their corners.

- Remember to keep slides uncluttered and relatively free of distractions. It's best to keep the amount of text per slide to around 33 words or less. [2] X Research source

- Slide content will animate in the order in which you assign transitions. For example, if you animate a photo on the slide and then animate the title, the photo will appear before the title.
- Make your slideshow progress automatically by setting the speed of every transition to align with your speech as well as setting each slide to Advance . [3] X Trustworthy Source Microsoft Support Technical support and product information from Microsoft. Go to source

- If you need to exit the presentation, press Esc .

- Windows - Click File , click Save , double-click This PC , select a save location, enter a name for your presentation, and click Save .
- Mac - Click File , click Save As... , enter the presentation's name in the "Save As" field, select a save location by clicking the "Where" box and clicking a folder, and click Save .
Community Q&A
- If you save your PowerPoint presentation in .pps format instead of the default .ppt format, double-clicking your PowerPoint presentation file will prompt the presentation to open directly into the slideshow view. Thanks Helpful 6 Not Helpful 0
- If you don't have Microsoft Office, you can still use Apple's Keynote program or Google Slides to create a PowerPoint presentation. Thanks Helpful 0 Not Helpful 0

- Your PowerPoint presentation (or some features in it) may not open in significantly older versions of PowerPoint. Thanks Helpful 1 Not Helpful 2
- Great PowerPoint presentations avoid placing too much text on one slide. Thanks Helpful 0 Not Helpful 0
You Might Also Like

- ↑ https://onedrive.live.com/view.aspx?resid=DBDCE00C929AA5D8!252&ithint=file%2cpptx&app=PowerPoint&authkey=!AH4O9NxcbehqzIg
- ↑ https://www.virtualsalt.com/powerpoint.htm
- ↑ https://support.microsoft.com/en-us/office/set-the-timing-and-speed-of-a-transition-c3c3c66f-4cca-4821-b8b9-7de0f3f6ead1#:~:text=To%20make%20the%20slide%20advance,effect%20on%20the%20slide%20finishes .
About This Article

- Send fan mail to authors
Reader Success Stories
Artis Holland
Sep 22, 2016
Is this article up to date?
Oct 18, 2016
Jul 23, 2016
Margery Niyi
Sep 25, 2017
Jul 21, 2016

Featured Articles

Trending Articles

Watch Articles

- Terms of Use
- Privacy Policy
- Do Not Sell or Share My Info
- Not Selling Info
wikiHow Tech Help Pro:
Level up your tech skills and stay ahead of the curve
7 Steps to Create a Presentation in PowerPoint (+ Templates)
Learn essential steps and tips to move beyond data slides. Discover why PowerPoint falls flat and unveil next-gen tools for impactful presentations.

Hadar Peretz
6 minute read

Short answer
7 steps to create a presentation in PowerPoint
Begin with a surprise or bold statement.
Provide necessary background information.
Frame your presentation as a story.
Keep the text concise and meaningful.
Use visuals to complement the text.
Incorporate interactive design.
Conclude with actionable insights.
Effective data and visual presentation requires specific knowledge
Displaying complex data and project visuals via multimedia elements demands substantial knowledge.
It's not merely about presenting data but doing so in a manner that's intuitive and engaging for the audience.
Utilizing graphs, charts, videos, and interactive animations effectively necessitates a good grasp of design principles, storytelling, and data visualization.
Moreover, familiarity with the technology and platforms for creating and sharing these multimedia presentations is crucial.
This blend of design acumen, technological expertise, and succinct communication is key to ensuring the data and project visuals are comprehended well by the audience.
5 benefits of mastering PowerPoint presentations
PowerPoint presentations come with a variety of benefits that make them a popular choice for both professional and educational settings. Here are some of the advantages:
Visual Engagement: Utilize visuals to keep audiences engaged and convey ideas effectively.
Organization: Structured slides ensure a clear, linear flow of content.
Customization: Modify designs to suit different topics or branding needs.
Compatibility and Reusability: Easily share across platforms, and update or reuse presentations.
Supports Multimedia: PowerPoint supports the integration of videos, hyperlinks, and other multimedia elements.
How to make a presentation in PowerPoint? (7 steps)
Creating a compelling presentation in PowerPoint is a blend of artistry and storytelling, combined with a clear understanding of the material at hand.
Let’s break down this process into seven detailed steps to craft a presentation that not only captivates your audience but leaves a lasting impact.
1. Start with a surprising statement, a bold promise, or a mystery
Kicking off with something unexpected grabs your audience's attention right from the outset.
It might be a shocking fact related to your topic, a bold promise of what they'll learn, or a mystery that piques their curiosity.
For instance, if your presentation is about time management , you might start with a surprising statistic about the average amount of time people waste on trivial tasks.
learn how to avoid these presentation starters : overloading facts, over-explaining initially, generic content, relying solely on PowerPoint norms, revealing key benefits early, and focusing on self over audience engagement.
Aim for curiosity-sparking, audience-tailored narratives.
2. Provide context with a bit of background information
Before diving deep, give your audience a clear understanding of the topic at hand. Offer a brief background to set the stage.
Going with the time management example, you could provide some insights into how modern distractions have made managing time more challenging.
3. Structure your presentation within a story framework
Stories are a powerful medium to convey messages. Structuring your presentation as a story keeps your audience engaged.
Introduce a protagonist, which could be an individual, a group, or even your audience, facing a problem that your presentation will help solve.
For instance, narrate a day in the life of a person struggling to manage time and how the techniques you’re about to share turn things around.
4 steps to structuring your presentation within a story framework:
Introduce Setting and Characters: Kickstart by presenting the backdrop and the entities involved, making them relevant to your audience.
Highlight a Conflict or Challenge: Unveil a significant problem or hurdle that the audience can relate to, setting the stage for your solutions.
Propose the Resolution: Unfold your solutions to the earlier stated problem, walking your audience through each resolving step.
Recap and Look Ahead: Conclude by recapping the narrative and offering actionable steps or insights for the audience to ponder upon or implement.
4. Make every word count, and use as few as possible
Conciseness is key. Make sure each word on your slide adds value to your presentation. This approach keeps your slides uncluttered and easy to follow.
For instance, instead of writing a long sentence about the importance of prioritizing tasks, use a brief statement like “Prioritize to Monetize.”
5. Use visuals only to support your presentation text
Utilizing visuals judiciously within your presentation is crucial. Visuals should complement your narrative, not overshadow it.
Explore the steps to make a presentation creative , apply these methods, and see your skills enhance, leading to captivating presentations.
The essence is to employ images, graphs, and charts to enhance understanding or convey a message more efficiently.
For instance, a simple pie chart can swiftly illustrate how much time is saved by effective prioritization.
By adhering to this guideline, you ensure that your audience remains focused on the key messages being delivered, with visuals serving as a supportive tool rather than a distraction.
6. Use interactive design to make your audience active participants
Engage your audience with interactive elements. Incorporating clickable links, embedded videos, or live polls can make your presentation more interactive and engaging.
For instance, a live poll could be used to understand the audience’s prior knowledge about time management.

7. End by telling your audience what they can do with what they’ve learned
Your conclusion should empower your audience to apply the learnings in their lives. Recap the key points and provide actionable steps they can take post-presentation.
For instance, share a list of time-management tools or a 30-day challenge to improve productivity.
By following these seven steps, you’re on the path to mastering the art of creating impactful PowerPoint presentations.
Each step is geared towards making your content more engaging, understandable, and memorable, ensuring that your message not only resonates with your audience but prompts action long after your presentation concludes.
Browse basic examples about how to end a presentation and discover what should be on the last slide of the presentation.
8 pro tips for crafting effective PowerPoint presentations
Crafting an effective PowerPoint presentation demands a blend of clear objectives, engaging narrative, visual creativity, and audience-centric communication.
Here are key tips to guide you in this endeavor:
Know Your Audience: Tailor your message to match audience expectations.
Clear Objective: Define the primary goal of your presentation.
Engaging Storyline: Employ a compelling narrative to convey your message.
Simplicity is Key: Keep content concise and language simple.
Visual Aids: Use visuals like images and charts to support text.
Practice and Prepare: Familiarize yourself with your content and anticipate questions.
Interactive Elements: Incorporate polls or Q&A to engage the audience.
C all to Action: End with a clear call to action guiding the audience on the next steps.
Why it's time to move to the next-gen presentation tools
Making a memorable presentation requires more than just PowerPoint slides. In fact, making a PowerPoint presentation interesting is impossible .
In today's digital era, engaging your audience demands innovative tools and a narrative approach.
Let’s explore a game-changing tool for impactful presentations.
Embrace interactivity
Interactive presentations foster real-time engagement, turning monologues into dialogues.
Tools like Storydoc offer a fresh, engaging approach to sharing your message.
With the right tools, creating lasting impressions is a breeze. It’s time to change the narrative and make your presentations both informative and inspiring.
Here’s our CEO, Itai Amoza, discussing the key elements that make a presentation engaging:

Best tool for making an effective presentation
Traditionally, PowerPoint or Google Slides were the go-to platforms for crafting presentations, offering simplicity.
However, to truly engage modern audiences, stepping up your game is essential. This is where next-gen AI-driven tools like Storydoc come into play.
Unlike static slides, Storydoc enables the creation of interactive, immersive content experiences. It’s not merely about showcasing data, but weaving a compelling narrative that resonates with your audience.
Creative presentation templates
Ever faced the daunting blank slide with a blinking cursor urging creativity? It's like having a stage awaiting your script.
Overcoming this initial challenge can be hefty, but there's a savior - creative presentation templates.
These templates act like a structured canvas, guiding your narrative while leaving room for your unique flair.
Grab a template and witness the simplicity it brings to narrating your distinct tale.
I am a Marketing Specialist at Storydoc, I research, analyze and write on our core topics of business presentations, sales, and fundraising. I love talking to clients about their successes and failures so I can get a rounded understanding of their world.

Found this post useful?
Subscribe to our monthly newsletter.
Get notified as more awesome content goes live.
(No spam, no ads, opt-out whenever)
You've just joined an elite group of people that make the top performing 1% of sales and marketing collateral.
Create your best presentation to date
Try Storydoc interactive presentation maker for 14 days free (keep any presentation you make forever!)
Blog > How to create a PowerPoint Template
How to create a PowerPoint Template
08.27.21 • #powerpointtips.
Today, we are getting into a powerful PowerPoint feature that can save you and your co-workers lots of time. Maybe you are already using them, but since almost 70% of PowerPoint users do not, and if you are one of them you are about to learn some important things. Whether you already know about templates or you’ve never heard of them – we are going to teach you everything you need to know and show you the steps to create your own one.
What is a template and why should I use it?
- A PowerPoint template is a kind of pattern that is predefined for a presentation. It gives a frame for the content and the design of your slides.
- Elements like background, colours, titles, etc. are set beforehand.
- You can save the template separately and reuse it for as many presentations as you need.
- As all the designs and slides have already been defined, you only need to add your custom text and pictures. That saves a lot of time.
- Templates are especially perfect for companies. Make one template that fits the corporate design and any employee can use them from now on, saving time and giving your business a consistent and professional appearance.
Now, learn how to create a template by watching our video or reading the steps below.
The slide master
The Slide Master is the most important tool for creating templates. You can find it by clicking View in the PowerPoint menu (and then clicking on Slide Master ).

In the window on the left you will find a couple of slides that do not (yet) have a design. Also, you will see one slide on top that is slightly larger and connected to the other slides with dashed lines. That one is your Slide Master, your “main slide”. Everything you change there will directly affect all the other slides. You can try it out by setting a different background colour for the Slide Master. The other slides will immediately change colours, too.

Edit slide masters more precisely
We use the main slide to pre-set all our important elements. Once we like how it looks, we can go ahead and adjust each individual slide-template. Here’s a list of things you can/should change:
- Colours: Go to Colours and choose either one of PowerPoint’s predefined palettes or create your own one.
- Fonts: Click Fonts and then Customise Fonts and choose styles for your titles and regular text.
- Background: Go as crazy-creative or minimalistic as you want. Change the background colour, maybe add some shapes, or look for a nice image online that works behind your text. (To do so, right click on your main slide and go to “Format Background”)
- Title: Change the size, style and placement of the title, simply by editing it as you would usually do.
- Text Style: Do the same for your regular text boxes. Define what the bullet points should look like.
- Footer: You can switch the footer elements around, replace them and change them like any regular text.

Using themes
While themes in PowerPoint are similar to templates, they are not the same thing. A theme in PowerPoint is a predefined selection of colors, fonts, effects and backgrounds. So if you are creating a template for your company we recommend you to add a custom theme with the company's brand colors and fonts. Now, if you want to know in more detail what a theme design is in PowerPoint and how to create one, you can read about it in more detail in our blog post, Theme Designs .

Use the right fonts
A very important point with PowerPoint presentations is to choose the right font, because it must be easy to read, but it should also not be boring. In our blog post on the best fonts for your presentations , we have picked some good fonts for you to use.
Advance image design in templates

Rename master slides

Individual Templates for each slide layout
Once you are finished with your main slide, you can go ahead and adjust the other slide layouts. You may find that some look perfect already – you can leave them as they are. For those who don’t, or if you would just like some different slide designs in your template, here are some useful tips on what you can change:
- Background: You may not want the same background on each slide layout. To turn off the background that has been given to the slide (by setting it in the main slide), just tick off the box Hide background graphics in the top Slide Master menu. You are then free to design the background from scratch.
- Footers: On some slides you might not want the footer to show. Disable the Footers checkbox in the task line to make it disappear.
- Title: The same thing works with the title (the checkbox is right there with the Footers )
- Placeholder: Click on Insert Placeholder . You can choose from a variety of placeholders. They can be very helpful because they predefine where a certain element (e.g. image, video,...) should be placed in the presentation.
- Other elements: Of course, you can move, remove and add any other element or object you might need.
TIP: You might need another predefined layout (e.g. for slides that give an overview, for “Contact us” slides, …) You can easily create a template for that as well by right clicking in the grey box on the left with all your layouts and then clicking Insert Layout . By right clicking on that new layout you can go to Rename Layout and call it some name that makes sense. You can treat it like the rest of the layouts and simply adjust it to your needs.

Save your masterpiece and use it for a presentation
When you are satisfied with the look of all your layouts, you can save the template by clicking File and then Save As . You can now choose any folder or use the folder provided by PowerPoint and then save it as a PowerPoint template (*.potx). Close and open PowerPoint again, click on New in the left orange sidebar and then change from Office to Personal or Custom . Your template should now be visible here. Click on it and you can create a new presentation with your predefined layouts. You can also set your template as the default option. To do this, you need to click on the pin at the bottom right of the template and pin it to your list . If for some reason your template was not shown in the start menu OR if you have already created a template-less presentation that should get the template, go to Design at the top of the open presentation, click on the small arrow by the designs and then select Search for designs . There, click on your created template (in the folder where you saved it) and open it. The presentation should now take on your template design.

Related articles
About the author.

Pia Lehner-Mittermaier
Pia works in Marketing as a graphic designer and writer at SlideLizard. She uses her vivid imagination and creativity to produce good content.

Get 1 Month for free!
Do you want to make your presentations more interactive.
With SlideLizard you can engage your audience with live polls, questions and feedback . Directly within your PowerPoint Presentation. Learn more
Top blog articles More posts

Best Office Mix Alternative in 2022

How to mask images to crop to shape in PowerPoint

Get started with Live Polls, Q&A and slides
for your PowerPoint Presentations
The big SlideLizard presentation glossary
Asynchronous learning.
Asynchronous Learning means that the learning is time-shifted. The communication between student and teacher are time-delayed.
Virtual Reality
With Virtual Reality people can practice situations and important processes in a virtual room by putting on special digital glasses. They can influence what happens themselves.
Motivational Presentation
A motivational presentation is meant to inspire people. In a company, for example, you could tell the company's story in a motivational presentation.
Formal Communication
formal communication should be used for speeches or at work
Be the first to know!
The latest SlideLizard news, articles, and resources, sent straight to your inbox.
- or follow us on -
We use cookies to personalize content and analyze traffic to our website. You can choose to accept only cookies that are necessary for the website to function or to also allow tracking cookies. For more information, please see our privacy policy .
Cookie Settings
Necessary cookies are required for the proper functioning of the website. These cookies ensure basic functionalities and security features of the website.
Analytical cookies are used to understand how visitors interact with the website. These cookies help provide information about the number of visitors, etc.
How-To Geek
How to set a custom template as the default in powerpoint.

Your changes have been saved
Email is sent
Email has already been sent
Please verify your email address.
You’ve reached your account maximum for followed topics.
Microsoft Office vs. Google Docs, Sheets, Slides: Which Is Best?
What is budgie on linux and should you use it, these 5 linux commands make reading large files easier, quick links, create a custom template, set a custom template as the default.
Microsoft PowerPoint allows users to set a custom template as the default theme when creating a new presentation. This provides a way for users to immediately start building a slideshow using a template specially designed for them.
Creating a custom template in PowerPoint is quite easy. To get started, go ahead and open a blank PowerPoint presentation. You can do so by opening PowerPoint, selecting “New” in the left pane, and then selecting “Blank Presentation” from the template library.

Now, with your blank presentation ready, go ahead and select the slide orientation and size, which you can do by choosing the “Slide Size” option in the “Customize” group of the “Design” tab.

Once you’re finished with that, it’s time to open PowerPoint’s Slide Master, which is where the rest of the customization will take place. To access the slide master, click on the “View” tab and select “Slide Master” in the “Master Views” group.

The Slide Master will appear in the left pane. Here, you can customize the fonts, headings, colors, text and image box placement, and more.
Related: How to Create a Custom Template in PowerPoint
Once you’re happy with your setup, save your template and exit out of PowerPoint. After that, it’s time to set it as the default template that PowerPoint opens with.
To set your custom theme as the default, open PowerPoint, select “New” in the left pane, and then click the “Custom” tab.

Next, select the “Custom Office Templates” option.

Your custom templates will appear. Select the one you want to make the default template.

A new window will appear, giving you a preview of the template and some basic information (if you input any). Click the “Create" button.

Next, head over to the “Design” tab and select the “More” arrow in the “Themes” group.
A list of themes will appear. Right-click your custom theme and then select “Set as Default Theme” from the drop-down menu.

Now, the next time you open PowerPoint, it will automatically begin with this theme.
- Microsoft Office
- Microsoft PowerPoint
- office 2019
Master Slides 101: How to Create and Use Master Slides in PowerPoint

Get a complete overview of one of PowerPoint’s best tools: Slide Master!
The Slide Master in PowerPoint is, in short, an option that allows you to standardize specific visual aspects of your presentation .
It’s a feature that not many people are aware of. However, it can truly make a difference when you constantly work with presentation decks. If you like working with templates in PowerPoint , you’d love Slide Master!
In this article, we’ll explain what exactly the Slide Master feature is and how you can use it to create outstanding presentations.
We’ll go over the following topics:
- Master Slides 101: What is a Master Slide in PowerPoint?
- Why is Master Slide used? And most importantly: Why Slide Master is used for businesses
- Let’s go step-by-step: How to use slide master in PowerPoint
How to create master slides in PowerPoint
How to edit master slide in powerpoint.
- Ready to start? Get professional PowerPoint Master Slides!

What is a Master Slide in PowerPoint?
Slide Master is a PowerPoint feature you can find in the View tab . It allows you to create master templates (or master slides). It’s a way to automatically add elements that you want to be repeated throughout your slides, like a font or a theme.
Why is Master Slide used?
The Slide Master feature in PowerPoint is extremely useful for making your presentation design process more efficient . The main reason it’s used is because it helps you customize all of your PowerPoint elements at once.
That’s right, there is no reason to change slide by slide anymore . With master slides, you can change the typography, logo, and colors and even add your logo and watermark by changing these elements on one single slide. When you adjust one of the elements in the Master Slide, all of those elements will change in all the slides.
Why Slide Master is used for businesses
The slide master is not only a really efficient tool, it also can be great for your business. For example:
- It helps you standardize the design of your presentation : Instead of having a disparate array of different slide designs in your presentations, the Slide Master allows you to establish a consistent and professional look throughout. This consistency can enhance the professionalism of your brand and the clarity of your message.
- Or even better, it helps you brand your presentations : Something as simple as using your brand’s color scheme can make all the difference in creating truly unique slides. It can even help you convey values and ideas you want to be associated with your brand.
How to use slide master in PowerPoint
To create your own Master template, you just need to go to the View tab > Slide Master . This will allow you to access the Slide Master view.

Follow these steps to learn how to create a presentation using master slides in PowerPoint:
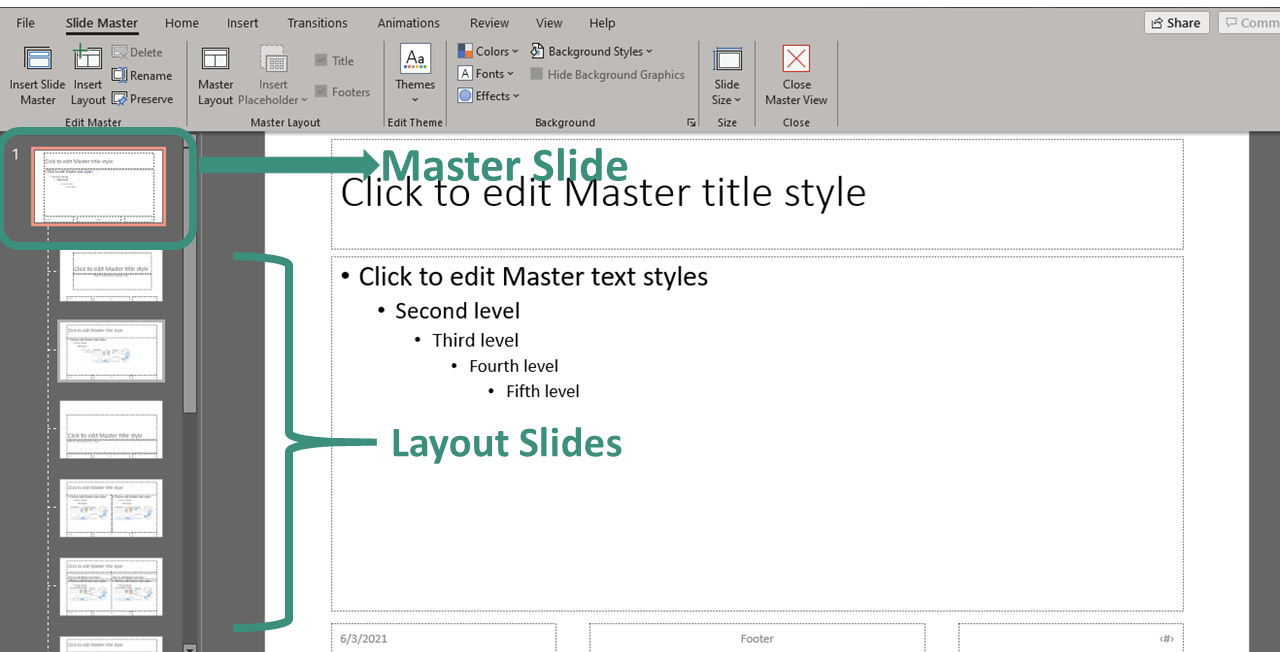
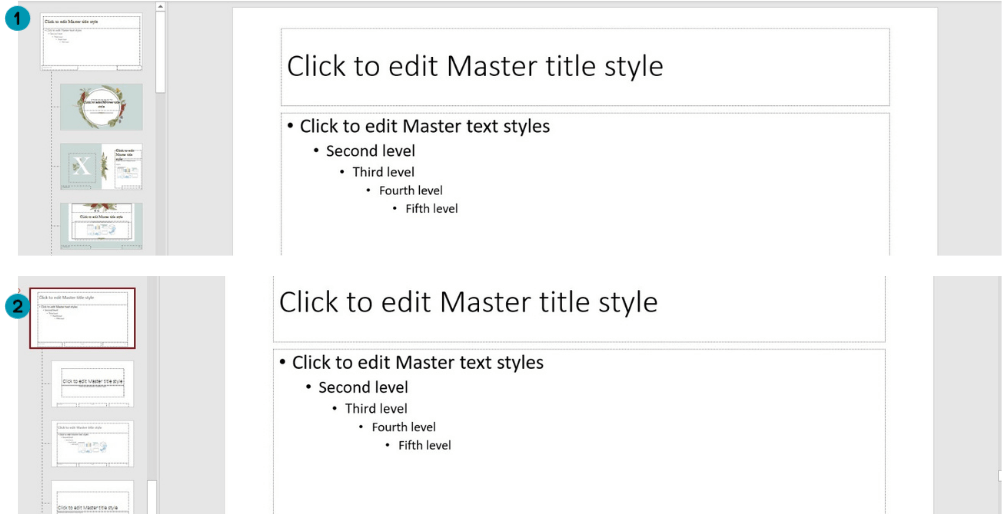
#1. Work on your main Slide Master
Once you are on the Master View, it’s time to get to work! Go to the very first slide on the Slides Overview Pane on the left. This is your Master Slide. You’ll recognize it because it’ll have a number 1 at the side, and it’ll be a little bigger than the rest:
Here is where you’ll work on the common elements all your slides will share. This is where you should customize your background, font style, and color . This is also the perfect opportunity to add an element you want to repeat throughout your slides, like a logo. Take into account that anything you do while in this mode will then be reflected in all the rest of your slides.
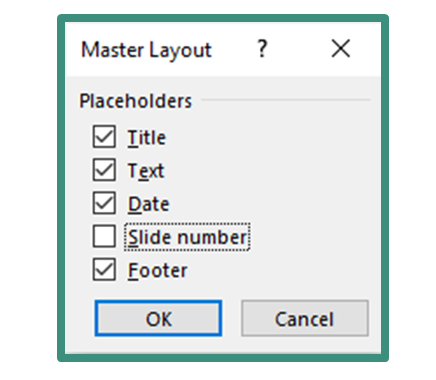
By clicking on the Master Layout option , you’ll also be able to customize which layout elements you want in your presentation slides.

For example, you can choose to include the date, the slide number, and more.
#2. Work on your Layout slides
Next, it’s time to move to the Layout slides . These are slides that appear below your Master Slide. In other words, these are your actual slides.
You’ll notice that PowerPoint offers 11 different default layout settings for you to start to work with . You can edit and alter these layouts as much as you want. Consider that these are meant to make your life easier when designing your presentation. That’s why it’s important to think through what kind of layouts your presentation will need.

If you don’t find a layout that fits your needs, you can also create a master layout from scratch . Select any of your layouts and click the option Insert Layout in the Edit Master group.

It’ll create a new type of slide you can edit and customize as you see fit. Use the option Insert Placeholder to add different kinds of elements to our new layout.
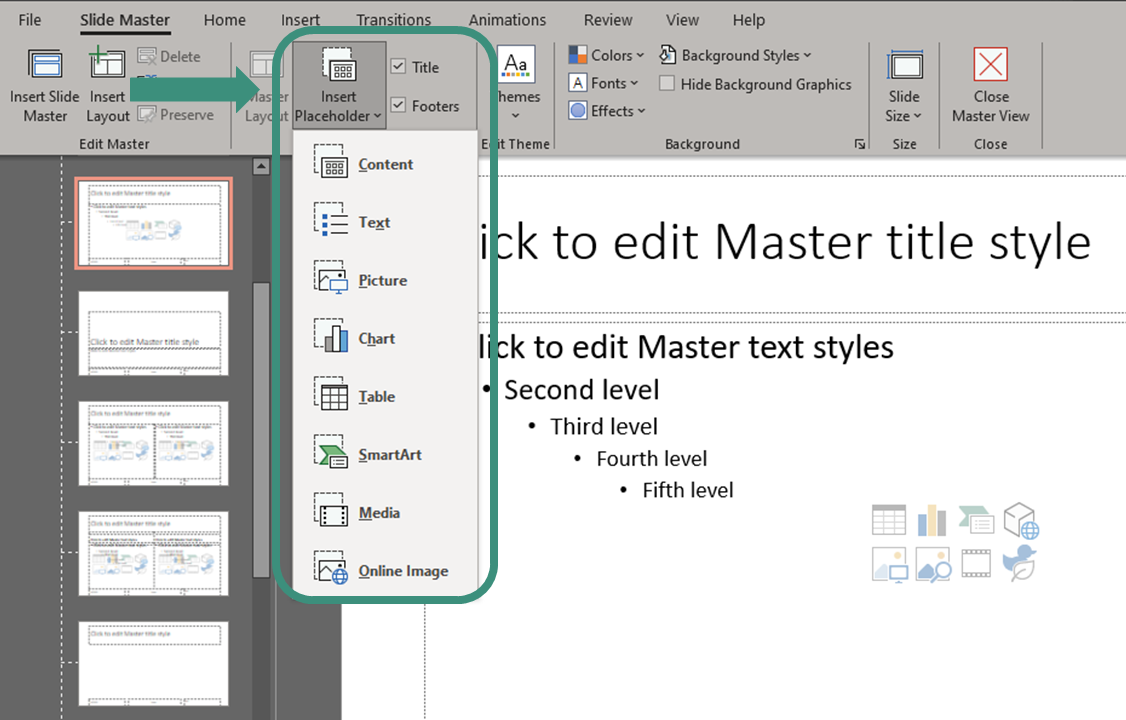
#3. Adding a new Slide Master if necessary
If you think just one “theme” is not enough for your presentation and want to use several different styles, or segments, in a single presentation, you can do it! You just need to add a second Slide Master. Select Insert Slide Master on the far left, and you’ll get a completely new Master slide in the same presentation.

You’ll be able to see your two different master slides, and the layout slides below each one:
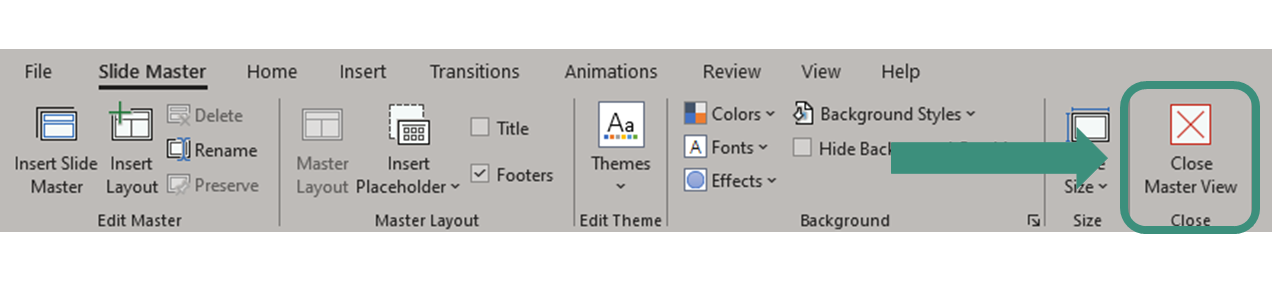
Once you’re happy with how your master template looks, remember to click the option Close Master View so you can see your changes.
If you’ve worked with a presentation that’s already using a master template, you can edit your slides through Master View . Especially if there are common elements you want to eliminate, add, or edit on more than one slide!
#1. Access the Master Slide View
Just like for creating a master template, the first thing is to access the master view. Go to View tab > Slide Master to see exactly all the design guidelines your presentation has at the moment.
#2. Edit the Master Slide
If there’s a common element that you want to change, the Master Slide is the place to do it! It works great for adding and removing logos or changing the background or color scheme.
#3. Edit Specific Layout Slides
If there’s a design element you want to change from a specific layout style, you can do so, too. Pick the slide layout you want to edit and customize as you see fit.
Remember that all the slides below the master slide will have these changes . So, if you are looking for a specific change in one of the slides, it’s better to avoid the Master Slide view and edit your slides as you normally would.
Get professionally customized PowerPoint Master Slides
Master Slides are an outstanding tool to make your presentation creation process more efficient. They can save you precious time and enhance design consistency within your slides.
However, using master slides still requires a steep learning curve . Design skills are a must if you truly want to make the most of your master slides. If you’re going to use PowerPoint Master Slides but don’t feel you have enough experience or time to create your master template, don’t worry! 24Slides professional designers will be happy to help you make the perfect master slides . You can just sit back and relax, and we’ll do all the heavy lifting!
The best thing is that you’ll get a completely customized, professional design that you’ll be able to apply to all your future projects! You’ll no longer have to worry about your slide design or making it reflect your brand! Get an outstanding presentation design that you can apply to your own slides with just one click.
Want to learn more?
- How to Add Speaker Notes in PowerPoint (Tutorial)
- How to Convert An InDesign File to a PowerPoint Presentation
- How to Convert an Adobe Illustrator File to PowerPoint
- How to Make a Timeline in PowerPoint? Step by step
- How to Link or Embed an Excel File in PowerPoint? Quick Guide!
Create professional presentations online
Other people also read

6 Presentation Styles of Famous Presenters
How to create and deliver a powerful presentation introducti...

The seven worst presentations of all time and why they went ...

Presentation templates
Captivate your audience with customizable business presentation templates. whether you're pitching clients, wooing investors, or showing off your latest wins, there are presentation templates that'll suit your next meeting..

Free slide templates for presentations
Presentation decks can make or break your speech—don't risk boring or unprofessional slides distracting from your message. Set yourself up for success with free, eye-catching presentation templates that don't require graphic design skills to use. Whether you're pitching to investors or sharing a class project, using presentation templates allows you to focus on the content of your work without worrying about the design. Explore presentation templates for pitch decks, annual reviews, and conference slides, and get ready to wow your audience. Choose a presentation template and customize it with your business's branding and logo. If you work in a creative field, don't shy away from bold designs and vivid colors . Presentation templates offer versatile options for personalizing—get creative by customizing your template or opt for adding your own text to existing designs. When you use a template at your next meeting, you'll turn a simple presentation into an opportunity to impress. To make presenting even easier, you can download your template in a variety of formats, like PowerPoint and PDF, or share it digitally with your colleagues.
- Vote: Reader’s Choice
- Meta Quest 4
- Google Pixel 9
- Google Pixel 8a
- Apple Vision Pro 2
- Nintendo Switch 2
- Samsung Galaxy Ring
- Yellowstone Season 6
- Recall an Email in Outlook
- Stranger Things Season 5
How to use Microsoft PowerPoint

Creating a successful slideshow is no small task. So, if you’re new to Microsoft PowerPoint, you’ll need to familiarize yourself with the features and tools you need to build a presentation.
How to create a slideshow
How to add a slide, how to insert slide elements, how to use different views, how to add speaker notes, how to start and end a presentation.
We’ll guide you through the process of creating a PowerPoint slideshow by adding slides and elements as well as how to present the show when you finish. These basics are just what you need as a beginner and should get you off to a terrific start with PowerPoint.
Note : The information in this tutorial applies to PowerPoint for Microsoft 365 on Windows. While you may see variations in features or menus, most PowerPoint versions have the same basic options.
When you open the application, you can create a new blank slideshow or use a built-in PowerPoint template . To best familiarize yourself with the application and the items we’ll walk through here, select a Blank slideshow on the Home screen and follow along.
Next, you’ll want to name and save your presentation file. Select File > Save or Save As name the file on the right, choose a location for it, and select Save .
Be sure to continue saving your slideshow regularly as you work on it by selecting Save in the Quick Access Toolbar.
A blank presentation in PowerPoint starts you off with a main slide. You’ll notice a text box at the top for the title and one beneath for the subtitle. Simply click inside these boxes to enter your text.
While it’s good to get in the habit of using title slides like these to begin future presentations, you’ll also need to know how to insert the additional slides.
Go to either the Home or Insert tab and open the New Slide menu in the ribbon.
Choose the layout you want to use for the new slide. You’ll see several options that include placeholders, which is handy for popping in what you need like text, lists, or images.
Once the slide appears, click inside a placeholder to add the necessary elements.
Continue to insert as many slides as you want the same way.
Along with using the placeholders on the slides, you can add your own items. This is helpful if a slide doesn’t contain the number or type of placeholders you need.
Add a text box
One popular slide element to add is a text box, which is just like the title and subtitle boxes on the title slide. With it, you can insert and format text as you wish.
Go to the Insert tab and select Text box in the Text group.
You can use your cursor to draw the size of the box you want or simply click the slide and begin typing inside the box.
To format the text in the box, select it and go to the Home tab. Use the options in the Font section of the ribbon to adjust the style, size, color, or emphasis.
Specific to PowerPoint on Windows, you’ll also see a floating toolbar appear near the text that you select. This toolbar contains the same features as on the Home tab along with additional options.
Add images, shapes, and icons
Because a slideshow is a visual tool, you’ll likely want to add photos, illustrations, shapes, or icons to slides.
Go to the Insert tab and open the Pictures , Shapes , or Icons menu.
- Pictures : Pick an image from your device, one of the stock images, or an online picture and select Insert .
- Shapes : Pick a shape from the menu and use your cursor to draw it on the slide.
- Icons : Search or use the categories to find the icon, select it, and click Insert .
Once you insert one of the above on your slide, you’ll see the corresponding tab appear to format the object. For pictures, you have a Picture Format tab, for shapes, you have a Shape Format tab, and for icons, you have a Graphics Format tab.
You can use the tools in the ribbon to do things like change the color, add a border, align or rotate the object, and resize it.
Add audio or video
Another useful object to add to your slides is an audio file or video. You can then play the sound or video clip during your presentation.
Go to the Insert tab and open the Audio or Video menu.
- Audio : Pick an audio file to add to PowerPoint from your device or record audio on the spot.
- Video : Pick a video to embed into your presentation from your device, one of the stock videos, or an online video and select Insert .
Like with images and shapes, you’ll see tabs appear to format the file you insert. For audio, you have an Audio Format tab, for video, you have a Video Format tab, and for both types of files, you have a Playback tab.
Use the Format tabs to adjust the color, add a border, or apply an effect and the Playback tab to set a fade in or out effect, loop the playback, or play it in the background.
You can take advantage of different views in PowerPoint for accomplishing various tasks. This is helpful for seeing all of your slides in a grid, viewing a notes page, or working with an outline.
Go to the View tab and you’ll see the options in the Presentation Views group.
- Normal : Use this to create and edit your slides.
- Outline View : Use this to work with an outline of your presentation. Each slide is numbered with a hierarchy of slide elements.
- Slide Sorter : Use this to see your slides in a grid format for an overall slideshow view.
- Notes Page : Use this to view your presentation with notes — this is where you print a PowerPoint presentation with notes .
- Reading View : Use this to play your slideshow in the same window without entering full-screen mode.
Use the tools in the Show section of the View tab to display a Ruler , Gridlines , or Guides . These items can help you line up your slide elements.
You can also select the Zoom and Fit to Window options in the Zoom section of the ribbon to get a better view of slide items or the overall slide.
Presenting a slideshow is similar to giving a speech where you may want to use speaker notes. Like note cards, you can add notes to each slide in your presentation. When you present the slideshow, only you can view your notes; your audience cannot see them.
Select Notes in the Status Bar at the bottom of the PowerPoint window or go to View > Notes .
Add your notes in the section that appears below the slide.
You can use the options in the Font section of the Home tab to add emphasis or create a list.
For more detail, check out our how-to for adding notes in PowerPoint .
When you’re ready to present your PowerPoint slideshow or to see it as your audience will, you can start the presentation anytime.
Go to the Slide Show tab.
To display your speaker notes and a dashboard of controls while you present, check the box for Use Presenter View in the Monitors section. Then, select the monitors for the slideshow display and presenter view using the Monitor drop-down menu.
On the left side of the ribbon, pick From Beginning or From Current Slide per your preference.
When the slideshow starts, you’ll see what your audience sees on one monitor with Presenter View on the other. This is a super helpful way to present your slideshow because the Presenter View window provides you with controls.
If you’re unable to use more than one monitor, you’ll also see controls on the bottom left of the slides.
In the Presenter View window, you’ll see the current slide on the left with the controls beneath and the next slide on the right along with your speaker notes.
To use a control, hover your cursor over each button for a brief description.
From left to right, you can choose a laser pointer or pen, see all slides in a grid, zoom in on the slide, display a black screen, turn the subtitles or camera on or off, and view additional options like changing the subtitle settings or ending the presentation.
To stop presentation mode, press your Esc key, select End Slide Show at the top, or use the three dots to choose End Show .
While this beginner’s guide to using PowerPoint should get you off to a great start creating and presenting your first slideshow, there’s plenty more to learn. Check out how to use Presenter Coach for rehearsing your presentation and best practices for making awesome PowerPoint slides for tips and suggestions.
Editors’ Recommendations
- What is Microsoft Teams? How to use the collaboration app
- What is Microsoft Edge and how to use it
- Best Microsoft Office deals: Get Word, PowerPoint, and Excel for free
- Copilot Pro: how to use Microsoft’s advanced AI sidekick
- Microsoft Copilot: how to use this powerful AI assistant

Microsoft hasn't been shy about pushing first-party services and apps in Windows, but this time, it's getting a little ridiculous. As reported by Windows Latest, the Microsoft application PC Manager claims you can "fix" your computer simply by changing Bing to be the default search engine.
The change was spotted when using the Edge browser and having, for example, Google as the default search engine. After you run a health check, one of the suggested changes will be to set Bing as your default search engine. If that's how you want to go, there's a button to make it happen.
In its Annual Work Trend Index, Microsoft has, unsurprisingly, published some fresh data around AI in the workplace. The big stat is that according to its survey, 75% of "knowledge workers" are already using generative AI at work, with that number doubling in the last six months alone.
The survey defines "knowledge workers" as "those who typically work at a desk (whether in an office or at home)," which is a pretty broad demographic.
Microsoft Teams was introduced in 2017 as a unified communication and collaboration platform aimed at helping businesses and organizations get things done. Microsoft leveraged the company's existing Office software experience and created a unified experience between Teams, Office 365, and Skype for Business. However, as with all software, things don't always go according to plan. Sometimes you can run into Teams problems.
We're big Teams users here at Digital Trends -- it's our go-to communication and meeting tool -- and we've come across a few issues ourselves over the years. In the event you're having Microsoft Teams issues, here's how to fix some of the most common problems.
How to Create Interactive Polls and Surveys in PowerPoint Using Microsoft Forms

In today’s digital age, making your presentations more engaging and interactive is crucial. It is actually the most important aspect. You must be able to get your audience involved, whether you’re teaching a class or leading a team meeting. This approach will make your presentation unique, effective, and memorable.
I know what you’re thinking: ‘How can I achieve this creatively?’ The answer is by using interactive polls and surveys directly in your PowerPoint slides with Microsoft Forms.
Imagine you’re presenting a new project to your team and want quick feedback on the proposal. Or maybe you’re teaching a workshop and want to check participants’ understanding right away. By adding polls and surveys to your presentation, you can create a two-way conversation with your audience, making your sessions more engaging and interactive.
This article will walk you through how to create and add interactive polls and surveys to your PowerPoint presentations using Microsoft Forms. Ready to make your presentations more fun and engaging? Let’s get started and see how easy it is!
Step 1: Open Your PowerPoint Presentation
Start by opening the PowerPoint presentation where you want to include a poll or survey. Navigate to the slide where you plan to add the interactive element.
Step 2: Access Microsoft Forms
Go to the “Insert” tab on the ribbon at the top of your PowerPoint window. Here, you’ll find various options for adding content to your slide. Look for the “Forms” option to start integrating Microsoft Forms into your presentation.
Step 3: Create a New Poll or Survey
Click on the “Forms” button, and a pane will appear on the right side of your screen. You can either choose an existing form or create a new one. To create a new poll or survey, select “New Form.”
Step 4: Design Your Poll or Survey
In the Microsoft Forms pane, you can start adding questions. You can choose from different question types like multiple-choice, text, rating, or date. Customize your questions to fit the purpose of your poll or survey.
Step 5: Embed the Poll or Survey in Your Slide
Once you’ve created your poll or survey, it will automatically be embedded into your PowerPoint slide. You can resize and position it as needed. Your audience will be able to interact with the form directly within your slide during the presentation.
Step 6: Collect and Display Responses in Real-Time
As your audience submits their responses, you can display the results in real-time on your slide. This feature is especially useful for generating discussion or gathering immediate feedback during your presentation.
Final Thoughts
Integrating polls and surveys into your PowerPoint presentations using Microsoft Forms is an effective strategy to enhance audience engagement and increase interactivity. Whether your goal is to collect feedback, assess comprehension, or actively involve your audience, this tool provides a straightforward yet highly impactful solution.
So, why not try adding a poll or survey to your next presentation? It’s a small step that can make a big difference in how your message is received and remembered by your audience.
At SlideBazaar, we help you create engaging and memorable presentations. Choose from our collection of professional templates or opt for our custom design services for a personalized touch. Your presentations deserve to be elevated to new heights, and we’re here to help you achieve just that!
BROWSE BY CATEGORY
- PowerPoint Templates
- Keynote Presentations
- Infographic
- Free slides
QUICK LINKS
- Frequently Asked Questions
- Terms & Conditions
- Privacy Policy
- DMCA Policy
EMAIL NEWSLETTER
Get updates of our PowerPoint templates and slide designs before anyone else.
Got any suggestions?
We want to hear from you! Send us a message and help improve Slidesgo
Top searches
Trending searches

35 templates

biochemistry
38 templates

hispanic heritage month
21 templates

travel itinerary
46 templates

mid autumn festival
18 templates

63 templates
Conference Style Presentation for High School
It seems that you like this template, conference style presentation for high school presentation, premium google slides theme, powerpoint template, and canva presentation template.
Download the Conference Style Presentation for High School presentation for PowerPoint or Google Slides. High school students are approaching adulthood, and therefore, this template’s design reflects the mature nature of their education. Customize the well-defined sections, integrate multimedia and interactive elements and allow space for research or group projects — the possibilities of this engaging and effective Google Slides theme and PowerPoint template are endless. Download this design to provide a logical and organized structure, allowing for the seamless flow of information.
Features of this template
- 100% editable and easy to modify
- Different slides to impress your audience
- Contains easy-to-edit graphics such as graphs, maps, tables, timelines and mockups
- Includes 500+ icons and Flaticon’s extension for customizing your slides
- Designed to be used in Google Slides and Microsoft PowerPoint
- Includes information about fonts, colors, and credits of the resources used
What are the benefits of having a Premium account?
What Premium plans do you have?
What can I do to have unlimited downloads?
Don’t want to attribute Slidesgo?
Gain access to over 29900 templates & presentations with premium from 1.67€/month.
Are you already Premium? Log in

Register for free and start downloading now
Related posts on our blog.

How to Add, Duplicate, Move, Delete or Hide Slides in Google Slides

How to Change Layouts in PowerPoint

How to Change the Slide Size in Google Slides
Related presentations.

Premium template
Unlock this template and gain unlimited access

Create your presentation Create personalized presentation content
Writing tone, number of slides.

Register for free and start editing online
How to Record a PowerPoint Presentation

Knowing how to record a PowerPoint presentation with audio and video can provide viewers with an engaging experience. Whether you're creating a tutorial , a lecture, or a business presentation, combining visuals with narration helps convey your message more effectively.
In this guide, we will walk you through the step-by-step recording process in PowerPoint . From setting up your equipment and recording your screen to editing the final video, you'll learn everything you need to know about creating narrated PowerPoint presentations.
Prepare everything
- Presentation . Ensure your slides are complete and in the correct order. Update PowerPoint to the latest version for the best performance and features.
- Microphone . Use a good-quality microphone to record clear audio . A USB or headset microphone is recommended.
- Webcam (Optional) . If you want to include a video of yourself, use a built-in or external webcam.
- Script . Outline what you want to say for each slide. This will help you stay on track during the presentation recording.
How to record a PowerPoint presentation?
1. set up a screen recorder.
Download and install the free screen recording software for Windows from the official website. Launch the video recorder on your computer.
Easy to use free screen recorder for PC. Record desktop, take screenshots, upload the created content to the cloud for easy and fast sharing.

2. Configure settings
Go to " Settings " to set recording preferences .
- In " Video ", choose the desired output quality and format. Make sure the toggles next to " Record mouse movements " and " Animate mouse clicks " are enabled if needed.
- In the " Audio " tab, adjust the sound levels and select the desired input devices.

3. Record your presentation
Click the " Capture video " option in the side menu and select the mode. Choose the entire display if your presentation is in full-screen mode. You can also manually adjust the screen recording area to show the desired content.
Open your PowerPoint and press the F7 hotkey or click the " Rec " button to record the presentation with audio . Navigate through your slides while speaking clearly into the microphone.
Use drawing tools in the presentation recorder to highlight key points during your narration.
If you need to take a break, use the pause button to temporarily stop the recording. When you've completed your presentation, press the F8 hotkey or click " Stop ".

4. Editing the final video
Use the built-in video editor to trim any unwanted parts of the presentation recording. You can also adjust the playback speed, change the format, and resize the video.
If you need to make more changes, you can import your recorded clip into third-party video editing software . Add transitions, effects, background music, or other enhancements as needed.
Save your edited video in the desired location. It is also possible to upload the recording to the cloud and share it via a link .

FAQ on how to record a presentation
PowerPoint screen recording with audio and video is a powerful way to enhance your message and engage your audience. By following the steps outlined in this guide, you can create professional and polished videos that combine your slides with a voice-over .
Whether you're an educator, business professional, or content creator, knowing how to narrate a PowerPoint presentation recording can significantly boost your impact. Remember to practice your delivery and utilize editing tools to refine your final product.
Expert Tech Writer
Like the article? Share it!
50,000+ PowerPoint Templates
Download ready-made powerpoint slides & 100% editable templates for your presentations. finish your work in less time., featured slide templates.
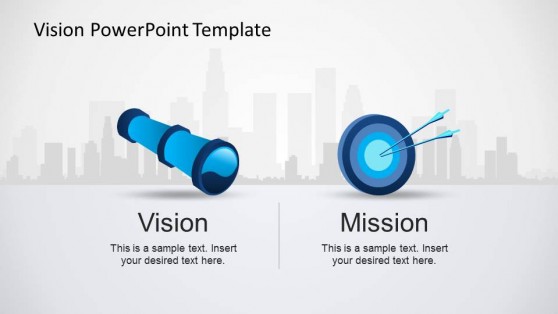
Mission and Vision PowerPoint Template
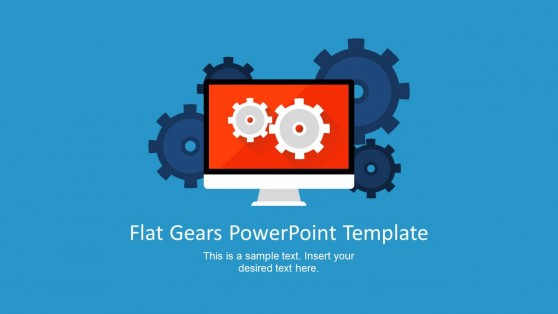
Modern Flat Gears PowerPoint Template
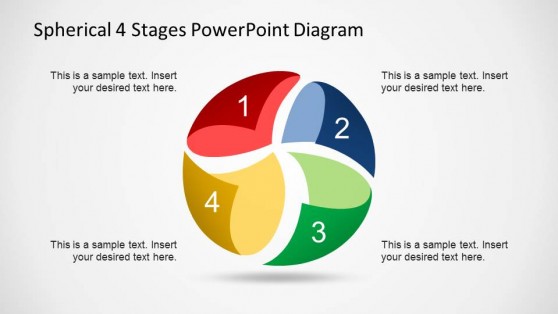
Spherical 4 Stages PowerPoint Diagram

Go-To-Market PowerPoint Template

Professional Report Infographics PowerPoint Template
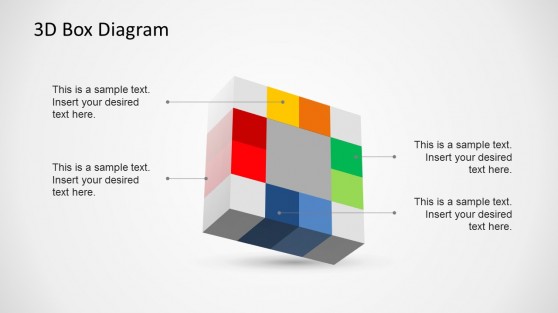
Creative 3D Box Diagram Template for PowerPoint

Professional Company Profile PowerPoint Template
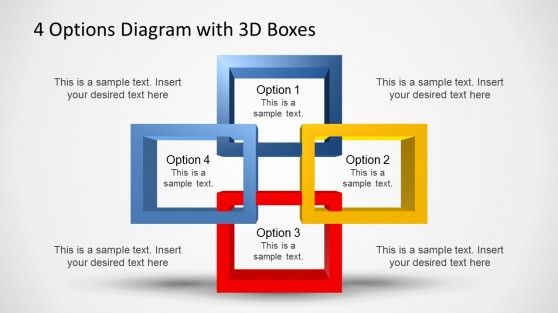
4 Options Diagram Template for PowerPoint with 3D Boxes
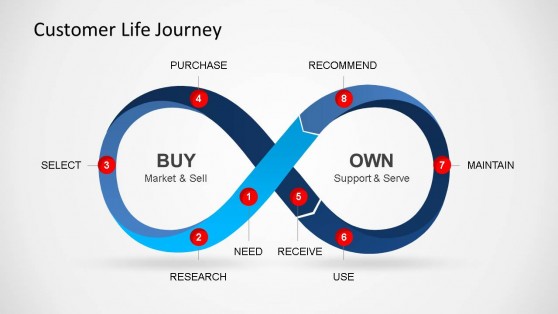
Customer Life Journey PowerPoint Diagram

Professional Business Presentation Template
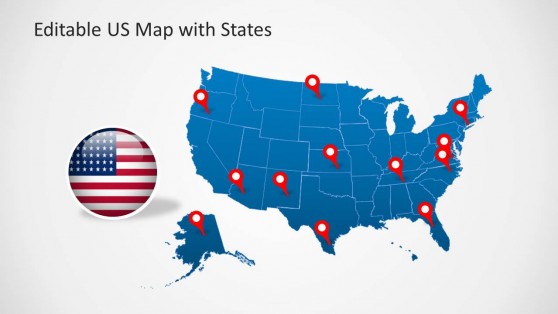
US Map Template for PowerPoint with Editable States

Global Company Profile PowerPoint Template
New slide templates.

Industry Analysis PowerPoint Template

Multi-Step Ribbon Diagram Template for PowerPoint

6 Pieces 3D Tetris Cube PowerPoint Diagram
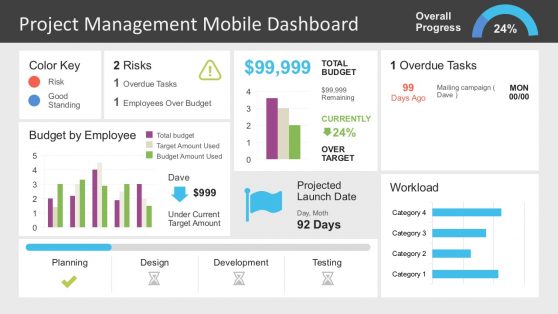
Project Management Dashboard PowerPoint Template
Simple and easy to use professional presentation templates.
Save hundreds of hours of manual work, be more productive and impress your audience with visually appealing PPT slides templates that are 100% editable.

Fully 100% Editable Templates
To make your editing process faster and easier, we made sure that all our templates and slide objects are fully editable in Microsoft PowerPoint, Google Slides, Keynote and OpenOffice. Both in size and color, even for advanced editing objects (points and curves).

Impress your audience
Make the right move and engage your employees, clients, investors and stakeholders with awesome slide designs for PowerPoint presentations and Google Slides templates that are less boring than the default templates. Make your boss say "Yes!" by presenting awesome presentation reports with stunning graphics.
Trusted by over 15,000 businesses and 350,000 users
Fantastic range of slide templates and in different aspects. Fascinating to work through what is available. I am delighted with my subscription which offers excellent value.

I am a customer and have used the PowerPoint templates to support several business and training sessions. I contacted SlideModel about modifying some of the people images to reflect more diversity. The images were modified and sent to me in less than an hour. I was impressed and amazed. This allowed me to continue to be productive, meet my deadline, and create an awesome slide presentation.
I found the slide I needed within the first 10 minutes and was able to edit and move forward with my project immediately.
100% Risk Free - Money Back Guarantee or try our Free PowerPoint Templates

Your Personal Concierge
Save more time. We can help you to pick the right slide template.
Get help to decide what is the best plan for you.
We can provide assistance in case you have questions.
We can help you to choose a different color palette.
Weekly Presentation Slides
24/7 support, easy to customize, 50,000+ templates.
PowerPoint Slide or Lecture Note References
This page contains reference examples for PowerPoint slides or lecture notes, including the following:
- PowerPoint slides available online
- PowerPoint slides from a classroom website
Use these formats to cite information obtained directly from slides.
If the slides contain citations to information published elsewhere, and you want to cite that information as well, then it is best to find, read, and cite the original source yourself rather than citing the slides as a secondary source.
Writers creating PowerPoint presentations in APA Style should present information clearly and concisely. Many APA Style guidelines can be applied to presentations (e.g., the guidance for crediting sources, using bias-free language, and writing clearly and concisely).
However, decisions about font size, amount of text on a slide, color scheme, use of animations, and so on are up to writers; these details are not specified as part of APA Style.
1. PowerPoint slides available online
Jones, J. (2016, March 23). Guided reading: Making the most of it [PowerPoint slides]. SlideShare. https://www.slideshare.net/hellojenjones/guided-reading-making-the-most-of-it
- Parenthetical citation : (Jones, 2016)
- Narrative citation : Jones (2016)
- When the slides are available online to anyone, provide the site name on which they are hosted in the source element of the reference, followed by the URL of the slides.
2. PowerPoint slides from a classroom website
Mack, R., & Spake, G. (2018). Citing open source images and formatting references for presentations [PowerPoint slides]. Canvas@FNU. https://fnu.onelogin.com/login
- Parenthetical citation : (Mack & Spake, 2018)
- Narrative citation : Mack and Spake (2018)
- If the slides come from a classroom website, learning management system (e.g., Canvas, Blackboard, Moodle, Sakai), or company intranet and you are writing for an audience with access to that resource, provide the name of the site and its URL (use the login page URL for sites requiring login).
- If the audience for which are you writing does not have access to the slides, cite them as a personal communication .
PowerPoint slide references are covered in the seventh edition APA Style manuals in the Publication Manual Section 10.14 and the Concise Guide Section 10.12
How many types of Layouts are in the PowerPoint
PowerPoint layouts organize slide content, helping you create clear, professional, and visually appealing presentations
How many types of layouts are in the PowerPoint
Type #1: title slide layout.

Type #2: Title and Content Layout

Type #3: Section Header Layout

Type #4: Two Content Layout

Type #5: Comparison Layout

Type #6: Title Only Layout

Type #7: Blank Layout

Type #8: Content with Caption Layout

Type #10: Picture with Caption Layout

FAQs are here to help you!
What is the purpose of using different powerpoint layouts, can i customize powerpoint layouts, how do i choose the best layout for my slide, create ppt using ai.
Just Enter Topic, Youtube URL, PDF, or Text to get a beautiful PPT in seconds. Use the bulb for AI suggestions.
character count: 0 / 6000 (we can fetch data from google)
upload pdf, docx, .png
less than 2 min
Sanskar Tiwari
Founder at MagicSlides
Top Quotes and Wishes for Brother's Day 2024
31 August 2024
How to create a PowerPoint template with Company Logo
2 September 2024
How to Rotate Ruler in PowerPoint
How can you Add a Hyperlink to a Slide in PowerPoint?
How to Delete Title box in PowerPoint
How to use Copilot to create Presentations
28 August 2024
How to change table border color in PowerPoint
How to Involve Your Audience in a Presentation
29 August 2024
How to Compress a PowerPoint Presentation: A Step-by-Step Guide
26 August 2024
Stunning presentations in seconds with AI
Install MagicSlides app now and start creating beautiful presentations. It's free!

Get AI-Generated Presentations Ready in Seconds
Free AI PPT Tools

Basic tasks for creating a PowerPoint presentation
PowerPoint presentations work like slide shows. To convey a message or a story, you break it down into slides. Think of each slide as a blank canvas for the pictures and words that help you tell your story.
Choose a theme
When you open PowerPoint, you’ll see some built-in themes and templates . A theme is a slide design that contains matching colors, fonts, and special effects like shadows, reflections, and more.
On the File tab of the Ribbon, select New , and then choose a theme.
PowerPoint shows you a preview of the theme, with four color variations to choose from on the right side.
Click Create , or pick a color variation and then click Create .

Read more: Use or create themes in PowerPoint
Insert a new slide
On the Home tab, click the bottom half of New Slide , and pick a slide layout.

Read more: Add, rearrange, and delete slides .
Save your presentation
On the File tab, choose Save .
Pick or browse to a folder.
In the File name box, type a name for your presentation, and then choose Save .
Note: If you frequently save files to a certain folder, you can ‘pin’ the path so that it is always available (as shown below).

Tip: Save your work as you go. Press Ctrl+S often or save the file to OneDrive and let AutoSave take care of it for you.
Read more: Save your presentation file
Select a text placeholder, and begin typing.

Format your text
Select the text.
Under Drawing Tools , choose Format .

Do one of the following:
To change the color of your text, choose Text Fill , and then choose a color.
To change the outline color of your text, choose Text Outline , and then choose a color.
To apply a shadow, reflection, glow, bevel, 3-D rotation, a transform, choose Text Effects , and then choose the effect you want.
Change the fonts
Change the color of text on a slide
Add bullets or numbers to text
Format text as superscript or subscript
Add pictures
On the Insert tab, select Pictures , then do one of the following:
To insert a picture that is saved on your local drive or an internal server, choose This Device , browse for the picture, and then choose Insert .
(For Microsoft 365 subscribers) To insert a picture from our library, choose Stock Images , browse for a picture, select it and choose Insert .
To insert a picture from the web, choose Online Pictures , and use the search box to find a picture. Choose a picture, and then click Insert .

You can add shapes to illustrate your slide.
On the Insert tab, select Shapes , and then select a shape from the menu that appears.
In the slide area, click and drag to draw the shape.
Select the Format or Shape Format tab on the ribbon. Open the Shape Styles gallery to quickly add a color and style (including shading) to the selected shape.

Add speaker notes
Slides are best when you don’t cram in too much information. You can put helpful facts and notes in the speaker notes, and refer to them as you present.

Click inside the Notes pane below the slide, and begin typing your notes.

Add speaker notes to your slides
Print slides with or without speaker notes
Give your presentation
On the Slide Show tab, do one of the following:
To start the presentation at the first slide, in the Start Slide Show group, click From Beginning .

If you’re not at the first slide and want to start from where you are, click From Current Slide .
If you need to present to people who are not where you are, click Present Online to set up a presentation on the web, and then choose one of the following options:
Broadcast your PowerPoint presentation online to a remote audience
View your speaker notes as you deliver your slide show.
Get out of Slide Show view
To get out of Slide Show view at any time, on the keyboard, press Esc .
You can quickly apply a theme when you're starting a new presentation:
On the File tab, click New .
Select a theme.

Read more: Apply a design theme to your presentation
In the slide thumbnail pane on the left, select the slide that you want your new slide to follow.
On the Home tab, select the lower half of New Slide .
From the menu, select the layout that you want for your new slide.
Your new slide is inserted, and you can click inside a placeholder to begin adding content.
Learn more about slide layouts
Read more: Add, rearrange, and delete slides
PowerPoint for the web automatically saves your work to your OneDrive, in the cloud.
To change the name of the automatically saved file:
In the title bar, click the file name.
In the File Name box, enter the name you want to apply to the file.
If you want to change the cloud storage location, at the right end of the Location box, click the arrow symbol, then navigate to the folder you want, then select Move here .
On the Home tab, use the Font options:

Select from other formatting options such as Bold , Italic , Underline , Strikethrough , Subscript , and Superscript .
On the Insert tab, select Pictures .
From the menu, select where you want to insert the picture from:

Browse to the image you want, select it, then select Insert .
After the image is inserted on the slide, you can select it and drag to reposition it, and you can select and drag a corner handle to resize the image.
On the slide canvas, click and drag to draw the shape.
Select the Shape tab on the ribbon. Open the Shape Styles gallery to quickly add a color and style (including shading) to the selected shape.

A horizontal Notes pane appears at the bottom of the window, below the slide.
Click in the pane, then enter text.

On the Slide Show tab, select Play From Beginning .

To navigate through the slides, simply click the mouse or press the spacebar.
Tip: You can also use the forward and back arrow keys on your keyboard to navigate through the slide show.
Read more: Present your slide show
Stop a slide show
To get out of Slide Show view at any time, on the keyboard, press Esc.
The full-screen slide show will close, and you will be returned to the editing view of the file.
Tips for creating an effective presentation
Consider the following tips to keep your audience interested.
Minimize the number of slides
To maintain a clear message and to keep your audience attentive and interested, keep the number of slides in your presentation to a minimum.
Choose an audience-friendly font size
The audience must be able to read your slides from a distance. Generally speaking, a font size smaller than 30 might be too difficult for the audience to see.
Keep your slide text simple
You want your audience to listen to you present your information, instead of reading the screen. Use bullets or short sentences, and try to keep each item to one line.
Some projectors crop slides at the edges, so that long sentences might be cropped.
Use visuals to help express your message
Pictures, charts, graphs, and SmartArt graphics provide visual cues for your audience to remember. Add meaningful art to complement the text and messaging on your slides.
As with text, however, avoid including too many visual aids on your slide.
Make labels for charts and graphs understandable
Use only enough text to make label elements in a chart or graph comprehensible.
Apply subtle, consistent slide backgrounds
Choose an appealing, consistent template or theme that is not too eye-catching. You don't want the background or design to detract from your message.
However, you also want to provide a contrast between the background color and text color. The built-in themes in PowerPoint set the contrast between a light background with dark colored text or dark background with light colored text.
For more information about how to use themes, see Apply a theme to add color and style to your presentation .
Check the spelling and grammar
To earn and maintain the respect of your audience, always check the spelling and grammar in your presentation .
Top of Page

Need more help?
Want more options.
Explore subscription benefits, browse training courses, learn how to secure your device, and more.

Microsoft 365 subscription benefits

Microsoft 365 training

Microsoft security

Accessibility center
Communities help you ask and answer questions, give feedback, and hear from experts with rich knowledge.

Ask the Microsoft Community

Microsoft Tech Community

Windows Insiders
Microsoft 365 Insiders
Was this information helpful?
Thank you for your feedback.
IMAGES
VIDEO
COMMENTS
When you create a presentation and then save it as a PowerPoint template (.potx) file, you can share it with your colleagues and reuse it again. To create a template, you'll need to modify a slide master and a set of slide layouts. Choose from thousands of free templates to download at Microsoft templates. Windows Web.
Open the file that contains the existing slides. Click the thumbnail pane and then select the slides you want: Select all slides: Ctrl+A. Select a subset of the slides: Ctrl+click. Copy the slides (Ctrl+C). Switch to the new file, right-click the thumbnail pane, and under Paste Options select Use Destination Theme: All the copied slides are ...
Best Five PowerPoint Presentation Templates from Envato Elements. Here are some of the top PowerPoint templates from Envato Elements: 1. Creature PowerPoint. Creature is a multipurpose presentation with a versatile design. There are over fifty unique slides that you can use to create a PowerPoint for any topic you have.
Create a new PowerPoint presentation and place yourself on the first slide. Go to Insert tab > Picture > This device (you can also try images from Office or Bing). Find the image you saved in the first step and insert it into your presentation. Go to the Design tab and press the PowerPoint Designer tool.
Press Ctrl+A. A subset of the slides. Press and hold Ctrl while you click the individual slides you want to select. Copy the selected slides (Ctrl+C). Switch to the new file, right-click the thumbnail pane, and under Paste Options select Use Destination Theme: All the copied slides are inserted in the new presentation.
Select the Date and time placeholder and hit Ctrl + R on your keyboard to align the text to the right. Go up to the Insert tab and in the Text group, select Header & Footer. Click on Date and time so that there is a checkmark next to it. Click on the Date dropdown and select the option as required.
Create a Custom PowerPoint Template. To create a custom PowerPoint template, you'll first need to open a blank presentation. You can do so by clicking the "File" tab and then selecting "New" in the left pane. A large library of templates will appear, but since that's not what we're looking for, go ahead and select the "Blank ...
Click Blank Presentation. You can either select here or go to File > New > Blank Presentation. On Mac, simply opening PowerPoint might open a new presentation depending on your settings. If it does, skip this step. 3. Click the Design tab. It's in the editing ribbon above your PowerPoint with File and Home. 4.
Watch over my shoulder and learn how to create a PowerPoint template from scratch - starting with your slide master and creating your own slide backgrounds. ...
To do that, simply go up to the Home tab and click on New Slide. This inserts a new slide in your presentation right after the one you were on. You can alternatively hit Ctrl+M on your keyboard to insert a new blank slide in PowerPoint. To learn more about this shortcut, see my guide on using Ctrl+M in PowerPoint.
In the "Insert" menu, select "Table" and opt for a one-by-one table. Change the table color to a light gray shade, elongate it, and position it neatly to the left of your text. To improve readability and aesthetics, increase the spacing between text phrases. A small adjustment in the before spacing setting (setting it to 48) significantly ...
You can get PowerPoint templates that have modern designs, animated ones, or even hand-drawn art in each slide. The color schemes range from bold to subtle. Each template's slides are also organized based on what you may want to include in your presentation. You can use the template as a starting point and customize its specific details from theme.
Open the PowerPoint app, select a template and theme, then like "Create.". Click the text box to add your title and subtitle to create your title slide. Click the "Insert" tab, then "New Slide" to add another slide. Choose the type of slide you want to add, then add text and pictures. Rearrange slides by dragging them up or down in ...
Begin with a surprise or bold statement. Provide necessary background information. Frame your presentation as a story. Keep the text concise and meaningful. Use visuals to complement the text. Incorporate interactive design. Conclude with actionable insights. Browse creative presentation templates.
To achieve this, first insert an image placeholder in the slide master (go to Insert placeholder and click on Picture). Next, you need to insert the desired shape on top of the image. You can either insert your own SVG image or use one of the default PowerPoint shapes. Then you have to select both (image placeholder and shape) and click Convert ...
Make Bullet Points Count. Limit the Use of Transitions. Skip Text Where Possible. Think in Color. Take a Look From the Top Down. Bonus: Start With Templates. Slideshows are an intuitive way to share complex ideas with an audience, although they're dull and frustrating when poorly executed.
Download the Branded Content Minitheme presentation for PowerPoint or Google Slides and start impressing your audience with a creative and original design. Slidesgo templates like this one here offer the possibility to convey a concept, idea or topic in a clear, concise and visual way, by using different graphic resources.... Multi-purpose.
Click the "Create" button. Next, head over to the "Design" tab and select the "More" arrow in the "Themes" group. A list of themes will appear. Right-click your custom theme and then select "Set as Default Theme" from the drop-down menu. Now, the next time you open PowerPoint, it will automatically begin with this theme.
Select any of your layouts and click the option Insert Layout in the Edit Master group. It'll create a new type of slide you can edit and customize as you see fit. Use the option Insert Placeholder to add different kinds of elements to our new layout. #3. Adding a new Slide Master if necessary.
To make presenting even easier, you can download your template in a variety of formats, like PowerPoint and PDF, or share it digitally with your colleagues. Craft engaging presentations for school, business, extracurriculars, and more. Start with eye-catching PowerPoint slide designs and customize easily with AI tools.
Create a presentation. Open PowerPoint. In the left pane, select New. Select an option: To create a presentation from scratch, select Blank Presentation. To use a prepared design, select one of the templates. To see tips for using PowerPoint, select Take a Tour, and then select Create, . Add a slide.
Outline View: Use this to work with an outline of your presentation. Each slide is numbered with a hierarchy of slide elements. Slide Sorter: Use this to see your slides in a grid format for an ...
Free Google Slides theme, PowerPoint template, and Canva presentation template. Engage your high school students with our vibrant, Renaissance painting-inspired presentation template focused on "The Odyssey." Perfect for teachers, this colorful PowerPoint or Google Slides template is designed to make classic literature come alive.
Step 1: Open Your PowerPoint Presentation. Start by opening the PowerPoint presentation where you want to include a poll or survey. Navigate to the slide where you plan to add the interactive element. Step 2: Access Microsoft Forms. Go to the "Insert" tab on the ribbon at the top of your PowerPoint window. Here, you'll find various ...
Disney Templates with your favorite Disney and Pixar characters Slidesclass Ready-to-go classes on many topics for everyone Editor's Choice Our favorite slides Multi-purpose Presentations that suit any project Teacher Toolkit Content for teachers Interactive & Animated Templates to create engaging presentations Printable Slides Presentations that suit any project Resources Pack Presentations ...
Navigate through your slides while speaking clearly into the microphone. Use drawing tools in the presentation recorder to highlight key points during your narration. If you need to take a break, use the pause button to temporarily stop the recording. When you've completed your presentation, press the F8 hotkey or click "Stop". 4. Editing the ...
Make the right move and engage your employees, clients, investors and stakeholders with awesome slide designs for PowerPoint presentations and Google Slides templates that are less boring than the default templates. Make your boss say "Yes!" by presenting awesome presentation reports with stunning graphics.
Use these formats to cite information obtained directly from slides. If the slides contain citations to information published elsewhere, and you want to cite that information as well, then it is best to find, read, and cite the original source yourself rather than citing the slides as a secondary source. Writers creating PowerPoint ...
How to create a PowerPoint template with Company Logo. 2 September 2024. How to Rotate Ruler in PowerPoint. 31 August 2024. How can you Add a Hyperlink to a Slide in PowerPoint? 31 August 2024. How to Delete Title box in PowerPoint. 31 August 2024. How to use Copilot to create Presentations. 28 August 2024. How to change table border color in ...
Select the text. Under Drawing Tools, choose Format. Do one of the following: To change the color of your text, choose Text Fill, and then choose a color. To change the outline color of your text, choose Text Outline, and then choose a color. To apply a shadow, reflection, glow, bevel, 3-D rotation, a transform, choose Text Effects, and then ...