The Ultimate Science Fair Project Guide – From Start to Finish
When our daughter entered her first science fair, we kept seeing references to the Internet Public Library Science Fair Project Resource Guide . However, the IPL2 permanently closed… taking the guide with it. Bummer ! After now participating in over a half-dozen elementary school science fairs (including a first-place finish!), we created our own guide to help other students go from start to finish in their next science fair project. If this is your first science fair, have fun! If you’ve done it before, we hope this is your best one! Let’s science!
*Images from Unsplash

How to Use the STEMium Science Fair Project Ultimate Guide?

If you are just starting off and this is your first science fair, here’s how to get started:
- Start with the STEMium Science Fair Project Roadmap . This is an infographic that “maps” out the process from start to finish and shows all the steps in a visual format.
- Getting Started – Why Do a Science Fair Project . Besides walking through some reasons to do a project, we also share links to examples of national science fair competitions, what’s involved and examples of winning science fair experiments . *Note: this is where you’ll get excited!!
- The Scientific Method – What is It and What’s Involved . One of the great things about a science fair project is that it introduces students to an essential process/concept known as the scientific method. This is simply the way in which we develop a hypothesis to test.
- Start the Process – Find an Idea . You now have a general idea of what to expect at the science fair, examples of winning ideas, and know about the scientific method. You’re ready to get started on your own project. How do you come up with an idea for a science fair project? We have resources on how to use a Google tool , as well as some other strategies for finding an idea.
- Experiment and Build the Project . Time to roll up those sleeves and put on your lab coat.
- Other Resources for the Fair. Along the way, you will likely encounter challenges or get stuck. Don’t give up – it’s all part of the scientific process. Check out our STEMium Resources page for more links and resources from the web. We also have additional experiments like the germiest spot in school , or the alka-seltzer rocket project that our own kids used.
Getting Started – Why Do a Science Fair Project
For many students, participating in the science fair might be a choice that was made FOR you. In other words, something you must do as part of a class. Maybe your parents are making you do it. For others, maybe it sounded like a cool idea. Something fun to try. Whatever your motivation, there are a lot of great reasons to do a science fair project.
- Challenge yourself
- Learn more about science
- Explore cool technology
- Make something to help the world! (seriously!)
- Win prizes (and sometimes even money)
- Do something you can be proud of!
Many students will participate in a science fair at their school. But there are also national competitions that include 1000s of participants. There are also engineering fairs, maker events, and hackathons. It’s an exciting time to be a scientist!! The list below gives examples of national events.
- Regeneron Science Talent Search
- Regeneron International Science and Engineering Fair
- Google Science Fair
- Conrad Challenge
- Microsoft Imagine Cup
- JSHS Program
- Exploravision
What’s the Scientific Method?
Before we jump into your project, it’s important to introduce a key concept: The Scientific Method . The scientific method is the framework scientists use to answer their questions and test their hypothesis. The figure below illustrates the steps you’ll take to get to the end, but it starts with asking a question (you’ve already finished the first step!).

After we find a problem/idea to tackle, and dig into some background research, we create a guess on a potential solution. This is known as our hypothesis.
Example of a Hypothesis
My brother can hold his breath underwater longer than I can (“our problem”) –> how can I hold my breath longer? (“our question”) –> if I drink soda with caffeine before I hold my breath, I will be able to stay underwater longer (“our solution”). Our hypothesis is that using caffeine before we go underwater will increase the time we hold our breath. We’re not sure if that is a correct solution or not at this stage – just taking a guess.
Once we have a hypothesis, we design an experiment to TEST our hypothesis. First, we will change variables/conditions one at a time while keeping everything else the same, so we can compare the outcomes.
Experimental Design Example
Using our underwater example, maybe we will test different drinks and count how long I can hold my breath. Maybe we can also see if someone else can serve as a “control” – someone who holds their breath but does not drink caffeine. For the underwater experiment, we can time in seconds how long I hold my breath before I have a drink and then time it again after I have my caffeine drink. I can also time how long I stay underwater when I have a drink without caffeine.
Then, once we finish with our experiment, we analyze our data and develop a conclusion.
- How many seconds did I stay underwater in the different situations?
- Which outcome is greater? Did caffeine help me hold my breath longer?
Finally, (and most important), we present our findings. Imagine putting together a poster board with a chart showing the number of seconds I stayed underwater in the different conditions.
Hopefully you have a better sense of the scientific method. If you are completing a science fair project, sticking with these steps is super important. Just in case there is any lingering confusion, here are some resources for learning more about the scientific method:
- Science Buddies – Steps of the Scientific Method
- Ducksters – Learn About the Scientific Method
- Biology4kids – Scientific Method
- National Institute of Environmental Health Sciences – Scientific Method
What Science Fair Project Should I Do?

And science is no different.
Just know that if you can get through the idea part, the rest of the science fair is relatively smooth sailing. Remember to keep an open mind and a positive outlook . Each year 100s of 1000s of kids, teenagers and college students come up with new projects and ideas to test. You’ve got this!
What Makes a Great Science Fair Project? Start with a Problem To Solve

As we discuss below, good science experiments attempt to answer a QUESTION. Why is the sky blue? Why does my dog bark at her reflection? First, we will step through some ways to find TESTABLE QUESTIONS. These questions that you create will be what you work on for your science fair project. Pick something fun, something interesting and something that you are excited about. Not sure what that looks like? Step through some of the tips below for help.
Use the Google Science Fair Idea Generator
Are you surprised Google made a tool for science fair projects?? Our post called the low-stress way to find a science fair project gives a more in-depth overview about how to use it. It’s a great first stop if you’re early in the brainstorming process.
Answer your own questions

- What type of music makes you run faster?
- Can boys hold their breath underwater longer than girls?
- How can I be sure the sandwich I bought is gluten free?
- If we plant 100 trees in our neighborhood, will the air be cleaner?
Still stuck? Get inspiration from other science fair projects

Check out the Getting Started section and look at some of the winning science project ideas, our STEMium experiments and our Resource page. We’ve presented a ton of potential idea starters for you – take time to run through some of these, but our suggestion is to give yourself a deadline to pick an idea . Going through the lists could take you longer than you think, and in many cases sometimes it’s just better to pick something and go for it! The next section will take you through how to create testable questions for your project.
Starting Your Project: Find A Testable Question
The best experiments start with a question. Taking that a step further, the questions you useyou’re your science fair project should be ones that are TESTABLE. That means something you can measure. Let’s look at an example. Let’s say I’m super excited about baking. OH YEA!! I love baking. Specifically, baking cakes. In fact, I love baking cakes so much that I want to do a science project related to cakes. We’ve got two questions on cakes that we created. Which question below could be most useful for a science fair project:
1) Can eating cake before a test improve your score?
2) Why isn’t carrot cake more popular than chocolate cake?
The second question isn’t necessarily a bad question to pick. You could survey people and perhaps tackle the question that way. However, chances are you will get a lot of different answers and it will probably take a lot of surveys to start to pick up a trend.
Although, the first question might be a little easier. How would you test this? Maybe you pick one type of cake and one test that you give people. If you can get five people to take the test after eating cake and five people take the test with no cake, you can compare the test results. There might be other variables beyond cake that you could test (example: age, sex, education). But you can see that the first question is probably a little easier to test. The first question is also a little easier to come up with a hypothesis.
At this point, you’ve got an idea. That was the hard part! Now it’s time to think a little more about that idea and focus it into a scientific question that is testable and that you can create a hypothesis around .
What makes a question “testable”?
Testable questions are ones that can be measured and should focus on what you will change. In our first cake question, we would be changing whether or not people eat cake before a test. If we are giving them all the same test and in the same conditions, you could compare how they do on the test with and without cake. As you are creating your testable question, think about what you WILL CHANGE (cake) and what you are expecting to be different (test scores). Cause and effect. Check out this reference on testable questions for more details.
Outline Your Science Project – What Steps Should I Take?

Do Background Research / Create Hypothesis
Science experiments typically start with a question (example: Which cleaning solution eliminates more germs?). The questions might come up because of a problem. For example, maybe you’re an engineer and you are trying to design a new line of cars that can drive at least 50 mph faster. Your problem is that the car isn’t fast enough. After looking at what other people have tried to do to get the car to go faster, and thinking about what you can change, you try to find a solution or an answer. When we talk about the scientific method, the proposed answer is referred to as the HYPOTHESIS.

- Science Buddies
- National Geographic
The information you gather to answer these research questions can be used in your report or in your board. This will go in the BACKGROUND section. For resources that you find useful, make sure you note the web address where you found it, and save in a Google Doc for later.
Additional Research Tips
For your own science fair project, there will likely be rules that will already be set by the judges/teachers/school. Make sure you get familiar with the rules FOR YOUR FAIR and what needs to be completed to participate . Typically, you will have to do some research into your project, you’ll complete experiments, analyze data, make conclusions and then present the work in a written report and on a poster board. Make a checklist of all these “to do” items. Key things to address:
- Question being answered – this is your testable question
- Hypothesis – what did you come up with and why
- Experimental design – how are you going to test your hypothesis
- Conclusions – why did you reach these and what are some alternative explanations
- What would you do next? Answering a testable question usually leads to asking more questions and judges will be interested in how you think about next steps.
Need more help? Check out these additional resources on how to tackle a science fair project:
- Developing a Science Fair Project – Wiley
- Successful Science Fair Projects – Washington University
- Science Fair Planning Guide – Chattahoochee Elementary
Experiment – Time to Test That Hypothesis
Way to go! You’ve found a problem and identified a testable question. You’ve done background research and even created a hypothesis. It’s time to put it all together now and start designing your experiment. Two experiments we have outlined in detail – germiest spot in school and alka-seltzer rockets – help show how to set up experiments to test variable changes.
The folks at ThoughtCo have a great overview on the different types of variables – independent, dependent and controls. You need to identify which ones are relevant to your own experiment and then test to see how changes in the independent variable impacts the dependent variable . Sounds hard? Nope. Let’s look at an example. Let’s say our hypothesis is that cold weather will let you flip a coin with more heads than tails. The independent variable is the temperature. The dependent variable is the number of heads or tails that show up. Our experiment could involve flipping a coin fifty times in different temperatures (outside, in a sauna, in room temperature) and seeing how many heads/tails we get.
One other important point – write down all the steps you take and the materials you use!! This will be in your final report and project board. Example – for our coin flipping experiment, we will have a coin (or more than one), a thermometer to keep track of the temperature in our environment. Take pictures of the flipping too!
Analyze Results – Make Conclusions
Analyzing means adding up our results and putting them into pretty pictures. Use charts and graphs whenever you can. In our last coin flipping example, you’d want to include bar charts of the number of heads and tails at different temperatures. If you’re doing some other type of experiment, take pictures during the different steps to document everything.
This is the fun part…. Now we get to see if we answered our question! Did the weather affect the coin flipping? Did eating cake help us do better on our test?? So exciting! Look through what the data tells you and try to answer your question. Your hypothesis may / may not be correct. It’s not important either way – the most important part is what you learned and the process. Check out these references for more help:
- How to make a chart or graph in Google Sheets
- How to make a chart in Excel
Presentation Time – Set Up Your Board, Practice Your Talk
Personally, the presentation is my favorite part! First, you get to show off all your hard work and look back at everything you did! Additionally, science fair rules should outline the specific sections that need to be in the report, and in the poster board – so, be like Emmett from Lego Movie and read the instructions. Here’s a loose overview of what you should include:
- Title – what is it called.
- Introduction / background – here’s why you’re doing it and helping the judges learn a bit about your project.
- Materials/Methods – what you used and the steps in your experiment. This is so someone else could repeat your experiment.
- Results – what was the outcome? How many heads/tails? Include pictures and graphs.
- Conclusions – was your hypothesis correct? What else would you like to investigate now? What went right and what went wrong?
- References – if you did research, where did you get your information from? What are your sources?
The written report will be very similar to the final presentation board. The board that you’ll prepare is usually a three-panel board set up like the picture shown below.

To prepare for the presentation, you and your partner should be able to talk about the following:
- why you did the experiment
- the hypothesis that was tested
- the data results
- the conclusions.
It’s totally OK to not know an answer. Just remember this is the fun part!
And that’s it! YOU DID IT!!
Science fair projects have been great opportunities for our kids to not only learn more about science, but to also be challenged and push themselves. Independent projects like these are usually a great learning opportunity. Has your child completed a science fair project that they are proud of? Include a pic in the comments – we love to share science!! Please also check out our STEMium Resources page for more science fair project tips and tricks .
STEMomma is a mother & former scientist/educator. She loves to find creative, fun ways to help engage kids in the STEM fields (science, technology, engineering and math). When she’s not busy in meetings or carpooling kids, she loves spending time with the family and dreaming up new experiments or games they can try in the backyard.
Leave a Comment Cancel reply
Notify me of follow-up comments by email.
Notify me of new posts by email.

How to Write a Research Plan for a Science Project

How to Make a Rough Draft on Science Projects
A research plan outlines your proposed science fair project and must be approved by a science fair committee before experiments are done. For this reason, it contains no experimental data but instead offers the questions you plan to address, the significance of questions, background information and experimental design. Since a committee must approve your plan, provide a proposal that represents your ideas as important, doable and unique in its approach.
Make a list of "what, when, where and how" questions that relate to your topic. Be specific. Start with all the possible questions, then eliminate those that are too vague or those you cannot answer, given your time and resources. Science Buddies provides an example of this.
Describe the significance of your questions by considering how answering them might be helpful to others in the future. Think big but not unreasonable. Answering questions about bacteria growth, for example, has implications on disease prevention. Research each implication and offer statistics or solid facts on how knowing more would be important. Keep track of your information for your bibliography.
Build a foundation for your questions with background information. Determine what is already known, who figured it out and how these finding have already affected the world. Make sure your questions are not already answered by the work of other people. If they are, find holes in the background information and find new questions that address them. Ask anyone with experience on your topic for help if you have difficult finding background information. Keep track of where you get all information for your bibliography.
Describe a detailed step-by-step method for answering your questions. Individual experiments may be necessary for individual questions. List the necessary materials and equipment. Include exact amounts and explicitly state data collection methods.
Anticipate the results you might get through the method you outlined. Consider any problems you may encounter in your experiments and how you will address them. Think critically about your planned experiments. Make sure they address the questions you stated. If not, redo either your method or your question list.
Formalize a research plan. Make it easy to read and include the following sections: questions, significance, background and materials and methods. Possible problems may be its own section or part of the materials and methods section. Follow school guidelines regarding accompanying paperwork and the order of your sections. The bibliography has its own section and is always last. Check for good grammar and spelling.
- Always cite whenever you use information from the Web or from books or people. Citations from reliable resources gives credibility to your project.
- Network at your local university. Students and faculty doing research on a related topic can be a valuable resource.
Related Articles

How to Write a Discussion for a Science Fair Project

How to Write a Technical Essay

How to Write a Master's Research Proposal

How to Write the Objectives for Study Proposals

How to Write a Microbiology Research Proposal

How to Write an Investigation Essay
How to evaluate research.

How to Write High School Research Papers
- Science Buddies
Dr. Alex Tan has been writing in science for more than six years. She is now working as a technical and science writer in California. Tan received her Ph.D. from Johns Hopkins University
Steps in a Science Fair Project
What are the steps in a science fair project.
- Pick a topic
- Construct an exhibit for results
- Write a report
- Practice presenting

Some science fair projects are experiments to test a hypothesis . Other science fair projects attempt to answer a question or demonstrate how nature works or even invent a technology to measure something.
Before you start, find out which of these are acceptable kinds of science fair projects at your school. You can learn something and have fun using any of these approaches.
- First, pick a topic. Pick something you are interested in, something you'd like to think about and know more about.
- Then do some background research on the topic.
- Decide whether you can state a hypothesis related to the topic (that is, a cause and effect statement that you can test), and follow the strict method listed above, or whether you will just observe something, take and record measurements, and report.
- Design and carry out your research, keeping careful records of everything you do or see and your results or observations.
- Construct an exhibit or display to show and explain to others what you hoped to test (if you had a hypothesis) or what question you wanted to answer, what you did, what your data showed, and your conclusions.
- Write a short report that also states the same things as the exhibit or display, and also gives the sources of your initial background research.
- Practice describing your project and results, so you will be ready for visitors to your exhibit at the science fair.
What are your chances of acceptance?
Calculate for all schools, your chance of acceptance.
Your chancing factors
Extracurriculars.

How to Write a Convincing Science Fair Research Proposal

Do you have a plan for applying to college?
With our free chancing engine, admissions timeline, and personalized recommendations, our free guidance platform gives you a clear idea of what you need to be doing right now and in the future.
For students interested in the STEM fields, there are many extracurriculars to choose from. You might join the Math or Science Olympiad team, you could join the Computer Science Club, or you could even volunteer as a naturalist at a local conservation area.
If you are interested in scientific research, you might pursue the opportunity to secure a research assistant position or shadow various scientific researchers. But if you truly want to take the helm and guide your own research, your path may lead you to participating in the science fair.
The science fair is a traditional component of many high school science programs, with participation ranging widely from school to school and science fair to science fair. At some schools, the science fair might be a rite of passage expected of every student. At others, it attracts a handful of dedicated science die-hards.
Regardless, most science fairs feature presentations by students who have completed experiments, demonstrated scientific principles, or undertaken an engineering challenge. Participants are judged by a panel of experts who score each presentation according to a rubric. Traditionally, awards are presented for the top-scoring projects.
There are many science fairs beyond school-sponsored fairs, too. Regional, state, national, and even international fairs are open to students who qualify through their schools and work their way up through the science fair circuit. Others, like the Regeneron Science Talent Search, are open through an intensive application process.
If you are considering entering a project in the science fair, you will need to think carefully about your subject matter, your experimental design, and the relevance of your work before committing to a project. Many science fairs will even require that you complete a formal research proposal to demonstrate the level of thinking you’ve put into your experiment before beginning it.
In this post, we will outline the purpose of a research proposal for the science fair, the common elements of such a proposal, and how you can go about writing a comprehensive research proposal that is sure to impress.
What is the Purpose of a Research Proposal?
A research proposal has three primary purposes. The first purpose is to explain what you intend to do. This is essentially what you will do in your experiment or project, summarized into a basic overview.
The second function of a research proposal is to explain how you intend to accomplish this. You will give a brief summary of the methods and techniques that you intend to employ, and list the materials that you will need to do so.
The final point of a research proposal is to explain why this project should be done. Here, you will discuss the important or relevance of this study. Basically, in this portion of your proposal you’ll answer the question, “so what?”
Now that you know the aim of a research proposal, you can begin to prepare to write one. -->
Step-By-Step Guide to Creating a Research Proposal
1. narrow down the subject area..
Before you go into your project in any sort of depth, you’ll need a fairly good idea of what your project’s focus will be. In order to narrow this down, you should consider a few different angles.
First, ask yourself what you’re interested in. You will be more likely to feel engaged and passionate about a project that is genuinely interesting to you, so take some time to carefully consider the areas of science that you find the most fascinating. Even if they don’t seem particularly well-suited to a science fair project at first, you never know what you might be able to come up with through some collaboration with mentors or through some background research. Keep a running list of areas of science that sincerely fascinate you.
Next, consider any specialized labs or equipment to which you might have access. Does your best friend’s mother work in a lab with highly specialized tools? Does your school have a state-of-the-art wind tunnel or fully equipped greenhouse? These are all possible resources you can utilize if you want your project to truly stand out. Of course, it’s completely possible to choose a project that shines on its own without any specialized equipment, but if you’re looking for every boost you might get, having access to specialized technology can be a great advantage to make your project truly unique.
Finally, consider if you know a teacher or other professional who might be willing to mentor you. You can also seek out a mentor specifically if you can’t think of anyone obvious. Having a mentor in your field will provide you with invaluable insight into practice and past research in the field.
In the ideal world, you would find a project that maximizes all of your resources, including your interests, access to equipment, and an enthusiastic mentor. Don’t worry if you can’t secure all three, though. Plenty of science fair participants go on to do quite well relying on only their own dogged determination and commitment to their subject matter.
2 . Decide How Your Experiment Will Be Done
If you have a mentor, teacher, or adviser willing to consult with you, schedule a time to sit down with them and discuss what you’d like to do. If you can’t find someone more experienced than you, even discussing your ideas with a trusted classmate, parent, or older sibling is a good idea. Sometimes the outside perspective will help to fine-tune your design or identify areas for improvement.
You should also begin some research at this stage to learn how similar projects have been conducted in the past. Use the results and limitations from these experiments to help guide your own experimental design.
As you do so, keep in mind any limiting factors. Remember to consider what equipment you have at your disposal, the time commitment you’re able to make, and the materials that you’ll need to acquire.
In addition, be sure to check the rules of the specific science fairs you’ll be attending. Some have strict regulations designed to keep you safe, like limiting the ways in which potentially hazardous chemicals can be used. Other rules are designed to keep the environment safe, like placing restrictions on how you dispose of foreign substances or non-native species. There are also ethical rules that govern the use of human participants or vertebrate animals in your studies. Make sure to check which rules govern the fair in which you’re participating and how they might impact your ideas before you put any more thought into your project.
Discover your chances at hundreds of schools
Our free chancing engine takes into account your history, background, test scores, and extracurricular activities to show you your real chances of admission—and how to improve them.
3. Background Research
Your background research should be fairly comprehensive at this point and will be the single largest component of your research proposal. You should focus on your research on relevant past studies that inform your work either by identifying areas for future research or by identifying limiting factors in their own research. You should also research past experiments that support or attempt to disprove your working theory.
Finally, your research should clearly show why the project is relevant. What is important about it? What does it add to the field? Why should we care? Make sure that you can communicate the scientific value of the project you’re proposing.
4. Write Your Proposal
Once you’ve chosen a project, decided how you’ll undertake it, and done the relevant background research, you are finally able to begin drafting your research proposal. Check with your school or science fair to see if there is a specific format or form that you’re required to adhere to. If not, and you are producing a general research proposal, follow this format:
This should be a one-paragraph description of the project, your hypothesis, and the goals of your experiment. Here, you provide a brief overview of your project for anyone who is skimming your work.
Introduction/Literature Review:
This is the bulk of your proposal. In your literature review, you present what is currently known about your project’s focus and summarize relevant research that has been done in the field. You will discuss previous discoveries in your field, including how they were made and what they lend to your current work.
You will also show what is interesting and ground-breaking about your research idea. In this section you will need to summarize why your project is relevant, what makes it important, and how the field or current base of knowledge could change or be improved due to your project’s results.
As you write your literature review, you’ll need to be sure that you’re using high-quality, accurate sources. It’s best to rely on scholarly journal articles or reference books. Be wary of using the Internet, as many sources are unverified. If you are using online resources, be sure to verify their source. Published, peer-reviewed scholarly articles are best.
It’s also important to include proper citations for every source cited. You’ll need to list all your sources in the appropriate format in your bibliography along with citing them in the text of your proposal when you quote directly or reference specific data. If you aren’t sure how to cite properly, check out the Scientific Style and Format page.
Hypothesis:
This is the working theory that you are testing and what you expect the results will be, based off what you have learned through your background research.
Materials and Methods:
In this section you’ll provide a precise, in depth description of how you plan to test your hypothesis and what tools or materials you’ll need to do so. Summarize your experimental design, specifically referring to how you will control and replicate the experiment. Also list the equipment and materials that you will need for undertaking your experiment.
Conclusion:
Here, you will reiterate how your proposed research will advance knowledge in the scientific field and outline any potential longterm impact that your work could have on theory or practice within the field.
Bibliography:
List all sources used in appropriate format. Refer to the Scientific Style and Format page if you aren’t sure how to do so.
What Happens After I Submit a Research Proposal?
After you submit the research proposal, it will be reviewed by your teacher or a science fair administrator or adviser. It will be approved, rejected, or returned for revisions based on its feasibility, value to the scientific field, and adherence to the science fair rules and regulations.
While larger, more selective science fairs will have to select only a limited number of candidates based on the merits of their research proposals, it is fairly uncommon for a science fair research proposal to get completely denied at the school level. Usually, in these cases, your proposal will be returned to you with requests for edits or further clarification. You have most likely consulted with your teacher or adviser throughout the process of developing your proposal, so nothing should come as a complete surprise when you receive feedback.
If your proposal is rejected and you don’t receive constructive feedback, don’t be shy about respectfully requesting some feedback to help you shape a better, more effective proposal in the future.
If your proposal is returned for revisions, you should feel encouraged. While you still have some work to do, this is generally a sign that with a few tweaks, your proposal will be accepted. Meet with a teacher, mentor, or adviser to review the revisions requested and address each thoroughly before returning the proposal for another round of review.
If your proposal is accepted, congratulations! It’s time to get to work. While your proposal itself was probably a time-consuming endeavor, your research will ultimately be easier for having taken the time and care to craft a precise proposal. Your research will be more focused and likely a smoother process due to all your careful planning, and you will be able to use large chunks of your written work in your final scientific report.
Don’t be intimidated if you’re getting ready to write a science fair research proposal. It can be a long process to fine-tune your project and focus your proposed research, but the work that you put in now ultimately makes your job easier in the long run.
Looking for help navigating the road to college as a high school student? Download our free guide for 9th graders and our free guide for 10th graders . Our guides go in-depth about subjects ranging from academics , choosing courses , standardized tests , extracurricular activities , and much more !
For more information about the science fair and opportunities for students interested in the STEM fields, see these valuable CollegeVine posts:
- How to Spend Your Summer As a Prospective Math Major (And Why Math is a Great Career Path)
- A Guide to STEM Scholarships
- Summer Activities for the Future BS/MD Applicant
- Ultimate Guide to the AP Research Course and Assessment
- How to Choose a Project for Your AP Research Course
- How to Get a Research Assistant Position in High School
- An Introduction to the AP Capstone Diploma
- How to Choose a Winning Science Fair Project Idea
- How to Plan and Implement an Independent Study in High School
- A Beginner’s Guide to the Science Fair
- Guide to National Youth Science Camp
Want access to expert college guidance — for free? When you create your free CollegeVine account, you will find out your real admissions chances, build a best-fit school list, learn how to improve your profile, and get your questions answered by experts and peers—all for free. Sign up for your CollegeVine account today to get a boost on your college journey.
High School Graduation Year* 2017 2018 2019 2020 2021 2022 2023 Other
Can't see the form above? Subscribe to our newsletter here .
Related CollegeVine Blog Posts

Introduction
1. get your idea and do some research, 2. ask a testable question, 3. design and conduct your experiment, 4. examine your results, 5. communicate your experiment and results.
Learning Space
Teachable Moments
Stay Connected

How to Do a Science Fair Project
To get started on your science fair project, you'll learn to observe the world around you and ask questions about the things you observe.
Observe the world around you and ask questions about the things you observe.
Develop your idea into a question you can test. Your question should follow the format, "How does [input] affect [output]?"
Design your experiment and keep track of the results. Remember to only change one variable and conduct your experiment multiple times for each trial. Each trial should be repeated in exactly the same way.
Now that your experiment is done, it's time to examine your results. You want to look for trends in your results and draw conclusions from those trends. You also want to examine your data for possible influences from factors you didn't consider at first.
Make a poster display that summarizes your experiment so you can share your results. Be sure to include the question you were trying to answer (your hypothesis), the steps you took to answer that question, your results and any factors that may have influenced your results. Your poster should be visually appealing, but also clear about what you did and why people should care.
Every great science project includes the same basic activities:
- Identifying a testable question . The question should be answerable, using affordable materials and methods that are both safe and feasible.
- Testing each variable in an experiment more than once. Repeated testing will ensure you have enough data to make valid conclusions.
- Testing only one variable at a time . This approach allows you to identify and measure the effect of each variable individually.
- Data gathering and recording . Data include measurements and observations.
- Graphing data , and then identifying trends in the data. That will help support your conclusion.
This science fair project guide published by Science Buddies can help you get started. This 15-minute animated video , by a young artist named Kevin Temmer, provides a great introduction to preparing for a science fair.
Now that you know what to do, choose a topic and then:
- Research the topic . This means becoming a mini-expert on the topic.
- Organize . This includes stating the question you want to answer.
- Create a timetable . Research takes planning, pacing and usually much more time than you expect.
- Make a research plan . This is a roadmap of the questions you will have to answer as you design, conduct and interpret your experiment.
- Review rules , and have an adult review and approve your experiment if necessary. Every science fair requires students to follow a set of rules. For example, here are the rules for Regeneron ISEF competition for high school students. Some projects also require the review and approval of an adult. These can include projects involving hazardous or potentially hazardous substances and devices, or live animals (including people).
- Construct a hypothesis. This is an educated guess about how something will work. An experiment will test your hypothesis.
- Conduct the experiment . You will have to repeat it multiple times, following the same procedure each time.
- Record results . This means collecting your measurements and observations.
- Analyze results . Review your data, using charts and graphs to help interpret them.
- Draw conclusions . Your data will either support or refute your original hypothesis.
- Present results . You can share the results of your experiment through an abstract, or brief summary. You may also present your results in a research paper or on a presentation board.
Project Timing
Each of the above steps will take time — more than you may think at first. Making a timetable will help you plan. Be ambitious but realistic. That means making sure that the topic you choose not only interests you but also can be researched in the amount of time you have. Once you have identified your testable question, next develop a timeline to manage how you will test it. Build into your project some extra time to accommodate unexpected problems. These might include taking a big test, getting the flu or having to leave town for a family event.
If you will be taking part in a large science fair, you may have to fill out entry forms and review your research plan with your sponsor. Allow time for that. Certain projects will require more time because they need prior approval from a Scientific Review Committee (SRC) or an Institutional Review Board (IRB). Budget time for that. And allow plenty of time to experiment and collect data. Sometimes experiments don’t work. Sometimes experiments raise more questions than they answer — and require even more experimenting. This all takes time. Finally, you may have to write a paper that pulls together your findings. Or you may need to create a display or poster that presents your data and findings.
Project Support
Creating an independent research project doesn’t mean you can’t ask for help. Parents, teachers, experts and other students may offer to help you on your project. Figuring out what kind of help is fair — and what type of help is not — can be tricky. Below are several stories from Science News for Kids that help offer guidance on that issue.
Many students find a mentor to help them refine what questions to ask and how to answer them. Ideally, a mentor should never tell you what to do (even if you ask). Instead, a good mentor will help you find information that will inform your decisions on what to do and how to do it. For example, this story from Science News for Students gives examples of the proper roles played by mentors. This article discusses the advantages of working with a mentor. Meanwhile, we feature in this story the rewarding example of a young student who had the courage to contact an outside expert in the topic he was researching.
Parents and teachers can play a role too. Parents and teachers may offer advice and give assistance, but they must not do any of the actual work on a research project.. For instance, they may help you map out the time you have available to do your work. Parents and teachers also can evaluate whether the project you want to do can be done in the time available. They also can help determine whether supplies will cost more than you can afford, or whether what you plan to do might be dangerous or require approval from others. Here are two links to SNK stories that expand on this topic.
This Science News for Students article features what parents learned about their role in helping on science fair projects. And this story highlights teachers sharing the roles they played.
Presentation and Competition
Once you have completed your experiment, analyzed your results and drawn your conclusions, there is still more to do: You must communicate your findings. You also should be prepared to discuss your project, answering any questions that judges, teachers or others might have about how and why you tested or developed something the way you did and how to interpret your findings.
There are many different ways to present the results of your research. Remember: Presenting results doesn’t mean performing, demonstrating or repeating your experiment. Instead, you should prepare:
- A research paper. This gathers in one document all the work you have done on your project. The contents will vary, but should include a title, table of contents, hypothesis, background research, materials, procedures, data analysis, conclusions and a bibliography. You might also include ideas for future research and acknowledgements.
- An abstract, or brief summary of your research paper. An abstract typically includes the purpose of the experiment, procedures used, results and conclusion. You also may want to include an introduction. Science Buddies offers this concise guide to writing an abstract .
- A project or display board . The board includes much of the same information as in your research paper. However, it is designed for display and brevity. That means it must be organized and laid out in a way that makes it easy to read — even by someone standing a short distance away. Again, Science Buddies provides some clear guidelines for preparing a board. For most science fairs, there are complex and strict rules that govern what a board must (and cannot) include. For example, review the Regeneron ISEF Display and Safety Regulations .
When presenting your work, it can be helpful to keep in mind what judges look for in reviewing the entries in a science fair. Even if you don’t plan to compete, these criteria can help you focus in creating a presentation of your work. Some of the criteria include originality and creativity, design and methodology, knowledge achieved, and clarity of expression.
For more examples of what judges look for, review the Regeneron ISEF Judging Criteria . You can also try searching on the Internet for “science fair judging criteria.” You can narrow your search by adding, for example, the name of your state. SSP-Affiliate Fairs are listed in a Find-A-Fair index by state; many have websites with details about registration, judging and past winners.
- Earth Science
- Physics & Engineering
- Science Kits
- Microscopes
- Science Curriculum and Kits
- About Home Science Tools
Science Projects > Science Fair Projects > How to Plan a Science Fair Event (at your co-op)
How to Plan a Science Fair Event (at your co-op)
So, you were tasked with hosting a science fair event at your homeschool co-op. Now you’re overwhelmed at the thought of planning a successful science fair. Maybe you weren’t homeschooled. Perhaps you weren’t interested in science. Regardless, there is something about a science fair that brings everyone together, making it the perfect event to host at your homeschool co-op.
What is a Homeschool Science Fair?
“A science fair is a competitive event hosted by schools worldwide. The distinguishing characteristic of a science fair is that the project entries employ the scientific method to test hypotheses. Science fairs are not exhibits or mere displays of projects.” ~ Wiki
So, how does an individual plan a successful science fair? Good question!

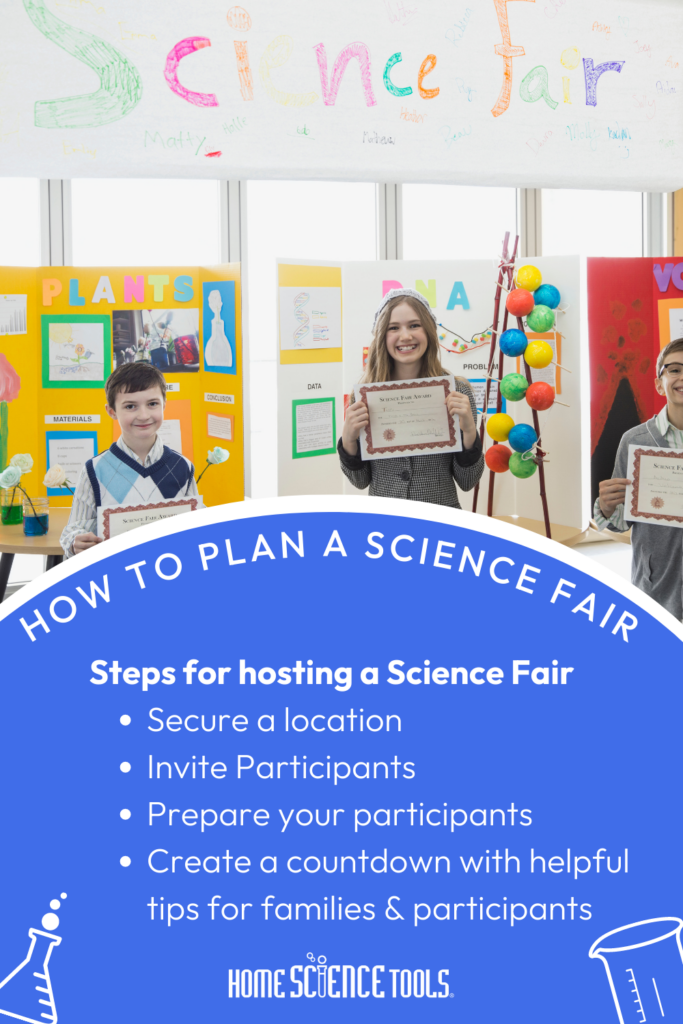
Steps to Hosting a Science Fair at Your Co-Op
This easy-to-follow science fair planning guide will have you on your way to creating a successful science fair for middle school or high school students in no time. You can print this out to use as a template to guide you. Before you know it, you’ll be science fair central!
Step One: Secure Your Location
If you’re already part of a co-op, the facility that hosts the co-op is adequate to host your homeschool science fair event. However, there are a few things to keep in mind when considering the space:
- Is the area large enough for the expected crowd?
- Is there a fee involved to use the space?
- Are you able to decorate the facility?
- Are tables and chairs available to have the science fair projects on display?
- Will you provide your set-up and take-down?
- Is there a time you must be finished and out of the space?
- Are there any rules or regulations governing outside promo?
Once you’ve secured your space, you’re ready for the next step – attracting science fair participants.
Step Two – Inviting Participants to Your Homeschool Science Fair at Your Co-Op
You’ll want to be sure you come up with a set of guidelines for your fair. Outlining the rules for the fair, who can participate, the number of participants, the age range of participants, who will be your panel of science fair judges, and more! The more questions you can answer upfront as a planning committee, the better prepared you’ll be when parents and participants begin asking questions.
- Will participants be restricted to co-op members only? If not, Will there be a review process for applicants?
- What is the date of the science fair? What are the deadlines and due dates?
- Who will be the go-to person responsible for handling sign-ups for the science fair and fielding questions?
- Will there be a maximum and a minimum number of participants?
- Will there be an age range or grade level required for participation?
- How will you invite competitors? Do you plan to email the invitation? Make flyers? Social media?
- Will you create an information packet to guide competitors through the participation process?
- Is there a cost to participate? If so, who will handle the money?
- The more participants your homeschool science fair hosts, the more significant the learning opportunity for everyone involved.
- Will there be an award’s fair? Will you need to come up with special awards?
- Who will judge the science experiments?
Step Three – Prepare Your Participants
If you desire max participation in your homeschool event, plan to prepare your participants. For many students and families, this will be their first fair.
Here are some tips and ideas to help prepare your kids:
- Partner with your co-op’s science teachers and host informative workshops on the scientific method of hypothesis, research, experiment, and conclusion. Demonstrate!
- Consider creating a calendar of lesson plans or learning activities to spark interest in participation.
- Encourage previous competitors or students with prior experience with a home school science fair to share their projects or talk about their experience. Past competitors could even consider being a mentor to new competitors. An older high school student with an elementary school student could be a great partnership!
- Make it easy to participate and get questions answered.
- Be sure to let the participants know if you’ll have an awards ceremony, and what kinds of awards there will be. Will you just do 1st, 2nd, and 3rd place ribbons for the finalists in the fair? Or maybe you’ll do a “Best in fair” award, too. Will finalists go on to compete in a regional science fair or state science fair perhaps?
- Balance the fun with the serious. Science is fun!
Step Four – Create A Count Down
Breaking down the bigger project concept of hosting a science fair event at your co-op into mini-goals can help the event run smoothly. We’ve listed out mini-goals below in a calendar format. Of course, be sure to add to it as needed, but this format will help get you started and you stay on track.
Calendar for Hosting a Science Fair
6-12 months ahead
- Set the event budget
- Secure the space & event date
- Come up with event guidelines
6 – 9 Months in Advance
- Partner with science teachers to create activities calendar.
- Secure your science fair judges
3 Months Out
- Create participation packet and advertising flyers if using and submit to the printer
- Begin Inviting your families, maybe host an info meeting. Be prepared to answer questions.
- Purchase decorations for the space.
1-3 Months Ahead
- Advertise to other Co-op’s and homeschoolers
1 – 2 months Out
- Collect any fees from participating families.
- Plan your space & flow layout.
- Enlist volunteers for setup & tear down
- Enlist volunteers to assist on the day of the event.
2 Weeks Before the Event
- Follow up with volunteers, budget spending, printing needs, and family questions.
1 Week Before the Event
- Elicit feedback from the committee and science team to determine and execute any last-minute needs.
Day Before the Science Fair Event
- Pack all decor, etc., for the morning of the event. Then, if possible, begin setup today!
Goals for Participating Families and Students
Each family that chooses to participate in the event will need to have an outline for what their calendar might look like leading up to the event, as well.
Upon Invite
- Set a time aside to talk to your students about participation interests. Jot down questions and concerns they have and plan to follow up with the answers.
- As soon as practical, reach out to your Co-op science teachers to have any questions answered.
- Put the date on your homeschool calendar.
- Make a list of supplies you’re likely to need (display board, table decoration, experiment needs, notebooks).
- If practical, invite family and friends.
- Create a checklist for your students to help keep them on track.
- Be prepared for your students to change their minds about a topic & consider setting a cut-off date for topic choices. Encourage diligence. Share stories of scientists who persevered in pursuit of testing their theories.
Two weeks out
- Make final supply purchases and create a space for crafting the display board.
One week out
- Revisit your student’s progress and checklist.
Two days out
- What do you need to do to have the project completed?
Night before
- Celebrate and sleep! You’ve worked hard to prepare and tomorrow will be a big day!
For the Student Participating in the Science Fair
Before you begin, you’ll want to discuss the event with your science teacher or parent. You’ll want to know about the science fair guidelines.
A rubric can also give you project ideas that you might not have thought of. When you begin preparing for the fair, ask for a rubric to help you structure your project.
A trip to the library or reading through a science journal could prove helpful in choosing a topic. Once you’ve chosen your topic you can begin your background research.
There are many types of science projects to choose from. You can find all sorts of science fair project idea supplies here to help you brainstorm and get started. Depending upon your age or grade level, some ideas for your fair experiment could include:
- simple machines
- model building the solar system
- weather-related projects
- types of dinosaurs
- environmental science -based experiments
- exploring mold, germs, bacteria, viruses
- physical science-based experiments
- life science research paper
If all of that wasn’t enough to get the ideas flowing, maybe you can find some ideas here . Once you’ve come up with an idea, you can find helpful tips here about how to design a science fair project.
The co-op, families, science staff, and students working together can address any social anxiety that you might feel when you begin thinking about competing in a science fair. Don’t worry though, even though science competitions can be intimidating, they don’t have to be. With the right preparation and help from a mentor or parent, you can have a great project and a lot of fun!
With a plan in place to host a fun and exciting science fair event at your co-op, you’re sure to create lasting memories.
And maybe even discover a budding Albert Einstein or Madaln Curie.
Teaching Homeschool
Welcome! After you finish this article, we invite you to read other articles to assist you in teaching science at home on the Resource Center, which consists of hundreds of free science articles!
Shop for Science Supplies!
Home Science Tools offers a wide variety of science products and kits. Find affordable beakers, dissection supplies, chemicals, microscopes, and everything else you need to teach science for all ages!
Related Articles

Science Fair Projects for 7th Graders
Science Fair Projects for 7th Graders Science fair projects for 7th graders are a step up in complexity. Because 7th graders have a better grasp of science concepts, they’re expected to practice the scientific method in the way they approach their experiments–which...

Home Science Experiments for Preschoolers
Home Science Experiments for Preschoolers Home science experiments for preschoolers are a great way to pique your child’s curiosity, teach them valuable knowledge, and allow them to have some fun in the comfort of their own home. There are plenty of activities your...

Easy Science Fair Projects for Kids
Easy Science Fair Projects for Kids Science fairs are a long-standing tradition that provide kids with the opportunity to better understand practical concepts in fun and innovative ways. The great thing about the experiments presented at these events is that they...

How to Make a Pollinator Hotel
Have you ever wondered how you can help provide habitat for pollinators like honey bees and butterflies in your back yard? Learn how to make a pollinator hotel with this step-by-step guide and lesson. Pollinators are animals that help move pollen. Most pollinators are...

Valentine’s Day Science Projects
Valentine’s Day is a great opportunity to inspire your student’s LOVE for science! Engage your kids with science concepts such as diffusion, density, and surfactants. These three, hands-on science projects include the Dancing Conversational Hearts, Rainbow Heart, and...
JOIN OUR COMMUNITY
Get project ideas and special offers delivered to your inbox.
Ultimate Guide for A+ Science Fair Project: Science Fair Board Layout Ideas & Examples
- September 27, 2021
- Kids Printables , Science Fair Ideas
Science fair project displays can seem like a daunting task for many students. However, there are some simple tips and tricks to make it easier for yourself!
This article will help you with your display by giving you free layouts and examples to use.
We provide a variety of science fair board ideas designed for different purposes, such as displaying all your entries or just some of them.
There is also information about how to organize your project, what materials you will need and more..
Steps to Plan Your Science Fair Display Board
We have learned the following advice from working with thousands of middle school students over the years.
By reading this post and following the tutorial, you will be on your way to a great display that will impress judges, parents, and spectators.
Your display board will be the only part of your science fair project that your child and anyone visiting the school will see. It’s your opportunity to show the judges that your child deserves recognition for their project and all the hard work they’ve put in.

So, how do you put together a plan for it?
Many project display boards follow a schematic format and are typically outlined in black marker, usually in columns. The columns represent the different pieces of information that the board contains.
Create a detailed plan of your project and board.
If you’re unsure where to start or how to go about it, consider the complete science fair project steps below.
2. Organize
3. Research
8. Evaluate
Know Rules / Regulations of Science Fair Competition
When it comes to the judging of science fair projects , it’s important to know the rules. Most competitions will have a list of criteria for judging, and following these can help your project stand out.
If you’re following a science fair project book, check its list of judging criteria. Many science fair books have a list of categories and points for each, so you can run a quick Google search to see if your book matches up with the criteria of the competition you’re entering.
If you’re entering a local science fair, ask someone there about the criteria for judging. Many local science fairs have online entry forms where you can also find out about criteria.
If your competition is online, go to the competition website and search for the rules or criteria. Many science fair websites have downloadable copies of their rules, so you won’t have to hunt them down.
You might also ask the science fair coordinator or teacher for a copy of the rules. Many science fairs take entries online, so organizers have access to this information.

If you’re entering a national science fair, check its website for rules. Science fair rules vary widely from competition to competition, so you may have to do a little more research, but it’s usually not hard to find.
Once you’ve found the rules, make sure to follow them. Certain rules may vary from school to school, so it’s best to do a small web search first.
Some science fair rules might be hidden; be sure to look in the “Additional Information” section or check the website’s FAQ page. If you’re still unsure whether the rules apply to your project, ask the teacher or coordinator.
Sections to cover in Display Board

The science fair project display board is the students’ opportunity to showcase their hard work and how they solved a problem or question.
Good science fair project display boards should be organized, easy to read, and visually appealing. The science fair judges are not scientists, and their science fair project displays should be the same way.
There are two main parts to a science fair project display board: the header and the body.
The header should include:
– Your name
– the category you belong to (“Chemistry” or “Math”)
– your science fair project title
– the district or region you belong to (“Chicago,” “Illinois,” “Midwest”)
– and your grade level
Body aka Science Fair Display Board
The display board is the body of the display and should incorporate all the details of your science project. The typical science fair project display board is made up of several standard components.
The display board should include the following information:
Title and Name of Project
The title and name of the project should be clearly written on the board, and the project information should be written on the board clearly and concisely.
The science fair project display board title may include the project title, your name, and your school name.
Background information
The background section includes background information about the project.
The hypothesis section includes your hypothesis or what you are hoping to prove. The problem or question that the student attempted to address.
Materials Used
The materials used in the project should be listed along with the quantity used. You can also include a list of the tools and equipments used in the project.
The methods section includes your methods or how you went about proving your hypothesis. The method by which the student attempted to address the problem or question.
The steps of the procedure should be written on the board.
Results and Final Outcome
The final result, product or outcome of the experiment should be displayed on the board.
Significance
The significance of the project to the child and to his or her community.
Reference list
In this part, include necessary references to the project that you used.
Photos / Graphics
Try to include as many visual elements as possible to make the inference clear and simple.
Things to Consider while Designing Project Display Board

A science fair project display board is the first thing people look at when visiting your project room. Therefore, it is important to make a good impression.
You have to consider certain things while designing your project display board. For example,
* The background is very important. You can use any board or paper for the background, but keep in mind that the white colour needs to be bright.
* Use colour contrast. Use colours that are in contrast with each other. For example, you can use a black background with white-coloured text.
* Consider your theme. If your project is related to space, then consider using a space theme for your project display board.
* Use pictures. Pictures give your project display board a personalized touch.
* Include important information. Include information regarding the topic, as well as contact information.
* Use graphics. You can use graphs, diagrams, and figures to make your project display board look more interesting.
Size of Project Display Board

A science fair project display board is a large sheet of paper, poster board, or foam core used to display information about an experiment in a science fair.
The size of the board should
be at least 36″ x 48″.
The dimensions of the science fair board should be 2 feet wide by 3 feet long, and this allows for ample space to cover all the details and diagrams needed to present the research at an exhibition level.
Most science fair display boards have a 4′ by 10′ layout, which gives you plenty of room to cram all your data, photos, and drawings. But, if you want to pack in more information or a larger display board for a big project, there are alternatives.
One approach is to make the board out of the poster board. Posterboard comes in 2′ by 3′ sheets. You can arrange the sheets end to end to make a 12′ by 36′ display board. You don’t have to put these sheets together, though, and you can just join them at their corners and cut your display board to size.
You can also make a display board out of foam core. Foamcore comes in 2′ by 3′ sheets, too. You can buy it at most office supply stores. But, as with poster board, you don’t have to put these sheets together to make a display board. You can join them at the corners, cut your board to size, and glue the sheets together.
standard science project board size

The standard scientific board size is arbitrary.
(It was originally called the Lincoln Board.) But it’s arbitrary in the same way that a dusty tube of paint is arbitrary. The colour you paint with isn’t important; what’s important is what you paint.
The rectangular board is better for making things. You can make almost anything rectangular, including mazes, making rectangular boards better for displaying science fair projects.
Once you’ve selected the perfect science display board, you have one final task: setting up the display.
How to set up a science project display board

So you’ve found the perfect project, and you’re ready to construct your display board. Congratulations! Now, how do you get started? First, find blank poster board (or foam core) in sizes appropriate for your project. You’ll need at least a 24×36-inch poster board for your display board’s background (this is called a “background board”).
Then, find an image file or paper printout of your project. You’ll need to “posterize” this printout or image for use as your display board background. Posterize simply means shrinking or stretching it to fit within the boundaries of the poster board. The image below shows how you can do this:
Now, place the background board on a flat surface.
Center your printout or image on the board, and trim any excess.
Next, tape the printout or image to the board.
Then, tape the poster board to a flat surface (such as a table or countertop).
Finally, tape the decorative border (if applicable) to the board.
You now have your display board.
One simple rule to remember: Don’t crowd your display board.
Project display boards often serve a dual purpose. On the one hand, they provide a space for showcasing projects, but on the other, they serve as a gathering space for students and families.

Here are some tips to make the most of your display board, whether you’re hosting or attending:
1) Placement is crucial. Make sure there’s room to move around the board and that it’s possible to read everything on it. Most boards should be 18 to 24 inches high and 36 to 48 inches wide.
2 ) Color counts. Colour helps differentiate projects. If you’re planning on hanging your display board, consider the colour contrast. Black text on dark backgrounds is easier to read than dark text on light backgrounds.
3) What goes on the board? Consider the length of your project. A 15-minute project should be photographed, but projects lasting more than 15 minutes should be described in the text. Test different layouts to make sure the board can be navigated easily.
4) How much detail? Photos should clearly show the project and explain how it works. Avoid “bullet points.” Students should be able to follow a project from start to finish without having to read anything.
5) Consider lighting. Try to place the board in an area that receives plenty of natural light. If your board is hung, make sure it has plenty of light behind it.
6) Writing. Consider using dry-erase markers. Writing on the board with a dry-erase marker is a quick and easy way to jot down notes, check off items on a to-do list, or display student responses.
7) Think about storage. You’ll want to store the board
Display Board Layout Types

Display boards can be in different shapes, designs, and sizes, but a few standard layouts work well for science fair projects.
1. The “step and repeat” layout is the most common. This layout features one central background or image with many smaller images, text or graphics surrounding it.
2. The “block” layout is similar to the step and repeat, but it uses one large image, maybe with text or graphics, surrounded by smaller images or text.
3. The “grid” layout is similar to step and repeat, but it’s organized like an Excel spreadsheet, with columns and rows.
4. The “storyboard” layout features one large background or image with several smaller images, text or graphics around it.
5. The “poster” layout features one central background with a picture or text of project steps or process above it.
How to choose the best title for your science fair project

You spend hours or even days doing experiments, coming up with ideas, and collecting and documenting data. Many kids don’t realize that 80% of the hard work is done before you even start the project.
The first step in the process is to choose a good title for your project. This decision can make or break your project.
A creative, funny, or interesting title will catch the judges’ attention and may even make them laugh. On the other hand, a dull title may turn them off.
How you choose to title your science fair project says a lot about you. Your project’s title should be short but catchy. Your title should describe your project and highlight it.
So, how do you come up with a good title? There are several ways.
1. Ask an adult.
2. Look at the pictures on the magazine covers.
3. Make a list of your topics.
4. Do an Internet search.
5. Look for other interesting titles.
6. Think about funny titles.
7. Think about titles that will grab attention.
8. Think about descriptive titles.
9. Think about titles that express excitement.
Why Images / Visual Items are Important for Science Fair Display

Visualizing your work is a great way to help other people understand it, so it’s important to make sure that your presentation is always clear. For example, if you’re making a poster, the first thing people will see is your title and subtitle, followed by your visual elements.
A science fair project display board presents several challenges. The first is making sure your text and graphics are the right sizes, so they don’t overwhelm your viewer.
The second challenge is making sure your text is easy to read. Many science fair display boards have a bold font. That can work if the font is easy to read, but in general, it’s better to go with a more subtle font that doesn’t compete with your visuals.
Your visual elements are just as important as the text. Images and charts need to complement your words, not overpower them.
The biggest mistake you can make is not including your visual elements. It’s important that other people understand what your project is, and images can definitely help with that.
For example, if your project tests the effect of a fertilizer on plant growth, pictures of different plants with different fertilizer levels would be important.
If your project is about the effects of pollution on fish, images of fish with different pollution levels would be important.
For a project about the effects of global warming, images of ice melting and icebergs breaking apart would be important.
Putting in a lot of effort to make your science fair project display board appealing and appealing is worthwhile. People will be interested in your project, and it will help make sure you achieve a good score.
Visual items, such as charts, graphs, photos, and displays, are unnecessary for every science fair project. Still, they do help to make the display more interesting and easier for the audience to understand.
It’s a good idea to have several different visual elements on your science fair project display board.
This lets the judges know you’ve thought carefully about the project and that you’ve done your homework.
Plus, having an array of visual elements allows the judges to compare and contrast your project with others.
Labels for Your Project Display Board
It seems like a lot of work to print out labels for all your charts and graphs for your science fair project display board. But, once it’s done, you’ll wonder why you didn’t label everything yourself.
First, you need to prepare the label sheets. Most printers come with label sheets, but you can get label sheets at any office supply store.
Get Free Project Display Board Labels from here
To make a label sheet, you just measure the height and width of the space you want to label and divide that by the label size. For instance, my label sheet measures 8.5″ by 11″. This means that I can print 8.5″ by 11″ labels.
Then, you print the labels on regular printer paper. To print labels, you simply select ‘Label’ from the printer menu.
When you’re finished, you just cut around the labels and punch a hole in them with your label puncher.
Here’s how to label all your graphs and charts:
1. Print the graph/chart onto the label sheet.
2. Cut around the graph/chart on the label sheet.
3. Punch a hole in the top left corner of the label.
4. Attach the labels to your graphs/charts with pushpins.
How to Setup Background for Your Project Display Board
A display board isn’t exactly a wall, so it doesn’t have to withstand as much weight or pressure. But if you stuff your board too full, people won’t be able to take in all the information you’re trying to convey.
Also, if your background is too busy, people won’t be able to read everything you’ve written.
On the other hand, if nothing stands out on your board, it might not even catch the eye of judges.
How to make informed decisions about background colours:
Use contrasting colours. Use colours that don’t match. Think complementary.
Use neutral colours. Use blacks, greys, whites and muted shades. These colours won’t distract the judges from what you have to show them.
Use bright colours. Use colours like yellows and oranges, but only very small amounts. Too much of it will stand out like a sore thumb.
Use colors that are neutral or bright. Use both dark and light versions of the same colours. This will balance your display.
Use dark colors. Use colors like grey, brown, or black. These colors aren’t as bright or distracting as bright ones.
Don’t use too many colours. Use no more than three colors for your background.
Stick to shades of the same colour for your background.
Background colours should be pleasing to the eye. Bright colours tend to grab attention, but dark colours can make your display look more mysterious. Select colors that blend well together for your specific project.
Why & How to Use Tri-fold display boards
A trifold project board is a formal way to present and display your science fair project. Often, the trifold display board consists of one large panel, which is divided into three smaller panels.
A tri-fold Science Fair display board often comes in single or double-sided versions, but the board can be any shape. Double-sided displays are more economical, but single-sided display boards provide more flexibility.
Your project display board needs to be large enough to hold the information you present but small enough to fit on a classroom board.
A display board that is 24 inches wide by 36 inches tall is a good starting point for most projects, but you may need a custom display board if your project is very large or complex.
You can assemble your display board very simply with foam core and poster board, but heavier materials usually require heavier frames. For heavier materials, the choice is usually between a tri-fold display board and a wall-mounted display board.
Tri-fold display boards are inexpensive, lightweight, and easy to transport, but they usually don’t offer much support for heavier materials. For thicker displays, you’ll probably need a sturdy metal frame.
The best way to display your project is by tri-folding the poster board.
The tri-fold display board is 11×17 and is 2.5 inches deep. A tri-fold display board can hold 2-3 science projects.
You should place all your project details on the tri-fold board.
You should write in your project title, date, and your grade level.
You can write in project details and results.
You should place your presentation in the center of the tri-fold board facing out.
You can include handouts, information sheets, and any associated materials.
You should add three small pictures in the center of the tri-fold board.
The pictures should be 5.5 x 7.5 and on plain white paper
Size of tri-fold science fair project display board
There are several options for the science fair display board, including tri-fold, tri-fold with portrait mount, and tri-fold with portrait mount and foam core board.
Tri-fold display boards come in various sizes, including 24 x 36 inches, 30 x 40 inches, 36 x 48 inches, and 36 x 60 inches.
The size of the science fair display board that you choose largely depends on the size of the science fair project.
If you display something small, such as a science fair project measuring 12 x 12 inches, then a 24 x 36-inch tri-fold display board may be a good choice.
However, if your science fair project measures 18 x 24 inches, you may need a 30 x 40-inch tri-fold display board.
Tips for choosing from Different Types of Display Boards
There are several types of display boards, each with strengths and weaknesses.
Variable display boards
Variable display boards are the simplest and most affordable. They can be as simple as a corkboard or a sheet of poster board, or they can be more elaborate, with pushpins, thumbtacks, and magnets to hold materials in place.
Variable display boards are useful for short, simple presentations. They can even be used to illustrate simple models, such as diagrams or Venn diagrams.
Oneway display boards
Oneway display boards are a variation on the variable board. Instead of providing multiple surfaces to attach materials, they typically have a single panel on which the materials are displayed.
Oneway display boards are more durable than their variable counterparts. For example, they’re made of heavier paper and can be mounted on the wall. They also tend to have more grommets or holes for hanging, making it easier to hang heavier materials. Oneway boards are often used for more durable materials like posters or blueprints. They’re also useful for presenting complex models, such as diagrams or Venn diagrams.
Pinnable display boards
Pinnable display boards are similar to one-way boards, but with one major difference: They can be pinned. Instead of being mounted to the wall, they’re designed to be pinned on walls. They’re useful for displaying posters and blueprints.
It’s simple: pick the one that’s right for you. Here are the differences among science fair display boards:
Display Boards: Also known as “poster board,” this type of display board will cover your entire wall. Display boards are rigid and don’t fold, so you’ll need a frame. They’re best for hanging, but you can also display them standing.
Poster Boards: Poster boards are thinner, more flexible, and fold smaller than display boards. They’re also easier to hang, but you may have to invest in a frame. They’re great for smaller projects.
Bulletin Boards: Bulletin boards are staples in classrooms, but they’re also useful for science fair projects. They’re sticky-backed and come in rolls. Bulletin boards can be hung on the wall, but they also work well on easels or tables.
Easels: Easels are a common part of classrooms, but they’re also useful in science fair projects. They’re ideal for displaying large projects, and they come in a few varieties, including folding, portrait and landscape.
Table Covers: Table covers are thin, vinyl sheets that can be attached to tables. They’re ideal for table-top displays because they’re easy to put up and remove.
Other Options: You can also hang your display board on the wall, using a frame or a poster frame, and you can display your display board on the floor.
Here are 10 tips for designing a good science fair display board
A science fair display board is the centrepiece of your science fair project. Your display board should clearly define your project and communicate its goals to the judge.
1. Show how you plan to carry out your project. A science fair display board should show how you will carry out your project. Include pictures, diagrams, and sketches along with the written description.
2. Include a budget. Include a budget for the whole project. The budget should include all of the costs, such as materials, labour, and any equipment.
3. Include a list of materials. Include a list of materials needed to carry out your project. Include brand names and retail prices if possible.
4. Use headings and subheadings. Use headings and subheadings to organize your project document.
5. Include a summary. Your summary should clearly describe the scientific problem you address, the steps you took to solve the problem, and what you learned.
6. Include the hypothesis . Explain the hypothesis, or idea, that you tested in your science fair project.
7. Explain the results. Explain the results you obtained.
8. Explain your interpretation . Explain how you interpret your results.
9. Include a bibliography with sources . Include a list of sources you used.
10. Leave room for corrections. Let the judge know if you made any changes or discovered new information during the project.
Here are 6 tips to make the most of your science fair project display board:
1. Pick an interesting display board. The display board is the centrepiece of your display. It should be eye-catching, and it should complement your project. It’s important to be creative here. Try to find something that fits your project theme. If you’re making a volcano, for example, a lava rock display board would be perfect.
2. Keep the display board simple. No rule says your display board has to be a work of art. Please keep it simple, or, at the very least, keep it clean.
3. Use complementary colours. Don’t overwhelm your display board with colours. Ideally, your display board will have a cohesive colour scheme. For example, if your project is volcanoes, your display board might have a warm colour palette.
4. Use contrasting colours. If your science fair display board has a central colour, use complementary colours as accents. For example, if your display board is red, use blue as an accent.
5. Use clear labels. It’s easy to get hung up with fine details, but the last thing you want to do is confuse your audience. Label everything on your display board.
6. Use contrasting fonts. Again, use easy-to-read fonts.
Tips for presenting in your science fair
Nothing is worse than being at the science fair and seeing someone else’s beautiful display. It leaves such a bad taste in your mouth and makes you think, “how could I be that poor?”
Well, I’m here to tell you that it is not as difficult as you think.
It’s especially important that everything you display is to scale. This means measuring your magnifiers and beakers first and marking their dimensions on your cardboard board.
Also, try to bring decorations that compliment your display. For instance, if your display is about solar energy , bring props from nature such as a tree branch or potted plants.
Time is also an issue. Don’t try to squeeze in last-minute projects. Give yourself plenty of time to finish, so you won’t be in a rush to get everything done.
“The first rule of presenting is: keep it simple,” says Jeffrey Palermo, Ph.D., chief scientist for undergraduate STEM education at the National Institutes of Health.
After you’ve spent countless hours tweaking your project, the last thing you want to do is fail to recognize its potential. Palermo recommends keeping the message simple: “If you don’t know what you’re talking about, then your audience won’t either.”
Here are some simple guidelines to keep in mind when you’re presenting your science project:
Keep it short.
A presentation should be no longer than 5 to 10 minutes. Short presentations also allow you to cover more ground, so your audience gets a stronger sense of what you’re presenting.
Keep it simple.
“Those 10 minutes are the most effective 10 minutes that students spend in their science classes,” Palermo says.
Keep it organized.
“A presentation should be a clear, logical flow from one step to the next,” Palermo says. Even if your science fair project is full of twists and turns, keep your audience on track by asking a few questions early and often.
Tell your audience what you’re going to present and why they should care. Sometimes that means repeating yourself.
Why & How to Use Digital Display Boards
For decades, display boards have been a mainstay in science classrooms, but in recent years, especially after the Corona impact, they’ve also become popular outside of schools.
This shift has occurred due to three factors.
First, technology has made it easier to create high-quality display boards, which has led to a sharp increase in demand for the technology.
Second, displays can be used for various purposes beyond school, including business presentations, trade shows, and museum exhibits.
Third, digital technology makes presentations more interactive and accessible to a wider audience.
As the demand for display boards has increased, so too have many companies offering digital versions of the boards. Digital display boards are the result of cutting-edge technology, but they’re also easy to use.
Here are some of the reasons why they’re ideal for science classrooms and other parts of an educational program:
• Easy scheduling, editing, and sharing. With digital board software, you can set up your displays in advance, then edit them or add additional content later. There’s no need for physical boards, which take up floor space, and they can be updated easily when new information becomes available.
• Versatile applications. Digital displays can be used for various purposes, from displaying information for students in the classroom to representing data for museum exhibits.
• Easy transportation. Digital displays can be transported easily, so they’re ideal for classrooms that have multiple classrooms. The displays can be set up and taken down quickly, and the software allows minor adjustments to be made on the fly.
• Cost-effective. Because digital displays are digital, they eliminate the costs associated with traditional boards, such as the cost of multiple printing runs.
• Eco-friendly. Digital displays have a smaller carbon footprint than traditional boards.
http://www.chicagostudentsciencefair.org/ – The best place to find information about the Chicago Public Schools Science Fair
http://www.neiu.edu/~sfc/ This webpage gives detailed information about the future CPS Science Fair dates in and around Chicago.
http://www.scifair.org/ How-to guides and tips on science projects created by teachers and former winners, all for your convenience
http://www.newton.dep.anl.gov/aasquesv.htm Argonne National Laboratory is one of the world’s foremost research centers for science, engineering, and technology. The website features over 10,000 questions and answers on various topics in science. The archive of questions has not only helped students find answers for their Science Fair projects but it also provides information to teachers who are looking for reliable sources.
http://www.acs.org/ American Chemical Society is an educational resource designed for the teaching of chemistry and chemistry related projects.

Leave a Reply Cancel Reply
Your email address will not be published. Required fields are marked *
Name *
Email *
Add Comment *
Save my name, email, and website in this browser for the next time I comment.
Post Comment

Create a DIY Family Science Fair Using These Tips
A re you looking for an interesting way to explore science with your family? If so, a science fair from the comfort of your home is the perfect idea.
A DIY family science fair is one way to stimulate your family's interest in science and technology .
In this post, I will share some tips for creating your own family science fair.
So let's get to it.
*Post may contain affiliate links. Full disclosure can be viewed here .
Related Posts:
9 Summer Science Activities the Kids Will Absolutely Love
How to Keep Your Kid Busy- Even if You're Stuck Indoors
Six Educational Gifts That Your Child Will Actually Love
Choose a Theme or Focus and Research
To kick off your science fair fun, decide on your family's focus for the fair.
You can each choose a topic that you find interesting or simply pick a single area around which the whole family can explore.
There are so many fields of science you can dive into such as engineering, physics, biology, chemistry, and more. Within those specific areas, there are a ton of opportunities for experimentation.
Once the topic is decided, start researching it. Research can be done online or at the library.
Additionally, the entire family can work together during the research process to make it fun and engaging.
Create a List of Experiments to Choose From
Next, create a list of potential experiments or activities. Consider the practicality of each activity, as well as the safety of your family members. There should be age appropriate experiments available for each family member.
You can discuss your options as a group and pick the projects you would each like to complete.
Make sure to allow for some freedom to try something new or explore certain subjects further.
Gather all Supplies
Once everyone has chosen their project, you will have to gather all the necessary supplies for each experiment.
For example, you may need to pick up simple materials such as wire, plastic, and wood to create a basic structure, or purchase more complex materials such as electricity kits, zoology kits, and magnets.
You can work with kids to create a supply list, and then head out to the store together to purchase everything you need.
To keep it simple, you can also take advantage of MEL Science Kits , and show off the many projects they have to offer.
Set a Timeline
Set a timeline for the completion of each science project. Consider hosting your science fair on a specific day so that everyone knows when to have their projects completed.
Create Display Boards
Create a presentable display board for your projects. Your display board should include the name of the project, a description o the project (including raw data, graphs, images, etc.), a conclusion, and sources used.
There are many templates available online to guide you in creating a display board.
Invite Some Guests!
Finally, to add some extra excitement, invite your family and friends to your DIY family science fair.
Have each family member explain their project to the guests, and be prepared to answer any questions they may have. Be sure to enjoy yourselves and have fun!
Make sure to take plenty of pictures! Documenting the process will create a lasting memory of your family science fair.
Creating a DIY family science fair is a great way to boost your family's interest in science and technology. With the tips outlined above, you will be sure to create a memorable (and very educational) event.
The post Create a DIY Family Science Fair Using These Tips appeared first on Major League Mommy .

An official website of the United States government
Here's how you know
Official websites use .gov A .gov website belongs to an official government organization in the United States.
Secure .gov websites use HTTPS. A lock ( Lock Locked padlock ) or https:// means you've safely connected to the .gov website. Share sensitive information only on official, secure websites.
Dear Colleague Letter: Planning Grants to Broaden Participation in the Emerging Frontiers in Research and Innovation Program
December 15, 2023
Dear Colleagues:
The National Science Foundation’s (NSF) Directorate for Engineering (ENG) continually seeks to advance engineering and scientific progress in research and innovation while broadening participation and inclusion of the full spectrum of diverse talents in engineering and science fields. This Dear Colleague Letter (DCL) seeks to inform the community about an opportunity to pursue both goals through Planning Grants for the development of Emerging Frontiers in Research and Innovation (EFRI) proposals. These Planning Grants will support costs associated with the development EFRI research projects and the formation of teams that are responsive to the current EFRI solicitation and that significantly address the goal of broadening the participation and inclusion of researchers and institutions supported by the EFRI program. Funding opportunities are available in FY 2024 to provide support to teams that plan to submit an EFRI proposal to the FY 2025 cycle of the current EFRI solicitation described on the EFRI website .
The National Science Foundation’s strategic goals include expanding knowledge in science and engineering and building capacity for a diverse and inclusive science and engineering workforce. The primary goal of this DCL is to broaden the diversity of institutions, faculty, and trainees participating in the EFRI program by enabling the engineering and science community to develop potentially transformative ideas that challenge current understanding or provides pathways to new frontiers in science and engineering, recruit the personnel needed to form topic-responsive teams, and build capacity and preparedness prior to submitting to the EFRI solicitation. As described in the 2020 National Science Board’s (NSB) Vision 2030 report, “progress in creating a diverse and inclusive [Science and Engineering] S&E enterprise has not kept pace with demographic trends or with the increasing centrality of S&E to our economy, national security, and jobs of the future. America’s diversity is a great strength. Leveraging that strength by broadening participation in the U.S. S&E enterprise will be crucial to fostering individual opportunity and a thriving economy.” Importantly, progress in engineering and science is accelerated when research teams are comprised of diverse individuals who are equitably integrated into the team environment. 1 The array of perspectives and talent that comes from a diverse team and leadership can heighten the likelihood of transformative research and outcomes. 2
The EFRI program is working in conjunction with the NSF Directorate for Engineering’s Broadening Participation in Engineering (BPE) program solicitation ( NSF 22-514 ) to coordinate EFRI Planning grants. The BPE program seeks to strengthen the future U.S. Engineering workforce and catalyze research innovation by enabling the participation of all citizens in STEM, thus reflecting the diversity and true intellectual capacity of the Nation's population. In line with the goals of Track 1 of the BPE program solicitation, the EFRI program will offer planning grants that aim to catalyze the inclusion of the full spectrum of diverse talents in engineering.
The EFRI program seeks proposals with potentially transformative ideas that represent an opportunity for a significant shift in fundamental engineering knowledge with a strong potential for long term impact on national needs or a grand challenge. Thus, research teams that draw on and fully integrate engineering and science research talent, ideas, and perspectives from non-research-intensive institutions, Minority Serving Institutions (MSIs), Primarily Undergraduate Institutions (PUIs), as well as institutions in EPSCoR states have the capability to undertake research that significantly addresses the societal needs and grand challenges presented in the EFRI solicitation. Through this DCL, the EFRI program offers planning grants that support the engineering and science community to form and enhance multi- and interdisciplinary research collaborations that are responsive to the goal of supporting the full spectrum of diverse talents in engineering and science expressed in this DCL.
Description of the Opportunity
Planning grants funded through this DCL are expected to cultivate potential EFRI research teams that actively address broadening participation and inclusion goals expressed in this DCL and to develop a competitive EFRI proposal for the FY 2025 cycle of the current EFRI solicitation. As a result of planning grant activities, potential EFRI teams should be better equipped to carry out potentially transformative research that addresses the Biocomputing through EnGINeering Organoid Intelligence (BEGIN OI) EFRI topic. Proposers supported through this mechanism may use the funding to organize activities that help stimulate the formation of EFRI teams (in terms of PI, Co-PI, Senior Personnel, and organization type) and crystalize the ideas and research plans to be presented in a potential EFRI proposal.
Examples of planning grant activities can include, but are not limited to:
- Lead PIs from MSIs, PUIs, and institutions in EPSCoR states,
- Lead PIs from underrepresented in the field of engineering,
- Co-PIs and senior personnel from MSIs, PUIs, and institutions in EPSCoR states
- Development of research goals
- Leadership and management of mid-size projects
- Development of a research plan that is responsive to the EFRI BEGIN OI solicitation
- Geographical distance: The physical distance between researchers at collaborating institutions
- Cognitive distance: The degree of overlapping specialized knowledge between members of an inter- or multidisciplinary team
- Social distance: The “trust and friendship” (at the micro-level) among members of the team
- Organizational distance: The methods or networks used to exchange information, knowledge, and make decisions; The level of autonomy afforded to each member of the team
- Institutional distance: The level of shared values, norms, and language present among collaborating team members and institutions
- Assessment of planning grant goals
Given the complexity of an EFRI proposal, NSF recognizes that many teams will identify important research priorities but may not have the full complement of skills needed to effectively address the challenge. The planning grant can be used to support team formation activities that create opportunities for the development of partnerships between researchers and institutions that are bi-directional and mutually beneficial, thus engaging a wide array of perspectives and scientific talent to address the national needs and grand challenges presented in the EFRI solicitation. The National Institutes of Health Collaboration Team Science Field Guide can provide a starting point for team formation activities.
Award size and Duration
The budget for a planning proposal may be up to $100,000. The proposal may request funding for up to 12 months.
Preparation and Submission Information
To be considered for an EFRI Planning Grant, planning proposals must be submitted by 5:00pm, submitter’s local time, on February 23, 2024.
PIs must contact Alias Smith at [email protected] prior to submission of a planning proposal to aid in determining the appropriateness of the work for consideration under this opportunity.
This activity is being conducted under the auspices of the Broadening Participation in Engineering (BPE) solicitation ( NSF 22-514 ), Track 1. Planning grant proposals should be prepared in accordance with the guidance in Chapter II.E.1 of the NSF Proposal & Award Policies & Procedures Guide (PAPPG) and as described in the BPE solicitation. Planning proposals must be submitted to the BPE program solicitation ( NSF 22-514 ) via Research.gov and the “Planning” type of proposal should be selected. The system will automatically insert the prepended title “Planning” and that should be followed by “Track 1 EFRI DCL”. Please note that although the BPE solicitation accepts Track 1 proposals at anytime, planning proposals submitted in response to this DCL must be submitted by 5:00pm, submitter’s local time on February 23, 2024. When selecting the due date in Research.gov, proposers should select the target date available in the system.
Submission or receipt of a planning grant is not a requirement for participating in forthcoming EFRI competitions. Planning grant proposals do not constitute any commitment on behalf of the PI/co-PI(s) or their organizations to submit a future proposal. Award of a planning grant does not constitute any commitment on behalf of NSF to fund an EFRI proposal subsequently submitted by the Planning Grant team. Prospective PIs are encouraged to read this DCL and the PAPPG carefully for planning proposal preparation and submission requirements and to review the current EFRI solicitation for EFRI program priorities.
EFRI planning proposals may be reviewed internally by NSF staff, reviewed in a panel, by ad hoc reviewers, or any combination of these methods.
For further information, please contact
- Alias Smith, ENG/EFMA, [email protected]
- Sohi Rastegar, ENG/EFMA, [email protected]
Susan Margulies, PhD Assistant Director Directorate for Engineering National Science Foundation
- Smith-Doerr L., Alegria S., and Sacco T. (2017). How Diversity Matters in the US Science and Engineering Workforce: A Critical Review Considering Integration in Teams, Fields, and Organizational Contexts. Engaging Science, Technology, and Society, 3 (2017), 139-153.
- Dai Y., Byun G., and Ding F. (2019). The Direct and Indirect Impact of Gender Diversity in New Venture Teams on Innovation Performance. Entrepreneurship Theory and Practice, 43(3) 505–528
- Boschma R. (2005). Proximity and Innovation: A Critical Assessment. Regional Studies, 39(1): 61–74
IMAGES
VIDEO
COMMENTS
To make a background research plan — a roadmap of the research questions you need to answer — follow these steps: Identify the keywords in the question for your science fair project. Brainstorm additional keywords and concepts. Use a table with the "question words" (why, how, who, what, when, where) to generate research questions from your ...
The purpose of your research paper is to give you the information to understand why your experiment turns out the way it does. The research paper should include: The history of similar experiments or inventions. Definitions of all important words and concepts that describe your experiment. Answers to all your background research plan questions.
Title. Writing a Science Fair Project Research Plan. Subject. How to conduct your background research, including tips on preparing a research plan and identifying good research sources. Keywords. background research plan, research tips, research techniques, background research.
After now participating in over a half-dozen elementary school science fairs (including a first-place finish!), we created our own guide to help other students go from start to finish in their next science fair project. If this is your first science fair, have fun! If you've done it before, we hope this is your best one!
Choose a title that identifies the content of your project. The title can include the nature of the study, the species used, and the place of field studies. It should reflect the principal objective of the investigation. Hypothesis: Based on your reading and information research, organize everything you have discovered, and then make an ...
1. Get a bound notebook to use as a logbook and number the pages. 2. Select a topic. 3. Narrow the topic to a specific problem, stated as a research question, with a single variable. 4. Conduct a literature review of the topic and problem and write a draft of the research report. 5.
The Maine State Science Fair welcomes research or engineering projects in any of the following general categories. Animal Sciences; Behavioral and Social Sciences; ... Your Research Plan is a summary of Steps 1, 2, and 3—a description of background information leading up to your research question, a statement of your hypothesis, and an ...
Step 6. Formalize a research plan. Make it easy to read and include the following sections: questions, significance, background and materials and methods. Possible problems may be its own section or part of the materials and methods section. Follow school guidelines regarding accompanying paperwork and the order of your sections.
• All projects must have a Research Plan/Project Summary. a. The Research Plan is to be written prior to experimentation following the instructions below to detail the rationale, research. question(s), methodology, and risk assessment of the proposed research. b. If changes are made during the research, such changes can be added to the ...
Research. Hypothesis. Experiment. Construct an exhibit for results. Write a report. Practice presenting. Some science fair projects are experiments to test a hypothesis. Other science fair projects attempt to answer a question or demonstrate how nature works or even invent a technology to measure something. Before you start, find out which of ...
Watch the "How to Do a Science Fair Project" video series at the top of the page for instructions on creating a successful science fair project. Procedures. Download the example image used in the video series and ask students to identify objects in the image they could ask a question about. Then, ask students to look around their classroom ...
Step-By-Step Guide to Creating a Research Proposal. 1. Narrow down the subject area. Before you go into your project in any sort of depth, you'll need a fairly good idea of what your project's focus will be. In order to narrow this down, you should consider a few different angles.
Get your idea and do some research. DIY Space: How to Do a Science Fair Project - Step 1. Watch on. Observe the world around you and ask questions about the things you observe. 2. Ask a testable question. DIY Space: How to Do a Science Fair Project - Step 2. Watch on. Develop your idea into a question you can test.
Guide to Completing a Science Fair Project. A science fair project is an opportunity for the student to: 1) demonstrate an in-depth knowledge about a science topic of his/her choice, 2) perform appropriate research, 3) investigate professional sources of information within the community, and 4) plan and conduct an experiment and present findings.
If any of them do apply, then add the correct information for each part that is needed.) Human Participants Research If the student is including humans in their project, as participants, then they must talk about that here. Read #1 on page 8 of the science fair packet for more information about what to write. Vertebrate Animal Research
Research takes planning, pacing and usually much more time than you expect. Make a research plan. This is a roadmap of the questions you will have to answer as you design, conduct and interpret your experiment. Review rules, and have an adult review and approve your experiment if necessary. Every science fair requires students to follow a set ...
2 Weeks Before the Event. Follow up with volunteers, budget spending, printing needs, and family questions. 1 Week Before the Event. Elicit feedback from the committee and science team to determine and execute any last-minute needs. Day Before the Science Fair Event. Pack all decor, etc., for the morning of the event.
The research plan, however, serves another, very important function: It contributes to your development as a scientist. Your research plan is a map for your career as a research science professional. As will become apparent later in this document, one of the functions of a research plan is to demonstrate your intellectual vision and aspirations.
The size of the board should. be at least 36″ x 48″. The dimensions of the science fair board should be 2 feet wide by 3 feet long, and this allows for ample space to cover all the details and diagrams needed to present the research at an exhibition level.
Invite Some Guests! Finally, to add some extra excitement, invite your family and friends to your DIY family science fair. Have each family member explain their project to the guests, and be ...
Importantly, progress in engineering and science is accelerated when research teams are comprised of diverse individuals who are equitably integrated into the team environment. 1 The array of perspectives and talent that comes from a diverse team and leadership can heighten the likelihood of transformative research and outcomes. 2