Canva » Design » How To Highlight Text In Canva (Step By Step)
How to highlight text in canva (step by step).
One of the best ways to grab someone’s attention with text is by highlighting it. Doing this with graphic design software is usually not as easy as doing this with a word processor. With a word processor, you can select the words you want to highlight and just hit a button. With graphic design software, highlighting text often requires many different buttons and so many choices. Thankfully, highlighting text in Canva is quick and easy!
When Canva first came out, highlighting your text was just as cumbersome as any other graphic design software. Recently, Canva updated its text effects; now, you can highlight your text in a snap! You will learn how to highlight entire passages of text as well as single words. Not just on Canva Desktop but on Canva Mobile as well.
Table of Contents

How To Quickly Highlight Text In Canva
Step 1: create a piece of text.
Before highlighting your text, you must get some text on the canvas.
Click on the Text Tab in the Side Menu to see your text options. You have three options: Add a Heading , Add a Subheading and Add a Little Bit of Body Text . You can also press T to drop some quick body text down.
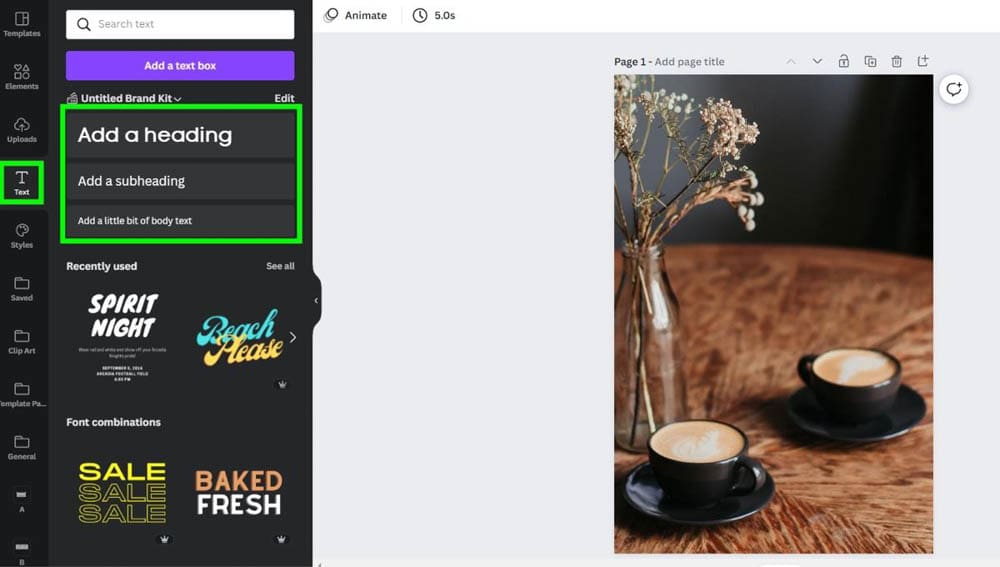
Click inside the text block to add your wording.
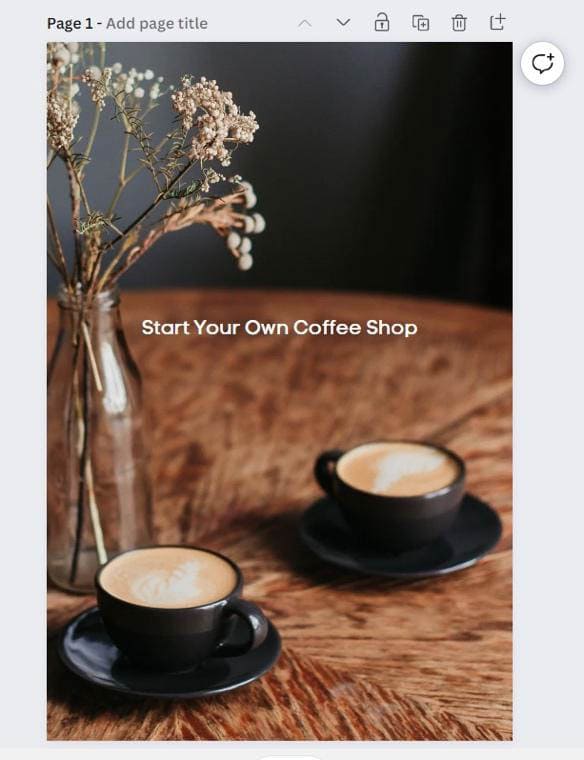
It’s best to edit the look of your text before you highlight it. This way, you won’t have to adjust the highlight again after resizing your text.
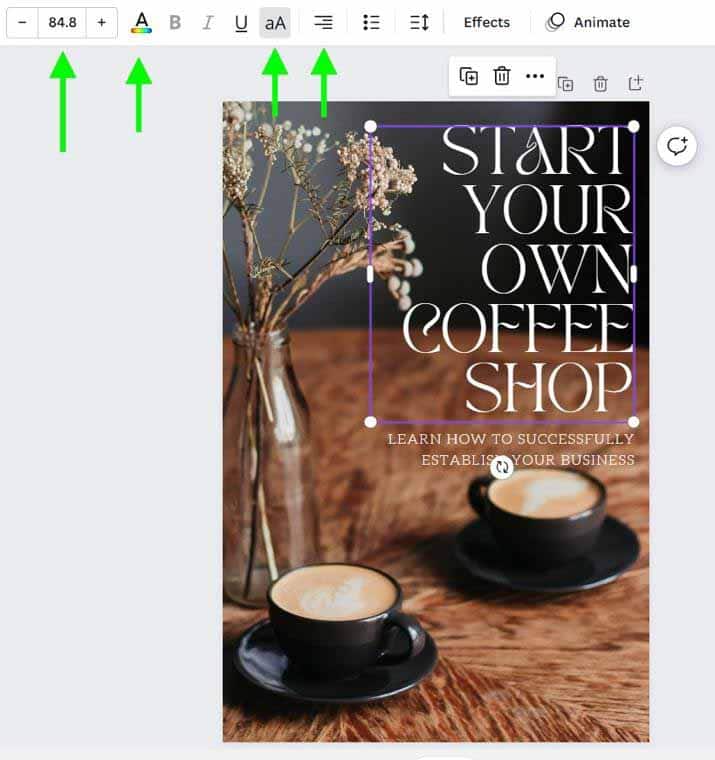
First, pick out the font type by clicking the Font drop-down menu. You can choose from an extensive list of free fonts that Canva provides.
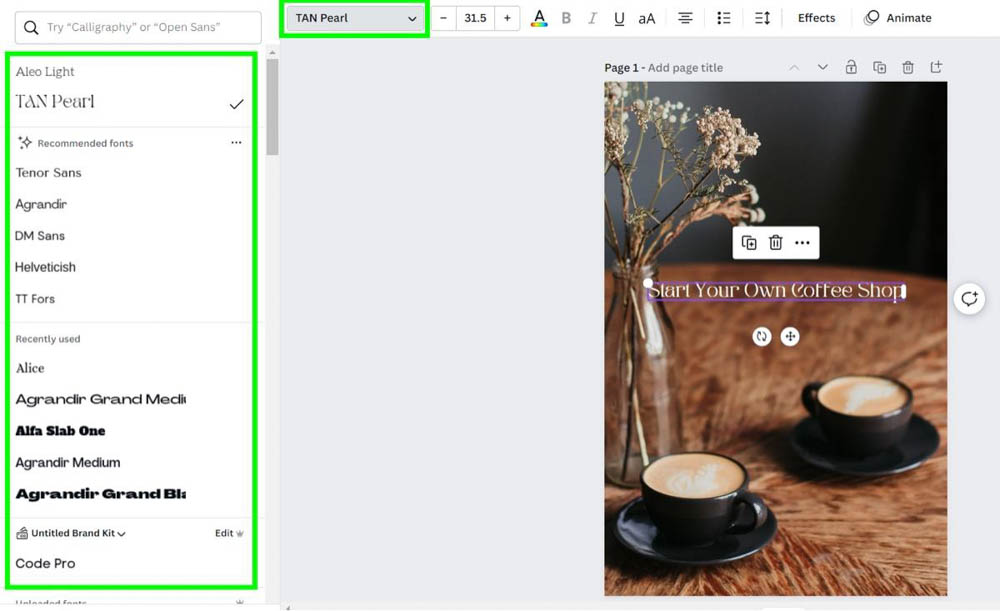
After your font is picked out, feel free to adjust your text further with
- Font Size : Click the Plus and Minus buttons to make your text bigger or smaller.
- Text Color : Change the text color to match your project.
- Upper Case : Quickly change your text to all caps with the Upper Case button.
- Alignment : You can align the wording in the text box to the left , middle or right .
Step 2: Click The Effects Option
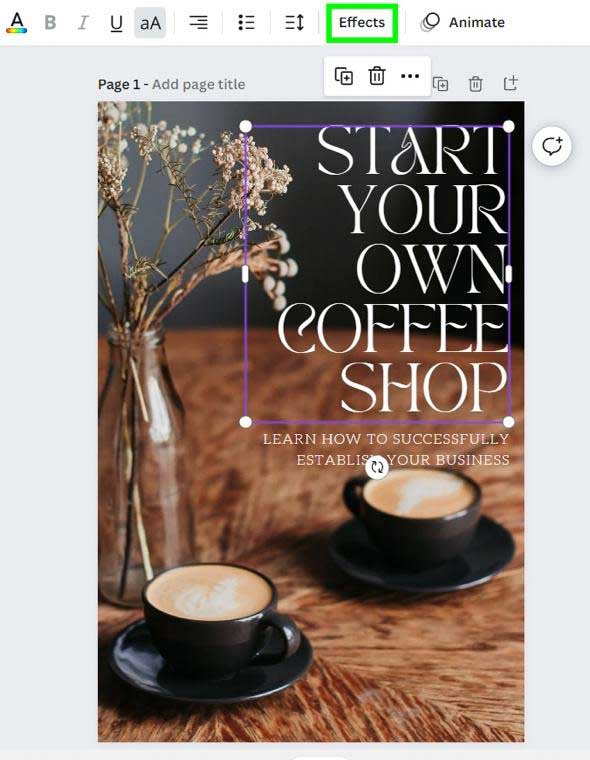
Now that your text is all set, it’s time to highlight it. Select your text, then click on the Effects button.
Step 3: Choose The Background Effect
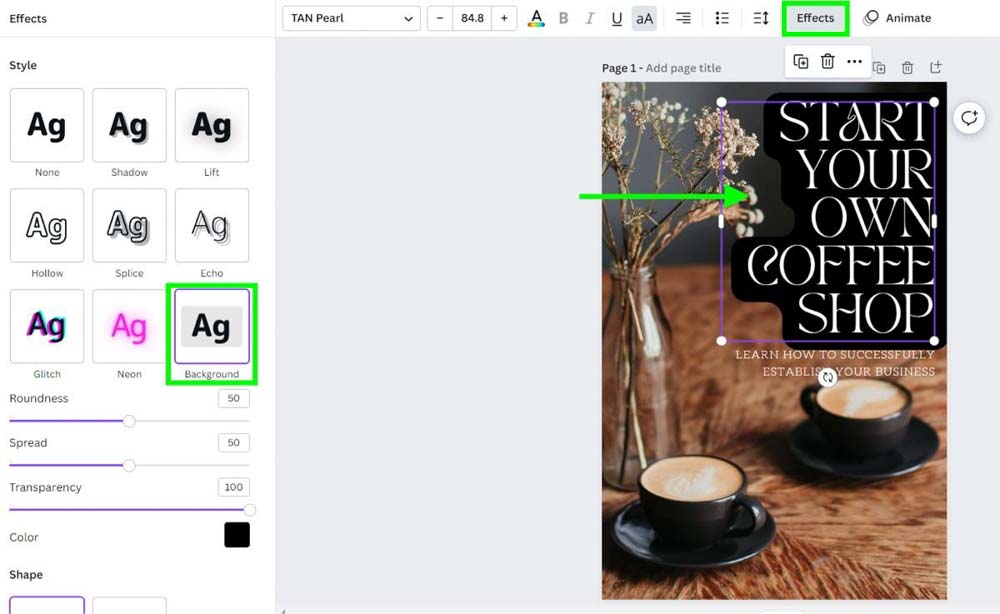
Out of the effects options that pop up, choose Background . Your text will be outlined with a default color and default settings.
Step 4: Adjust The Background Color & Shape
If the default settings work for your project, then great, you’re done!
Most likely, the default settings will not work for you. Let me show you how to fix your highlight in the order that I usually do:
– Color
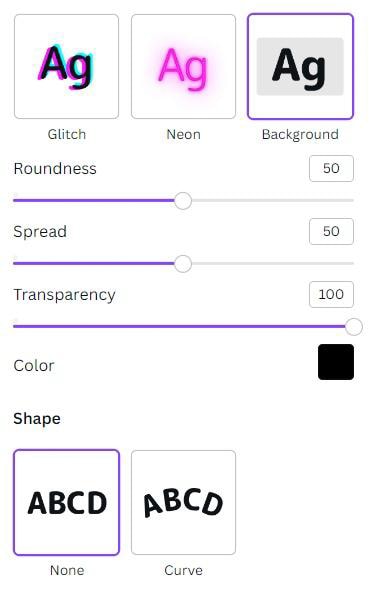
First, you should ensure the highlight’s color matches the rest of the project. This will help you see things visually as you design.
To change the color of your highlight, click on the Color Picker in the Effects Panel . A color panel will open with a list of default colors available. Click on any of them to change the highlight color.
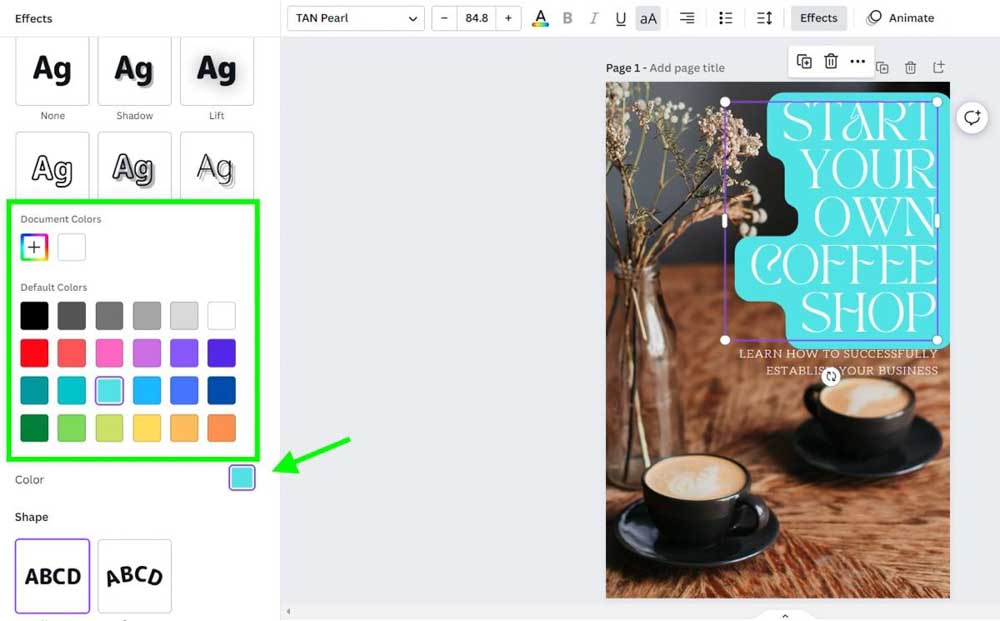
If none of the default colors fit your project, you can pick a more specific color by clicking the Add a New Color Button . This will open the Color Spectrum Map , where you can choose a more or less saturated version of your color of choice.
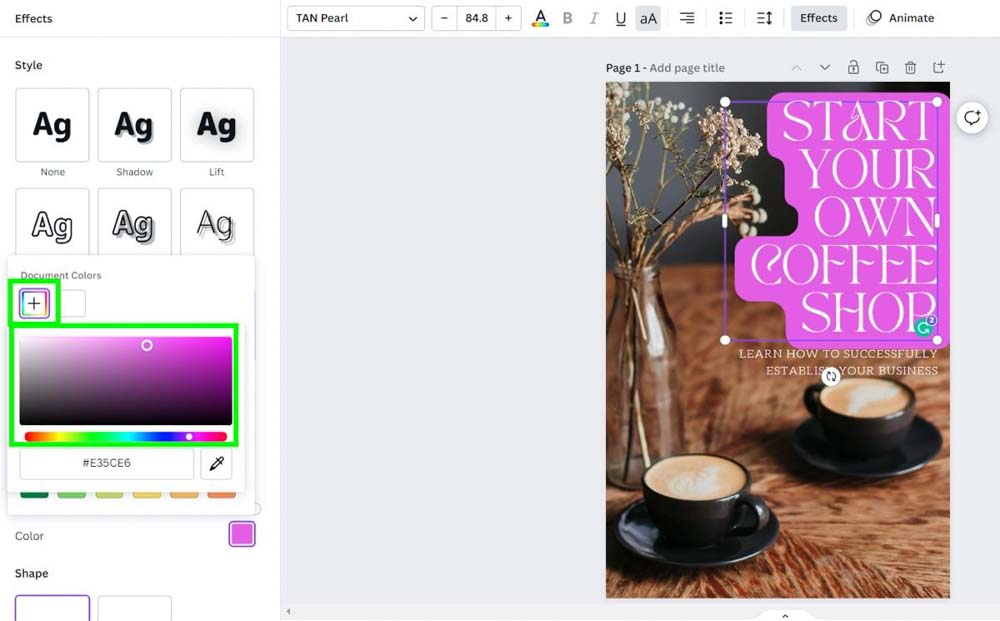
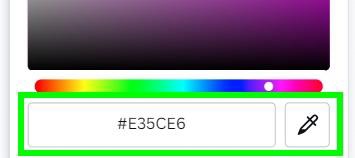
If you have a Hex Code, you can input it below the Color Spectrum Map.
Also, you will find the Eyedropper Tool under the Color Spectrum Map. This will allow you to pick a specific color from your image.
– Roundness
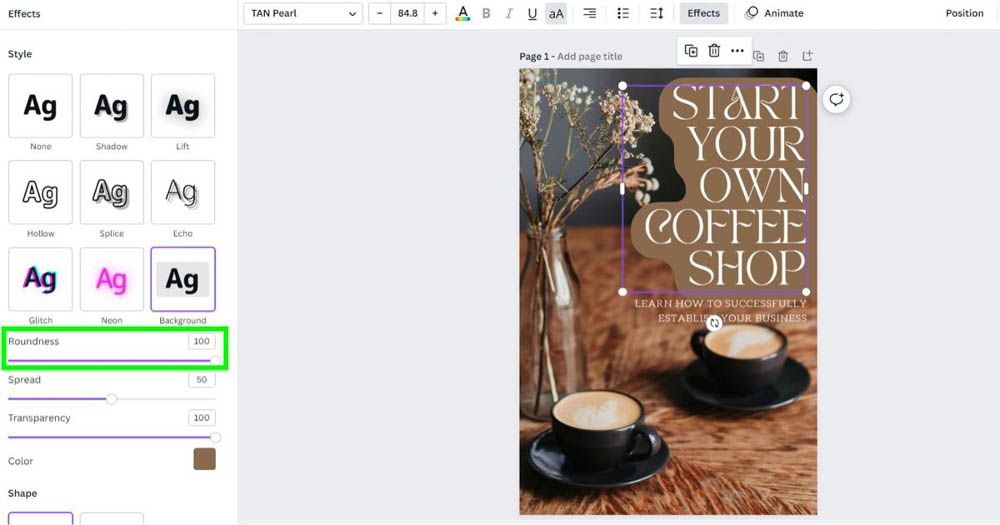
You can change how round you want your highlight by adjusting the Roundness Slider .
If you drag the slider all the way to the left, your highlight will be completely sharp, like a rectangle.
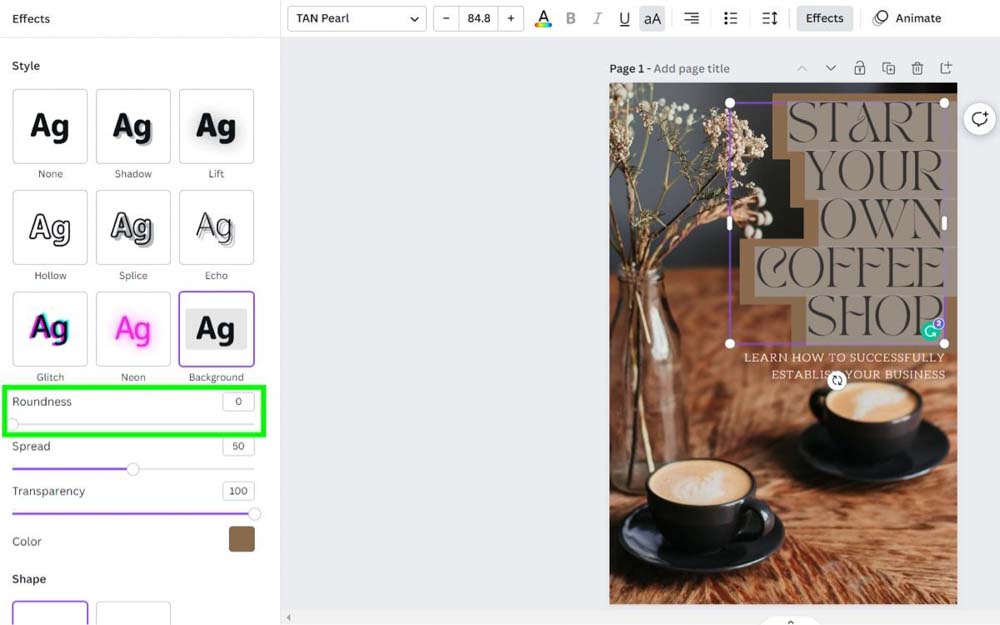
Drag the slider all the way to the right to make your highlight round like a circle.
– Spread
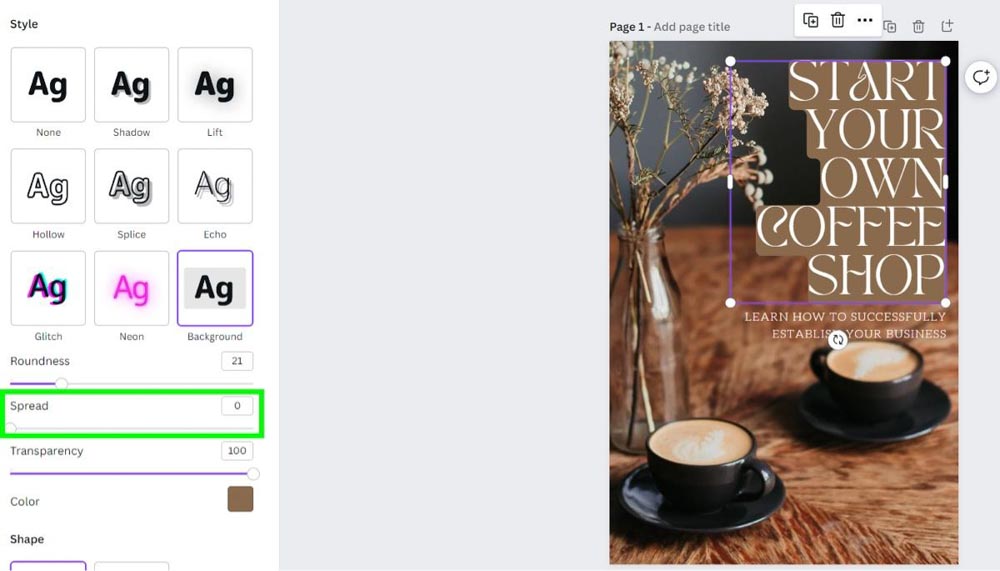
The spread option determines the size of your highlight.
Drag the slider all the way to the left to keep the highlight tight to your text. The edge of the highlight will touch the text itself.
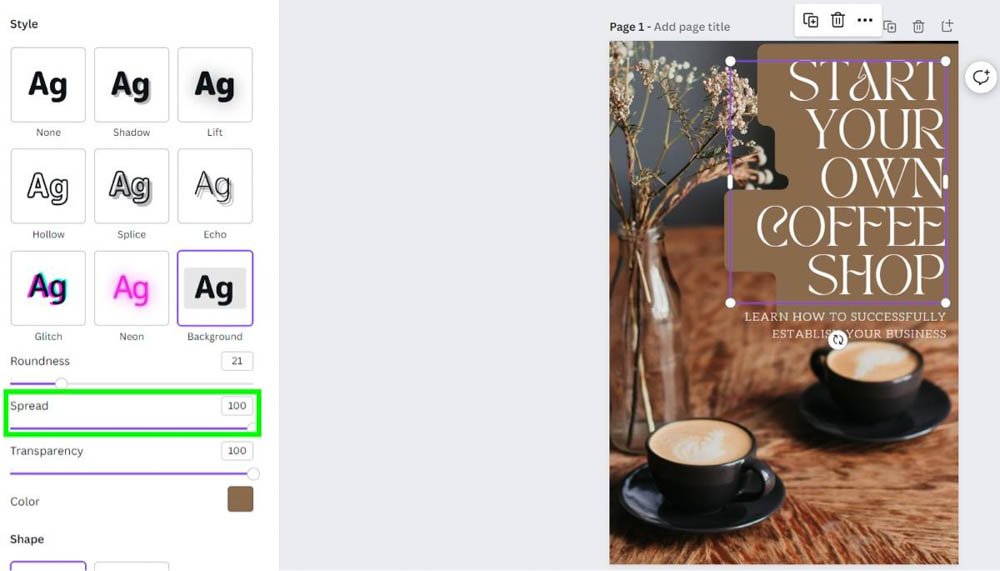
Drag the slider all the way to the right to increase the size of the highlight. Most of the time, this size will be too much for your project. It’s best to find somewhere in the middle that works for you.
– Transparency
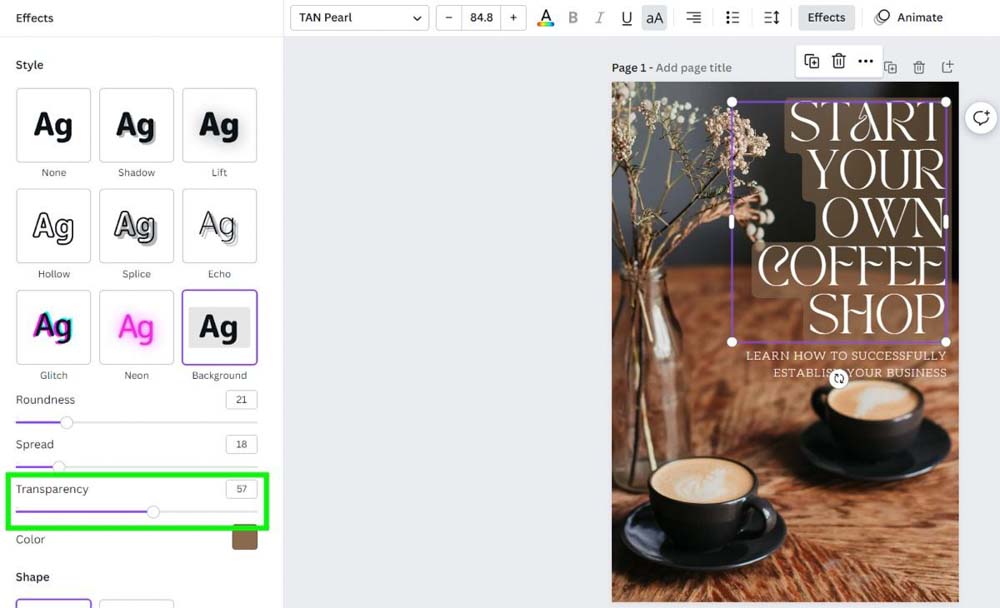
You can adjust how much you can see through your highlight with the Transparency Slider .
Slide it all the way to the left to make your highlight disappear. This is not the best approach for this effect.
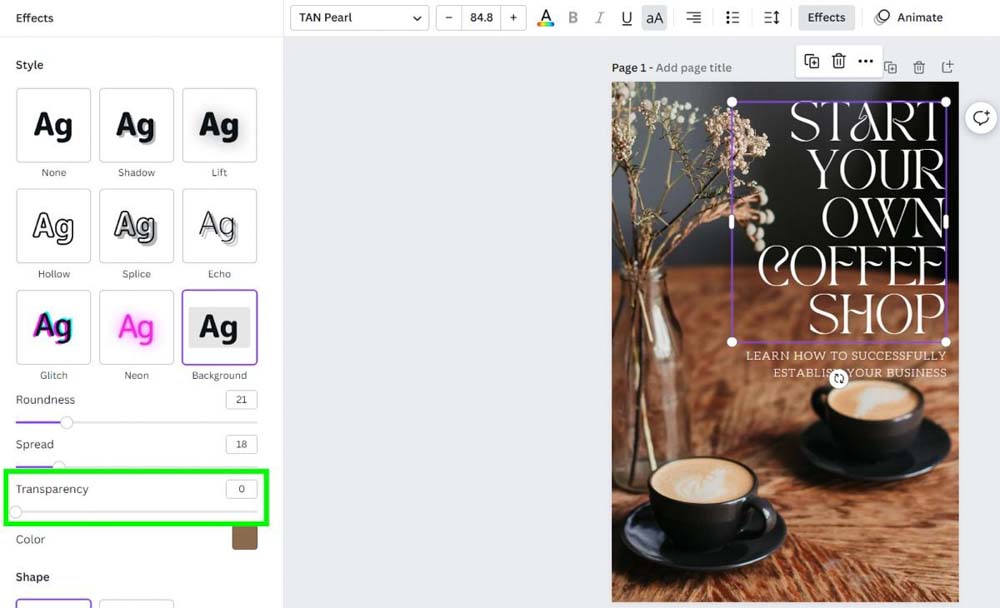
Drag the Transparency Slider all the way to the right to see your highlight completely. This is the default setting.
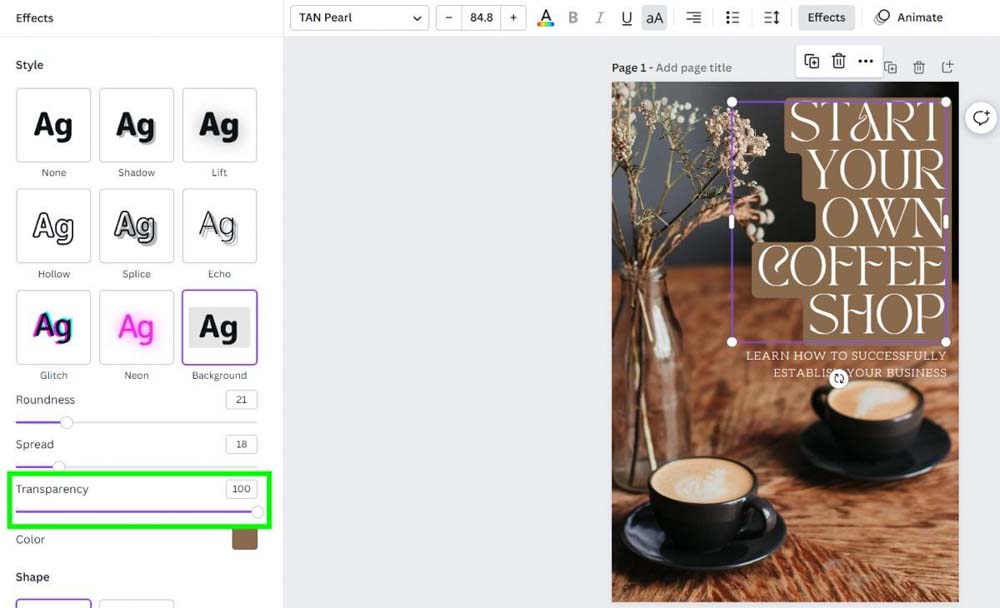
Drag the slider somewhere in the middle to see the highlight and some background through it.
– Shape
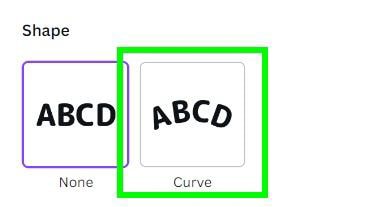
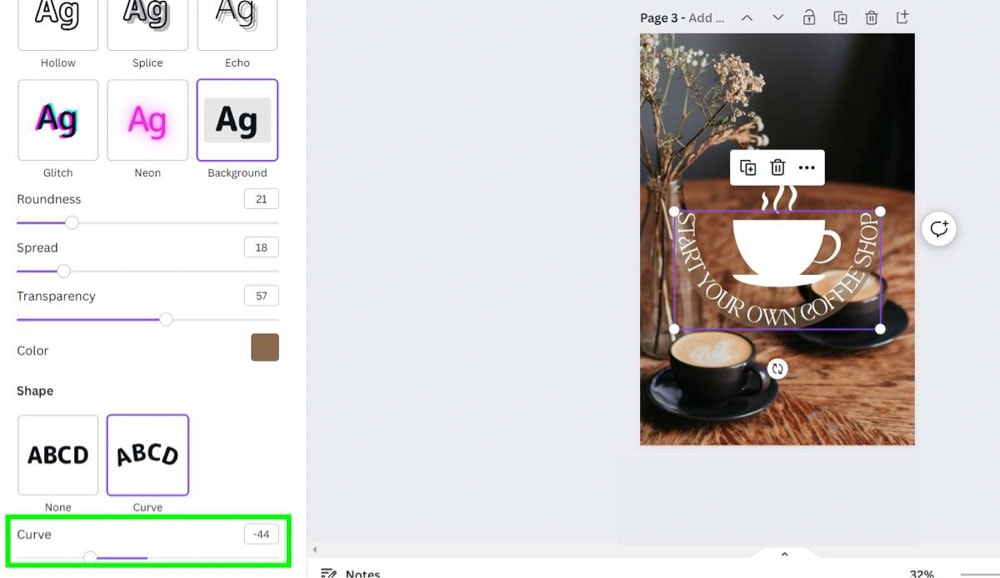
The last option you can apply is the Curve Effect . Clicking on this effect will curve the selected text into a circle shape.
Drag the Curve Slider to the right to bend your text down.
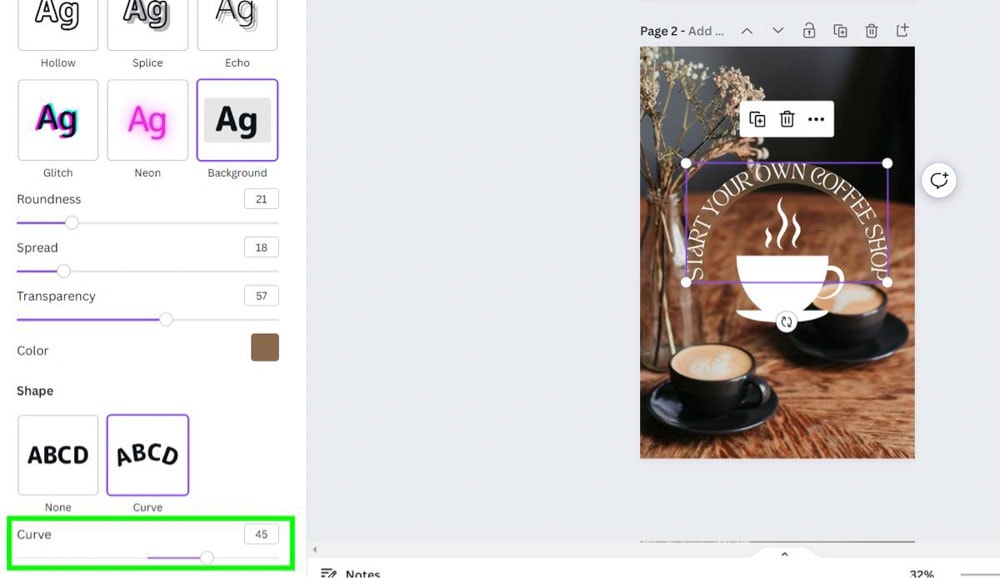
Drag the Curve Slider to the left to bend your text up.
How To Highlight A Single Word In Canva
What if you don’t want to highlight your entire sentence but instead highlight just one word?
You won’t be able to do this using the Background Effect, but there is a workaround.
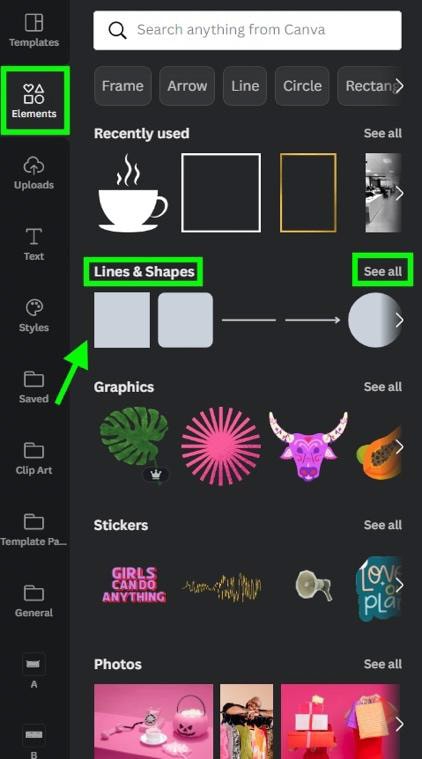
First, click on the Elements tab, and scroll down to Lines & Shapes . Select the Rectangle to add it to your canvas.
If the rectangle is not automatically available, click on See All to open up all the Lines & Shapes options. You’ll find the rectangle right away.
With your rectangle on your canvas, click on the Transparency Button and drag the Transparency Slider toward the middle.
This will make your rectangle see-through. You can now position it easier behind your target word.
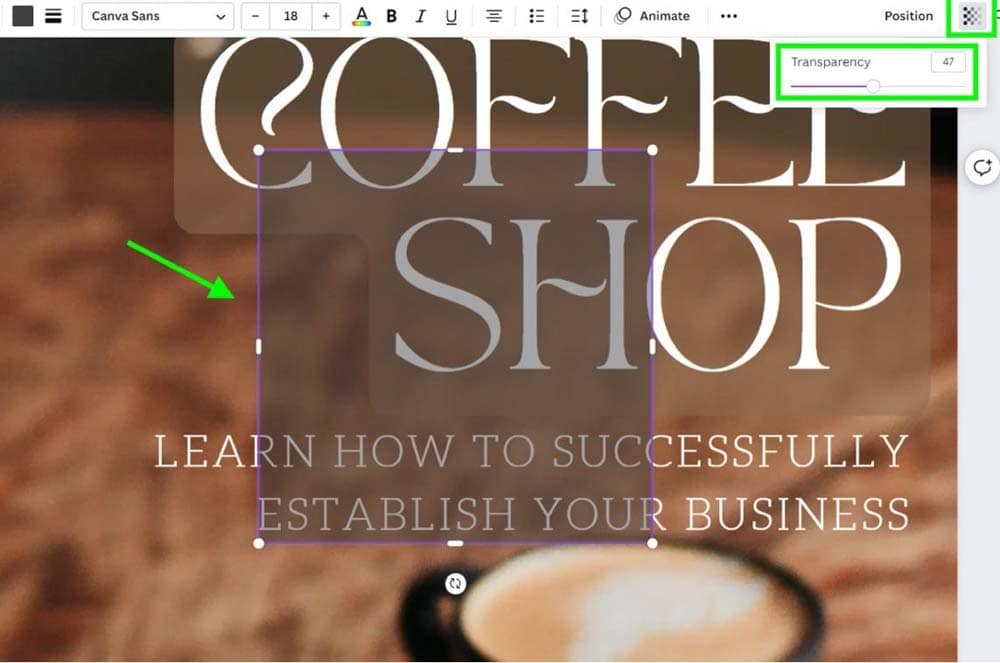
Now that your rectangle is see-through adjust the shape to the size you want your highlight to be.

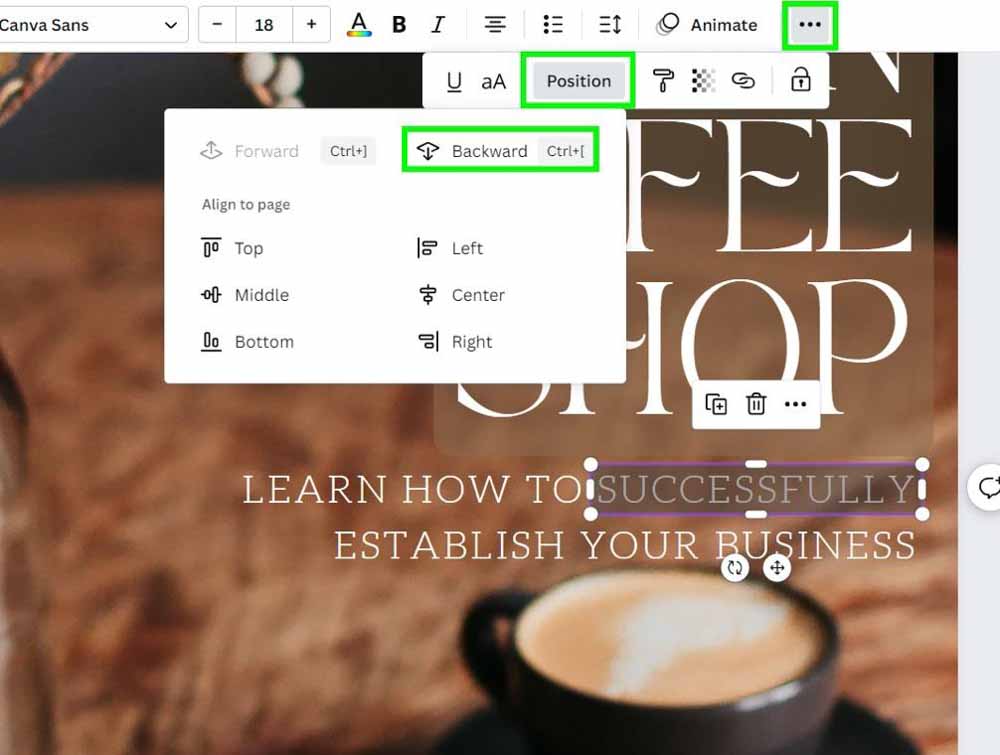
Now, you need to send the shape behind your target word.
To do this, click on the Three Dots in the Options Bar and then click on Position . Click on Backward to send the shape behind the word.
Now that your highlight is in place, you can make any other edits you need to make.
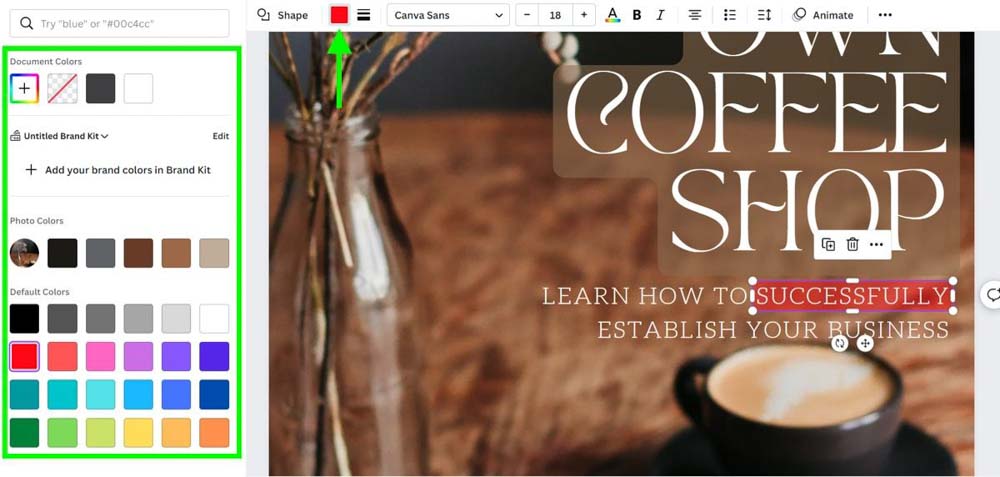
For example, click the Color Picker if you need to change the color.
How To Highlight Text In Canva Mobile
To highlight text on Canva Mobile, you must first lay down some text.
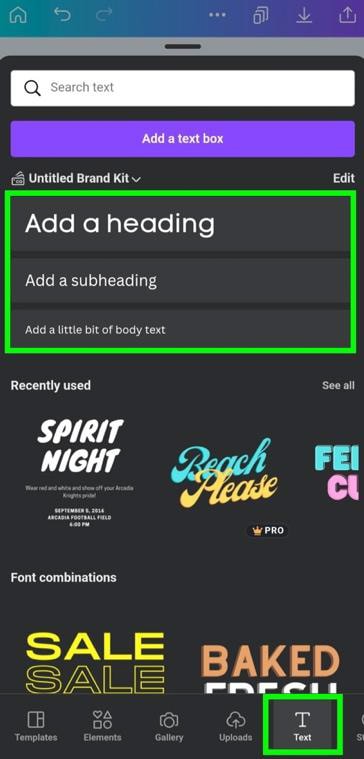
Click on the purple Plus Button to open up the Main Menu Panel .

Tap on the Text Icon to open the Text Panel . You will have the same three size choices that you will find on the desktop version of Canva.
Tap on the size of your choice to add your text to the canvas.
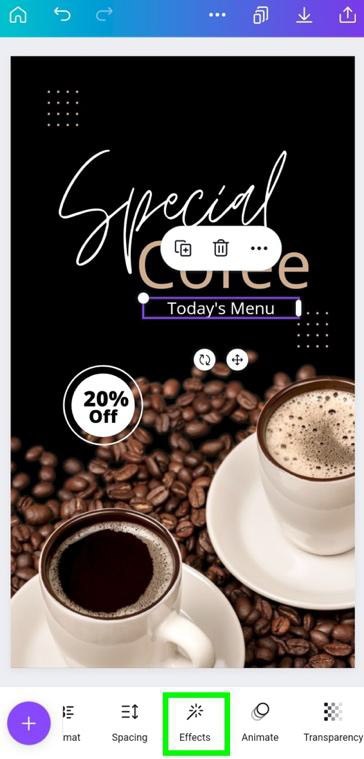
Next, tap on the Effects button and choose the Background effect out of your options.
Your text will be highlighted automatically with the default highlight.
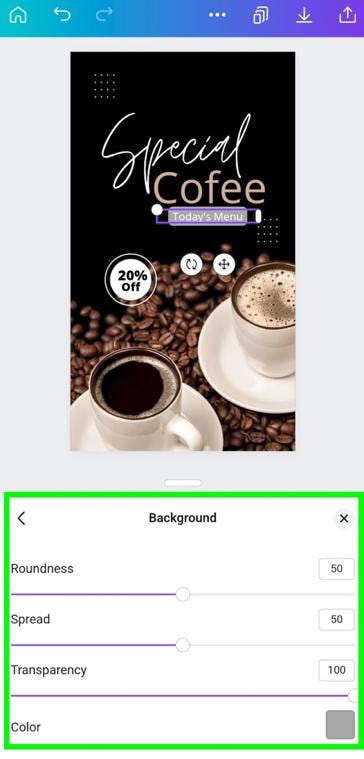
To adjust the options, tap on the Background button again.
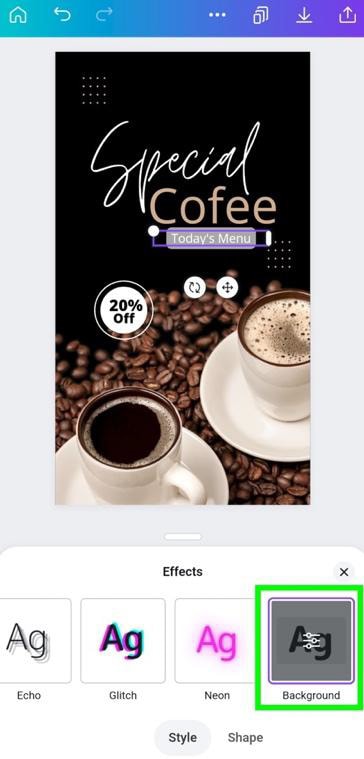
You will have all the same options available to you on Canva Mobile as on Canva Desktop. Adjust each setting to your liking.
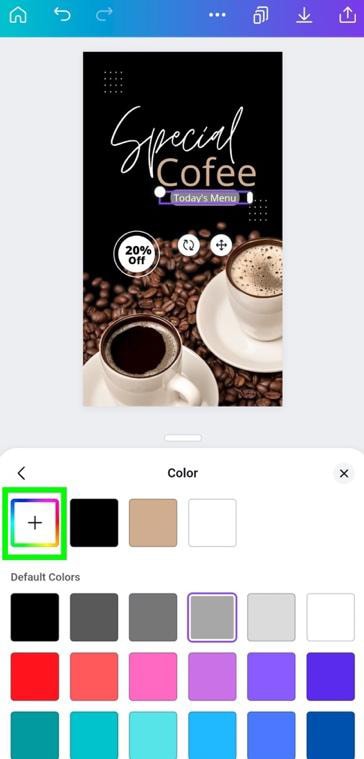
You can get more specific with the color of your highlight by tapping on the Add A New Color button and choosing your color from the Color Spectrum Map . You can also add a Hex Code here and use the Color Picker.
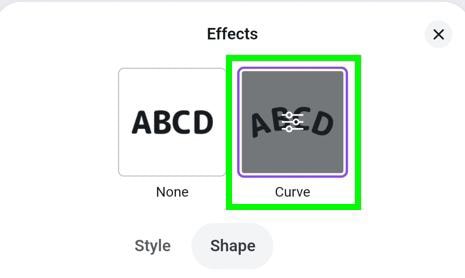
The last option you have is the Curve Effect . Tap on it to bend your text into a circle shape.
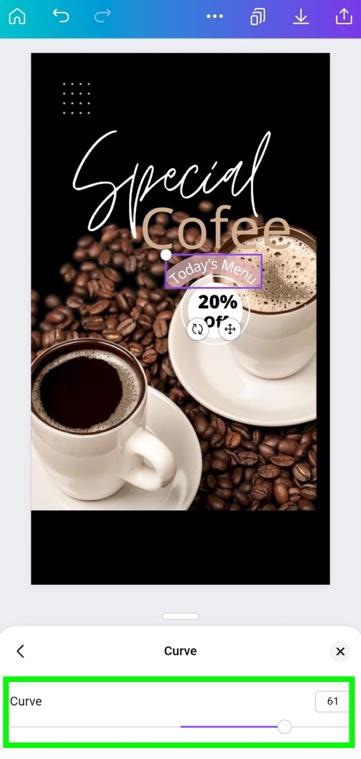
Tap on the Curve button again to adjust the Curve Slider to your liking.
- 100+ million premium stock photos, videos, audio, and graphics
- 610,000+ premium and free templates with new designs added daily
- Up to 100 Brand Kits to establish your brand's identity online
- Remove image backgrounds instantly with Background Remover
- Resize designs without quality loss with Magic Resize
- Schedule social media content to 8 platforms
- 1TB of cloud storage
- 24/7 customer support
Continue Reading:

How To Use The Marquee Tool In Photoshop

How To Crop A Layer In Photoshop (3 Simple Methods)

How To Fill A Selection In Photoshop (5 Best Ways)

What Are Embedded Previews In Lightroom + How To Use Them

Adobe Lightroom System Requirements For Mac & PC

How To Add A Watermark In Lightroom Classic & CC

How To Outline An Image In Canva

How To Add A Border In Canva (To Images, Shapes & Text!)

How To Make A Background Transparent In Canva
Products & Courses
Email: [email protected]
As an Amazon Affiliate, I earn from qualifying purchases. Brendan Williams Creative also participates in affiliate programs with Impact, Clickbank, CJ, ShareASale, and other sites. Brendan Williams Creative is compensated for referring traffic and business to these companies . Keep in mind that we may receive commissions when you click our links and make purchases. However, this does not impact our reviews and comparisons. We try our best to keep things fair and balanced, in order to help you make the best choice for you.
The leading authority in photography and camera gear.
Become a better photographer.
12.9 Million
Annual Readers
Newsletter Subscribers
Featured Photographers
Photography Guides & Gear Reviews

How to Highlight Text in Canva (Easy Steps)
Make your marketing material more effective with this basic but smart graphic design technique. Read on to learn how to highlight text in Canva.
Canva | Software | By Judyth Satyn
Make your marketing material more effective with this basic but smart graphic design technique.
Highlighting text is effective at helping to focus the reader’s eye on important content, making the information easier and more enjoyable for them to process.
Read on to learn how to highlight text in Canva.
Get a 16% annual discount to Canva Pro for UNLIMITED access to all the best design content!
- Related: How to change highlight color in Adobe Acrobat
Table of Contents
How to Highlight Text in Canva
Highlighting text is the number one graphic tactic for drawing attention to content that would otherwise be lost in a sea of words.
It makes important information stand out and helps the reader quickly process the theme or relevant points.
Highlighting Text
Open your document in the Canva workspace.
Find and click on the text you wish to highlight.
Your text will now be surrounded by a purple bounding text box and the text options menu bar will open above your workspace.
Click on the Effects button in the text menu bar.
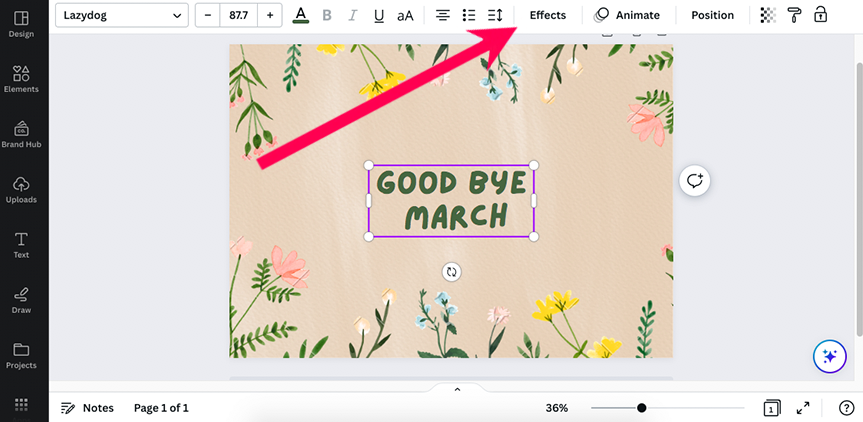
Open Effects
When you click on the Effects button, the Canva text effects panel will open on the left side of your workspace.
Scroll down in the effects panel and click on the Background button.
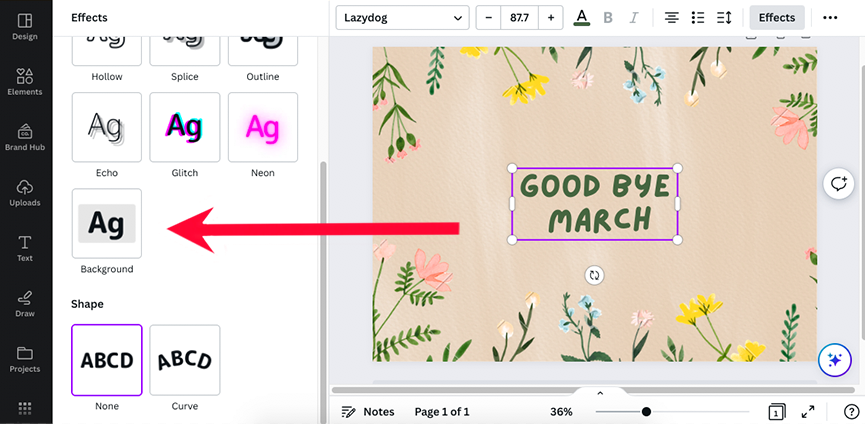
Once clicked, your text will be highlighted, and three sliders and a color options box will open below the Background button.
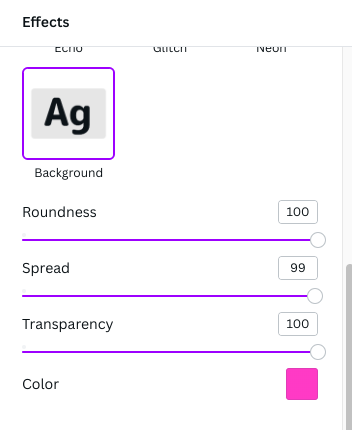
Customise Highlight Text
Slide the Roundness slider to the left or right to increase or decrease the roundness of the edges of the highlight.
Slide the Spread slider to the left or right to decrease or increase the distance of the highlight from the text.
Slide the Transparency slider to increase or decrease the opacity of the highlighted area.
If you need to choose a different color, click on the color box.
The color options panel will open – simply click on a color and the highlighted area in your workspace will be adapted accordingly.
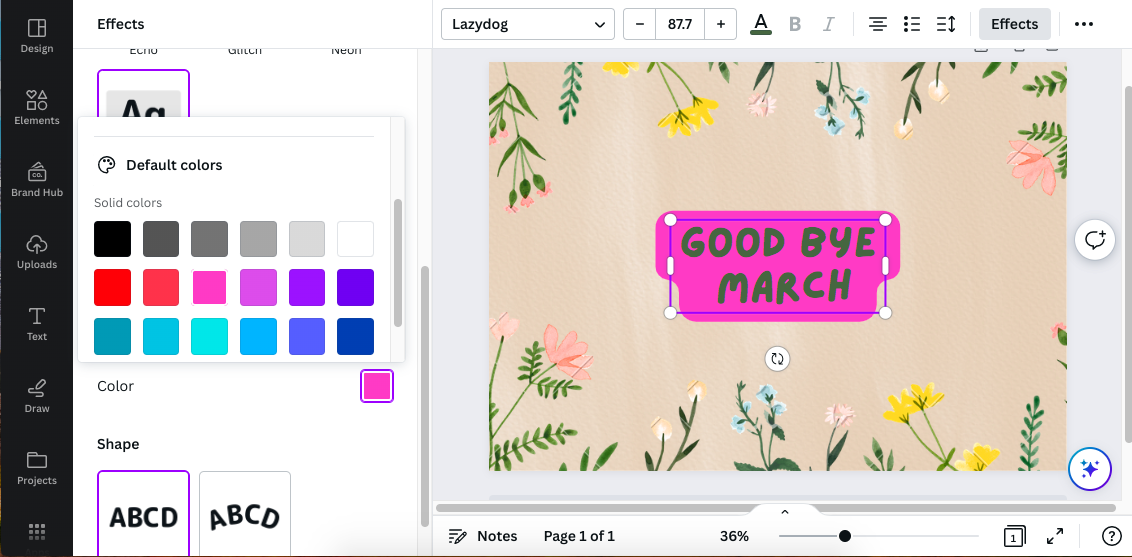
If you can’t find the color you want in the color selection offered, click on the square box with the rainbow outline below “Document Colors”.
This will open a color picker. You can click anywhere on the color picker to select your color or use the eyedropper to make a selection from your workspace.
To use the eyedropper, click on the eyedropper icon beneath the color picker and then hover your cursor over your workspace.
As you move your cursor, a chequered square shape box will replace your pointer demonstrating the selection of colors that will be selected.
Click the chequered box to select the color as your text highlight.

When you are happy with the final highlight, save your document.

Now you know how to highlight text in Canva.
Your highlighted text is going to give your reader the ability to easily notice and digest your information.
Your reader will now be drawn in and ready to pay attention to the finer details of your content.
- Read more: How to draw in Canva
How to Highlight Only One Word
Often enough, it isn’t a phrase or a sentence that needs to be highlighted to draw attention to your information.
Sometimes it’s just one word.
So, how do you select one word instead of all of the text in a text box?
When you have your document open, select the text you wish to highlight.
If you’re using the Canva Pro Account, you can use the first option below. If you’re using the free version, use the second option.
When the text box is selected, it will be surrounded by a purple bounding box and the text menu bar will appear above your workspace.
Click inside the text box and use your cursor to select the word you wish to highlight.
Once you have selected the single word in the text box, you can now highlight just this word without affecting the rest of the text in the text box.
Using the free version of Canva, you won’t be able to highlight just one word in the text box using Text effects.
However, you will be able to select a suitable element from the design elements that Canva offers and place this behind the word to highlight it.
Click on the Elements button in the left side menu bar.
The Elements panel will open to the left of your workspace.
In the Elements search bar, enter the shape you require, such as a rectangle.
You will now be presented with a range of different rectangles – click on one and it will appear in your workspace.
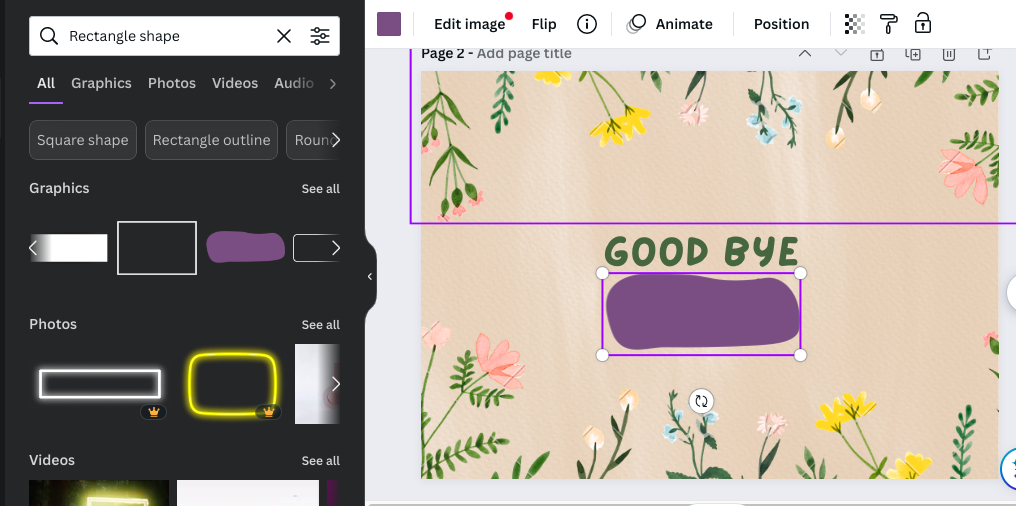
You can change the color of the shape, resize it and reposition it using the top menu bar above your workspace.
The shape element is currently positioned over your word. To reposition it, hit the Position button at the top of your workspace.
When clicked, a panel will open to the left of your workspace.
Below Arrange is the option to move the shape “Backward” or “To Back”.
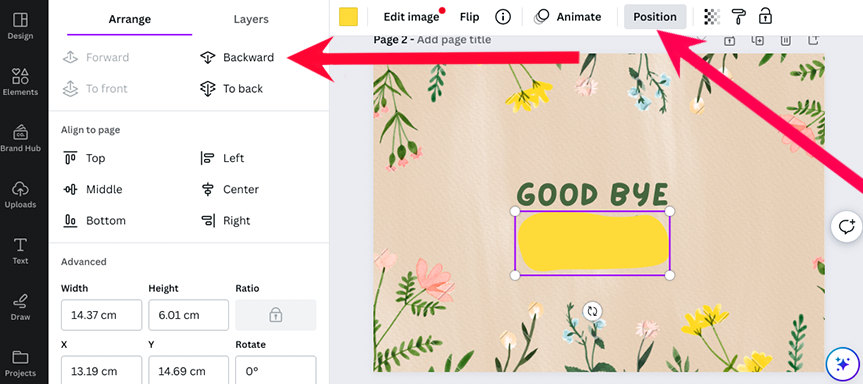
Click on “Backward” and your shape element will be placed behind one single word.
This effectively draws the viewer’s eye to this single word.

Want to learn more ways to jazz up your text? Check out this tutorial for how to curve text in Canva .
You'll Also Like These:

Judyth is an experienced studio photographer and glass artist. When she isn’t Photoshopping comedians into the bellies of sharks, you can find her cooking delicious treats for her guests.
Leave a Comment Cancel Reply
👋 WELCOME TO SHOTKIT!

🔥 Popular NOW:

Unlock the EXACT blueprint to capture breathtaking iPhone photos!
Shotkit may earn a commission on affiliate links. Learn more.
Highlighting Text in Canva
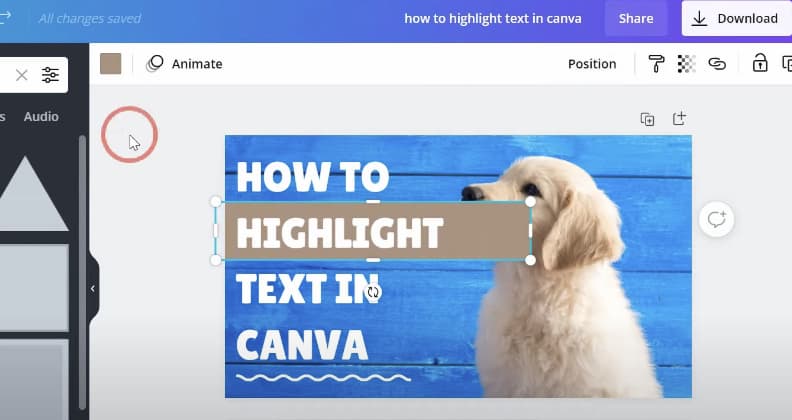
Canva, a graphic design platform, is widely recognized for its user-friendly interface and extensive range of features. It’s particularly popular among designers and non-designers alike for creating social media graphics, presentations, and other visual content. One such feature that users find valuable is text highlighting, which plays a pivotal role in making your designs stand out.
In this article, we will walk through a detailed process of how to highlight text in Canva. Despite the fact that Canva does not have an in-built ‘highlight text’ button, there are creative ways to achieve the desired effect.
Method 1: Using Shapes to Highlight Text
Step 1: insert text.
To insert text in Canva, follow these steps:
- Launch Canva and open your design: Open Canva in your web browser or launch the Canva app. Once you’re in the Canva dashboard, click on the design you want to work on, or create a new design by selecting the appropriate template;
- Access the text tool: On the left sidebar, you’ll find various design elements. Look for the ‘Text’ tab and click on it. This will open a panel with different text style options.
- Choose your desired text style: Scroll through the available text styles to find the one that suits your design. Canva offers a wide range of fonts and text effects to choose from. Click on the desired text style to select it.
- Type your text onto the canvas: With the text style selected, you can now click anywhere on the canvas to start typing your text. A text box will appear, allowing you to enter your desired text. Customize the text further by adjusting its size, color, alignment, and other formatting options available in the text editing toolbar.
Step 2: Add Shape
To add a shape in Canva and highlight your text, follow these steps:
- Launch Canva and open your design: Open Canva in your web browser or launch the Canva app. Access the design you want to work on from the Canva dashboard or create a new design using a suitable template;
- Access the shapes library: On the left sidebar, locate the ‘Elements’ tab and click on it. This will open a panel with various design elements, including shapes;
- Choose the shape for highlighting: Browse through the shape options available, such as squares, circles, lines, etc. In this case, select the ‘Square’ shape to form a rectangle that can cover your text;
- Resize and position the shape: Click and drag the selected shape onto the canvas. Resize it to fit the area you want to highlight, such as covering the text. Adjust the position and dimensions of the shape by clicking and dragging its edges;
- Customize the shape: Once the shape is in place, you can customize its appearance by changing its color, opacity, border style, or adding additional effects using the options available in the toolbar.
Step 3: Position the Shape
To position the shape behind your text in Canva, follow these steps:
- Select the shape: Click on the shape you added to the canvas to select it. The selected shape will have bounding boxes and handles;
- Access the positioning options: Look for the ‘Position’ button on the top right menu, which appears as a square icon with arrows pointing in different directions. Click on the ‘Position’ button to access the positioning options for the selected shape;
- Move the shape backward: In the positioning options menu, you’ll find various options like ‘Forward,’ ‘Backward,’ ‘Bring to Front,’ and ‘Send to Back.’ To place the shape behind your text, click on the ‘Backward’ option. Each click will move the shape one step backward in the layer order;
- Verify the position: Keep clicking the ‘Backward’ option until the shape is positioned behind your text. You can visually confirm the position by checking that the text is not obscured by the shape.
Step 4: Customize the Shape
Method 2: using a highlighter pen.
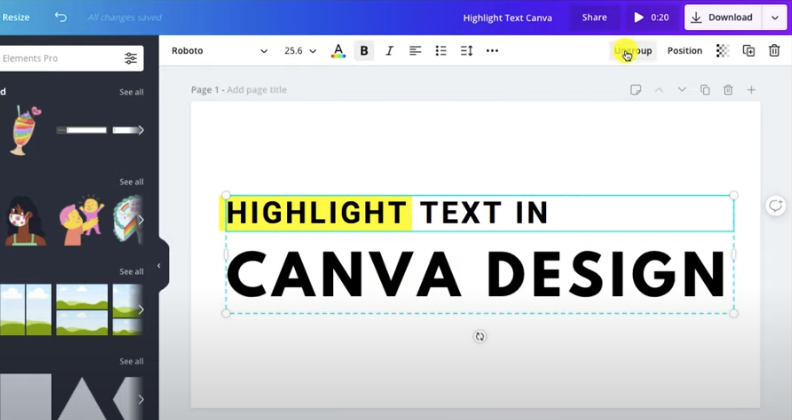
To achieve a more authentic ‘hand-highlighted’ look, you can utilize the highlighter pen element in Canva. This method may not yield as clean results as the shape method but provides a more natural effect. Here’s a detailed breakdown of the steps involved:
Understanding how to highlight text in Canva allows you to emphasize essential points, create contrast in your design, and guide your audience’s eyes to where you want them to look. By following the methods described above, you can easily create designs that have a greater visual impact. Canva’s versatility allows you to experiment and find the style that suits your design best. So, take advantage of these features to make your designs stand out even more.
As of now, Canva does not have a direct ‘highlight text’ button. However, you can use different elements such as shapes or highlighter pen designs to create a similar effect.
Yes, it’s possible to adjust the transparency of the shape used for highlighting. After selecting the shape, go to the color menu, and you’ll find a checkered button at the top right corner which allows you to change the transparency.
Absolutely! You can change the color of the shapes or the highlighter pen designs to suit your preferences. Simply select the element and use the color button to choose the desired color.
Both methods discussed in this article can be applied to single or multiple lines of text. If you have a block of text that needs highlighting, just resize the shape or the highlighter element to cover the entire block.
How To Highlight Text In Canva With 4 Easy Ways
In this blog post, you will learn more about how to highlight text in Canva . There’s no need for you to have a Pro Canva account. You can do these in the free version.
How to Highlight Text in Canva
In this example, I will show you how to highlight the word “HIGHLIGHT” in this design below:
Method 1: How to Highlight Text Without Drawing Anything
In this example, you will learn to use the graphics available in Canva to highlight your text. No, you don’t have to draw anything!
Step 1: Search For Graphic
First, select the Elements button on the left side menu. A dropdown panel appears. Type in the word “highlight” in the search bar at the top of the dropdown panel.
Step 2: Select A Highlight Effect
You will see a huge range of graphics that look like effects created when you use a real highlighter. But this also includes stock photos that are not what you want right now.
Select the tab that says “Graphics” and you will only see the highlight effects while the stock photos will not be shown.
Step 3: Highlight Your Text
Next, select a highlighter graphic that you desire. Click on it once and it will appear on your artwork.
Adjust the size and colors to your liking. You can crop it, flip it and even animate it.
Once you are satisfied, click on the Position button on the right-hand side of the top bar. Click Backward on the drop-down menu.
Or you can right-click on your cursor and select “Send Backward” in the dropdown menu. Or use the keyboard shortcut ⌘[ .+
You will see your text visible and the shape is repositioned at the back of your text.
Use the same steps to try different highlight effects if you like!
Method 2: Highlight One Whole Text Box in Canva
In this example, you will learn how to highlight one text that is in one text box. You can also use these same steps to highlight many words in one text box.
Step 1: Select Your Text
The first step in highlighting a specific text of your design in Canva is to click on the Text tool on the left side menu.
Then type in the text you want to highlight in one text box. Browse and apply your preferred font type to your text from the text options in the top menu.
Step 2: Select Effects
Click on the text box to select it and select the Effects button. You will now see a range of styles pop up in the left-hand menu.
Next, select the style that says “Background”. You will see a rounded box appear as a background for your selected text.
Step 4: Adjust Highlight Settings
When you click on the Background button, a settings menu will appear below the range of effects.
You can adjust the roundness, spread, transparency, and color of the background effect of the text box by altering the default settings.
The default color is black while the default value for the roundness is 50, the spread is 50 and transparency is 100. I believe they are measured in percentage % although it’s not mentioned.
In this example, I want to reduce the roundness and I do this by sliding the toggle toward the left to make the corners of the background smaller.
I also find that the highlighted area is too wide, it would look better if I toggle the spread down to 26 instead.
Leave the transparency at 100 to keep it bold and striking.
Then, the color should be adjusted to shine from the main background. I chose yellow to brighten it up.
There are other color choices, but if you don’t see your preferred color, click on the plus (+) icon under the heading “Document Colors”. Then, key in the hex code of your preferred color.
Next, adjust your text styles as you deem fit for your design.
This is a great way to highlight your text because the text layer moves with the highlighted area.
But in this method, take note that there is no way to adjust the height of the highlight or background color of the text without adjusting the width.
You can adjust the size of the background as a whole only, changing both the height and width together.
You will have to create your artwork with enough space for the background color around the text.
Method 3: Filling a Shape with Text
If you wish to have some flexibility to customize the size of your text box highlight, one way is to fill a shape with text.
In this way, you can control the height and width of the shape around the text. This can’t be done if you use the Background function in the Effects section.
Here’s how you do it:
Step 1: Select a Shape
First, go to the left-hand menu and select the Elements button.
Under Lines and Shapes , look for a square with sharp corners or rounded corners, or any shape you desire for your highlighted area. In this example, I will select the square with sharp corners.
Click the square shape and it appears on your design right away.
Anytime you wish to change the square to another shape like a square with rounded corners or a circle, you can do that.
Select your current square, and select the Shape button on the top menu bar. A range of shapes appears on the left side of your design.
Click on any shape you desire and your original shape changes to the one selected.
Step 3: Add Text to Shape
Once your shape appears on the design canvas , you will see a text cursor blinking in the box. This means it’s ready for you to type some text into the shape.
If you don’t see it, double-click on the shape and it will appear. Next, type out the word you desire.
Adjust the style of your text by trying out different font styles, and selecting font size and color from the font menu.
Step 4: Adjust Shape
With your text highlighted, you can adjust the size of the shape by dragging the handles on the top, bottom, and sides of the shape.
If you don’t have much space around your text, you can make the highlighted area smaller, narrower or shorter. You can also make it bigger, depending on your purpose and design.
Method 4: Highlight Part of a Text Box in Canva
The second method shows you how you can highlight part of a text box. Sometimes you have a string of words that were typed out in one text box at one go.
Instead of highlighting all the text in that one text box, you only want to highlight one word out of the string of words in one text box.
In this case, you may not want to use the method of highlighting the text box with the Effects function, because you will have to break them up into individual text boxes to use it.
And this can be a real chore, especially if you have many words in one text box.
In the example below, I will show you how to create a background that makes a text look highlighted manually from scratch.
The first step is to go to the left-hand menu and select the Elements button.
Under Lines and Shapes, look for a square with sharp corners or rounded corners, or any shape you desire for your highlighted area. Click on any of the shapes and it appears on your design right away.
Step 2: Adjust Color of Shape
With your preferred shape, click on it and drag it over the text you’d like to highlight. Next is to change the default color to one that works best with your design. In this example, I’d like to change it to yellow.
To change the shape color , select the shape, go to the top menu bar and click on the square-colored box next to the Shape button. A range of colored squares appears on the left side. Click on the color that you desire and your shape will change to the one selected.
Step 3: Position to Highlight Text
Next, position the shape to the back of your text. Click on the Position button on the right-hand side of the top bar. Click Backward on the drop-down menu.
Or you can right-click on your cursor and select Send Backward in the dropdown menu. Or use the keyboard shortcut ⌘[ .
Adjust the size of your highlight by dragging the handles on the top, bottom, and sides of the shape.
Final Thoughts: Highlighting Text
I hope you found this tutorial useful. Canva is an easy-to-use graphic design tool and there isn’t one way to highlight text.
The most important thing is to decide what it means by highlighting text to you. Then, use the appropriate method to highlight your text.
Marilyn Wo is a graphic design expert. She has spent over two decades creating branding and graphic design work for clients all over the world, including X (formerly Twitter) and Samsung.
She runs MeetAnders, a graphic design company where she trains and works with a team of reliable designers. Follow her on LinkedIn .
Similar Posts
Ideas and keywords to find the best canva elements, what is x-process in canva [3 easy steps 2024], 4 easy ways to blur photos on canva, 75 free editable christmas app icons on canva, 4 easy ways to use frames on canva, 3 quick steps to change page size in canva for free, leave a reply cancel reply.
Your email address will not be published. Required fields are marked *
Save my name, email, and website in this browser for the next time I comment.
Welcome to The Passive Plan - Creating freedom through passive income!

How to Highlight Text in Canva: Quick & Easy Guide
Canva is a blogger’s dream tool – in fact, I don’t think I know a single blogger who doesn’t use it!
If you’re a fan of this graphic design software but don’t yet know how to highlight text in Canva , keep on reading.
But first: if you’re a beginner blogger and not using Canva already, sign up here for the free version. It’ll change the game!
Highlighting text in a different colour really helps your designs to stand out and puts an emphasis on important information.
As someone who frequently uses Canva (like, literally ten times a day), I can tell you that text highlighting is a super easy process that can be done in just a few clicks.
There are a couple of different ways to highlight text in Canva:
- The first method is using the ‘Effects’ tool
- The other is using shapes to highlight text.
We’ll delve further into each below.
Psst! Stick around to the end to receive my FREE Canva Pinterest Templates !
Whether you’re designing a social media post, graphics, or Pinterest pins – any and all Canva projects really – highlighting text will help you create a more visually aesthetic design that shouts your message loud and clear.
You might also be interested in:
- 30 Best Canva Font Pairings: All You Need to Create an Instant Impact on Your Designs
- How to Make Money with Canva in 2022: A Beginners Guide
- How to Make Digital Stickers & Sell Them Online
- Is Investing in Stock Photos Worth the Splurge? An Honest Styled Stock Society Review
PIN FOR LATER!

Full disclosure! See those links below? These are affiliate links. If you happen to click on one of these and purchase something I recommend, I’ll get a small commission (wohoo). Don’t worry, this is at no extra cost to you (in fact, often I’ll have some discounts you can enjoy!). As an Amazon Associate, I earn from qualifying sales. You can read my full disclaimer here .
How to Highlight Text in Canva – Step by Step
The text highlight feature on Canva is exceptionally useful for any content creator, as long as you know how. So let’s get into the nitty gritty of it… well actually it’s very simple so let’s get into the quick and simple steps!
Step 1: Open up Canva and start creating a new design or open an existing one. For the purpose of this tutorial, I’m going to share images of a Pinterest template design I already created.
Step 2: Add a text box to your design by clicking on the ‘ Text ‘ tool in the left-hand menu and selecting ‘ Add a heading ‘, ‘ Add a subheading ‘, or ‘ Add a little bit of body text ‘.
Alternatively, you can just press ‘ T ‘ on your keyboard to quickly add a text box (don’t you love shortcuts?).

Step 3: Type in whatever text you want to highlight into the text box.
Step 4: Here’s where we begin adding the highlight text effects. With the text box selected (just click on it until you see the box surround it) click on the ‘ Effects ‘ button in the top menu.

Step 5: From the dropdown options, choose ‘ Background ‘ (you may need to scroll down a little).
Step 6: To change the colour of the text from the default colour, scroll down a little more and choose your preferred colour swatch or enter a hex code.
Once you’ve chosen your text colour, you have the option to adjust the opacity and blur of the highlight by using the sliders below the colour options. This will let you create a subtle or bold highlight depending on your specific design needs.

The highlight colour you choose will only apply to the selected text box. If you want to highlight various text boxes with the same colour, you’ll need to repeat the steps for each text box.
Step 7: Adjust the size of your highlight by dragging the sliders or entering a value in the ‘ Width ‘ and ‘ Height ‘ fields. This will also adjust the font size.
And that’s it! You now have a highlighted text box (or a few) in your Canva design.

Need an SEO Blog Audit?
My clients are having great success having had their blogs audited by me and I’d love for you to have the same success! Click the link below to see what they’re saying…
How to add just a small section of text in Canva
So we’ve gone through how to highlight a full piece of text, but what if you just want to highlight one or two words in a sentence?
This can also be done easily, but you’ll need to follow the following steps…
Let’s assume you already have your text box created (steps 1 to 3 above).
The first step is to click on the ‘ Elements ‘ tab on the left hand menu. Next find the ‘ Lines and Shapes ‘ heading and select a square shape.

This will place a square directly onto your design – most likely not in the right place.
You can then drag the square to the text you want to highlight, drag it to reshape it to a rectangle if necessary.

Next up, you can click on the box and go to the colour option on the top menu to choose your desired colour – preferably from your own branded colour palette.
At this stage, if your ‘highlight’ is on top of your text rather than highlighting from behind, you’ll need to click on the coloured box to select it and click the ‘ Position ‘ button on the top menu. This will bring up another menu on the left-hand side, where you can choose ‘backwards’ to move the box to behind the text.
And viola! You have a small section of text highlighted within your design.
Removing Highlights
If you added some highlight to your text in Canva but later decide that you don’t want it anymore, you can easily get rid of it. Here’s how:
Step 1: Select the text box with the highlighted text and click on the ‘ Effects ‘ tab in the top menu.
Step 2: Click on ‘ Background ‘ in the left menu and then choose the ‘None’ option. This will remove the highlight.
If you have multiple highlights in your design, you can click and drag to select all the text boxes with highlights and repeat the above two steps.
Removing highlights in Canva is just as quick and easy as adding them (if not easier) so just follow the steps above and your design will be highlight-free in no time at all!

Overall, I find the different methods of text highlighting with Canva to be super easy and intuitive to use and I hope you do too!
It’s a great way to draw attention to important information in your graphics and make them pop out above your competitors.
How do I highlight text in Canva?
To highlight text in Canva, you’ll either select a text box and use the ‘ Effects ‘ option or use a shape to create a highlighter effect if it’s just a single word rather than the entire text box.
Can I use a highlighter tool in Canva?
Canva doesn’t actually have a dedicated highlighter tool, but you can either use the ‘ Effects ‘ option or shapes to create a highlight effect.
Do I need Canva Pro to highlight text in Canva?
No, you won’t need a pro Canva account in order to highlight text – all Canva users can simply use the free version.
What are the steps to underline text in Canva?
To underline text in Canva, simply select the text you want to underline and click on the ‘ U ‘ icon in the text toolbar. This will add an underline to the selected text. If you want to add a fancier underline effect, go to the ‘ Elements ‘ tab on the left-hand menu and type ‘ underline ‘ in the search bar. You can then place one of these underline options under specific text.
How can I change the background colour of text in Canva?
If you need to change the background colour of text in Canva, select the text box and click on the ‘ Background ‘ tab in the text toolbar. You can then choose one of your brand colours or upload one of your own images to use as the background of the text box.
Can you highlight an image in Canva?
You can highlight an image in Canva. By placing a shape over the image and then adjusting the shape’s colour and transparency, you can create a highlight effect. Or you also use the ‘ Blur ‘ option to create a subtle highlight effect.
How do I highlight text on the Canva mobile app?
If you’re using a mobile device and want to highlight text, you can select the text you want to highlight and tap on the ‘ Style ‘ tab on the bottom toolbar. Then choose a colour or gradient to use as the background of the text box. You can also adjust the transparency of the background to create a highlight effect.

Similar Posts

25 Irresistible Opt In Freebies to Grow Your Mailing List
If you’re running an online business, then you know that growing your mailing list is key to your success. But getting people to sign up can be tricky – especially if you’re not offering anything enticing in return. That’s where opt-in freebies come in! These goodies are so tempting, people will sign up for your…

12 Best Laptops for Bloggers in 2024 (Written By A Blogger)
If you’re reading this, you’re likely on the lookout for a laptop for your blogging business. Blogging isn’t just about typing away your thoughts and hitting that ‘publish’ button. There’s so much more involved – researching, editing photos and videos, SEO and keyword research. It’s a lot! You need a laptop that can keep up…

How to Promote Your Blog For Free: 13 Easy Ways to Increase Traffic
So you’ve just started a blog. Fantastic! You’re on your way to sharing your ideas with the world (or at least, the internet). But now what? Unfortunately, many amateur bloggers don’t realise that it’s not just a case of hitting publish and getting thousands of views on their blogs instantly. No, you need to promote…

How to choose the right legal pages for your blog
So you’ve decided to start a blog. Congratulations! You’re about to embark on a journey of self-discovery, creative expression, and hopefully, global domination. But before you can start sharing your insights with the world, there’s one important task that needs to be taken care of: choosing the right legal pages for your blog. If you’re…

27 Greatest Affiliate Programs for Food Bloggers in 2023
If you’re a food blogger looking to monetise your blog, affiliate marketing can be a great way to earn extra income. By promoting products and services related to food, you get to earn a commission on every sale made through your unique affiliate link. However, with so many affiliate programs out there, it can be…

100 Creative Valentine’s Day Blog Post Ideas to Love This Year
Ah, Valentine’s Day – one of the most anticipated holidays of the year. Whether you love it or loathe it, there is no denying that V-Day brings out the creativity and fun in so many people. So why not take advantage of this romantic holiday and spark up your blog with creative Valentine’s day blog…
Privacy Overview

We do not use any AI writing tools. All our content is written by humans, not robots. See our editorial process .
How to Highlight Text in Canva
On Canva you are able to create a highlighter effect behind the text so that it looks like you are using a real highlighter! This can be achieved by utilizing the Effects toolbar once you select the text you want to use and then adding a colorful background.
Hello there! My name is Kerry, and I love exploring new technological platforms that make notetaking and creating informational flyers easy and eye catching! If you are like me, adding creative flair to your projects in a simple way is important, which is why I love using Canva !
In this post, I’ll explain the steps for highlighting texts in your projects on Canva. This is a great feature that will help designers emphasize important information in their creations that can sometimes get hidden amidst the other elements in their designs.
Are you ready to get started? Wonderful! Let’s learn how to highlight text in your projects!
Table of Contents
Key Takeaways
Highlighting text in canva, how to highlight text in your project, final thoughts.
- There is no specific highlighter tool that is currently available in Canva, but you can manually add a color background behind your text to achieve this look.
- To add a highlighter effect to your text you can use the Effects toolbox and add a background color to specific text that you want to highlight (either full-text boxes or just a few words).
- You can change the color, transparency, size, roundness, and spread to customize this highlighter effect on your text.
Did you know that you can highlight text in your Canva projects? This is a cool feature that will allow certain areas of your text to pop and stand out and also brings back those old-school vibes when highlighters were the best of the school supplies (in my humble opinion).
Especially when creating materials such as presentations, flyers, and handouts where you want to emphasize various points within the project this can be an extremely helpful method to learn. It also is beneficial if you have an abundance of text and want to draw the viewer’s eye to a particular spot!
Unfortunately, there is no highlighter tool that can automatically highlight words on your Canva project. (That would be pretty cool and hey, maybe it’s a feature that will be developed on the platform soon!)
If you are looking to achieve the same effect as a highlighter, you won’t have to take too many steps because it is a pretty simple thing to learn how to do on the platform.
Follow these steps to learn how to highlight text in your project:
Step 1: Open up a new project or existing one that you are currently working on the Canva platform.
Step 2: Insert text or click on any text box that you have included in your project that you want to highlight.

Remember that any font or Font Combinations that have a crown attached to them are available to Canva Pro users only. If you want to be able to access the full library on Canva, you’ll have to join a Teams account or pay extra for it.
Step 3: Once you have included the text that you want to highlight, make sure that the text box is selected by clicking on it. At the top of your canvas, an additional toolbar will appear with various editing options.
Step 4: Find the button that is labeled Effects . Click on it and another menu will pop up on the side of your screen displaying all of the different effect options that you can use to change your text. These include adding shadows, making the text neon, and curving your text .

Step 5: Click on the button that says Background . Once you do this, you’ll see even more options to customize this effect on your Canva piece.

You can change the color, transparency, spread, and roundness of the highlighter effect. As you play around with it, you can see (in real-time) the changes to your text on the canvas which will be displayed next to this menu on the right side of your screen.

To go back to your project and continue working, simply click on the canvas and the menu will disappear. You can continue to follow this process whenever you want to highlight text boxes!
Note that if you want to add a highlighter effect to only part of the text within a text box, simply highlight only the words you want to add the effect to and follow the same steps as described above!
The option to highlight text in Canva projects is an excellent addition to the platform – as long as you know how to do it! Highlighted words add a retro charm to your work while still being useful in emphasizing important material that needs to be noticed!
What types of projects do you like to include the highlight effect in? Have you found any tricks or tips that you would like to share with others about using the Effects tool for text? Comment in the section down below with your contributions!
Submit a Comment Cancel reply
Your email address will not be published. Required fields are marked *
How to Highlight Text in Canva
Home » Blog » How to Highlight Text in Canva

Founder of CanvaTemplates.com & Professional Graphic Designer
Jake Tucker
Canva Templates is reader supported. When you buy through links on our site, we may earn an affiliate commission. Learn more
Canva is a popular graphic design platform that allows users to create stunning visuals for various purposes. One of the essential features of Canva is text highlighting. Highlighting text in Canva is a great way to emphasize important information and make it stand out from the rest of the content.
To highlight text in Canva, users can follow a few simple steps. First, they need to create a piece of text by clicking on the Text Tab in the Side Menu. Then, they can select the text they want to highlight and click on the Effects button. From there, they can choose the Background option and define the size, shape, and color of their highlight.
Highlighting text in Canva is an effective way to make important information stand out in a design. With a few simple steps, users can create visually appealing highlights that draw attention to specific text. Whether you’re creating a flyer, a social media post, or a presentation, highlighting text in Canva can help make your message more impactful.
Understanding Canva
Canva is a popular graphic design tool that allows users to create professional-looking designs without any prior design experience. It is a cloud-based platform that provides users with access to a wide range of design templates, graphics, and fonts. Canva is used by individuals and businesses alike to create social media posts, marketing materials, presentations, and more.
One of the key features of Canva is its drag-and-drop interface, which makes it easy for users to add and edit elements on their designs. Users can also customize their designs by changing the colors, fonts, and backgrounds. Canva offers a variety of design formats, including social media posts, flyers, posters, business cards, and more.
Canva has a free version, which provides users with access to a limited number of design templates and graphics. The paid version, Canva Pro, offers additional features such as unlimited storage, access to premium templates and graphics, and the ability to resize designs for different platforms.
Overall, Canva is a user-friendly tool that allows users to create professional-looking designs quickly and easily. Whether you are a beginner or an experienced designer, Canva is a great option for creating high-quality designs.
Highlighting Text Basics
What is text highlighting.
Text highlighting is a graphic design technique that emphasizes specific words or phrases in a block of text. It involves using a contrasting color or shading to make the text stand out from the rest of the content. In Canva, you can highlight text by adding a background color or shape behind the text box.
Importance of Text Highlighting
Text highlighting is an effective way to draw attention to important information in your design. It can help your audience quickly identify the key points of your message and make it easier to read and understand. Highlighting text can also add visual interest to your design and make it more engaging.
When highlighting text, it’s important to use contrasting colors that complement the overall color scheme of your design. Avoid using too many colors or making the highlight too distracting, as this can detract from the message you’re trying to convey.
In summary, highlighting text is a simple yet powerful design technique that can make your message more effective and engaging. By using contrasting colors and shapes, you can draw attention to important information and make your design more visually appealing.
Steps to Highlight Text in Canva
Highlighting text in Canva is a simple yet effective way to draw attention to specific words or phrases. Here are the steps to follow to highlight text in Canva:
Selecting Text
The first step is to select the text you want to highlight. To do this, click on the text box that contains the text you want to highlight. The text box will be highlighted with a dotted line, and the text will be highlighted in blue. You can also select multiple text boxes by holding down the Shift key and clicking on each text box.
Applying Highlight
Once you have selected the text you want to highlight, you can apply the highlight effect. To do this, click on the “Effects” button in the toolbar on the left-hand side of the screen. Then, click on “Background” and select the color you want to use for the highlight. You can also adjust the opacity and size of the highlight by dragging the sliders.
Adjusting Highlight
After you have applied the highlight effect, you can adjust it to make it look exactly how you want it to. To adjust the highlight, click on the text box again to bring up the editing options. Then, click on “Effects” and select “Background” again. From here, you can adjust the size and position of the highlight by dragging the sliders. You can also change the color of the highlight by selecting a different color from the color palette.
In conclusion, highlighting text in Canva is a simple and effective way to draw attention to specific words or phrases. By following these steps, you can easily highlight text in your Canva designs and make them stand out.
Advanced Highlighting Techniques
Canva offers several advanced highlighting techniques that can make your text stand out even more. Here are some of the most effective techniques:
Using Shapes for Highlight
One way to highlight text in Canva is by using shapes. To do this, create a shape using the “Elements” tab and place it behind your text. Then, adjust the opacity and color of the shape to create the desired effect. This technique works especially well for highlighting individual words or phrases.
Gradient Highlights
Another way to highlight text is by using gradient highlights. To do this, select the text you want to highlight and click on the “Effects” button. Next, select the “Gradient” option and choose the colors you want to use. You can adjust the angle and opacity of the gradient to create a more subtle or dramatic effect.
Text Shadow as Highlight
Finally, you can use text shadow as a highlight in Canva. To do this, select the text you want to highlight and click on the “Effects” button. Next, select the “Text Shadow” option and adjust the color and opacity of the shadow. This technique works especially well for creating a subtle highlight that doesn’t overpower the text.
By using these advanced highlighting techniques, you can create text that stands out and captures your audience’s attention.
Troubleshooting Common Issues
Text not highlighting.
If you’re having trouble highlighting text in Canva, there are a few things you can try. First, make sure that the text is in its own text box. If the text is grouped with other elements, it may not be possible to highlight it separately. If the text is in its own text box and still won’t highlight, try selecting the text box and then clicking on the “Ungroup” button in the top toolbar. This will separate the text box from any other elements it may be grouped with and make it easier to highlight.
Another common issue is that the text may be too small or too thin to be highlighted. In this case, try increasing the font size or bolding the text to make it more visible. You can also try zooming in on the canvas to get a closer look at the text and make it easier to highlight.
Highlight Color Not Changing
If you’re having trouble changing the highlight color in Canva, there are a few things you can try. First, make sure that you have selected the correct text box or element. If you have multiple text boxes or elements on the canvas, it can be easy to accidentally select the wrong one.
Another common issue is that the highlight color may be set to transparent or white, making it difficult to see. To fix this, select the highlight element and then click on the “Fill” button in the top toolbar. From there, you can choose a new highlight color or adjust the opacity of the current color to make it more visible.
If you’re still having trouble changing the highlight color, try selecting the element and then clicking on the “Reset” button in the top toolbar. This will reset any changes you’ve made to the element and allow you to start over with a fresh canvas.
Best Practices for Highlighting Text
When highlighting text in Canva, there are a few best practices to keep in mind to ensure that your design looks polished and professional.
First, choose a highlight color that complements the rest of your design. If your design has a specific color scheme, try to choose a highlight color that matches or complements those colors. If you’re unsure which color to choose, you can use Canva’s color wheel to find a color that works well with your design.
Second, consider the size and shape of your highlight. A highlight that is too large or too small can look out of place in your design. Try to choose a size and shape that fits well with the rest of your text and design elements.
Finally, use highlights sparingly. While highlights can be a great way to draw attention to important text, using too many highlights can make your design look cluttered and unprofessional. Instead, choose one or two key pieces of text to highlight, and use other design elements (such as bold text or different font sizes) to draw attention to other important information.
By following these best practices, you can create designs that effectively highlight important text without sacrificing the overall look and feel of your design.

By Josh · 2022-12-12
How to highlight text in canva -- both the simple and creative way.
Hi everyone! I'm Josh, a writer at Xenyo. And for the next couple of days, my task is to write "design" content. So I thought "why not write about literally the only design tool I've ever used, Canva!". Here, you'll get to read some useful Canva tutorials, tips, and tricks!
Highlighting texts is one of the basic things you need to learn in any graphic design tool. However, sometimes it’s not obvious, even for Canva, which is often touted as the easiest and most intuitive graphic design software out there.
So, where’s the highlight button? Clue: it’s not called “Highlight”.
Below, you’ll see two step-by-step guides on how to highlight texts in Canva, both the simple and the all-out creative way!
The Simple Way of Highlighting Text in Canva
If you just want to highlight something quick, here are 4 simple steps to follow! This method only involves basic highlights with limited personalization such as adjusting roundness or width. However, note that this method might not work with some font combinations (The types of font with grand text effects).
Step 1: Click on the Text you want to Highlight
The first step is to select the text box you plan on highlighting. Here, you’re basically telling Canva, “Hey, I want to edit this thing!”. You can customize the heading, subheading, body text, and some font combinations.
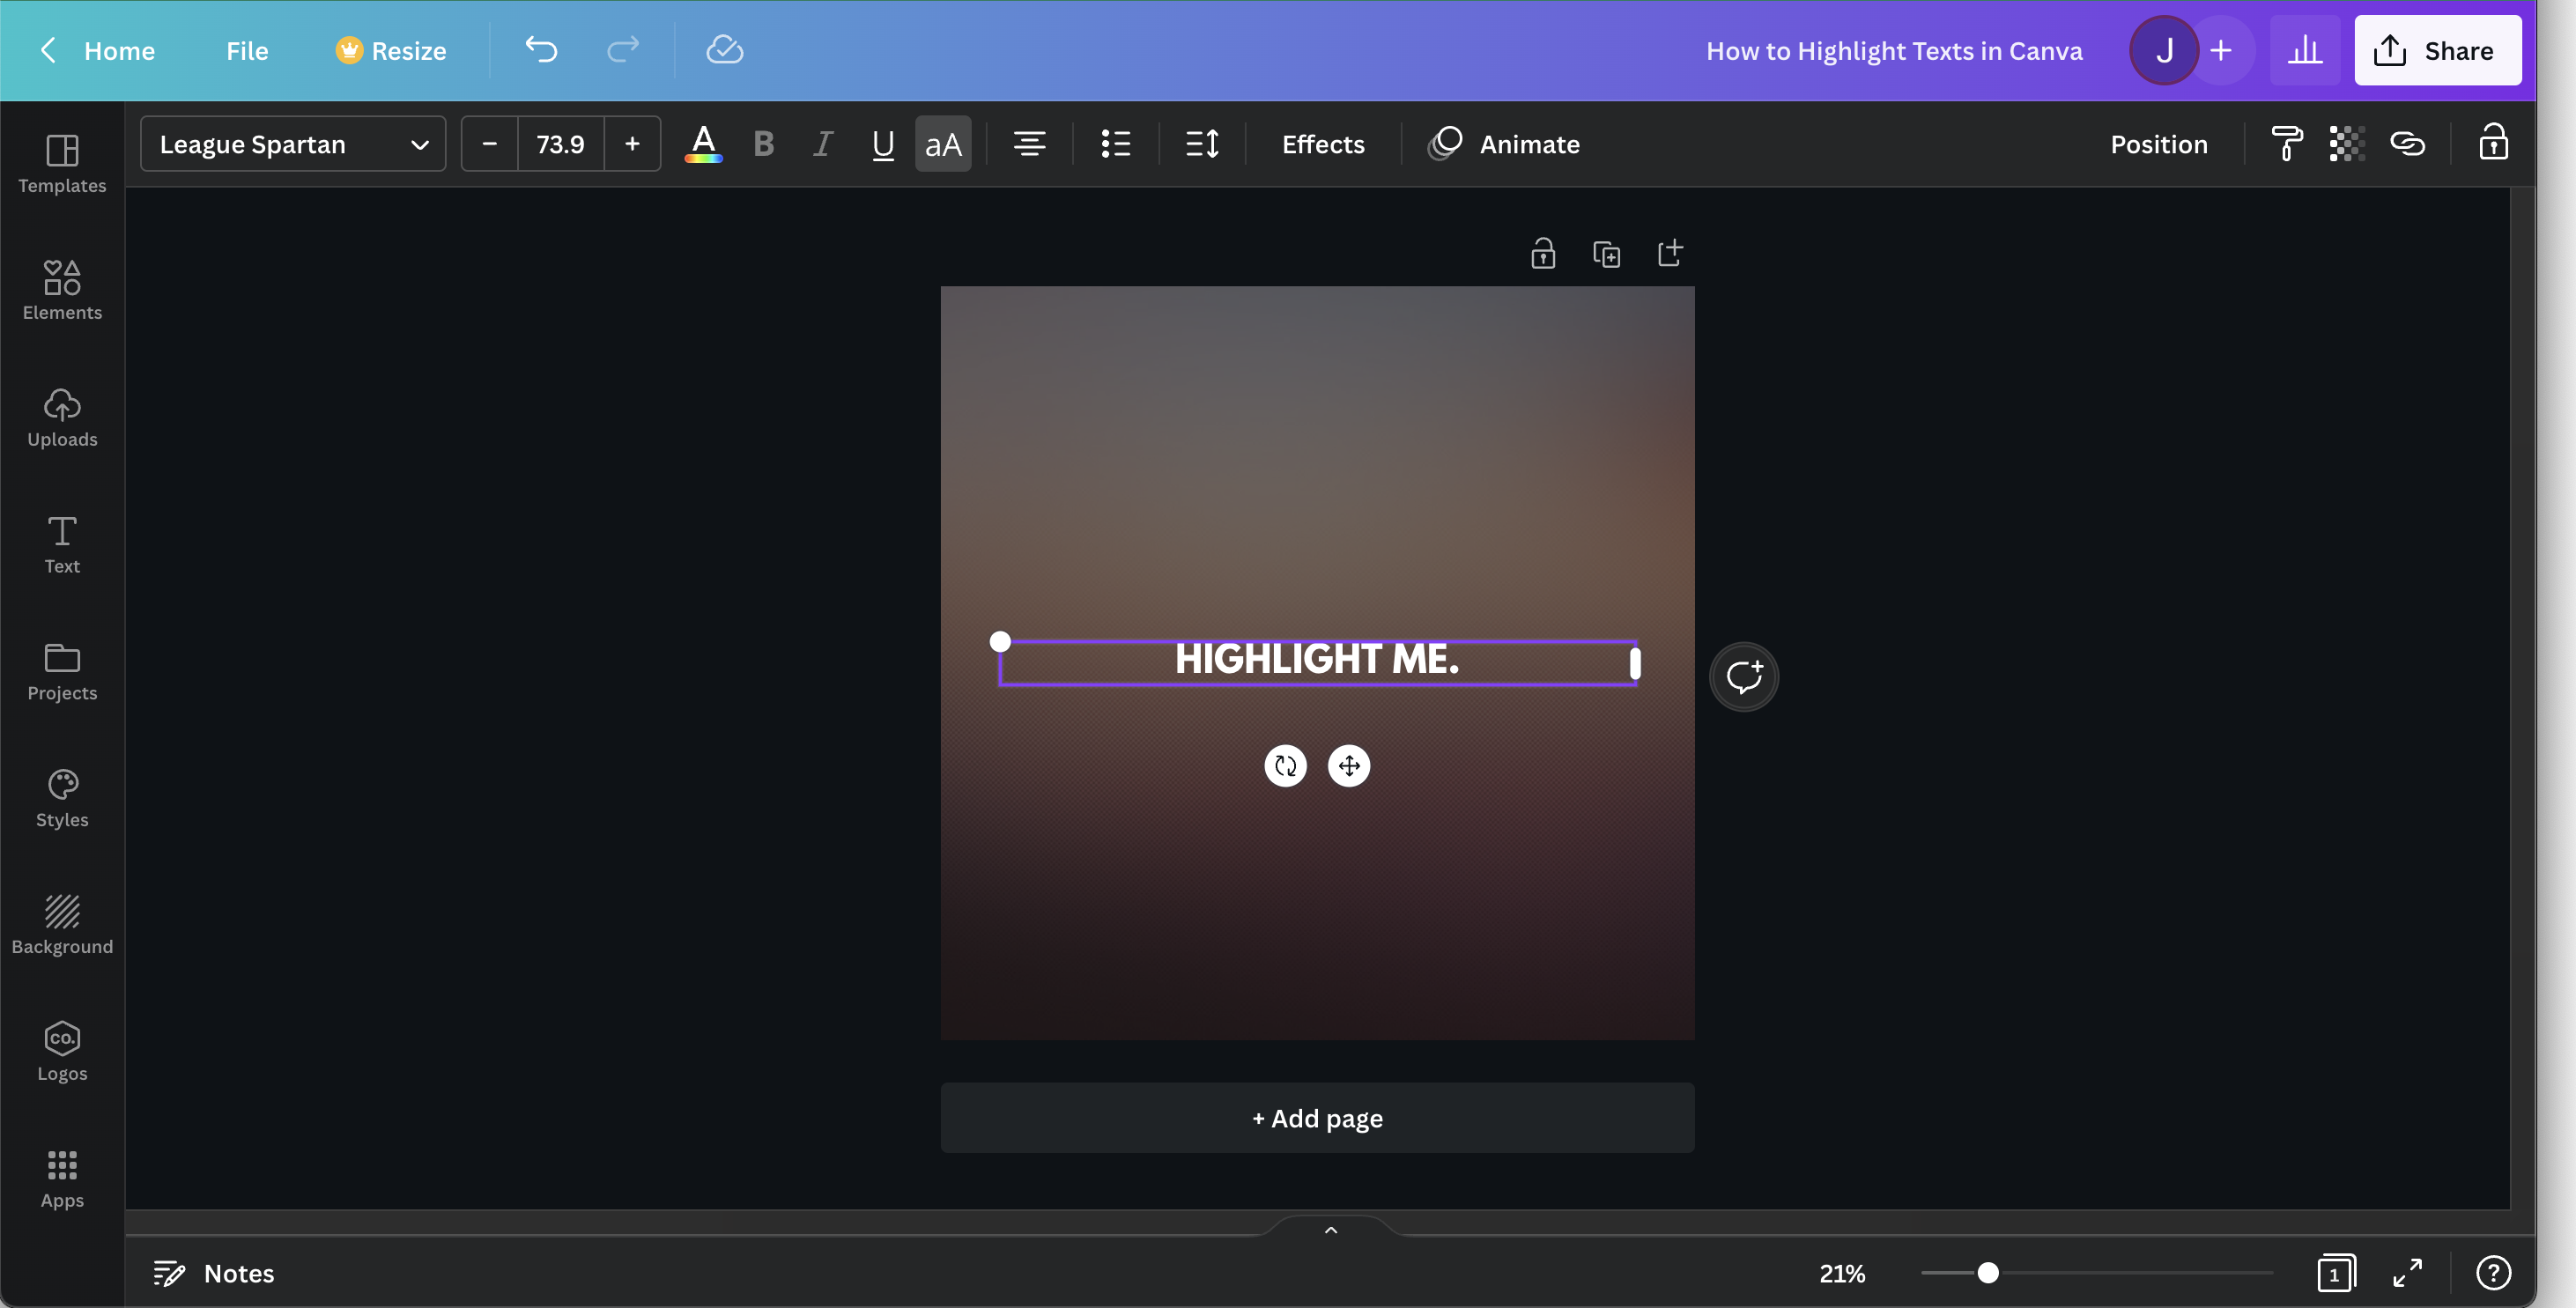
Step 2: Select “Effects” on Top
Once you're done with that, a toolbar will show up on top. On this toolbar, click on the Effects option.
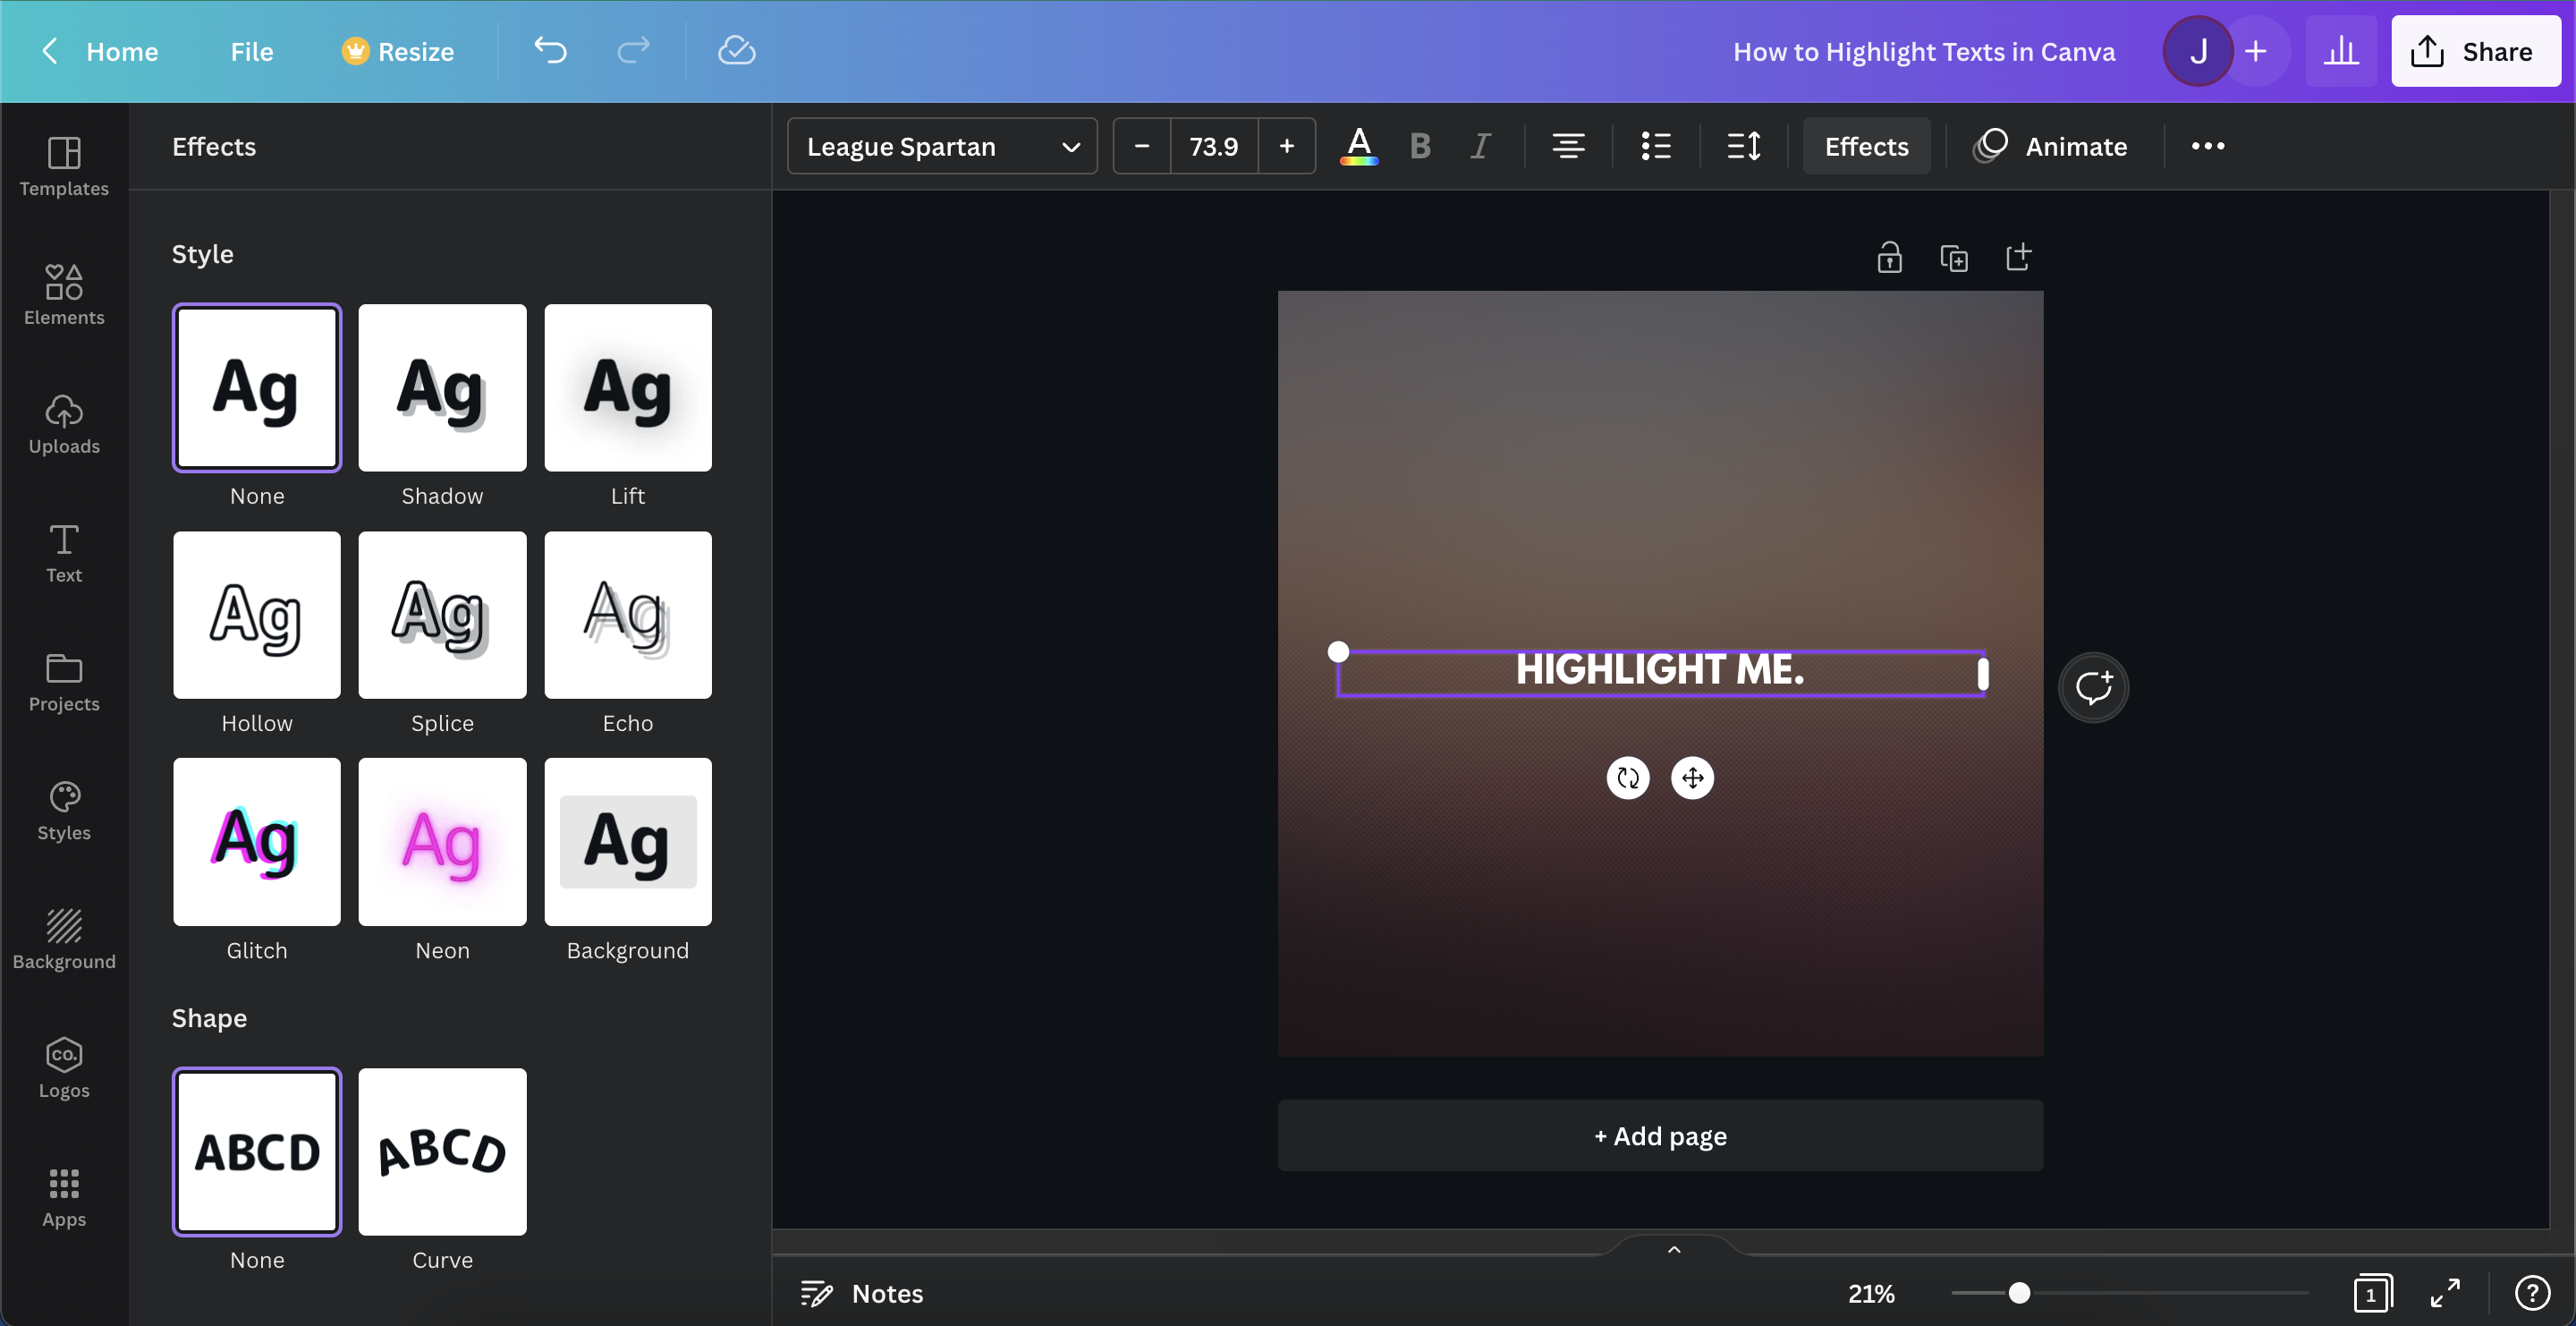
Step 3: Choose “Background” from the Style list
Clicking “Effects” will reveal a selection of styles and shapes you can choose from. Here, you have various options for changing the way the highlight looks, like roundness, spread, transparency, and even background color! Once you’re done selecting what you like and making sure everything is according to your style, click on “Background”.
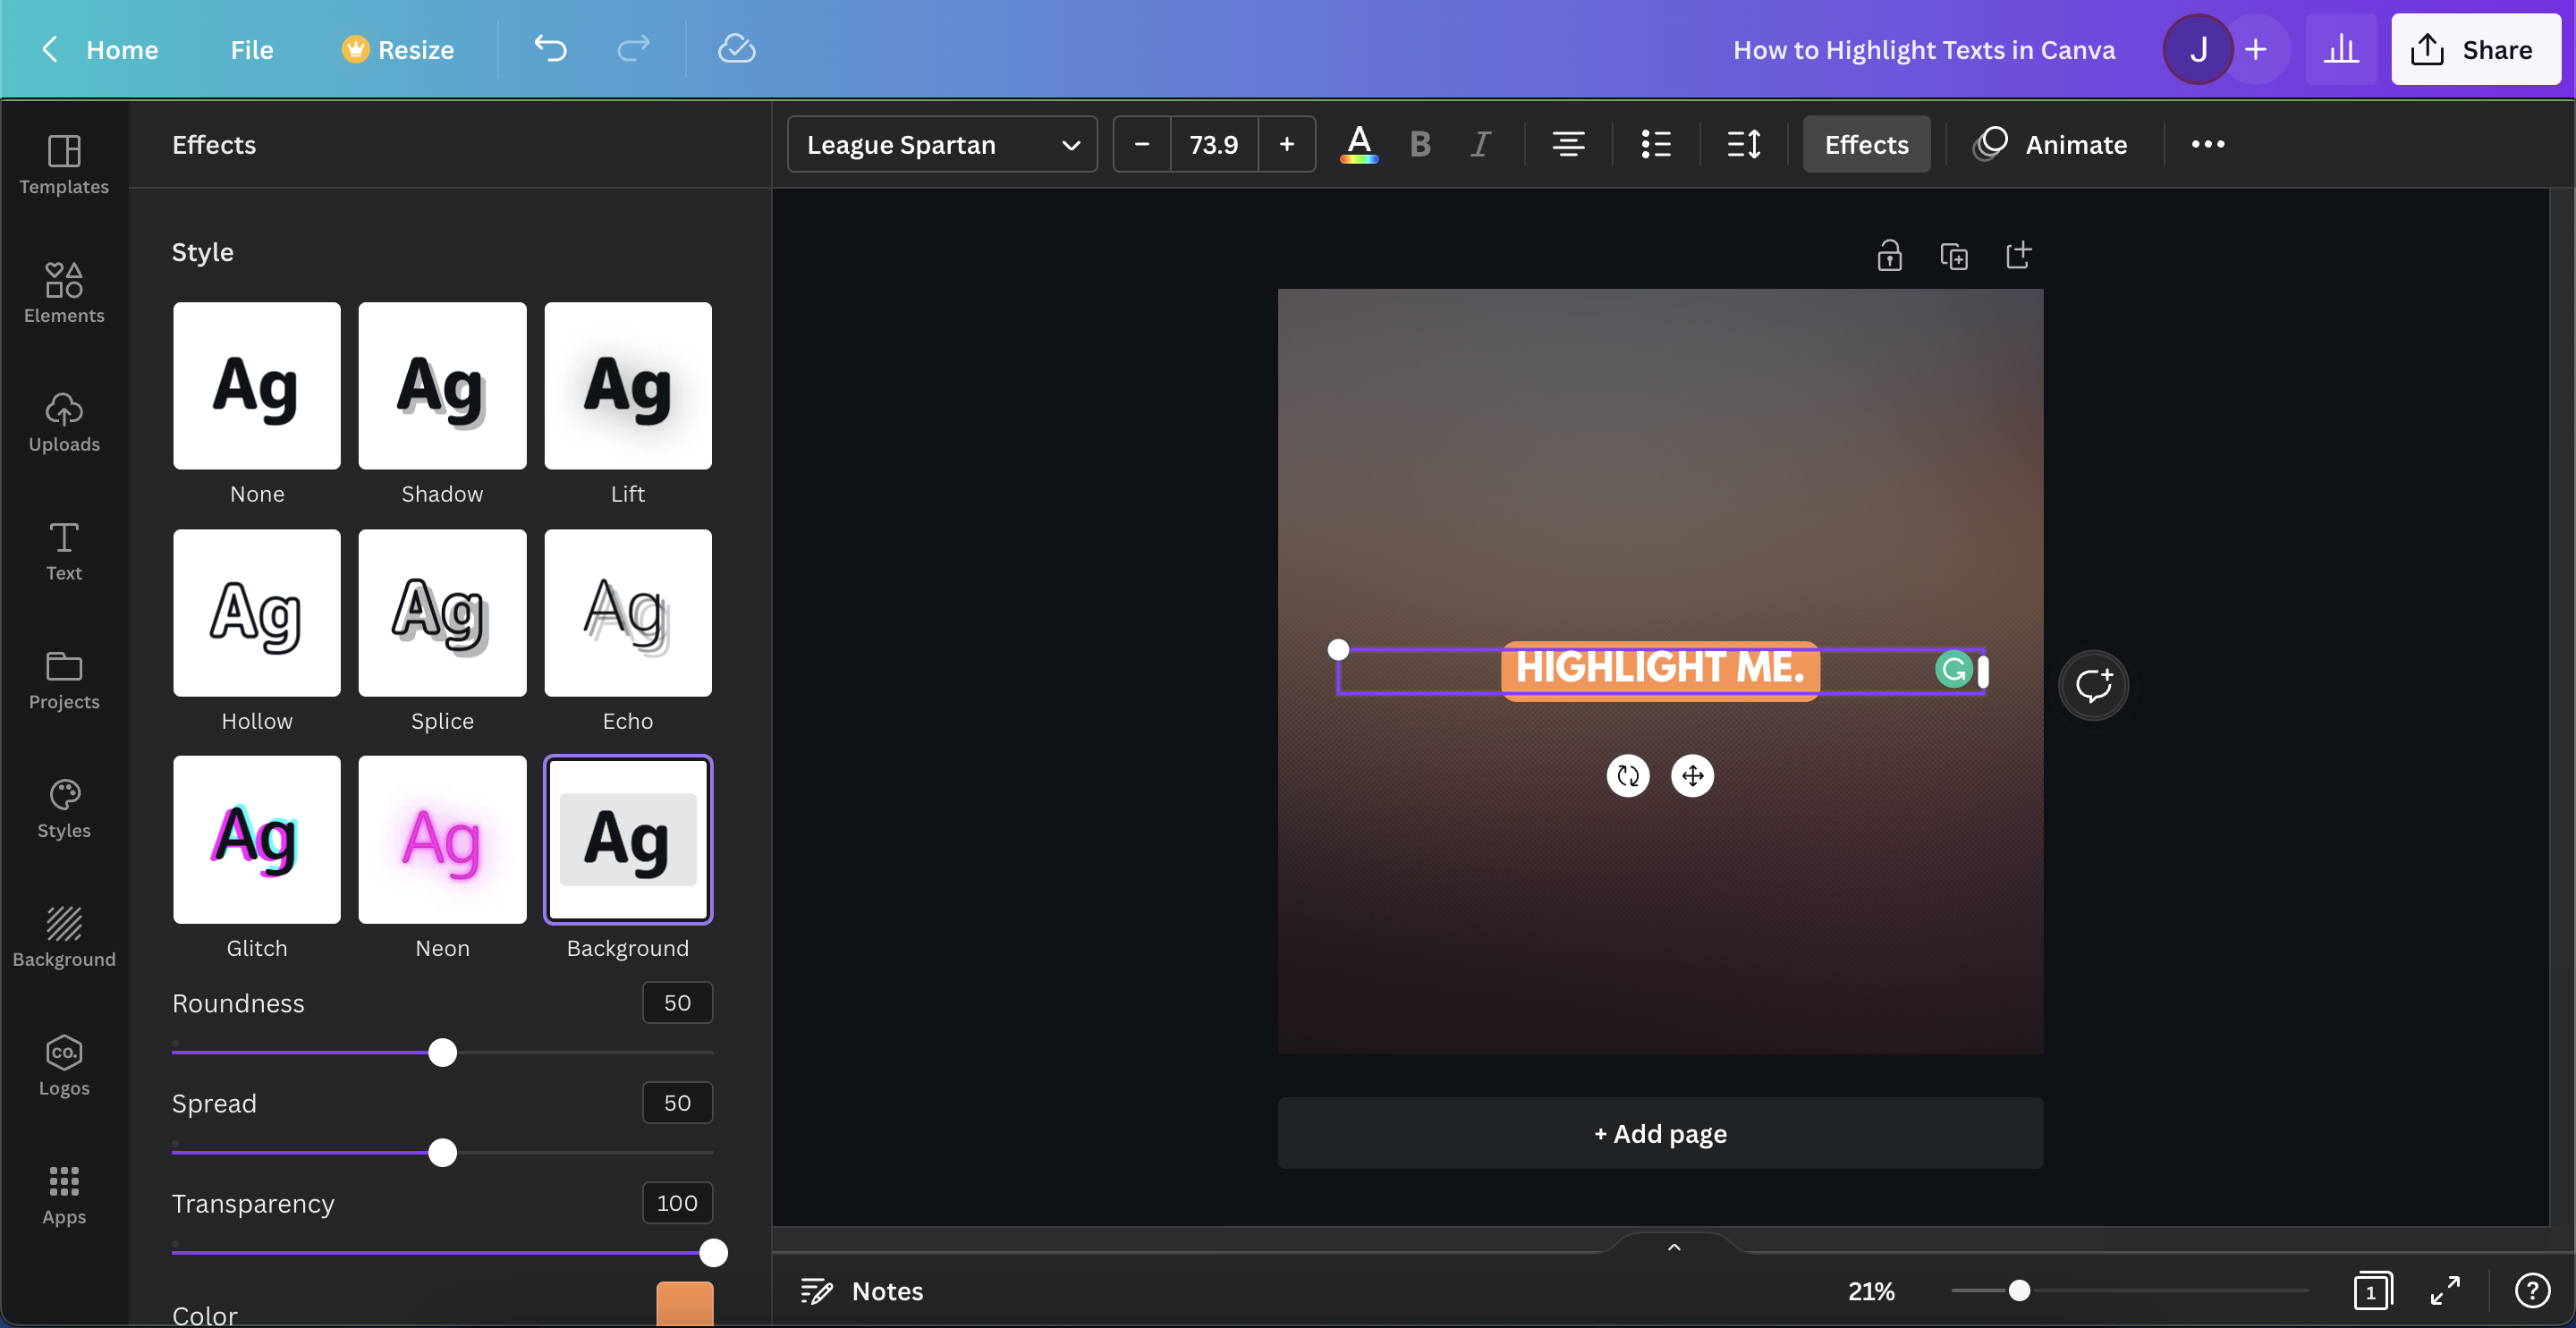
Step 4: Adjust its Design
Change the way it looks by sliding the bar for roundness, spread, and transparency!
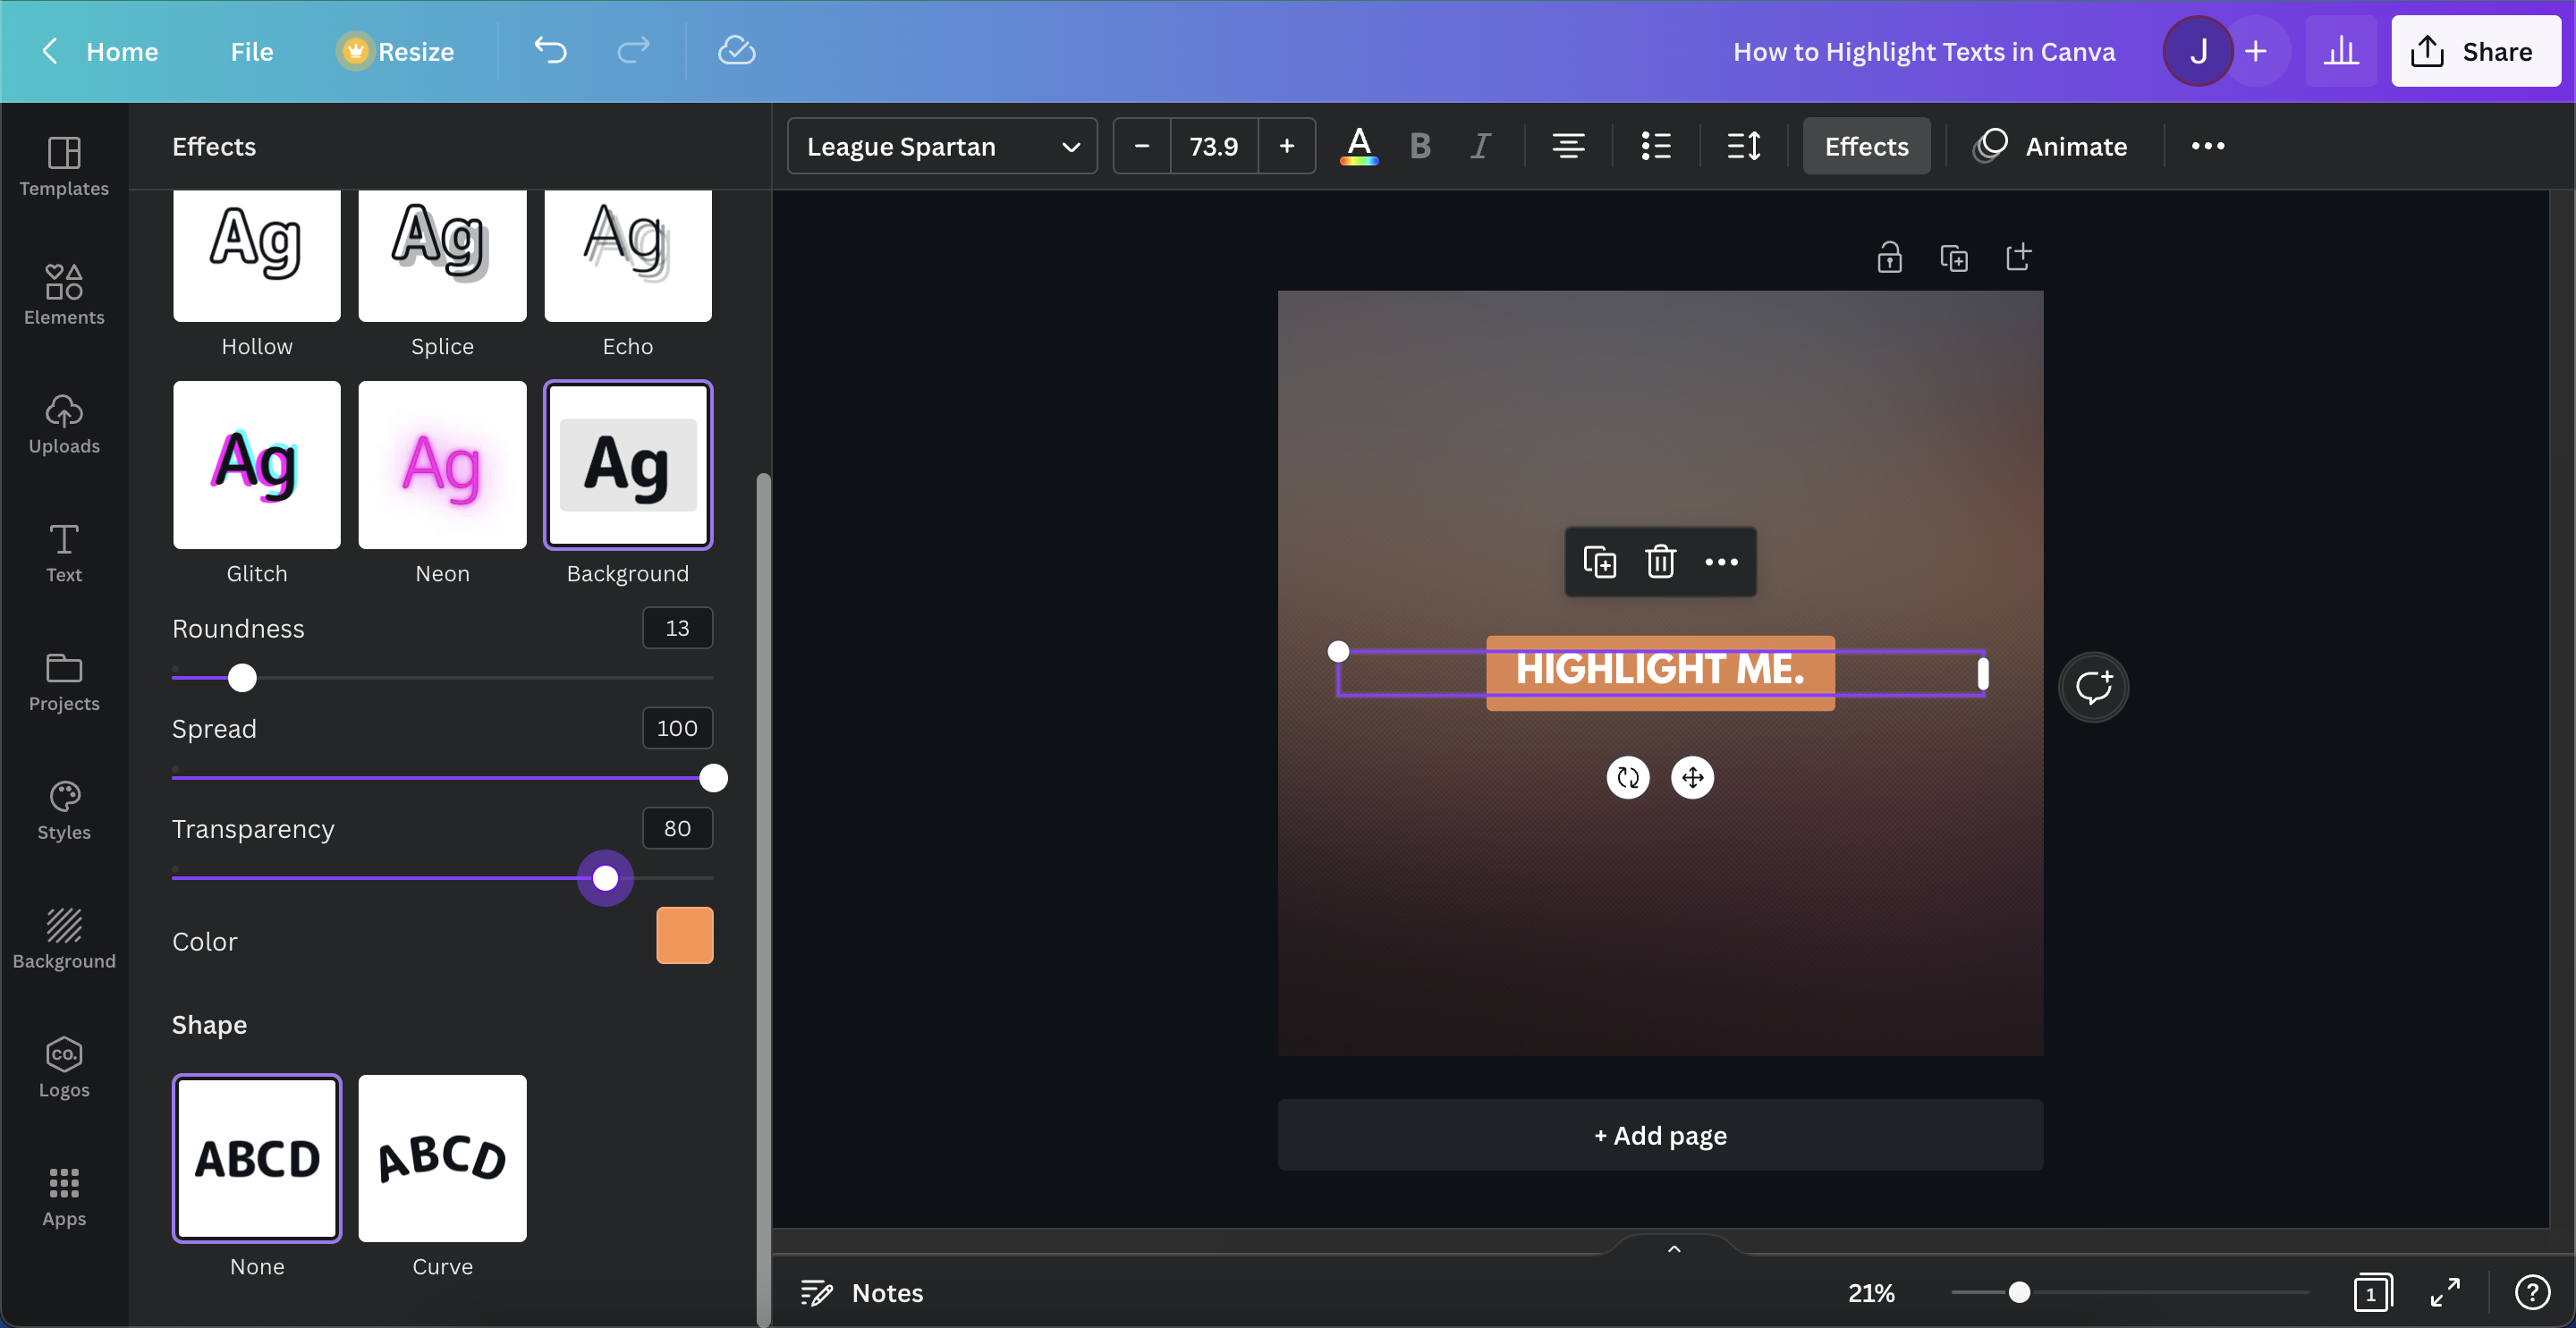
Quick tip: To remove the text highlight, follow steps 1 to 2 and choose “None” from the Styles section.
The Creative Way of Highlighting Text in Canva
Are basic text highlights not enough? This method involves more styles that might be better suited to your overall design.
Step 1: Head to “Elements” on the Sidebar
With this method, you don’t need to select your text — instead, head over to the Elements Tab on the Sidebar.
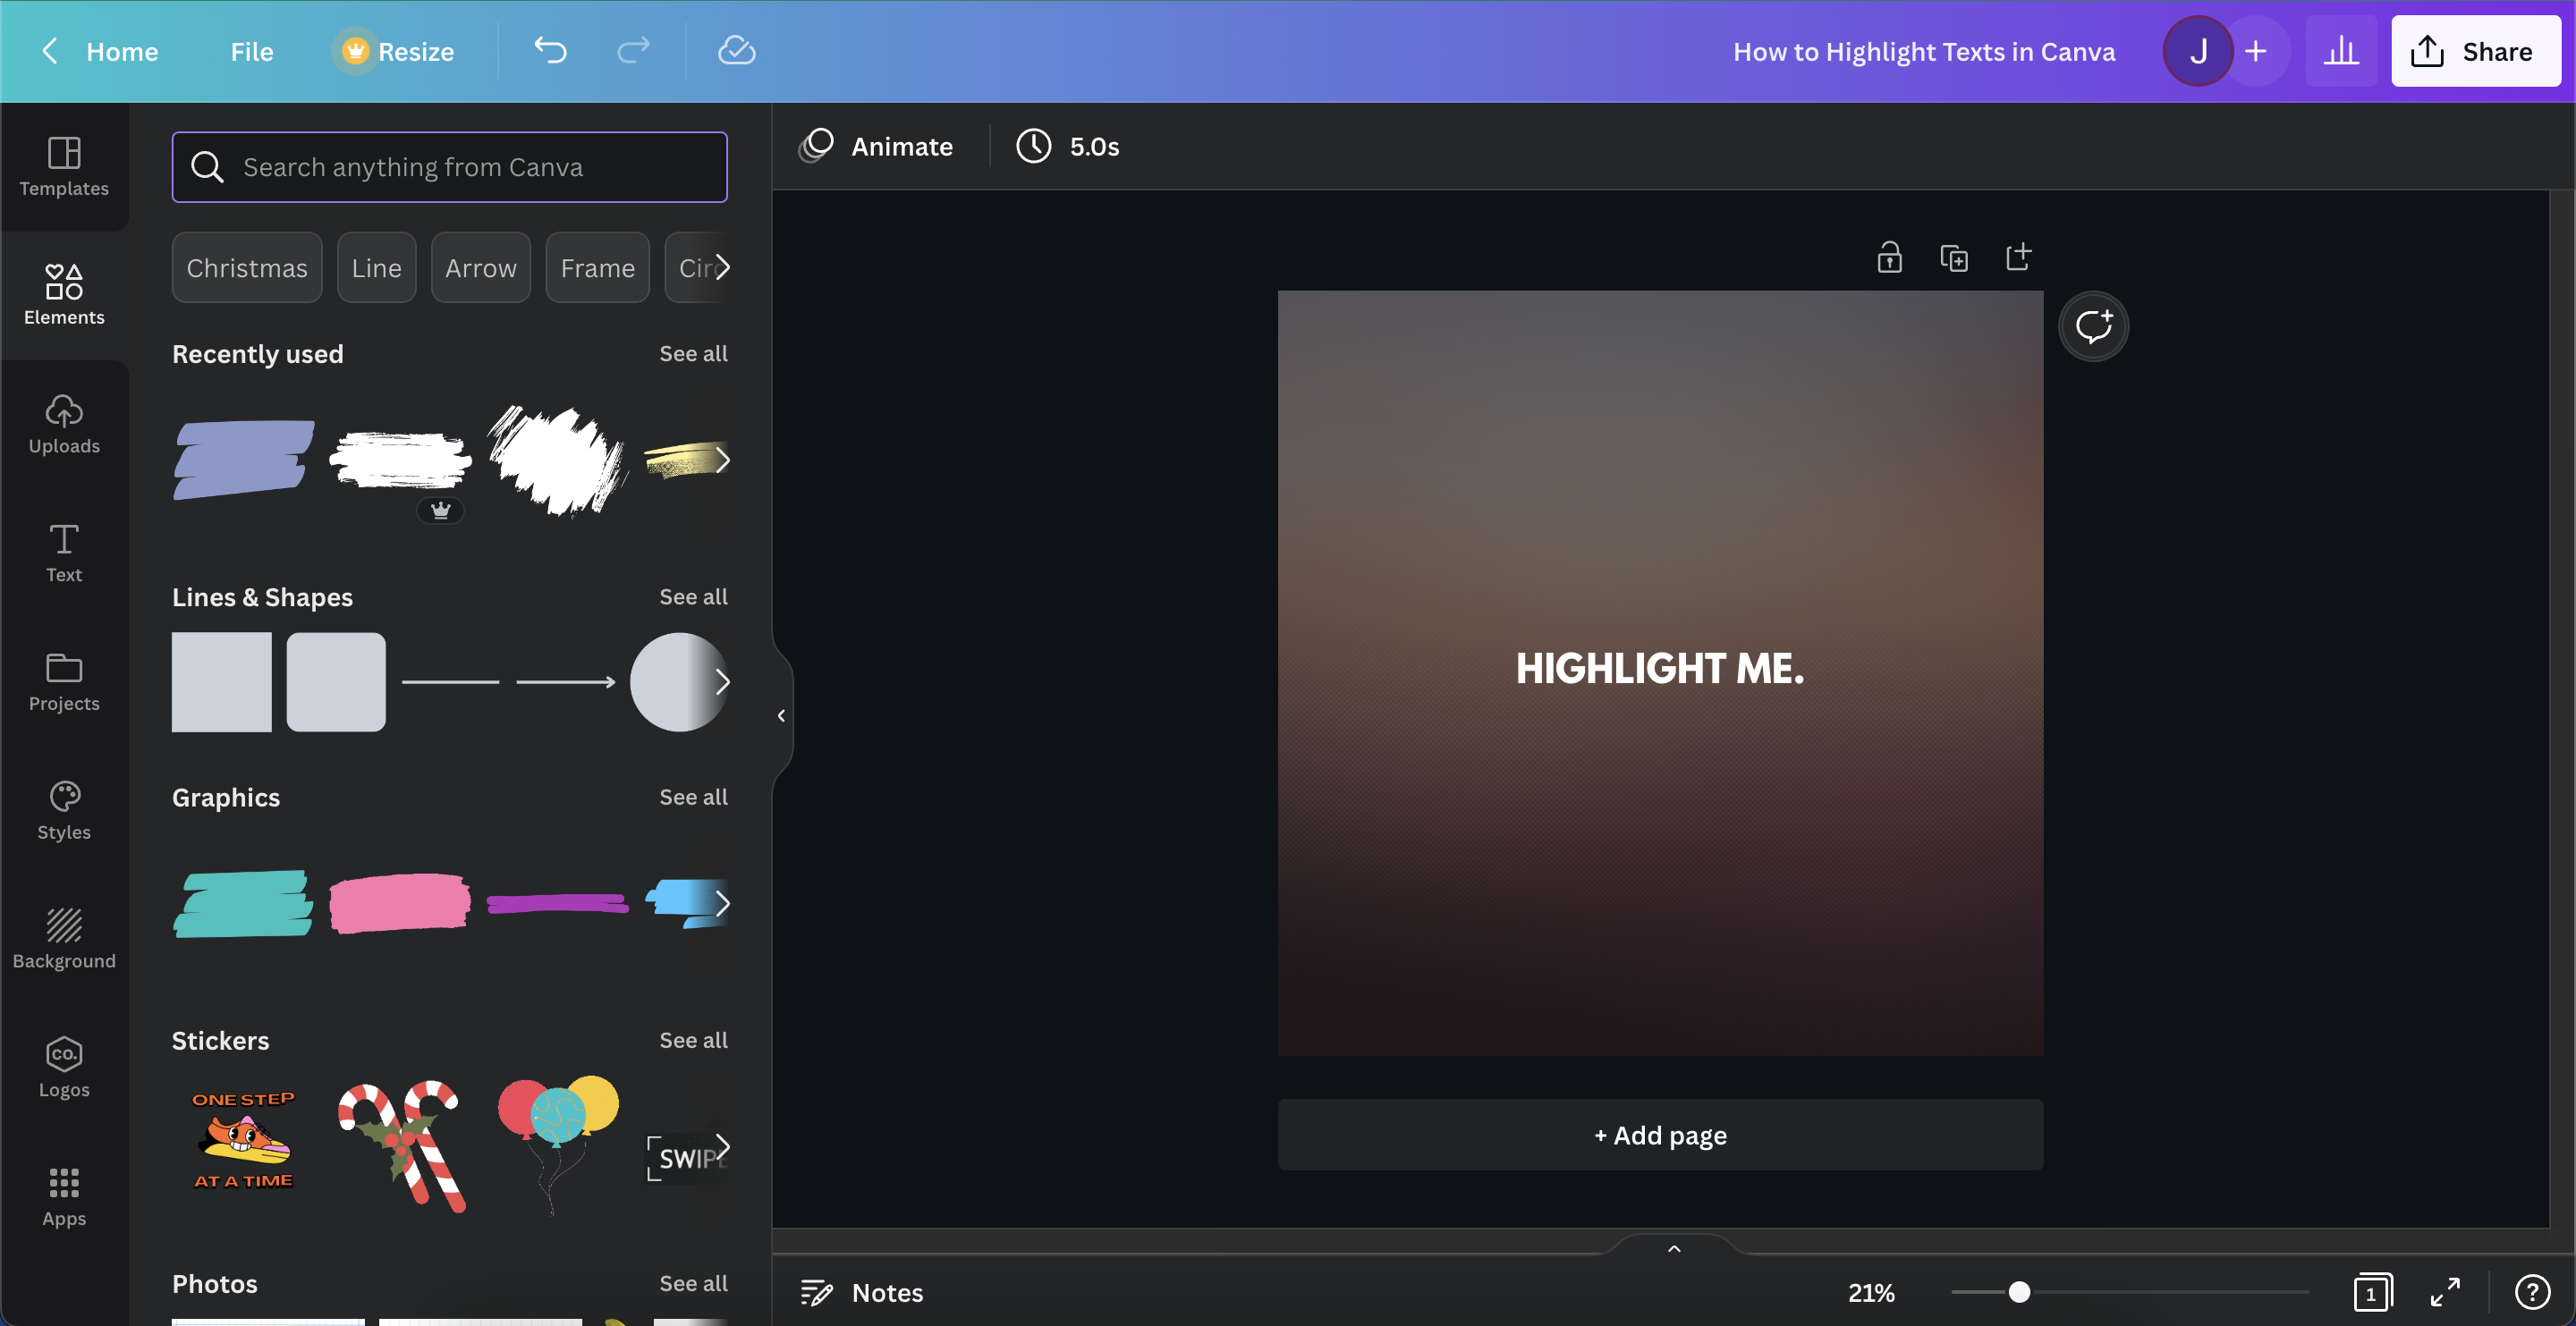
Step 2: Search for your Preferred Highlight Design
This is where you get creative! Here is where you think of highlight designs for your text. Need some ideas? Here’s what I’d recommend.
- Brush stroke
- Neon border
But if you just want a simple text highlight, then choose either the rectangle or square shape.
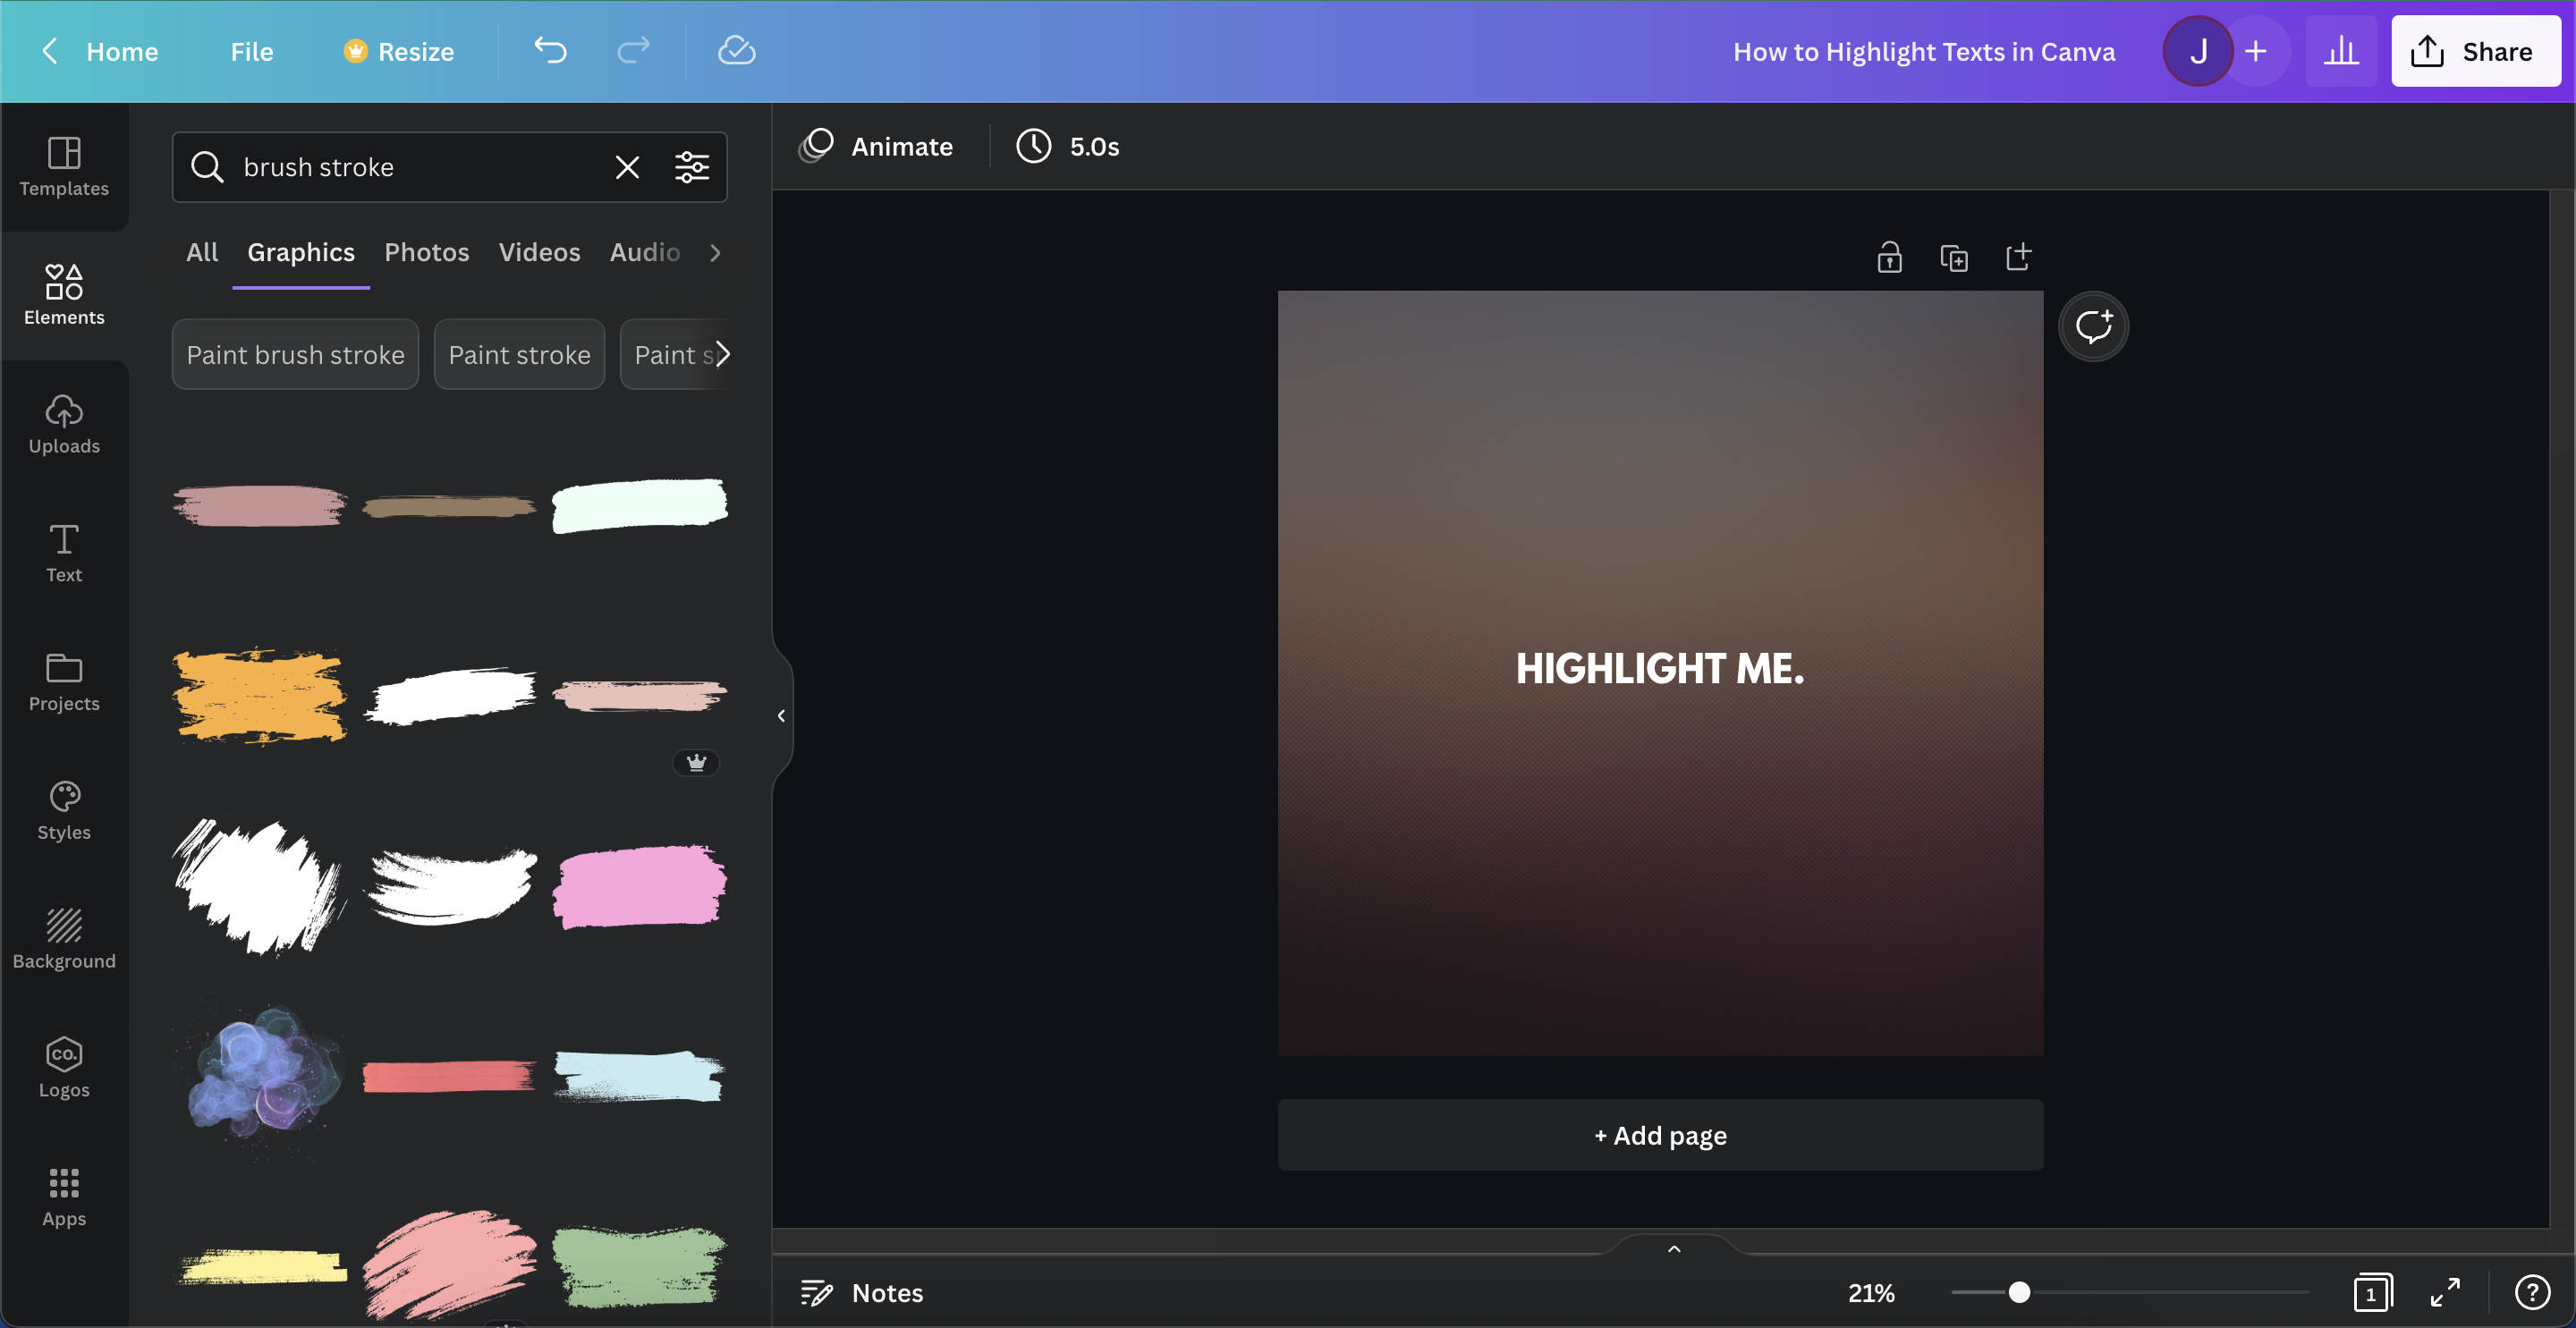
Quick tip: For better search results, select “Graphic” from the list just below the search bar.
Step 3: Adjust your Chosen Shape
Now that you’ve chosen your shape, it’s time to adjust it to your text’s size and color! Start by clicking the shape. Then, drag the nodes on any of the 4 corners. For the color of your highlight, select the shape and click the color button on the upper left side of the toolbar. You can also rotate the shape by turning the cycling arrows clockwise or counterclockwise.
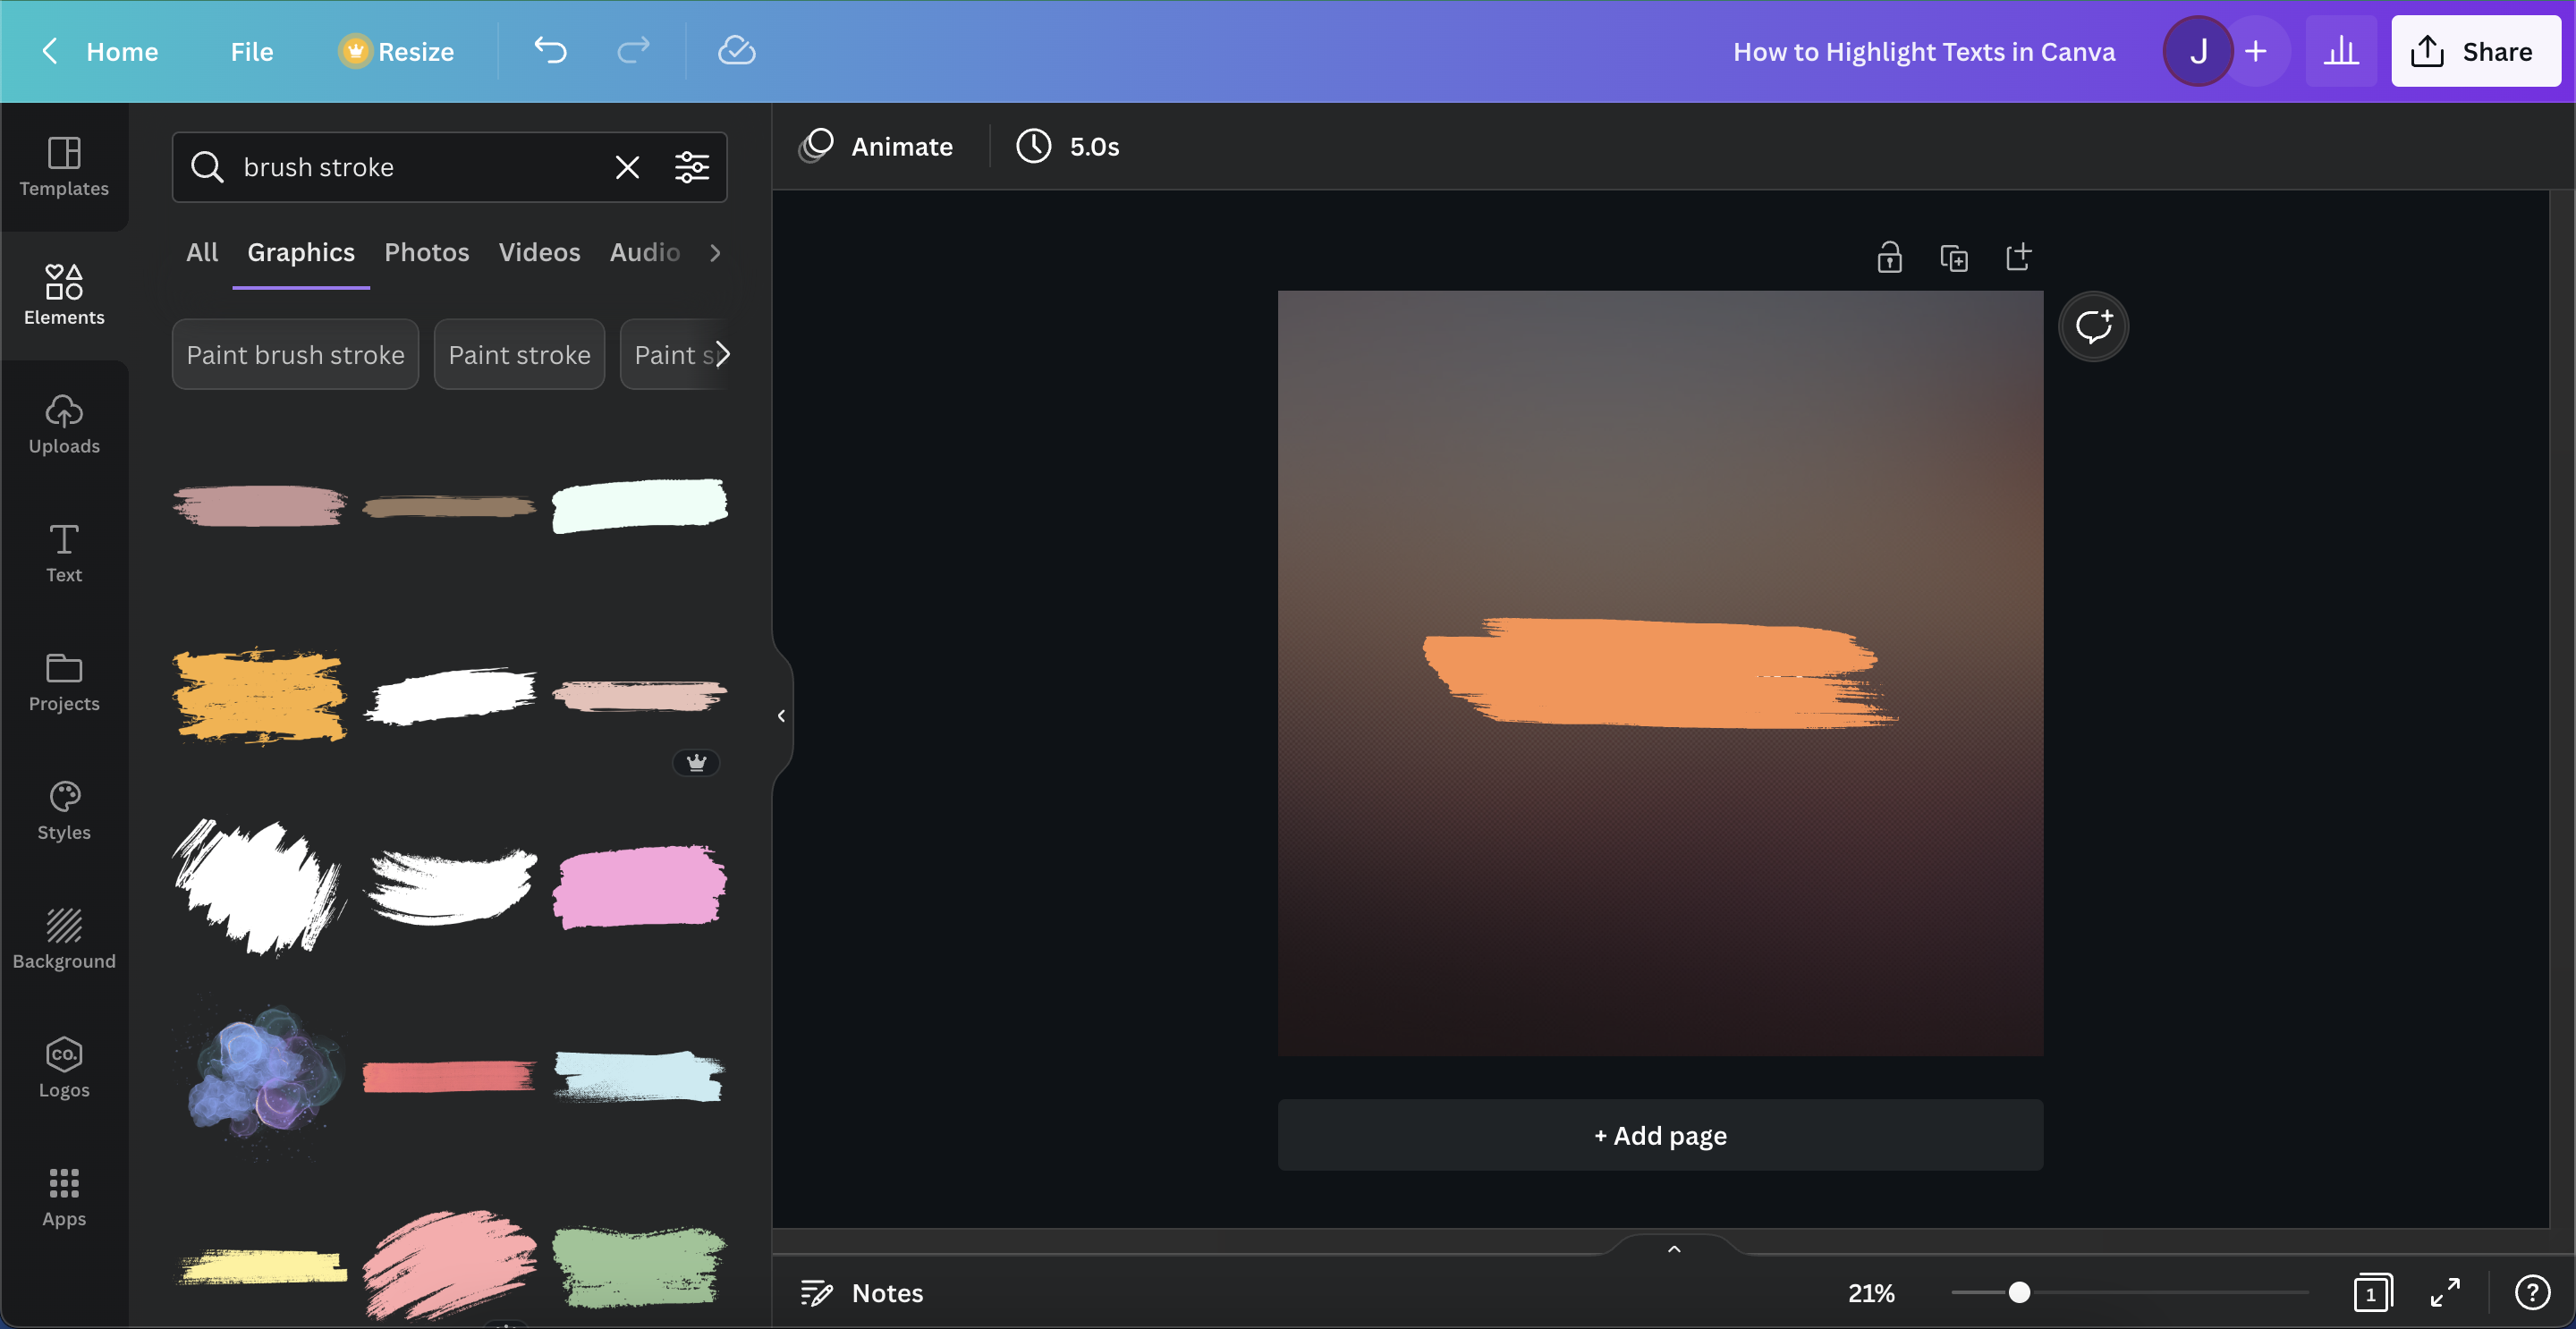
Step 4: Place it Behind Your Text
Sometimes when you drag the shape to the text, it goes over it. To solve this, you have to send it backwards. Here are 4 ways to do that:
- Right-click the shape and choose “Send backward”
- Click the shape, click the 3 dots on the newly shown pop-up, then choose “Send backward”
- Click the shape, from the toolbar on top, click Position, then choose “Backward”
- Click the shape, then (on Mac): “cmd + [“ or (on Windows): “ctrl + [“
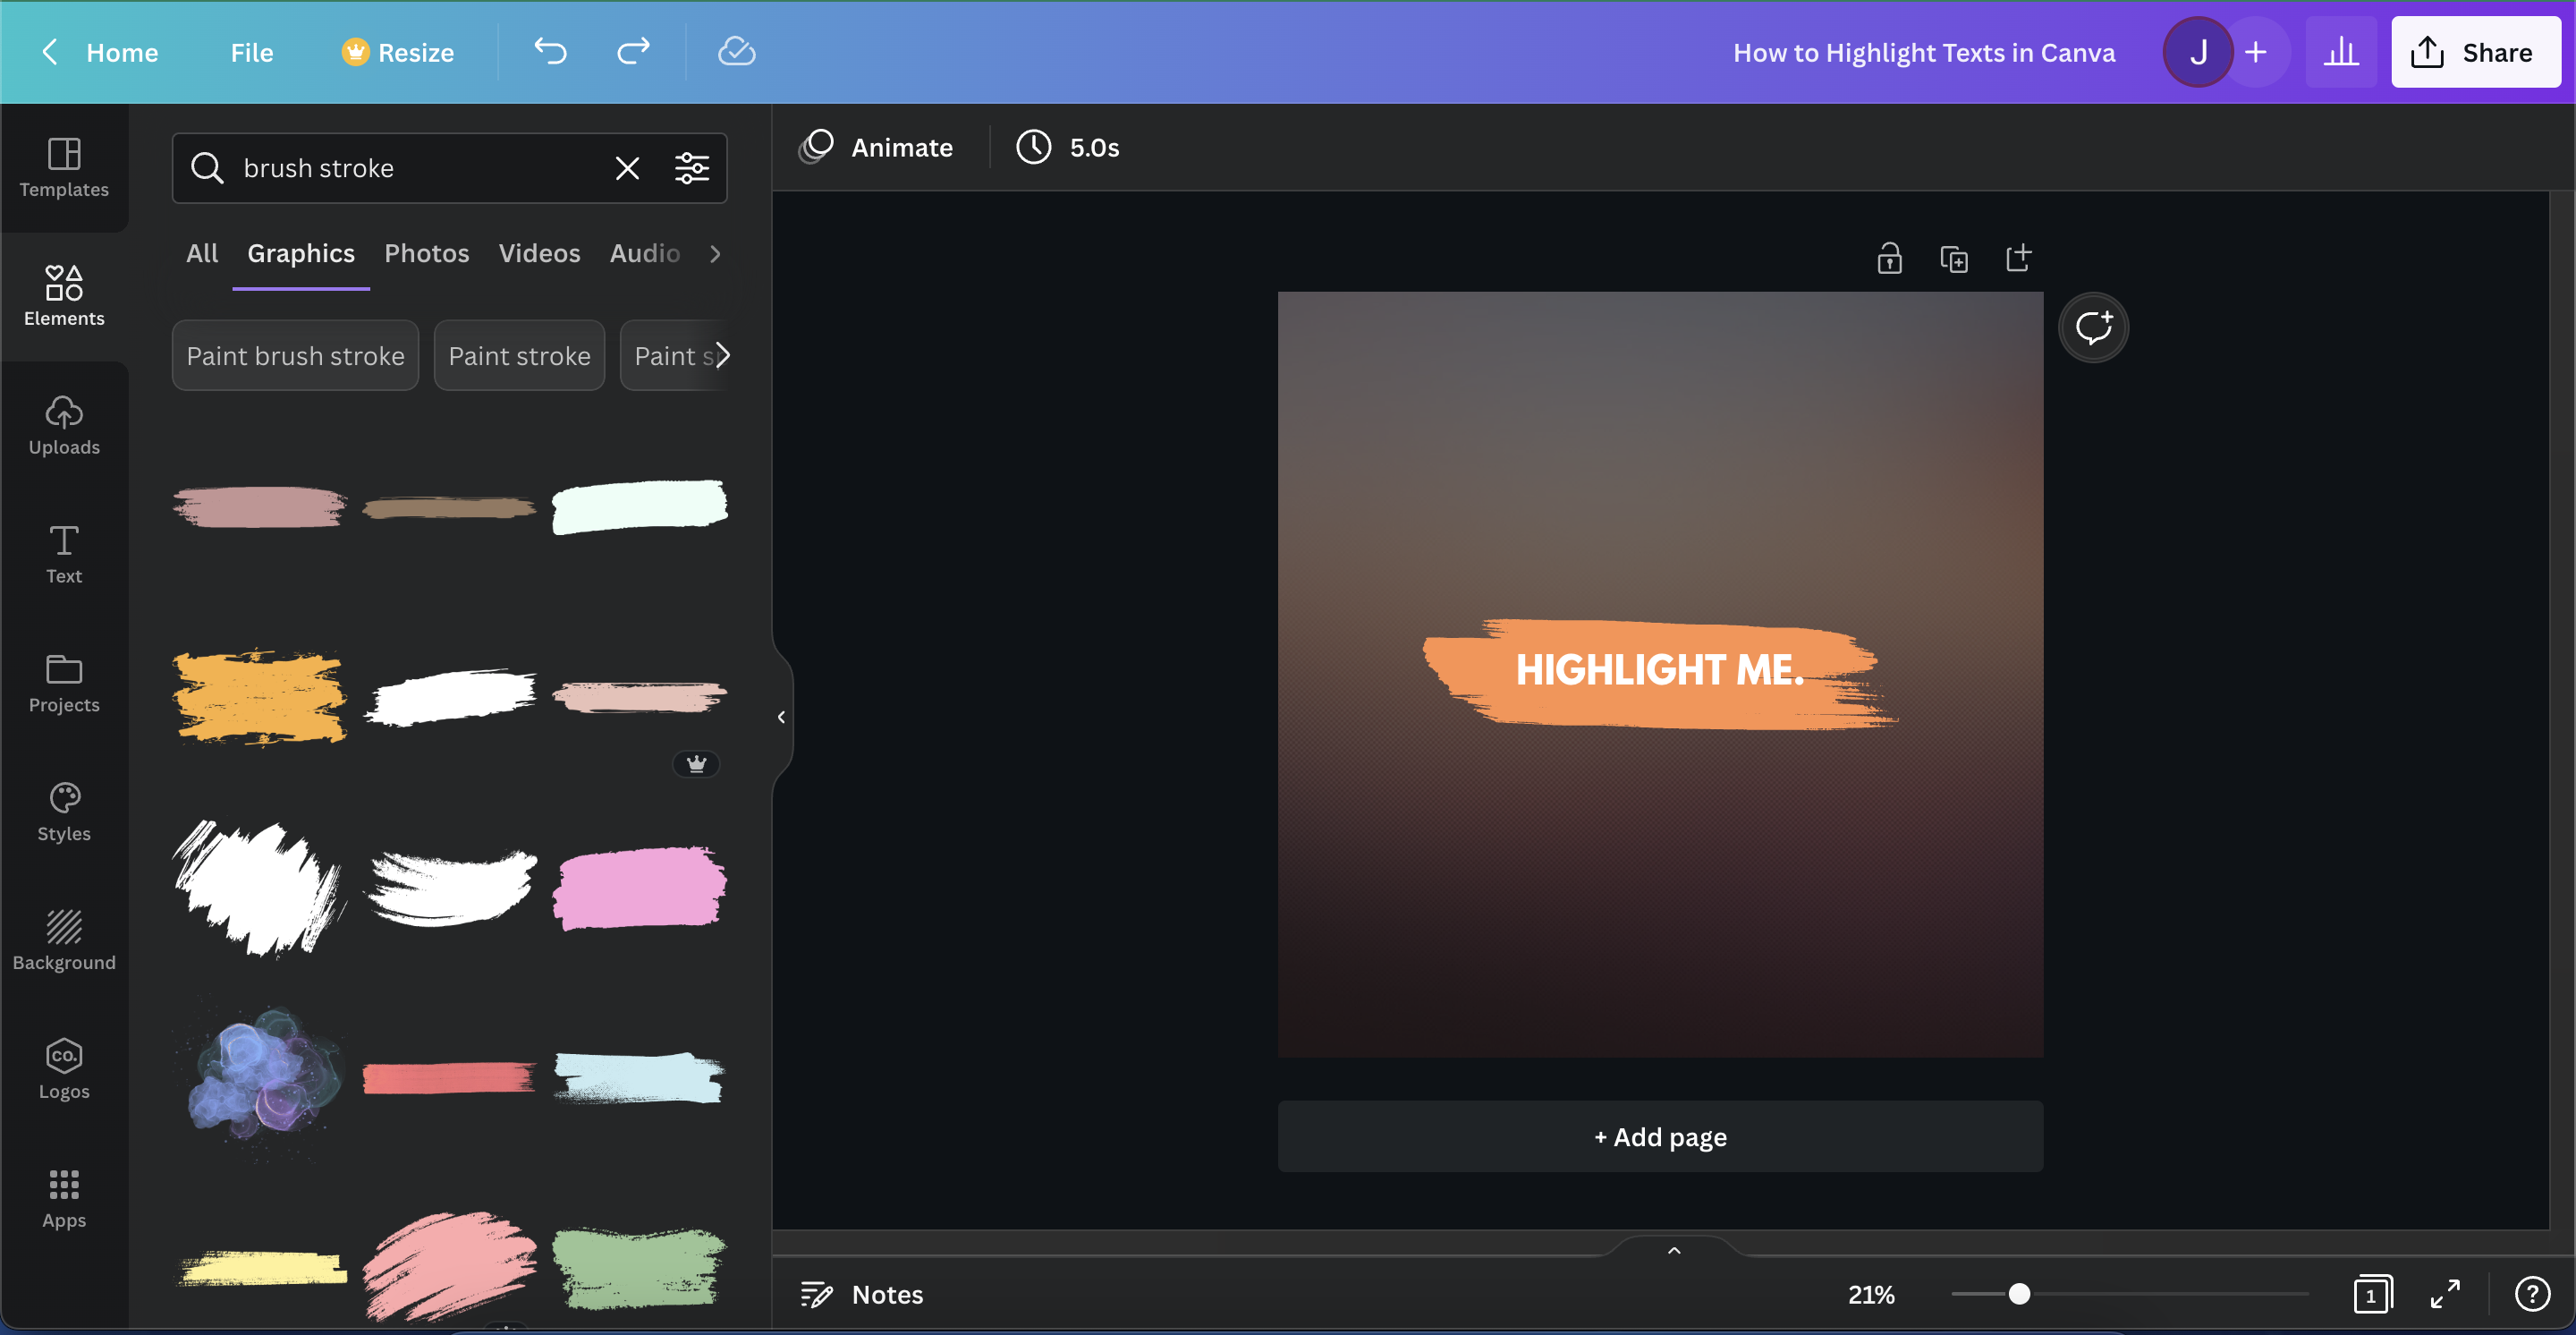
How to Highlight Specific Words from your Text in Canva
Highlighting specific texts using the simple method doesn’t work. So what do you do?
In order to highlight specific words in the Canva app, all you have to do is to follow the Creative method. And instead of sizing it for the entire text, just make it small enough for the word you want.
Checklist Summary:
The simple way.
- Select your text
- Click “Effects”
- Choose “Background”
- Adjust to your liking
The Creative Way
- Click “Elements” on the sidebar
- Search for a background highlight (ex. rectangle)
- Adjust the shape’s size and orientation
- Place it behind your text
Conclusion:
Highlighting in the Canva app is pretty easy when you know where to start. In fact, because of how flexible the tool is, there are different ways you can go about this. Canva lets you highlight texts in a simple, straightforward way and a creative way! With options to highlight only certain sections of a text when you feel like emphasizing a particular word.
Related Articles

How to animate in Canva | Texts, Images, even GIFs!

How to Blur in Canva: Photos, Texts, and Backgrounds
GPT Chatbot for Universities?

Written by Casey Botticello
Disclosure : Some of the links below are affiliate links, meaning that at no additional cost to you, I will receive a commission if you click through and make a purchase. Read our full affiliate disclosure here .
How to Highlight Text in Canva
1. select the text you want to highlight.
Select the text you want to highlight and click on the “Effects” button.

2. Choose the “Background” Option
Choose the “background” option. You can also adjust the settings for the filter.

3. To Highlight a Portion of the Text, Add a Colored Square Behind Text
If you want to highlight only a part of the text you can place square behind the text in the highlighted color.

I hope you found this tutorial covering how to highlight text in Canva , useful! Click here to read our comprehensive Canva Guide. If you haven’t tried CanvaPro, click here to try it for free for 30 days through our exclusive offer! Below are several related Canva tutorials that you might find useful.
Related Articles
Latest Posts
- March 2024 Niche Site Report
- How to Configure Your Mediavine Ad Settings to Optimize RPM
- Why Was My Blog Rejected by Mediavine?
- February 2024 Niche Site Report
- January 2024 Niche Site Report
How to Highlight Text in Canva [A 2024 Step-by-Step Guide]
Design plays a crucial role in capturing attention and conveying information effectively.
When it comes to highlighting text in designs, it is important to use eye-catching techniques that not only make the text stand out but also contribute to the overall visual appeal.
In this guide, we will explore different ways to highlight text in order to create stunning and attention-grabbing designs using Canva , a popular graphic design tool .
From bold typography to creative text effects, we will delve into the techniques that can instantly make your designs pop and leave a lasting impression on your audience.
So, if you want to learn how to highlight text in Canva , keep reading!
Note: This article contains affiliate links. When you click an affiliate link and make a purchase, we get a small compensation at no cost to you. See our Privacy Policy and Disclaimer for more info.
How to Highlight Text in Canva?
Canva offers a variety of text highlighting tools that help to make your designs stand out. You can highlight specific words or phrases by changing their color, background, or adding effects.
With Canva's text highlighting tools, you can easily create eye-catching designs that grab attention. Experiment with different text highlighting techniques to find the one that best suits your design and message.
Whether you want to draw attention to a key word with a vibrant color or create a subtle effect with a textured background, Canva's tools give you the flexibility to customize and enhance your text in unique ways.
To start learning how to highlight text in Canva graphic design tool, you need to follow the steps as highlighted below.
Create a Design
First, you either need to open your existing design or if you want to start from scratch, log in to your Canva account and click on Create a design .
If you don't have a Canva account, you can sign up for the 30 days free trial or create a free account with basic features.
When you click on Create a design , you would get some suggestions (see the below screenshot) or you can enter your design that you would like to create in the Search bar.
For example - Pinterest post, infographic, Facebook post, blog banner, YouTube thumbnail, and more .
For this tutorial, I have chosen the option - Instagram Post (Square) as shown in the below screenshot.
Choose Your Template
As you select you preferred design, you would be presented with lots of templates (both free and paid) to chose from inside the Canva Editor .
Select the template that you like. In the below screenshot, you can see that I have chosen a Instagram Post template from the left of the Canva Editor .
Also Read: How to Create Vertical Text in Canva
Text Effects
To highlight a text in your design, Canva Editor offers lots of options. Let's check them out one by one.
First, you need to select the text you want to highlight. When you select a text, a purple border will appear around your text and a text editing menu bar will appear on the top.
The first option - Effects , can help you highlight your text dramatically.
As you click on Effects , you get lots of different styles to chose from on the left. For example, I have chosen the Outline effects to the highlight the text in my post.
If you compare the image on the top of this paragraph with the image given below, you can see that the selected text - Diwali , has taken the effect of the style - Outline .
If you want, you can also change the background color the selected text. In the above screenshot, you can see the Background effect under the Color option.
To apply the background effect, keep your text selected and click on the Background from the left (see the below screenshot).
As you click on it, the selected text will now have a background color around it (see the above screenshot).
Plus, you also get three sliders ( Roundness , Spread , and Transparency ) and a Color options box below the Background button.
- Roundness: By default the slider is set to 50. You can move the slider to the left or right to increase or decrease the roundness of the edges of the background of your highlighted text.
- Spread: This one is also by default set to 50. As in the case of Roundness , you can also move this slider to the left or right to increase or decrease the distance of the background from the text.
- Transparency: By default the value is set to 100. You can increase or decrease the opacity of the highlighted area by moving the slider.
If you again see the screenshot I have added above, you would observe a fourth option - Color . If you don't like the default color, you can change the background color by selecting this option.
When you click on it, the color options panel will open. Now, as you select any color, the background color of your highlighted text will automatically change.
Font Color and Style
If you wish, you can also change the font color, size and style of your highlighted text in Canva.
To apply any of these options, you again need to select your text which will cause a text editing menu bar to appear.
For example, if you change the font style of your highlighted text, click on the text. As seen in the below screenshot, a menu bar will appear.
From the menu bar, select the font style of your choice. You can also change the font size of your text.
Similarly, if you want to change the color your text, click on the color options as shown below. It will open a color panel from where you can select color of your choice.
If you don't like the color in the sample color offered, you can click on the square box with the rainbow outline below the Document colors (see the above screenshot).
A color picker will open from where you can select any color of your choice. If you find it difficult to find a color of your choice, you can try this free tool - Coolors.co . It offers lots of color templates with color hex codes that will surely help you find your perfect color.
Download Highlighted Text in Canva
After you've finished highlighting your text in Canva, it's time to download it in your preferred format.
To download any design, you need to click on the Share button at the top right.
From here, you have the option to share your design with your team members, share on social media, or download it in formats like PNG, JPG, PNG Standard, or PDF Print.
That's it, now you know how to highlight text in Canva.
Also Read: Best SEO Affiliate Programs
Why Should You Highlight Text in Canva?
Text highlighting in design serves the important purpose of drawing attention to key information.
By highlighting specific words or phrases, you can make them stand out and catch the viewers' eye . This technique not only helps to enhance the visual appeal of your design but also aids in improving readability.
By breaking up large blocks of text with highlighted elements, you make it easier for readers to skim through the content and quickly find the information they need.
Incorporating text highlighting techniques can make your designs more engaging and visually appealing.
Grabbing Attention with Bold Typography
Bold typography can be a powerful tool when it comes to highlighting text in your design. By using bold fonts, you can effectively emphasize important words or phrases, making them stand out from the rest of the content.
This technique not only adds contrast and hierarchy to your design but also creates a focal point that guides the viewer's eye towards specific areas.
By using bold typography sparingly, you can add visual interest and make your design more impactful. It's important to strike the right balance to avoid overwhelming the viewer, but when done correctly, bold typography can truly make a statement in your design.
Creating Hierarchy and Visual Flow
Highlighting text in your designs allows you to create a clear hierarchy , guiding the viewer's eye from one element to another.
By using different font sizes, weights, and colors, you can establish a visual flow that leads the viewer through the content in a logical order. This helps to make your designs more organized and visually balanced.
Creating a visual hierarchy also makes it easier for viewers to understand the importance of different elements in your design.
By effectively using text highlighting techniques, you can ensure that key information stands out and catches the viewers' attention.
Frequently Asked Questions (FAQs)
Q1. Can I customize the highlight color in Canva?
Answer. Yes, you can customize the highlight color in Canva. After selecting the text and choosing a text element that supports highlighting, you can use the color picker to select a specific highlight color or choose from the pre-set highlight options.
Q2. Can I highlight multiple sections of text in Canva?
Answer. Yes, you can highlight multiple sections of text in Canva. Simply select each section of text individually and apply the highlight color using the same steps mentioned earlier.
Q3. Can I highlight text in Canva on mobile devices?
Answer. If you're using the Canva mobile app, you can certainly highlight text in your design. The process is similar to the desktop version. Select the text, access the text options, and choose a text element that supports highlighting. Then, apply the desired highlight color.
Q4. Can I print or download designs with highlighted text in Canva?
Answer. Yes, you can print or download designs with highlighted text in Canva. The highlight color will be retained in the final output, whether it's a printed document or a downloaded file in various formats like PDF or image formats.
Q5. Can I try Canva for free?
Answer. Yes, you can either join the free plan which offers basic features or sign up for the 30-days free trial that allows you to try premium features for free for 30 days.
Wrapping Up
Creating eye-catching designs in Canva can be achieved by effectively highlighting text.
Understanding the importance of text highlighting is key, as it allows you to grab attention with bold typography and create hierarchy and visual flow in your designs.
By utilizing Canva's text highlighting tools, such as color and contrast, you can make your text stand out and create a visually appealing composition.
I hope this tutorial has helped you learn how to highlight text in Canva and some other very cool features. Get started with Canva today using the link below.
If you have liked this tutorial, please share it with your friends on social media.
Related Posts
- 5 Best Graphic Design Software of 2024 (Both Free and Paid)
- 7 Best Aesthetic Fonts on Google Docs [Updated 2024]
- How to Paste Without Formatting in Google Docs [A 2024 Guide]
- How to Convert a Table to Text in MS Word in 2 Easy Steps
- How to Create Ebooks Using Automateed in 2 Easy Steps
- How to Make a Hanging Indent on Canva [An Easy 2024 Guide]
Deepak Choudhary
7 Best Cat Affiliate Programs of 2024 [Best Offers]
How to create vertical text in canva [a 2024 step-by-step guide].

How to Use Canva Presentations
Make visually appealing presentations that'll stand out among others using Canva.

Canva, a graphic design platform, is gaining a lot of traction as a design tool. Its basic premise – it’s just as easy to use for non-designers. You don’t need to be an expert in graphic designing to use Canva, and that is one of the main reasons behind its popularity.
With design becoming one of the hottest commodities for just about every field, Canva makes it accessible to everyone. Whether you’re an entrepreneur, a marketer, influencer, or a blogger, you can use Canva to make fetching content for social media, posters, graphics, design your own business cards even. If you’ve got even a little eye for design, Canva can help you cut down on the costs of hiring professional designers.
But did you know you can also use it to make just as engaging and stimulating presentations? Whether you want to make presentations for a professional environment or personal use (like a birthday surprise), Canva Presentations have got you covered. Let’s dive right into it!
Getting Started
Canva offers a web app you can immediately start using on your desktop without having to download anything. Unfortunately, the web app is your only option as there is no desktop app. So you need an internet connection to work with Canva as it stores all your work on its servers.
Canva also has a mobile app for iPhone and Android, which you can use on the go. But when getting started, using the web app is the best course of action.
Go to canva.com and create a free account. Click the ‘Sign Up’ button to create a new account.

You can sign up with your Google account, Facebook account, or your email address.

Canva has a freemium structure, so you can use it for free with limited features or get a Pro or Enterprise subscription for complete access. It also offers a 30-day free trial to its Pro features, so you can try it out before deciding whether you want to convert to a paid user.
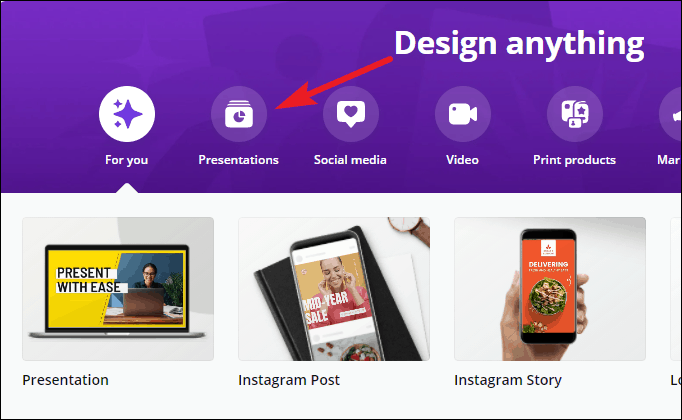
Now, from the Canva home page, click the ‘Presentations’ button under the Design anything banner. If you can’t find the option, you can also search for ‘Presentation’ from the search bar.
There are plenty of size options to choose from when creating a presentation. Let’s stick with the standard size ‘1920 x 1080 px’ here.

One of the things that makes Canva so easy to use for everyone is the sheer number of templates. The assortment of templates in existence ensures that you’ll find something to match your needs. But if not, you can also start with a blank slate and create your presentation from scratch.
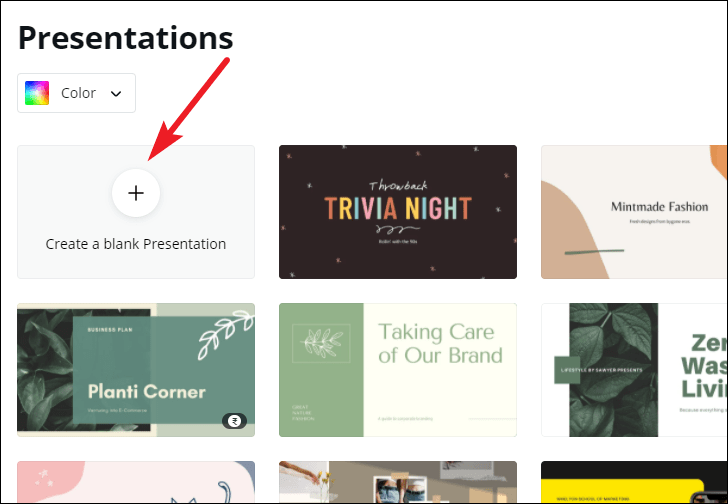
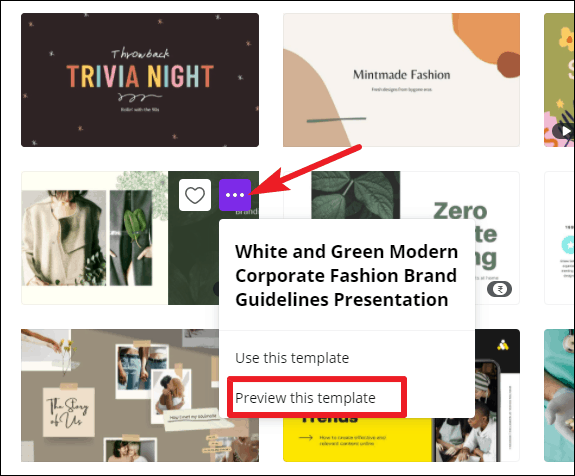
For this guide, we are selecting a template for the presentation. Before selecting a template, you can see what it has to offer by clicking the three-dot menu and selecting ‘Preview this template’.
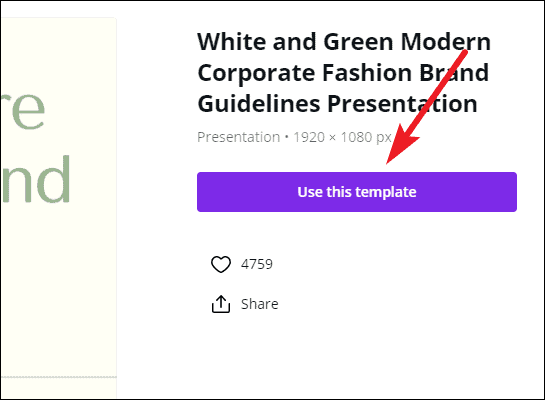
Click ‘Use this template’ to select the template if you like it or go back and select another.
Editing the Presentation
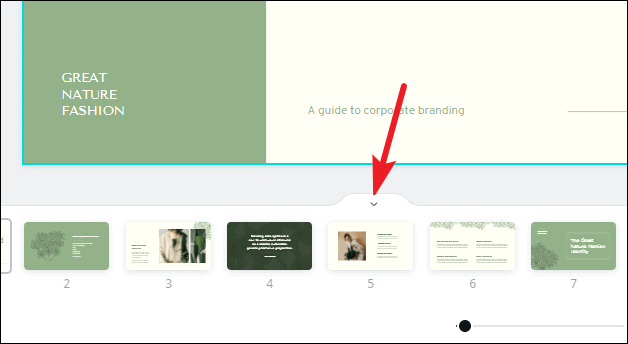
The template will load into the editing interface. Canva has an eerily easy editing interface. Let’s navigate the interface first. Below the slide is the thumbnail view where you can see all the slides in thumbnails side by side.
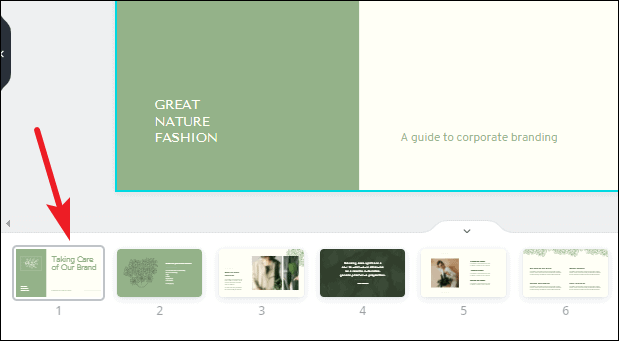
To turn off the thumbnail view, click the on/ off toggle (arrow).
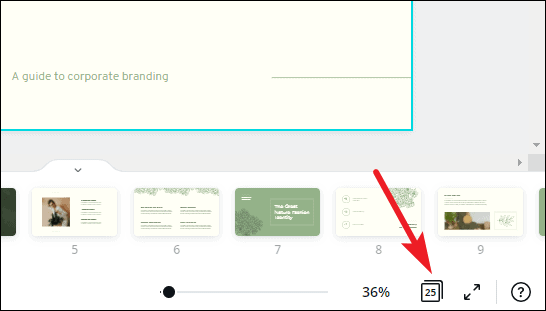
Click the grid view button to switch views.
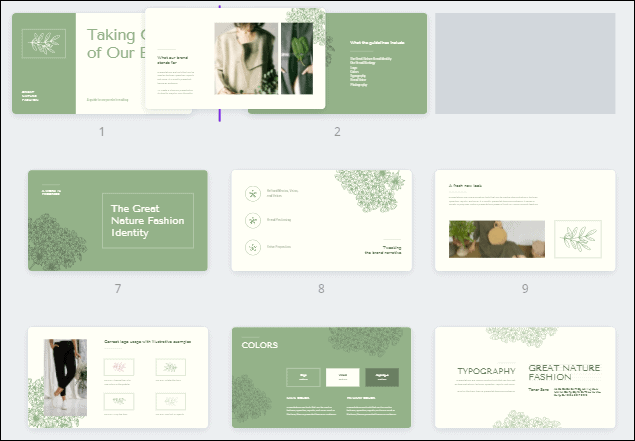
The grid view is helpful when there are a lot of slides in your presentation. Using grid view, you can get an overview of them all. You can also rearrange the slides by dragging and dropping slides into a new position. Click the ‘Grid View’ button again to switch back.
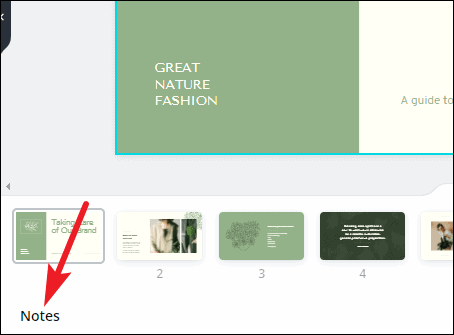
Click the ‘Notes’ option to add notes to the presentation that you can use for reference while presenting.
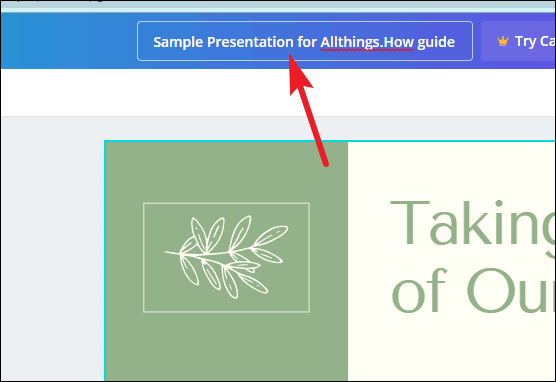
The name of the presentation can be edited from the top-most toolbar.
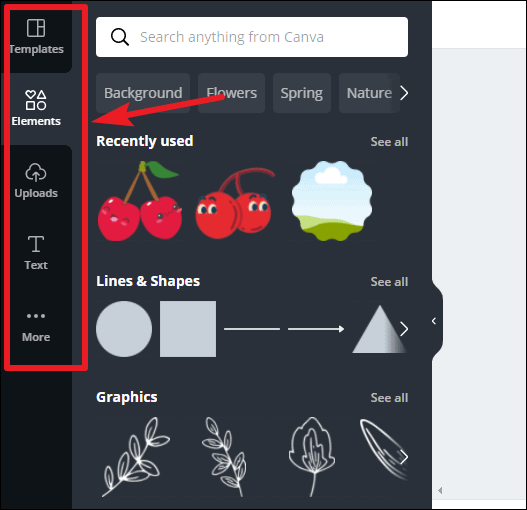
Now, on the left is the toolbar that houses all the tools for editing the design elements in the presentation.
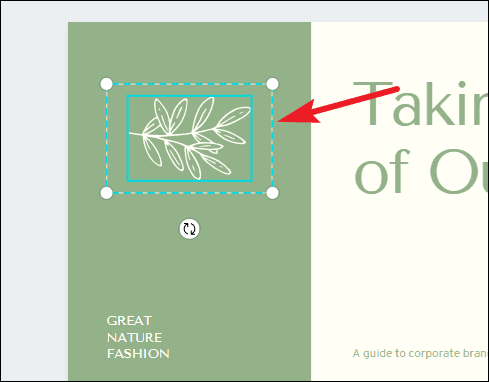
When you’re using a template, almost all of the elements can be selected and edited. You can delete an element, change color, font (for text). To select an element, hover over it. The part of that element will be highlighted in blue. Click it to select it.
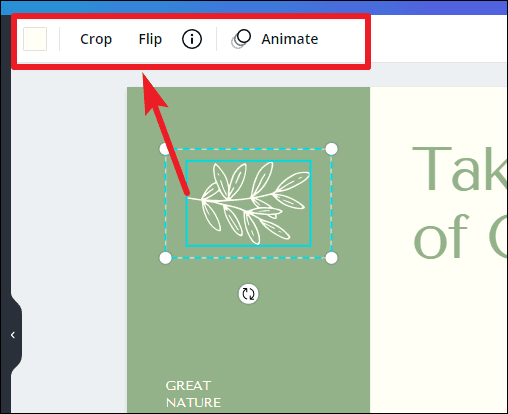
Another toolbar will appear above the slide with editing options specific to the element you have selected. Depending on the element, you can change it’s color, font, font size.
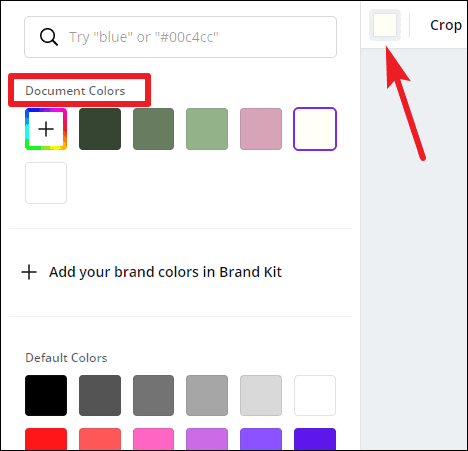
When you click the color option, a palette for document colors will appear above, followed by available default colors. For free users, only limited color options are available. If you have a Brand Kit (available only for Canva Pro users), that palette will also appear here.
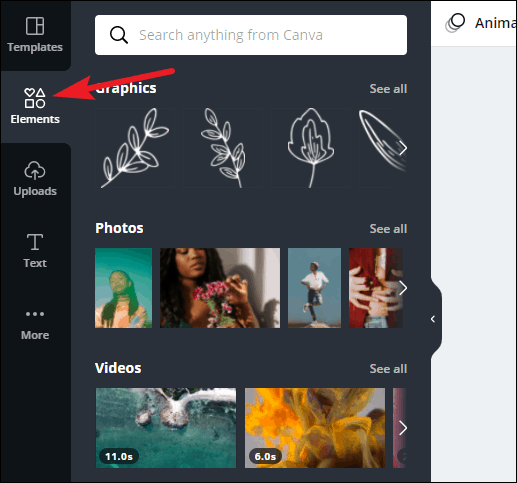
Click on the ‘Elements’ option on the left toolbar to add elements like photos, videos, graphics, audio, charts, etc. to your presentation.
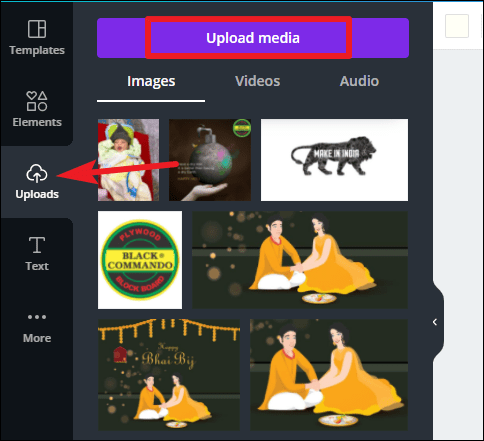
To add photos, videos, or audio from your computer, click the ‘Uploads’ button. Then, click the ‘Upload media’ button to select content. Any media you previously uploaded will also be available here.
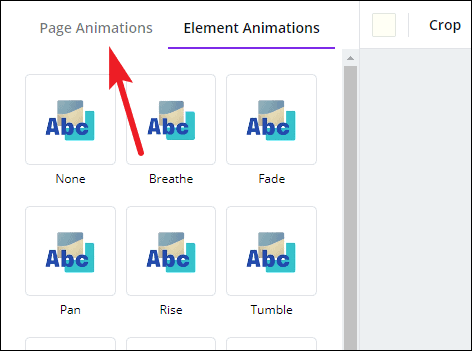
You can also add animations to individual elements or the entire page. Select an element and click the ‘Animate’ button.
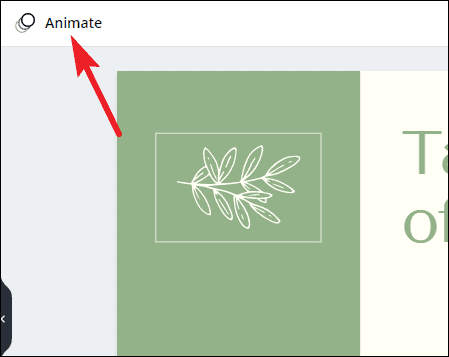
‘Element animations’ will open. To switch to page animations, click the ‘Page Animations’ tab.
Presenting your Presentation
Once your presentation is complete comes the main part – presenting it. Canva offers a lot of options for your finished presentation. You can present it right from Canva or publish or download it for various platforms.
To publish it elsewhere or download it, click the ‘three-dot’ menu on the top-right corner.
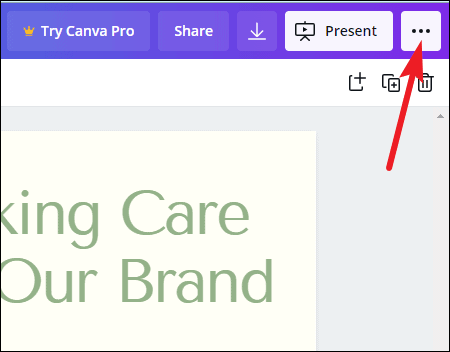
A list of options will appear. You can download it onto your computer, or as a PowerPoint presentation, share a link to the presentation, publish it as a website, embed it on your website, and much more. You can also record it while presenting with a voiceover.
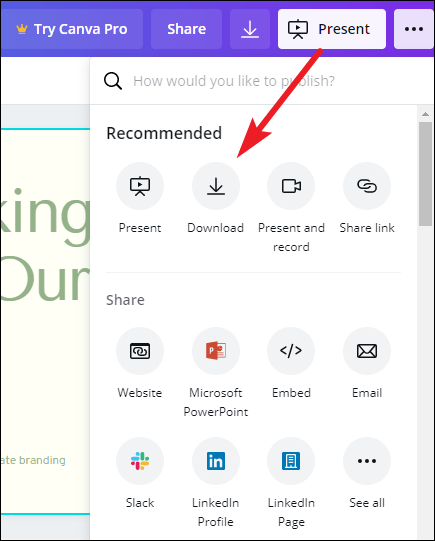
To present straight from Canva, click the ‘Present’ button.
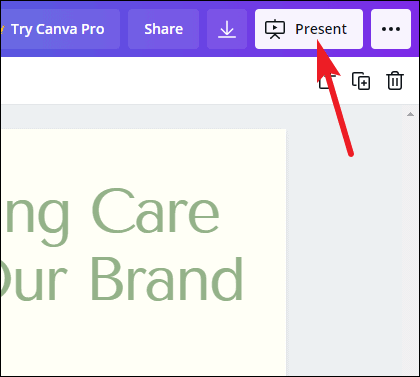
Click the drop-down menu below ‘Type’ and select how you want to present it.
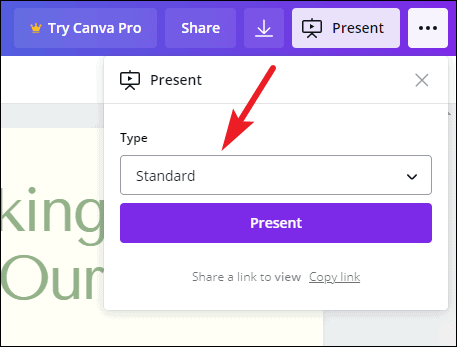
There are three options to choose from: ‘Standard’ – where you present at your own pace, ‘Autoplay’ – where the presentation advances automatically, and ‘Presenter View’ – where you can view your notes and upcoming slides, but the rest of the people cannot. Presenter View is best used when you’re presenting on a projector.
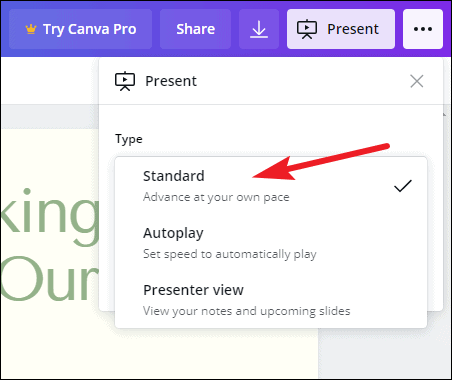
After selecting the type, click the ‘Present’ button.
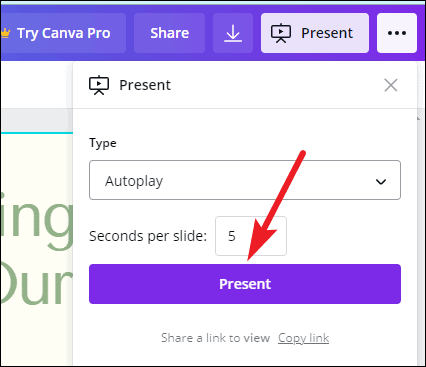
Bonus Tips for your Presentation
While presenting the presentation on Canva, you can add special effects to enhance the performance with some keyboard shortcuts. All you need to do is press the associated key with each effect to bring it into action. Press the same key to stop it. You can also press multiple keys to add 2 or more special effects. With these effects, your presentation is bound to stand out to your audience and be memorable.
Drumroll : Add a drumroll before a slide by pressing the key ‘D’ before a big reveal.

Confetti : Add a shower of confetti to celebrate something with the key ‘C’ .
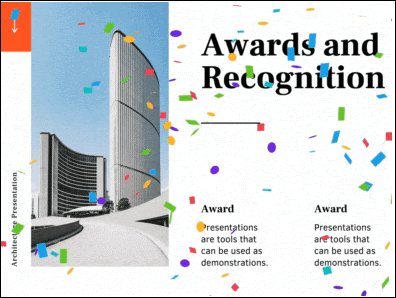
Countdown : Add a countdown from ‘1-9’ by pressing one of the keys.
Quiet : Bring a 🤫 emoji to screen to hush your audience with the ‘Q’ key.
Bubbles : Press down the ‘O’ key to bring bubbles on the screen.

Blur : Build tension and add drama to the atmosphere by blurring the screen with the key ‘B’.

Presentations are a huge part of professional life, whether you’re presenting to your clients, doing a webinar, promoting your brand, to name a few. With Canva, you can make presentations that’ll leave a long-lasting impact but won’t take long to make.

How to Use Gemini Code Assist in VS Code

How to Code Using AI

Microsoft Copilot Pro Review: There is a lot of Unrealized Potential
Get all the latest posts delivered straight to your inbox., member discussion.

How to Use Magic Switch in Canva to Instantly Convert Your Designs

How to Use Soundraw AI Music Generator in Canva

How to Use Magic Studio in Canva to Transform Your Ideas into Videos

How to Make Artistic QR Code in Canva using Mojo AI

How to Create AI Art & Graphics Using Canva Magic Studio
Home Blog Design How to Use Canva and PowerPoint for Presentations
How to Use Canva and PowerPoint for Presentations
Creating the perfect presentation design is a challenge that speakers often aim to achieve, only to find themselves lacking graphic design knowledge. Although high-tier options like Adobe Photoshop and Adobe Illustrator help users worldwide to put their ideas into pixels, the reality is they are not user-friendly interfaces for people outside the graphic design industry, namely business professionals, marketers, and educators. Hence, the need to find an alternative for making powerful graphics to use in our presentations – and here’s where Canva comes into the picture.
This web-based graphic design tool has quickly become the preferred choice of teachers, social media influencers, and small business owners due to its free-tier plans and pro plans at a convenient subscription-based fee.
In this article, we will see how to use Canva presentation in PowerPoint and how to export Canva to PPT, to create visually appealing presentations.
Table of Contents
Canva vs. Microsoft PowerPoint: Pros and Cons for Presenters
Designing with canva, how to export a canva presentation to powerpoint, how to use canva-made graphics in powerpoint, final words.
Although presenters often see Canva as an alternative to PowerPoint, the reality is that they differ in one single aspect: Canva is a graphic design tool, whereas PowerPoint is a presentation design software. Some of the tools available in PowerPoint are not there in Canva, and vice versa.
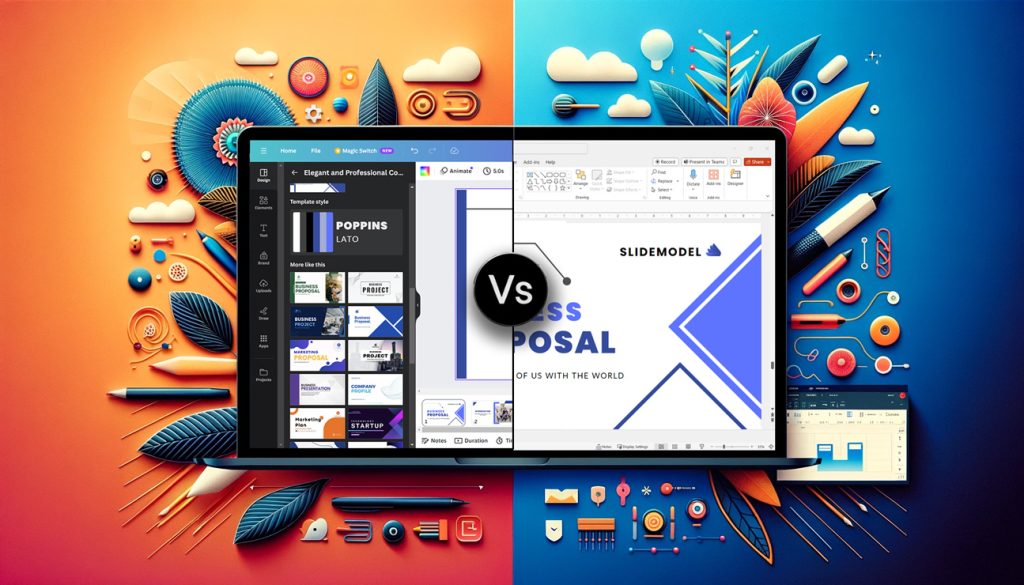
Going into more technical aspects, here are the Pros and Cons of working with either software as a presenter.
Pros of Canva as a Presentation Tool
User-friendly interface.
Canva’s drag-and-drop feature makes it easy for non-designers to create presentations by using its library of shapes, graphics, text styles, and other resources.
Wide Range of Templates
It offers a vast library of Canva templates, which can be easily customized in their online editor, saving time on design. There’s a con associated with this point, which we shall discuss later.
Magic Studio for Canva was released mid-Q3 this year with the idea of powering designs with AI tools. This tool is available in Canva search features and in the editor at the bottom right corner, which features the list options:
- AI text generation
- Suggested graphics to match your design
- Suggested photos to match your design
Collaboration Feature
Allows multiple users to simultaneously work on the same presentation, which is great for small team projects. Compared with PowerPoint, it does not require all users to be Premium to collaborate online.
Web-Based Platform
Being an online platform, it allows users to work from any device with Internet access without needing software installation. This particularly helps users with legacy computers who cannot install current versions of Microsoft Office.
Integrated Stock Library
Provides access to a broad selection of stock photos, illustrations, and icons within the platform. Just like with the Canva templates, there’s also a con to this point.
Customization Options
Users can upload images and fonts, enabling brand consistency across presentations. Note: The upload fonts feature is only available for Canva Pro users.
Photo Editing and Animation Features
Canva lets users tweak their graphics with simple-to-use controls. These options help us to adjust opacity, apply photo filters, add animation effects, add bevels and shadows, and more.
Cross-Platform Compatibility
Can export presentations to various formats (as a PDF document, as a video presentation in MP4 format, or even as images), making them viewable on different devices and platforms. The export options allow us to post directly into social media, create printables, post to the web, etc. While some export formats require an upgrade to a Canva Pro subscription (like the ability to export to SVG format), the basic export features are enough for simple presentations and beginners.
Cons of Canva as a Presentation Tool
Limited offline functionality.
Requires an internet connection for full functionality, which can be a limitation in areas with poor connectivity, for business people working on an airline flight, while using Airplane mode, or for people traveling in other zones without Internet access.
Fewer Animation and Transition Options
Unlike PowerPoint, the available options for animations and transitions are limited. Users can find this reiterative, which may be unappealing to using these effects in our presentations.
Premium Content
Although the Canva library is extensive in terms of assets, the reality is that most of these elements are only available for premium users. This applies to templates, shapes, images (mostly), and exporting options. Resizing the graphics you create in Canva to repurpose your design is only available to premium users.
Template Overuse
Popular templates can be overused, making presentations look similar to many others. This is of particular interest to business professionals, as people tend to easily associate some designs as being made with Canva.
Design Decisions
Unlike using a PowerPoint template , you have to work your way with Canva content, as the PPT templates tend to be quite generic and do not offer tools for data representation. Consequently, you have to know how and where to introduce those elements on your own rather than working with a presentation template that already assigned the space for such graphics.
Lack of Advanced Multimedia Integration
Integrating complex multimedia elements like videos is not as seamless as in some desktop applications. You won’t find options to link to source elements; you need to upload the content to your personal Canva library and manually add the resource to the slide. Presenters can also lose third-party integrations via plugins for some multimedia resources.
Pros of PowerPoint as a Presentation Tool
Widespread use and familiarity.
PowerPoint is the leading market tool for presentations, making most audiences and presenters are familiar with it at a basic operational level. This can help us to outsource technical issues quickly rather than aiming to use web-based interfaces to share Canva-created content.
Offline Access
PowerPoint can be used offline, which is ideal for people traveling, areas where the Internet connection is unreliable, or simply because we want to focus on creating the slides rather than facing distractions via the Internet.
Integration with Other Microsoft Office Tools
Seamlessly integrates with other Microsoft products like Excel and Word, making it easy to import data and documents. This is ideal for creating complex graphics for data representation, where the content can be synced, importing databases, working with Gantt Charts in software like Microsoft Project, and more.
Also, Microsoft PowerPoint has the same text editing capabilities as Microsoft Word – a striking contrast with Canva’s limited features.
Templates and Design Options
This is PowerPoint’s forte: the capability of using third-party presentation templates, like the ones provided by SlideModel . Users can buy pre-designed slide decks from professional vendors and ease the need to make design-related decisions. On top of that, Microsoft already includes some basic templates with its 365 subscription.
Advanced Features
Offers a broad range of features, including detailed animations and transitions, which can enhance presentations. For example, the ability to work with SVG graphics allows presentation designers to make pixel-perfect presentations without losing image quality. This is available to all users, unlike Canva, which requires a subscription to unlock certain elements.
Multimedia Capabilities
Supports embedding of various multimedia elements like audio, video, and images directly into presentations. You can use hyperlinks to embed content or work with third-party plugins for specific tasks.
Extensive Support and Resources
As a long-established tool, users can find tutorials everywhere, support communities, and additional resources available online.
Cons of PowerPoint for Presenters
Some features can be complex to use, and the interface may be overwhelming for new users. In particular, this is linked to editing PowerPoint Shapes and graphs, working with Slide Master , applying advanced animation effects and so on.
Unlike Canva or Google Slides, PowerPoint requires purchasing Office 365 or a standalone license.
Heavy Files
PowerPoint files, especially those with multimedia content, can become large and difficult to share via email. As a side effect, those heavy files can be complicated to handle in computers that lack sufficient RAM and processing power. Moreover, they require significant free disk space on your PC.
Time-Consuming
Creating a high-quality presentation with custom animations and graphics can be time-consuming. That’s the reason why we highly recommend users work their way with PowerPoint templates, and mix and match designs to create a unique slide deck .
Learning Curve
Users need to invest time in learning the software to fully utilize its advanced features. This applies to both acquiring the knowledge and practicing the skills you learned. And still, for some users, it feels frustrating not to achieve results relatively quickly.
In this section, we will learn how to use Canva to create graphics for a product presentation. The idea is to create placeholder graphics containing images of a product; then, we will export that content to continue creating our presentation in PowerPoint.
After creating our Canva account, we find ourselves at the Home screen. Go to Templates, and you will see something similar to this UI.
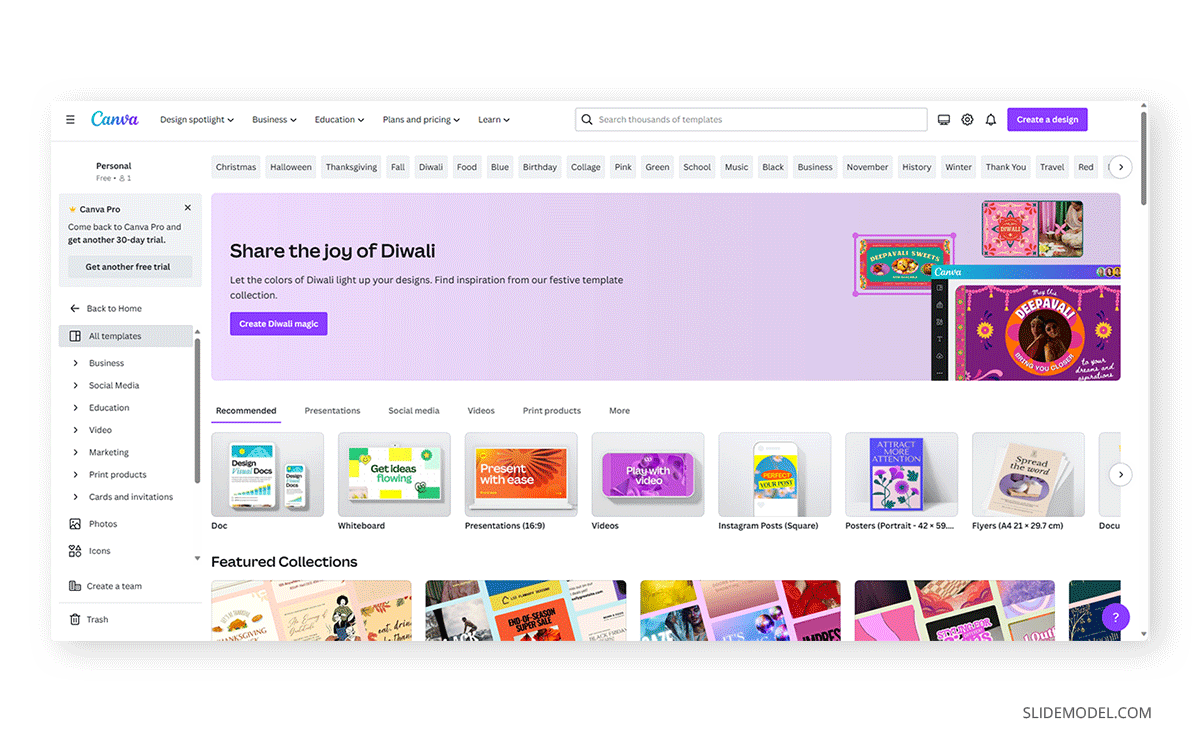
We can go straight to the Presentations (16:9) option or use the search bar to locate the template we want. In this case, we will opt for that scenario and search “Product.”
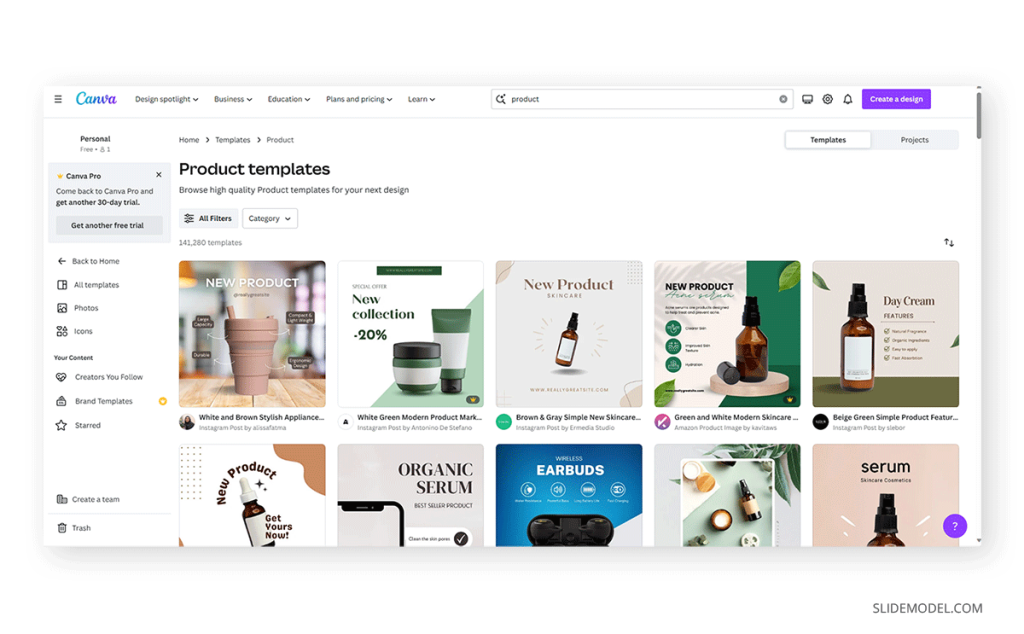
The images that show a little crown at the low right corner are premium templates, which means we cannot use them with a free account. We will pick a template that fits the needs of our presentation by clicking over it. At the contextual window that opens, select Customize this template .
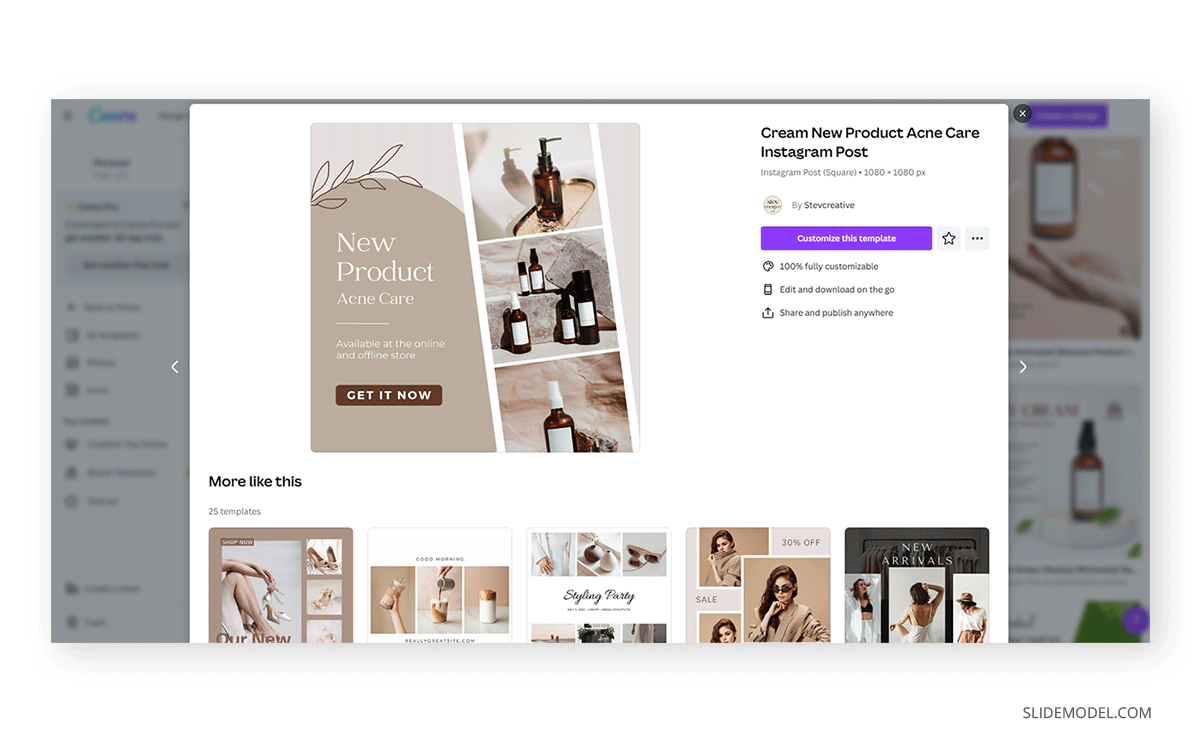
The Canva builder may take a bit to load, especially if your internet connection is slow. You will find yourself with a window like this one, opened at the Design tab, which offers alternatives for other templates similar to the one you chose.
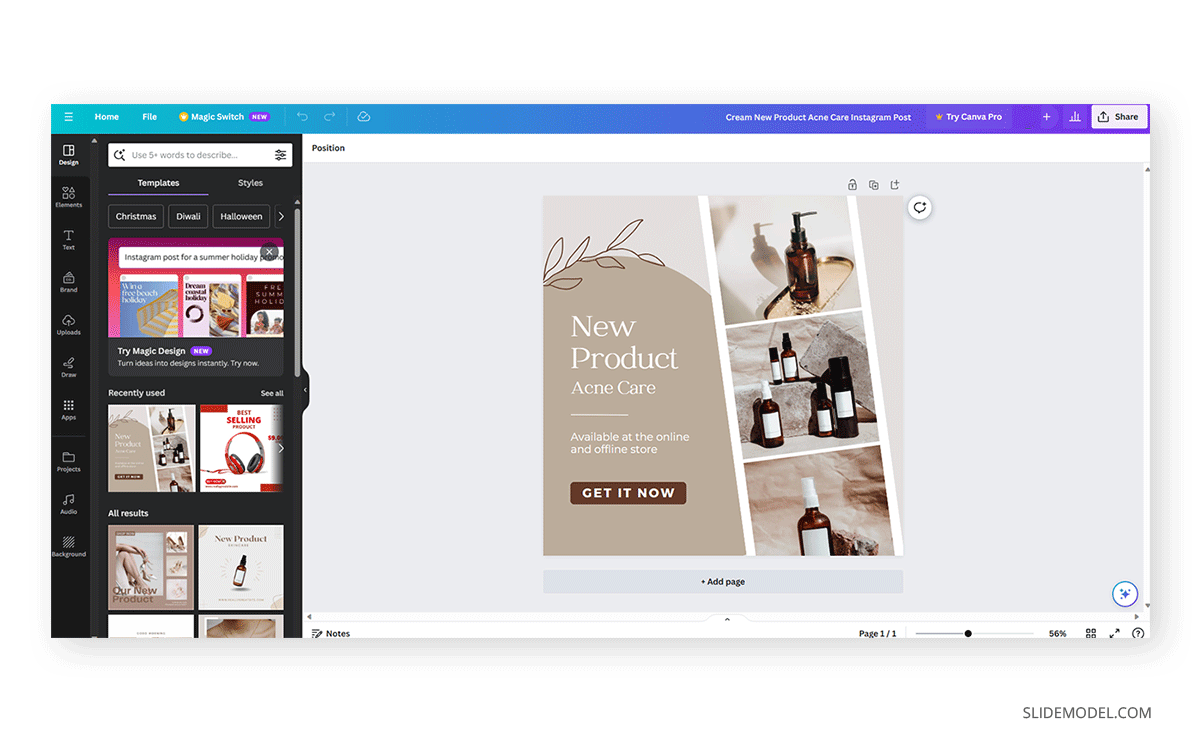
The Styles tab allows us to quickly change the layout, altering color themes and fonts. Sometimes, that can suit our needs immediately; sometimes, it requires extra work to customize to our preferences.
We can click on any element in this design and customize its content. Depending on the element type, the options are available for us. For this presentation, we will change the text and images, and alter font color at the button to make it stand out.
Next, it’s time to replace the images. We can drag and drop the image into Canva, or we can go to the Uploads button and add the content from there.
In this case, we’re using DALL-E-generated images for this product presentation, you can also use illustrations, photos, videos, or Midjourney illustrations . Once the images are uploaded, drag and drop them to replace the images in the placeholder areas. To complete this design, we removed the shape that came with the template – you can add a new shape by going to Elements > Graphics .

Learning how to use Canva for PowerPoint is pretty straightforward. Download your Canva design as a PowerPoint presentation, which you can do by accessing your design and going to the top-right corner to locate the button Share . Click on it, and then click on Download .
Under File Type , we will select PPTX , as it’s PowerPoint’s native format. Click on Download , and wait for the process of downloading the file to be completed. Depending on the graphic assets included, it can take a while.
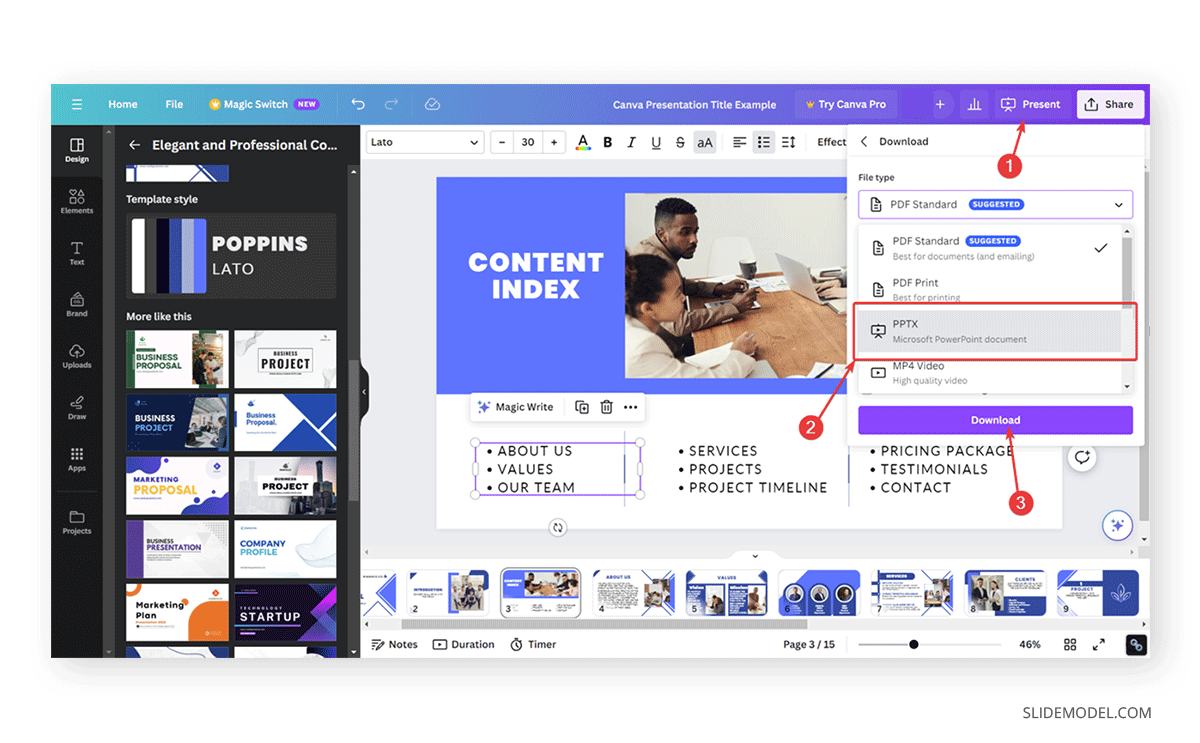
At this point, don’t be surprised if you’ll be prompted to upgrade your Canva plan (if you don’t have a premium account). The reason is that Canva will charge you for exporting what they call premium graphics, and since most of the Canva presentation templates use premium graphics, this will be a limitation when exporting your Canva slides to PowerPoint.
A simple workaround is removing the premium graphics before exporting from Canva to PowerPoint. Although, take in mind this may affect the overall design of your presentation.
As you can see below, the PowerPoint file is entirely editable. Something to consider is that unless you have the font installed on your computer, PowerPoint will reassign to a generic font.
Remember the design we created before? Well, it’s time to use that image as part of a marketing deck presentation , which will represent a social media post to be used by the marketing team to promote the brand.
The first step is to download the design we created as PNG. We can close Canva after that.
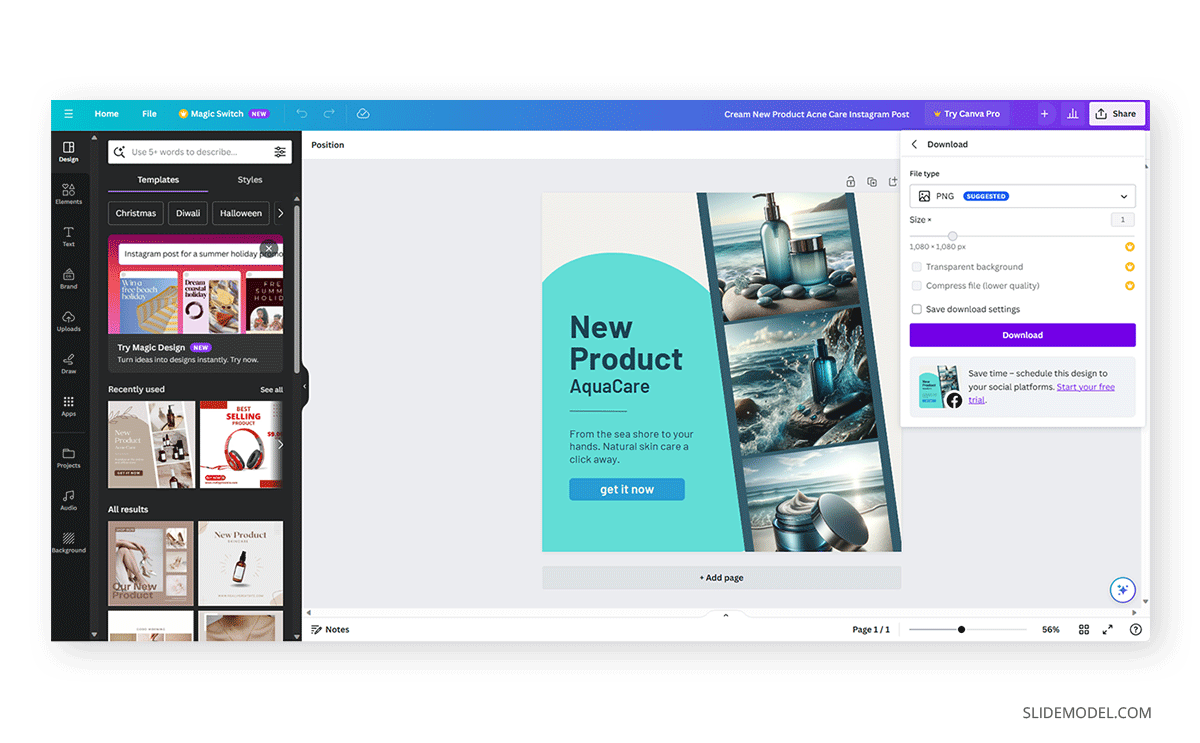
We opened our PPT template, which is the Annual Marketing Plan PowerPoint Template , and customized the PowerPoint theme colors . Go to Insert > Pictures > This Device .
Select the image we created in Canva and upload it here. We will add some image shadow effects via Shape Format, and a textbox below that describes what the image is about.
And that’s how easily we can use graphics from Canva in our PowerPoint presentations. Remember, it’s best to work with PNG images rather than JPG to reduce file size and preserve image quality.
You can invite others to collaborate on your design by sharing a link to the editable design or by adding them via email as team members on your Canva account.
Canva uses standard cloud storage security measures to protect your data, but like any online platform, it’s important to use a strong password and follow good security practices.
There are two methods for this. You can upload a PPT template into Canva via the Canva Homepage by clicking on Projects , and then go to the Uploads folder. Drag and drop or click on Upload, as we’ve seen before. Once imported, you must click on that file to open it in the Canva editor. The second method is on the editor: go to the Uploads button and upload your PPT file as if it were an image or another media asset.
Yes, you can use SlideModel presentation templates in Canva. As a SlideModel subscriber, you can download .pptx files to import into Canva presentations. This way, you can enjoy the creative slide templates and graphics provided by SlideModel in your Canva presentations
Unfortunately, no, as Canva doesn’t have the same toolset to enable editing functions. That also applies to changing color, so we highly recommend you work with a final PPT file before switching to Canva.
Objects like charts, SmartArt, 3D objects, and WordArt aren’t supported in Canva and won’t be rendered if you upload a slide that contains them.
Yes, all users can download Canva presentations to PPTX format. In case the original Canva design isn’t a presentation file, like a banner or social media post, you won’t be able to resize for that output unless you have a premium account.
Yes, the file must be smaller than 70 MB, and you can import up to 300 slides.
Canva and PowerPoint can collaborate as complementary tools to help presenters overcome the limitations of each individual tool. It takes a while to create your desired workflow, but once that’s accomplished, you can elevate the quality of your PowerPoint or Google Slides presentations with Canva.
We don’t advise using Canva as an alternative to PowerPoint as the current state-of-the-art indicates it won’t support data representation or other PowerPoint stellar tools that make part of most PPT templates.
Like this article? Please share
Design, Microsoft PowerPoint Filed under Design
Related Articles
Filed under Google Slides Tutorials , PowerPoint Tutorials • April 17th, 2024
Google Slides vs. PowerPoint: A Detailed Comparison
Contrast and pick with presentation software suits your best. Check our guide on how the Google Slides vs. PowerPoint eternal debate.
Filed under PowerPoint Tutorials • April 16th, 2024
How to Insert an Equation in PowerPoint
Learn how to create easy-to-understand science slides by mastering how to insert an equation in PowerPoint. Step-by-step guide.
Filed under PowerPoint Tutorials • April 9th, 2024
How to Remove Notes from PowerPoint
Make alternative versions of your presentation files by learning how to remove notes from PowerPoint. Step-by-step guide with screeshots.
Leave a Reply

IMAGES
VIDEO
COMMENTS
Confused about how to highlight text on canva? This video explains the exact steps on how to highlight text in canva. Learn how to highlight text like a pro ...
Step 1: Create A Piece Of Text. Before highlighting your text, you must get some text on the canvas. Click on the Text Tab in the Side Menu to see your text options. You have three options: Add a Heading, Add a Subheading and Add a Little Bit of Body Text. You can also press T to drop some quick body text down.
If you do want to highlight your entire text box, here's what you need to do: 1. Click on the text to select it. To begin with, you'll need to select your text box. You can do that by clicking on any of the text within that text box. 2. Click on the "Effects" button. The "Effects" button is in the top Canva toolbar. 3.
In this Canva tutorial, learn how to highlight text in Canva. There are two ways to highlight text in Canva. You can add a background color to all text, or a...
How To Highlight Text In Canva | Canva TutorialTo highlight text in Canva, follow these steps:Select the text element you want to highlight by clicking on it...
Option 1. When the text box is selected, it will be surrounded by a purple bounding box and the text menu bar will appear above your workspace. Click inside the text box and use your cursor to select the word you wish to highlight. Once you have selected the single word in the text box, you can now highlight just this word without affecting the ...
Step 1: Insert Text. To insert text in Canva, follow these steps: Launch Canva and open your design: Open Canva in your web browser or launch the Canva app. Once you're in the Canva dashboard, click on the design you want to work on, or create a new design by selecting the appropriate template; Access the text tool: On the left sidebar, you ...
Step 2: Select Effects. Click on the text box to select it and select the Effects button. You will now see a range of styles pop up in the left-hand menu. Step 3: Highlight Your Text. Next, select the style that says "Background". You will see a rounded box appear as a background for your selected text.
Start with a presentation template. Use the 20/30 rule when designing presentations. Prioritize visual appeal in design. The importance of organization. Form a brand identity. The power of color in brand identity. Emphasize data with charts, graphics and infographics. Utilize icons to add dynamics to your presentation.
Here's how: Step 1: Select the text box with the highlighted text and click on the ' Effects ' tab in the top menu. Step 2: Click on ' Background ' in the left menu and then choose the 'None' option. This will remove the highlight. If you have multiple highlights in your design, you can click and drag to select all the text boxes ...
Step 1: Open up a new project or existing one that you are currently working on the Canva platform. Step 2: Insert text or click on any text box that you have included in your project that you want to highlight. Remember that any font or Font Combinations that have a crown attached to them are available to Canva Pro users only.
Another way to highlight text is by using gradient highlights. To do this, select the text you want to highlight and click on the "Effects" button. Next, select the "Gradient" option and choose the colors you want to use. You can adjust the angle and opacity of the gradient to create a more subtle or dramatic effect.
Use the same 'banner' or title font throughout your design. Have the same 'frame' or 'grid' throughout your design. Apply the same background throughout your design. Use consistent fonts. 2. Work smarter, not harder. Create a template page for your presentation to keep all the points above about consistency in line.
In this video, you'll discover the simple steps for adding text highlights to your Canva designs. Whether you're creating social media posts, flyers, or pres...
Step 3: Adjust your Chosen Shape. Now that you've chosen your shape, it's time to adjust it to your text's size and color! Start by clicking the shape. Then, drag the nodes on any of the 4 corners. For the color of your highlight, select the shape and click the color button on the upper left side of the toolbar.
What you'll learn. Duplicate your title graphics across slides. Create a content slide to match your title graphic. Place padding around your text to make it easy to read. Increase your font size to emphasise your points. Reduce the amount of text on each slide to avoid clutter. Share. Start tutorial. 3:24.
Select the text you want to highlight and click on the "Effects" button. 2. Choose the "Background" Option. Choose the "background" option. You can also adjust the settings for the filter. 3. To Highlight a Portion of the Text, Add a Colored Square Behind Text. If you want to highlight only a part of the text you can place square ...
To highlight a text in your design, Canva Editor offers lots of options. Let's check them out one by one. First, you need to select the text you want to highlight. When you select a text, a purple border will appear around your text and a text editing menu bar will appear on the top. The first option - Effects, can help you highlight your text ...
Select an element and click the 'Animate' button. 'Element animations' will open. To switch to page animations, click the 'Page Animations' tab. Presenting your Presentation. Once your presentation is complete comes the main part - presenting it. Canva offers a lot of options for your finished presentation.
Unlock your potential to create stunning visuals in this comprehensive guide to Canva Presentations. This tutorial will walk you through all the key features...
On your browser go to www.canva.com. Log in to your account. Click on "Text" on the left sided panel. Choose between "Heading," "Subheading," or "Body.". Double-click the text box you need to edit. At the top of the screen, click the dropdown menu next to font. Choose one of the boldest options.
Presenting your design. Easily present your reports, pitch decks, and more. Computer. Mobile. On the editor menu bar, click Present. If you don't see it, click on Share first, and then look for the Present option. Select a presentation type from the options. Learn more about the different presentation modes. Click Present.
Download your Canva design as a PowerPoint presentation, which you can do by accessing your design and going to the top-right corner to locate the button Share. Click on it, and then click on Download. Under File Type, we will select PPTX, as it's PowerPoint's native format.