How to do a voiceover on a PowerPoint presentation and add pre-recorded audio to your slides
- You can record a voiceover in PowerPoint and insert it into your next presentation using the software's Audio recording feature through the Insert menu.
- Recording and inserting a voiceover into PowerPoint is a relatively similar process on an Apple Macbook and Windows PC.
- Once you've recorded your audio, you can click the microphone icon that appears on your slide and playback your recording.
- Visit Business Insider's Tech Reference library for more stories .
Public speaking is a valid and common fear. And although you might be trying to hone your public speaking with your free time at home , there's a way you can incorporate your voice into your next PowerPoint presentation without the pressure of speaking on the spot.
How? Microsoft PowerPoint has a feature that lets you create narration for all slides as you see fit. This way, you can record — and re-record — voiceovers for your presentations that won't make you cringe.
The process is virtually identical for both Mac and PC users and you can use your computer's built-in mic or a headset. Whatever your operating system of choice is, easily record narration over a PowerPoint slide in a few quick steps.

Check out the products mentioned in this article:
Microsoft office (from $149.99 at best buy), apple macbook pro (from $1,299.00 at apple), acer chromebook 15 (from $179.99 at walmart).
SteelSeries Arctis 1 Wireless Headset (From $92.49 at Amazon)
How to record a voiceover for PowerPoint on a PC
1. Open a new or existing or presentation in PowerPoint.
2. From the top toolbar, select "Insert."
3. Toward the far right side, click "Audio."
4. Choose "Record Audio…"
5. Name your audio file.
6. Click the circle icon when you're ready to start recording.
7. Select "OK" when you're done recording.
8. A microphone icon will indicate the narration has been added to the slide.
How to record a voiceover for PowerPoint on a Mac
1. Open a new or existing or presentation in PowerPoint for Mac.
2. Find and select "Insert" from the top toolbar.
4. Select "Record Audio…"
5. Name the audio file, and click the circle icon when you're ready to start recording.
6. Click "Insert" when you're ready to finalize.
7. You can click the microphone icon on the slide to hear your recording.
Related coverage from Tech Reference :
How to download and access microsoft powerpoint on your mac computer, how to add a border to slides in powerpoint, and give your slideshow a sleek design, how to change and format the background of your powerpoint slides to custom designs, how to change your language settings in microsoft powerpoint in 3 different ways, how to copy or duplicate a powerpoint slide and put it anywhere in your slideshow.
Insider Inc. receives a commission when you buy through our links.
Watch: Apple just launched a $6,000 Mac Pro, available this fall
- Main content
- Is Hulu Worth It?
- iPad Pro vs. Surface Pro: What's the Difference?
How to Do a Voiceover on PowerPoint
Narrate your presentations with ease
:max_bytes(150000):strip_icc():format(webp)/ColettaTeske-af57404a91b342578a97252b7dbd720f.jpg "how to do voice over presentation")
- Central Washington University
What to Know
- Single slide: Select a slide. Go to Insert > Audio > Record Audio . Type a name, select Record , then read your script. Select Stop .
- Entire slideshow: Select View > Normal and choose the first slide. Select Slide Show > Record Slide Show > Record from Current Slide .
- To review the recording, click the sound indicator (it looks like a speaker) and then select Play to hear your recording.
This article explains how to record a voiceover on PowerPoint for a single slide or for the entire slideshow. The instructions apply to PowerPoint for Microsoft 365 , PowerPoint 2019, PowerPoint 2016, and PowerPoint 2013.
How to Record a Voiceover for a Single Slide
Before narrating your PowerPoint presentation, be prepared:
- You’ll need a microphone attached to, or built into, your computer. Test the microphone to make sure it is working. Set the sound level so your audio is easy to hear.
- Prepare yourself for the narration. Write a script you can follow while recording the voiceover. Practice the presentation a couple of times so your voiceover will sound smooth.
- Decide whether to record the voiceover one slide at a time or record a voiceover for the entire presentation in one go.
The simplest way to record audio for a voiceover is to record one slide at a time. To get started, select the slide where you want to add the narration, then go to Insert > Audio > Record Audio .
Here’s how to record a voiceover on the slide:
Type a Name for the voiceover narration.
Select Record (the button with a red dot).
Read your script or ad-lib the narration.
Select Stop when you’re finished recording.
The Record Sound dialog box disappears, and a speaker indicating sound appears in the center of the slide.
To review the recording, click that sound indicator and then select Play to hear your recording.
When you're finished, click anywhere outside the playback controls to accept the recording.
You’ll see an audio icon in the middle of the slide. Move this icon anywhere on the slide to get it out of the way of other elements on the slide.
How to Record a Voiceover for an Entire Presentation
The voiceover for the entire presentation can be recorded at one time. In addition to recording a voiceover, you can record a video of yourself giving your presentation.
To set up your presentation when you want to narrate an entire slideshow:
Select View > Normal
Select the first slide in the presentation where you want to record audio.
Select Slide Show > Record Slide Show > Record from Current Slide .
In PowerPoint 2019, the Recording window opens.
In PowerPoint 2016 and earlier versions, a Record Slide Show dialog box prompts you for further options. In the Record Slide Show box, select options to set up the slideshow:
- Slide and animation timings: When recording, PowerPoint automatically tracks the timing of slide changes and any animations that occur.
- Narrations, ink, and laser pointer: When recording, PowerPoint automatically tracks when narrations, any inking, or laser pointing occurs.
Leave both checked to make automating your slideshow easier.
Select Record .
In PowerPoint 2016, select Start Recording .
Select Pause to temporarily stop the recording if you need a break.
If you made a mistake and want to start over, select Clear > Clear Recordings.
In PowerPoint 2016 select Clear > Clear Recordings on Current Slide .
When you’ve finished recording a slide, select the Advance button to advance to the next slide or press the spacebar on your keyboard.
When you’re done recording your narration on the slide, select Stop and close the recording window to return to the presentation.
You may have noticed some controls at the bottom left side of the screen. These are a few controls to aid you in your presentation.
These handy handy tools include the Laser Pointer , Highlighter , and Eraser . As you advance through your presentation, mark or highlight parts of your slides as you narrate. PowerPoint records the timing of these marks (if you left the boxes checked) to go along with your narration. Likewise, using the laser pointer shows a simulated red laser dot so that you can point out different things on your slides as you narrate your presentation.
How to Listen to the Recorded Voiceover
Once you’ve recorded your narration, you can go back to the slides and listen to your voiceover.
Here’s how to play a narration:
Select the slide containing the voiceover you want to hear.
Look for the recording icon on the slide. It should appear as either a small video screenshot or a speaker icon on the slide.
Hover over select this icon and then click Play to preview the recording.
How to Turn a Voiceover Off
If you don’t want to hear your narrations when playing a slideshow, but want to keep the narrations with the slide, turn voiceover off.
To turn voiceover off, select Slide Show and click to deselect the Play Narrations checkbox.
How to Delete a Voiceover
There are a couple of ways to delete voiceover audio in your presentation. To delete the audio on a single slide, find and select the recording on that slide, then press the Delete key.
To delete the voiceover from all the slides in a presentation: Select Slide Show and then select the down arrow to open the Record Slide Show menu. Then, select Clear Narration on All Slides .
Embedding Versus Linking Audio Files in PowerPoint
When you use the PowerPoint tools to record a voiceover narration, the audio file is embedded in PowerPoint. This means the audio is part of the PowerPoint file and not stored in a separate file, making it easy to play your presentation on any device.
If you have audio you recorded using other software and it's stored on your computer, you can link to the audio file. Linked files keep your presentation size smaller, but links can be broken if the audio file isn't available to the PowerPoint presentation. To prevent broken links, store the presentation file and the audio files in the same folder on your computer.
Get the Latest Tech News Delivered Every Day
- How to Add Audio to PowerPoint
- How to Make a Slideshow on PowerPoint
- Adding Sounds, Music or Narration to PowerPoint Slide Shows
- How to Get PowerPoint on a Mac
- Edit Music, Sound, or Other Audio Settings in PowerPoint
- How to Make and Add Your Own Sound on TikTok
- Loop a PowerPoint Slide Show
- How to Convert PowerPoint to Video
- How to Use Speaker Notes in PowerPoint
- Change Order of Animations for PowerPoint Slides
- How to Add Music to PowerPoint
- How to Change a Black-and-White Picture to Color in PowerPoint
- How to Add Page Numbers in PowerPoint
- Create Family Trees Using PowerPoint Organization Chart
- Using Design Themes in PowerPoint
- Add, Delete or Change the Order of PowerPoint Slides
Blog > Record voice narration for PowerPoint
Record voice narration for PowerPoint
01.11.21 • #presentation #powerpoint #voiceover #narration.
In this blog post, you'll learn how you can add a narration for your PowerPoint presentation. Adding audio or video narration can be very helpful, especially in a time where many seminars and meetings have to be conducted online. If you would rather give your presentation using a live stream (which has many benefits), scroll down to the bottom and learn how you can do that!
Here's what you need for recording:
- a microphone (your computer's microphone should do)
- a finished set of PowerPoint slides
- a video camera (only if you want to record video as well)
- Open your PowerPoint presentation or create a new one.
- In the taskbar, select Slide Show . Then click Record Slide Show .
- Choose the option Record from Beginning .

- You'll now get to a different view, which we'll call "Recorder View". Here's an overview:

- In the bottom right corner, you'll see three icons. The one on the left is for switching the microphone on/off. Make sure this function is turned on. The icon in the middle is for turning on/off your camera. You can choose if you want to switch the video recording on or not. The last icon is only available if you've chosen the video recording function. If the function is enabled, you'll be able to see a video preview.
- In the top right corner under "Settings", you can choose what microphone (and camera) you'd like to use. This is only relevant if you have an external recording device that you would like to use. If you're recording with your computer, you don't have to set anything here.
- Now it's time to record. Click the big red Record button on the top left and start speaking.
- Tip: You can either record all the slides at once without pressing pause, or you record each slide individually, then click pause, then go on to the next slide and record again. However, it's important to note that PowerPoint creates an individual audio file for each slide, even if you record all at once.
- Important : PowerPoint does not record during transitions, so only speak when you're on a slide.

- You can also draw on your slides with the painting tools on the bottom. These drawings will be saved to your presentations.
- On the bottom left corner, you'll see what slide you're on. You can also see two time counts. The first one is for the recording on the current slide, the second one is for the recording of the presentation overall.
- If you want to delete the whole voiceover, click Clear and Clear Recordings on all Slides . If you only want to delete the recording on the specific slide you are on, click Clear Recording on current Slide.
- If you want to re-record the audio from one slide after deleting it, just go to that slide and click Record again. Record what you want to say, then click Stop when you're done.
- Once you're done, leave the Recorder View. Click the small x in the top right corner or hit Esc .
- You can now either save the presentation as a regular PowerPoint file (just click Save and you're done) or as a video. If you'd like a video, follow the instructions below:
Save Presentation as Video
- Go to File in the PowerPoint taskbar

- Choose Export on the left, then Create a Video .

- Select the quality you'd like. We recommend Full HD (1080p).
- In the following drop-down menu, make sure Use Recorded Timings and Narrations is selected.

- The setting Seconds spent on each slide is only for the slides where there is no recording (if you have recordings on all of your slides, you can just ignore this setting.)
- Click Create Video and choose where the video should be saved. The video creation might take a while, so don't close PowerPoint right away!

Live interaction with polls & quizzes
If you prefer to give a talk where you can also interact with your audience, then the free software SlideLizard is the ideal solution! Using live polls , Q&A and feedback , your presentations will become even more exciting and interactive. SlideLizard integrates directly with PowerPoint, making it a breeze to use.

Can I record a presentation in PowerPoint?
Yes, PowerPoint also allows you to record your presentation with voice and video narration. You can read about how this works in our blog .
How can I record a presentation in PowerPoint with audio and video?
At first create your presentation. For the recording you will need a microphone (the one on your computer should do), your finished presentation and a video camera (if you also want to record a video). We have created a tutorial on our blog where you can read the further steps.
Related articles
About the author.

Pia Lehner-Mittermaier
Pia works in Marketing as a graphic designer and writer at SlideLizard. She uses her vivid imagination and creativity to produce good content.

Get 1 Month for free!
Do you want to make your presentations more interactive.
With SlideLizard you can engage your audience with live polls, questions and feedback . Directly within your PowerPoint Presentation. Learn more
Top blog articles More posts

SlideLizard 1.6 Update
Best Sources for free Icons to use in PowerPoint Presentations

Get started with Live Polls, Q&A and slides
for your PowerPoint Presentations
The big SlideLizard presentation glossary
.potx file extension.
A .potx file is a file which contains, styles, texts, layouts and formatting of a PowerPoint (.ppt) file. It's like a template and useful if you want to have more than one presentation with the same formatting.
Slide Master
To create your own Template in PowerPoint it is best to use the Slide Master. After updating the Slide Master with your design, all slides (fonts, colours, images, …) adapt to those of the Slide Master.
Valedictory Speech
A valedictory speech is given in order to say goodbye, usually at graduation. It should inspire listeners and functions as a send-off into "real life".
Audience Dynamics
Audience Dynamics means the motivations, attitudes, beliefs and values, which influence the listener's behaviour.
Be the first to know!
The latest SlideLizard news, articles, and resources, sent straight to your inbox.
- or follow us on -
We use cookies to personalize content and analyze traffic to our website. You can choose to accept only cookies that are necessary for the website to function or to also allow tracking cookies. For more information, please see our privacy policy .
Cookie Settings
Necessary cookies are required for the proper functioning of the website. These cookies ensure basic functionalities and security features of the website.
Analytical cookies are used to understand how visitors interact with the website. These cookies help provide information about the number of visitors, etc.
- Add animation Video
- Add transitions between slides Video
- Add, format, and record video Video
- Add and record audio Video

Add and record audio

Add and record audio, such as music, narration, or sound bites, to your PowerPoint presentation and select the playback options.
Add audio from your PC
Select Insert > Media > Audio .
Select Audio on My PC .
In the Insert Audio dialog box, select the audio file you want to add.
Select Insert .
Record audio
Select Insert > Media > Audio .
Select Record Audio .
Type in a name for your audio file, select Record , and then speak.
Important: Your device must have a microphone enabled in order to record audio.
To review your recording, select Stop and then select Play .
Select Record to re-record your clip, or select OK if you’re satisfied.
To move your clip, select and drag the audio icon to where you want it on the slide.
Note: If you’re using more than one audio file per slide, it’s advisable to put the audio icon in the same spot on a slide to find it easily.
Select Play .
Change playback options
Select the audio icon and then select the Playback tab. Then select which options you'd like to use:
To trim the audio, select Trim and then use the red and green sliders to trim the audio file accordingly.
To fade in or fade out audio, change the number in the Fade Duration boxes.
To adjust volume, select Volume and select the setting you prefer.
To choose how the audio file starts, select the dropdown arrow and select an option:
In Click Sequence – Plays the audio file automatically with a click.
Automatically – Plays automatically once you advance to the slide that the audio file is on.
When Clicked On – Plays audio only when the icon is clicked on.
To choose how the audio plays in your presentation, select an option:
Play Across Slides – Plays one audio file across all slides.
Loop until Stopped – Plays an audio file on loop until it’s stopped manually by clicking the Play/Pause button.
To have the audio play continuously across all slides in the background, select Play in Background .
Delete audio
To delete audio, select the audio icon on the slide and press Delete.
Add audio to your PowerPoint presentation
Play music for the duration of your slide show

Need more help?
Want more options.
Explore subscription benefits, browse training courses, learn how to secure your device, and more.

Microsoft 365 subscription benefits

Microsoft 365 training

Microsoft security

Accessibility center
Communities help you ask and answer questions, give feedback, and hear from experts with rich knowledge.

Ask the Microsoft Community

Microsoft Tech Community

Windows Insiders
Microsoft 365 Insiders
Was this information helpful?
Thank you for your feedback.
How to Do a Voice Over on Google Slides: Tools & Tips
Eager to add a personal touch to your Google Slides presentation? Integrating a voice-over can significantly elevate your delivery, making it more engaging and accessible. But how does one navigate this process? It may seem complex, but with the right guidance, it’s actually a walk in the park.
Whether you’re new to Google Slides or have been using it for a while, this guide will serve as your roadmap. With comprehensive step-by-step instructions, we’ll unveil the process of adding a voice-over to your slides, helping you bring your presentations to life.
So, are you ready to lend your voice to your ideas? Let’s set sail on this journey and explore the dynamic world of voice-overs in Google Slides together! By the end, you’ll have a powerful new tool in your presentation toolkit.
2 Million+ Google Slides Themes, Presentation Templates + More With Unlimited Downloads
Download thousands of Google Slides themes, and many other design elements, with a monthly Envato Elements membership. It starts at $16 per month, and gives you unlimited access to a growing library of over 2,000,000 presentation templates, fonts, photos, graphics, and more.

Delica Google Slides
133+ unique slides.

Company Profile Template
Google slides.

Kloe Minimal Template
Clean & simple design.

Creative Template

Ciri Slides Template
Clean & minimal.

Alloyz Business Template
Explore Google Slides Themes
Understanding Voice Overs
Voice overs in presentations are essentially audio narrations that accompany and explain the visual content on your slides. They are an effective way to connect with your audience, explain complex concepts, and add a personal touch to your presentation.
Using Google Slides’ Built-In Audio Insertion Feature
While Google Slides doesn’t have a direct voice over feature, it does allow you to insert audio files. This means you can record your voice over separately and then add the audio file to your slides. Here’s how:
- Record your voice over for each slide using a voice recording tool. You can use built-in tools on your device, like Voice Recorder on Windows or Voice Memos on macOS and iOS, or use online tools like Vocaroo.
- Save each audio file individually. It’s recommended to use an organized naming system, like ‘Slide1’, ‘Slide2’, and so on.
- Upload the audio files to your Google Drive.
- Open your Google Slides presentation. Select the slide you want to add the voice over to.
- Click on ‘Insert’ > ‘Audio’. This will open a window showing your Google Drive files.
- Select the relevant audio file for the slide. Once inserted, an audio icon will appear on your slide. You can click on this icon and adjust the settings, choosing whether the audio plays automatically, on click, or loops.
Repeat these steps for each slide you want to add a voice over to.
Using Screen Recording Tools
Another approach to adding voice overs to your Google Slides presentation is by using a screen recording tool. This method allows you to narrate your presentation in real time, creating a more dynamic and interactive experience for your audience. Here are some popular screen recording tools you can use:
Loom is a user-friendly tool that allows you to record your screen, voice, and face simultaneously. You can use it to navigate through your Google Slides presentation while providing real-time narration. Here’s a simple guide:
- Download and install Loom on your computer.
- Open Loom and select ‘Screen + Cam’ to record both your screen and voice.
- Open your Google Slides presentation in Present mode.
- Start recording in Loom and navigate through your presentation as you provide your voice over.
- Once finished, you can edit the video in Loom, trimming any unwanted sections and adding callouts or captions as needed.
- Save the video and share it directly with your audience, or upload it to a video sharing platform like YouTube and embed the video into your Google Slides presentation.

2. ScreenPal
ScreenPal is another great tool for recording voice overs. It offers a range of editing tools, including options to add captions, animations, and even a green screen effect. Follow these steps to use ScreenPal:
- Download and install ScreenPal on your computer.
- Open ScreenPal and select ‘Start Recording’.
- Choose the screen capture area and ensure the microphone is turned on for voice recording.
- Start the recording and go through your Google Slides presentation, narrating as you progress.
- After finishing the recording, you can use the video editor to add effects, trim parts of the video, or adjust the audio.
- Save your video and upload it to a platform like YouTube. Then, you can share the link or embed the video into your Google Slides presentation.

Using Professional Voice Over Software
If you’re looking for a more professional sound or need advanced editing options, consider using professional voice over software like Audacity . Audacity is a free, open-source software that offers a wide range of audio recording and editing features. Here’s how to use Audacity for your voice overs:
- Download and install Audacity on your computer.
- Open Audacity and select the microphone for recording.
- Start recording your voice over. You can record the narration for each slide individually or record a continuous narration and split it later.
- Use Audacity’s editing features to clean up the audio, remove noise, adjust volume levels, and add effects as needed.
- Export the audio files and upload them to Google Drive.
- Open your Google Slides presentation and insert the audio files as explained in section 2.

Tips for Effective Voice Overs
Creating a compelling voice over involves more than just reading your slides. Here are some tips to help you create engaging narrations:
- Write a script: Don’t improvise your narration. Write a script for your voice over and practice it. This will help you deliver a clear, concise, and engaging narration.
- Speak clearly: Speak at a steady pace, articulate your words clearly, and use pauses effectively. Ensure your voice is loud enough to be heard clearly but not so loud that it’s jarring.
- Be conversational: Try to make your voice over sound natural and conversational, as if you were speaking to the audience face-to-face. This can make your presentation more engaging and relatable.
- Use an appropriate tone: Match the tone of your voice to the content of your presentation. If your presentation is about a serious topic, your voice should reflect that seriousness. Conversely, if your presentation is light-hearted or humorous, let that show in your voice.
Adding a voice over to your Google Slides presentation can elevate it from a basic slide show to an immersive, engaging experience for your audience. With the tools and techniques we’ve discussed in this article, you’ll be well-equipped to create effective voice overs for your presentations.
Remember, the key to a successful voice over is clear, engaging narration that complements and enhances your visual content. Happy recording!
Create Your Course
How to add voiceover to powerpoint (2022 update), share this article.
Are you looking to add audio, narration or voice-overs to your Powerpoint or Keynote slide presentations? This is a great way to make your presentations more engaging . We’ll show you how to do it within PowerPoint, and how to do it within Thinkific!
Related: Complete guide on How To Add Voice Over On Google Slides Or PowerPoint
How to do voice over PowerPoint
Microsoft Powerpoint has a feature that many average users don’t know about, which allows you to add voice-over narration to your slides.
For this option, all you’ll need is Microsoft PowerPoint, and a computer with microphone.
Step 1 – In the top menu, go to Slideshow >> Record Slideshow
You have the option to record from the beginning of the presentation, or from the current slide that you’re on.

Step 2- Start recording
Once you select which recording you’d like to do, you’ll be in full-screen mode with options to record, stop, and replay.
Once you click record, there will be a countdown timer from 3.

Anything you type in the notes section of the PowerPoint can be viewed by clicking on the notes button at the top.

The recording will stop automatically once you make it to the final slide. You can also pause, stop, or replay a recording any time by pressing the pause button in the top left of your screen.
You can also record video of yourself in the corner by selecting the video option in the bottom right corner.
Step 3 – Testing your narration
Once you’re finished, a speaker icon will appear at the bottom right corner of all the slides with recorded narration.
To play the narration, just hover over the speaker icon to play, skip to time, or adjust the volume.
Voila! You have now added a voiceover to your PowerPoint.
If you’re interested in creating voiceovers for an online course, next we’ll show you how to do it in Thinkific.
Why not monetize your presentations with an Online Course? Download this Guide To Earning $100,000 In Online Course Sales :
Using Thinkific for voice-over presentations
Voice overs can now be done directly within Thinkific, and you can deliver it as part of your online course!
Often, simple is key. We’ve heard from many of you that you’d love to create your course by simply adding audio to your Powerpoint and Keynote slide presentations, without having to fight with technology in the process. So, we built it for you.
- Save your slide presentation out of Powerpoint or Keynote as a PDF file
- Add a new presentation lesson type to your course, importing the PDF you just created
- Record audio narration slide by slide, directly within the system
And you’re done! With voice over PowerPoint, students will be able to flip through your presentation slide by slide, and your audio will play automatically. This makes it super simple to convert existing presentations for your courses.

Since launching this, we’ve seen people creating online courses faster than ever. You’re able to go from PowerPoint to a complete online course without any extra tools or software. If you’ve already got a presentation ready to deliver, you can use Thinkific’s presentation tool to easily create an online course.
Sign up for a free account now to try it out today! Or if you’re already signed up, give our presentation tool a try and see how easy it is to create online courses.
Free Download
As a bonus, we’ve put together a free resource with the 5 Best Presentation Practices used by our most successful course creators.
Note: This guide was created in April 2015 and was updated in August 2021 with updated steps on how to do voice-over PowerPoint.
- 13 Best Online Coaching Platforms and Tools for 2024
- 11 Top AI Tools for Content Creators
- 14 Ways To Protect Your Intellectual Property (Online Course Videos & Content)
- How To Craft Magnetic & Compelling Learning Outcomes
- Essential Questions To Ask In Your Training Evaluation Survey
Related Articles
10 steps to creating a wildly successful online course.
Award winning online course creator Sarah Cordiner shares her 10 step process for creating and launching wildly successful online courses.
Bite Sized Learning: A New Strategy For Teaching (How It Works & Tips)
Bite sized learning is as simple as it sounds… It's a strategy implemented to deliver content in very small, focused nuggets. Learn how to use it.
Best Practices for Onboarding Remote Employees
Onboarding employees remotely comes with a unique set of challenges. Learn our tips and best practices for onboarding remote employees.
Try Thinkific for yourself!
Accomplish your course creation and student success goals faster with thinkific..
Download this guide and start building your online program!
It is on its way to your inbox
How to Do a Voice Over Like a Pro: The Complete Guide

Marketing Content Strategist

Table of contents
What is a voice over, why is a good voice over important for your video, do i need a professional voice talent for great voice over, the essential elements of a good voice over, how can i make my voice sound better on voice overs, how to record a voice over, don’t forget the captions and audio transcription, how’s it feel to be a voice over pro, making a voiceover, the faqs, subscribe to techsmith’s newsletter.
Whether you’re making a YouTube video or recording a presentation, if you make videos — especially how-to and explainer videos — you will almost certainly need to record voice overs. In fact, depending on how many videos you create, you may have to do a lot of voice over work.
For many people, the thought of recording their voice and sharing it with the world is horrifying. Or at least genuinely uncomfortable. But it doesn’t have to be difficult or stressful!
So what is voice over recording? And how do you record voice overs that grab and keep your audience’s attention? Well, buckle up, because you’re about to find out!
In this article, we’ll discuss the ins and outs of what a voice over is, how you can record your own, and go over some voice over tips for beginners. Here’s what you’ll learn:
- How to record, edit, and add your voice over to your video in six easy steps .
- Four things that ensure a great voice over .
- Which audio recording software is best for voice overs?
- How to not hate the sound of your own voice .
The Marketer’s Ultimate Guide to Video
In our FREE ebook, we’ve put together practical strategies to get out of the woods and create engaging, powerful video content on your own that reaches your audience.
A voice over recording (or just a “voice over”) is a person speaking (but not seen) during a video — often describing, highlighting, explaining, or providing additional context to what a viewer sees.
It’s often confused (or equated) with narration. And, while they are similar, they are not quite the same thing.

Narration is a specific type of voice over that describes all of the on-screen action, often telling a story based on what’s happening. While narration is more commonly used for entertainment, non-narration voice overs are often used on instructional, informational, and educational videos.
An easy way to think about it: All narration is a voice over, but not all voice overs are narration.
Some might think that the audio portion of a video is less important than the visual aspects, but that’s not true. Most people that watch videos say they are more likely to stop watching a video with bad audio vs. one with lower-quality video.
In fact, a recent TechSmith study of viewing habits showed that more than 25% of video viewers watched a video all the way through because the audio was good — more than those who said professional video style was most important.
This isn’t that surprising when you think about it. While the on-screen elements of your video are what makes it a video, in many cases, it’s the voice over that helps people truly understand what’s being shown.
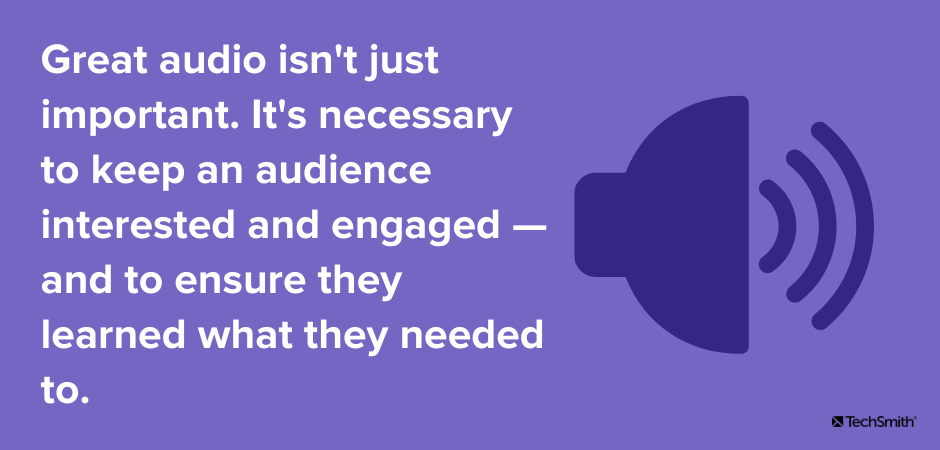
Muddy, muffled, or otherwise garbled or difficult-to-understand audio tracks are frustrating to viewers. And, for people who are blind, but still need the information your video provides, good audio is essential.
So great audio isn’t just important. It’s a fundamental necessity to keep an audience interested and engaged — and to ensure they get the information they need.
The Easiest and Fastest Way to Record and Edit Voice Over Audio!
Audiate makes recording and editing your voice as simple as editing text in a document.
The short answer: No.
Just because quality voice over is important for the success of your video, it doesn’t mean you need to go to great lengths (and expense) to get it. Some people think you need to have one of those super-snazzy radio voices to produce good voice overs for your videos, but that simply isn’t true.
Sure, if you have the budget and you’re making professional videos, you can hire a professional voice over artist. But it’s not necessary.
With the help of this guide, you’ll soon see why most videos don’t need professional voice overs and that you really can do it yourself! But how can you record your voice over a video? First, you need to know what good voice over is.
When most of us think of great video voice overs, we probably think of actors like Morgan Freeman or James Earl Jones, usually because there’s a tendency to associate voice overs with having a really great voice. And while that can help, it’s not a prerequisite for doing a voice over.
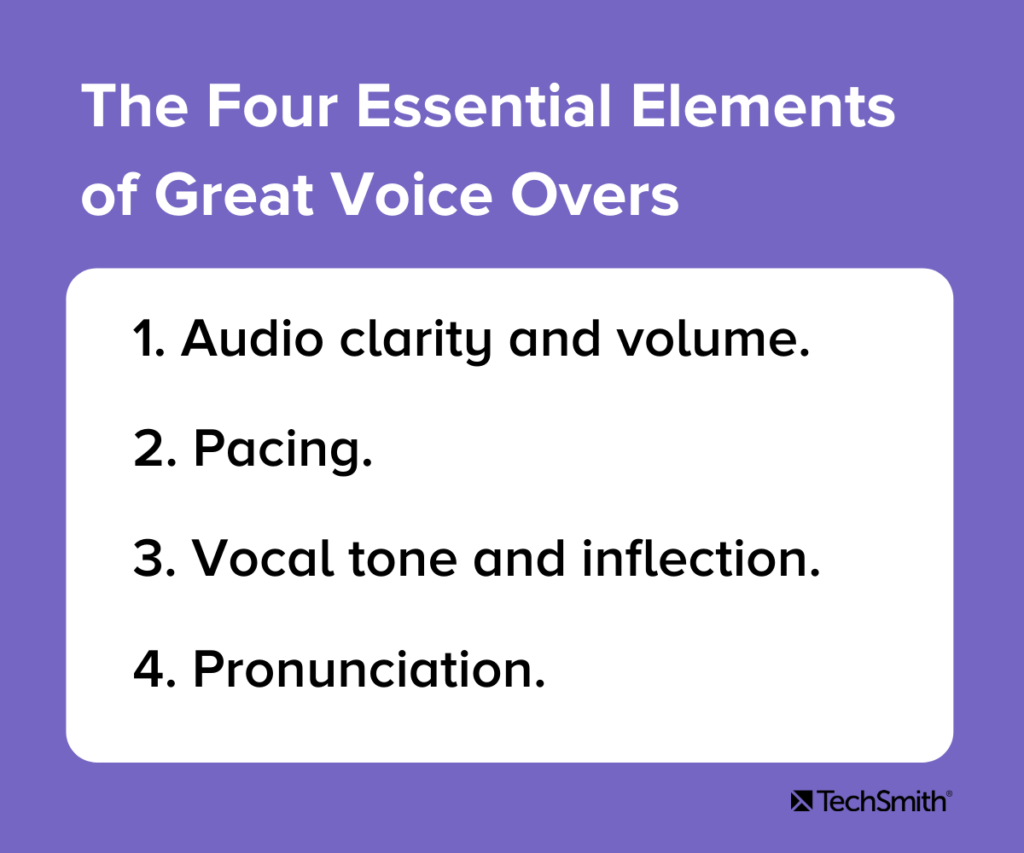
In fact, with a little know-how and some practice, almost anyone can produce a professional-quality voice over for a video. All you have to keep in mind are the key elements that make a voice over stand out:
- Audio clarity and volume
- Vocal tone and inflection
- Pronunciation
1. Audio clarity and volume
The clarity of your voice and speaking at a comfortable volume may be the most essential parts of great audio.
If your voice over recording is fuzzy or muddy sounding, it will be difficult for people to understand and your audience will be distracted and unable to absorb the information or may simply switch your video off. Either way, they’ll miss your message and you’ll miss an opportunity to share your knowledge.
Similarly, if the volume of your audio is too low, it may be difficult for people to hear. And if it’s too loud, you risk distorting it. Fortunately, there is a solid sweet spot for getting the volume just right, which we’ll talk more about in a moment.
Ever talk with someone who has a really exciting story to tell, but they’re so excited about it that they rush through it and when they’re done you can’t even remember what they were talking about? Or, someone who drones on and on with no end in sight, while you struggle to keep your eyes open?
This is called pacing, and it’s really important to get right. Too fast and your audience won’t know what hit them. To slow and they’re likely to get bored.
The best voice overs have a natural and deliberate pace, which is why you should always write a script (and practice it!) before you start recording as this will help you speak naturally. You should also remember that pacing includes things like pausing now and then to take a breath, either for effect or to give the listener a break to process important information.
3. Vocal tone and inflection
Like pacing, vocal tone and inflection refer to ensuring you speak naturally and pleasantly. You want to sound friendly and engaging, but not so much that you sound fake.
No one wants to sound like a game show host (or like Troy McClure). But, you also want to avoid a monotone robot voice which, like pacing that’s too slow, can be boring and off-putting.
4. Pronunciation and enunciation
The final element of great voice over work is ensuring that you pronounce each word correctly and that you speak clearly enough to be understood. Avoid mumbling, but don’t shout or over-enunciate, either.
Be mindful of your regional accent (yes, we all have them) and pronunciations as they relate to your audience. While it’s perfectly acceptable to “warsh” your hands in Missouri or have a great “idear” in New England, those pronunciations may confuse people from other locations.
Don’t worry, though. No one expects you to sound like a professional voice actor. The best thing you can do is speak naturally and clearly — the rest will follow with practice.
This is the number-one issue most people bring up when they have to do a voice over for their video.
Most of us rarely have to hear our own voices in audio recordings. We’re used to the rich, warm sound of our own voices in our own ears and there’s no way around the fact that you sound different on a recording than you do to yourself.
So how do you stop hating the sound of your own voice? Well, you just have to get used to it.
Think of it this way: Your voice on recordings is how you actually sound to everyone around you. When you speak to others, that’s what they hear. the only one who hears a difference is you.
So, there’s really nothing to be embarrassed or feel shy about.
Everyone who does voice work has to overcome this hurdle. But, like most things, the more you do it, the easier it gets. Once you’ve done enough voice-over work, your voice will sound just as normal on recordings as it does in your own ears.
Of course, if you really can’t get over it, you can always ask someone for help. Whether that means enlisting a friend or colleague, or hiring a professional to do the work for you.
1. Preparing to record
Not all videos need a ton of preparation. Quick one-off screencasts or a fast demonstration of a new user interface for a colleague can probably be done on the fly. But, for videos where you want a more polished look or need to cover more information, a bit of preparation goes a long way.
Find a quiet place to work
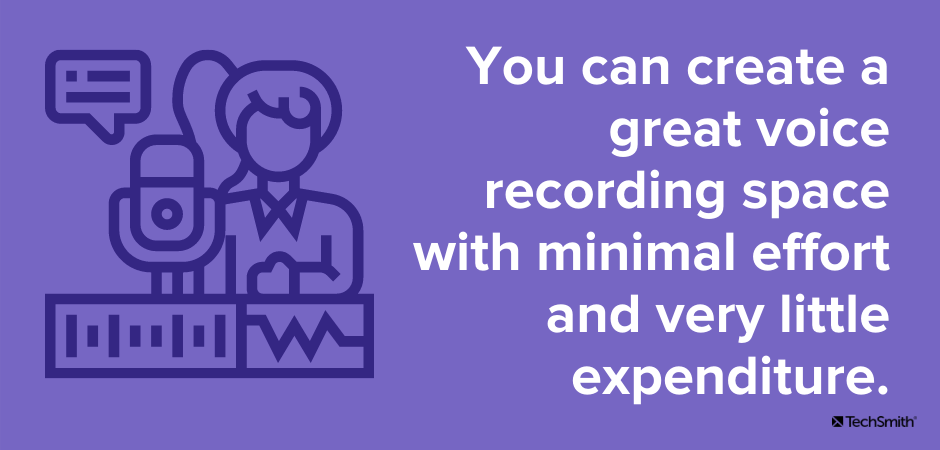
You’ve probably seen what a recording studio looks like. Professional voice over artists typically have a room somewhere with walls covered in sound-absorbing foam, a fancy microphone setup with a pop screen, and a computer workstation that looks like NASA’s Mission Control.
Luckily, you don’t have to go that far to get great results. You can create a great voice recording space with minimal effort and very little expenditure.
First — and most importantly — you’ll want a space that’s free from distracting noises and where you are unlikely to be interrupted. Most decent microphones pick up even faint ambient sounds, and those sounds will make it into your recording.
If your space is at work, avoid areas where you can hear your coworkers talking, etc. Or, plan to record when no one else is in the office.
Wherever you are, be mindful of the sounds of your heating and cooling system. If you can’t find a spot where you can’t hear air rushing through your ducts, you may want to shut down your furnace or AC while you’re recording.
If your recording space is near a window, listen for sounds from outside, such as wind, birds chirping, and dogs barking. Be especially mindful of traffic sounds — particularly loud delivery trucks as these will almost definitely be picked up in your recording.
Nowhere is going to be completely silent, so find the best place you can — even if that means thinking outside the box.
For example, you might find the quietest place you can find to record is in your car (with the engine off, of course). It might not be the ideal setup, but if all you need to do is speak into a microphone, it might be the quietest environment you have access to — and you might be surprised by the results!
Choose a microphone
Next, you need a decent microphone. We won’t go too in-depth with this here, but we do have another article detailing the best microphones for recording video .
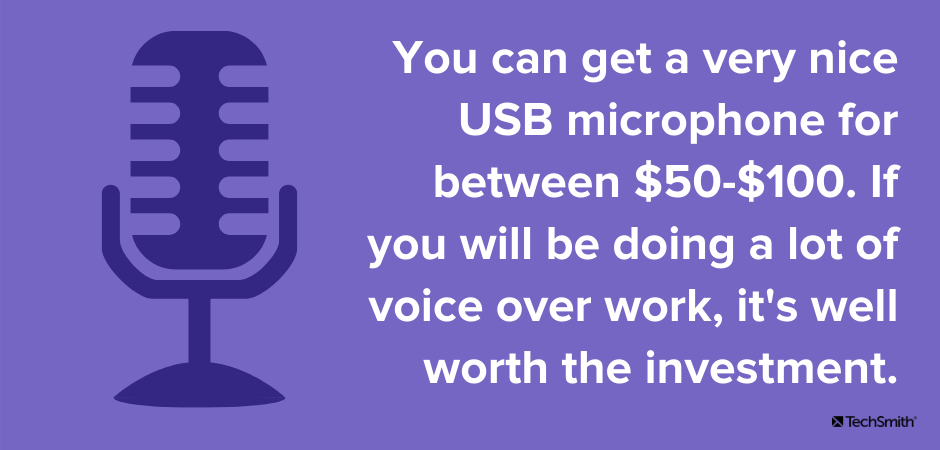
What we will say, however, is you should definitely avoid recording your voice ovesr on your laptop microphone, if possible. While built-in mics are fine for the likes of Zoom meetings, even a low-cost external microphone will be better for a video voice over.
You don’t need to spend hundreds of dollars, either. You can get a decent USB microphone for $50-$100, which is well worth the investment if you’ll be doing a lot of voice over work. However, even the headphones that come with your smartphone (which usually have a small built-in mic) will record a better sound than just your computer’s microphone.
If you do intend to use an external mic, we’d also recommend investing in a pop filter . They’re cheap and help minimize the distracting sounds caused by hard consonants such as “p” and “b.”
Choose your audio software
There’s no shortage of audio recording software on the market and most of them will offer more or less the same level of functionality. But, for the average user, these tools are often complicated and come with a high learning curve to be of any practical use.
So, with that in mind, we’d recommend checking out TechSmith’s Audiate — which comes with a seven-day free trial.
2. Write a script
Having a script is probably the single most important thing you can do to ensure your voice over sounds professional. Nothing ruins a good voice over faster than a lot of “uhms” and “ahs” as you try to remember what you wanted to say.
The best scripts will include everything you intend to say, word for word. Taking the time to write this out before recording helps ensure that you will cover everything you want to without the risk of wandering off into unrelated topics.
To write a script, you should first outline the points you want to make and then write the full script based on that outline.
Once it’s written, read your script aloud several times before recording, and be mindful of words or phrases that may feel awkward or difficult to say. A script often sounds and feels different when it’s read out loud compared to how it sounds in your head.
This great blog post will give you more information on writing your script.
3. Do a test recording
Now that all the essential tools are in place, it’s time to record your voice over!
Before you get down to the real thing, though, be sure to run a test recording to ensure your equipment is working as it should, and your audio levels are good.
Even if nothing has changed from the last time you did a voice over, it’s still good practice to run a test first. There’s nothing worse than jumping straight into the recording, only to finish and find that something wasn’t set up properly.
You don’t need to record the entire script for your test recording, but a few paragraphs will give you enough to ensure that the audio is clear and doesn’t include any stray or ambient noises.
Top Tip: When you listen back to your test recording, use headphones to check the audio quality. These will be much better than your computer speakers at picking up any unclear audio, feedback, or weird noises.
While you’ll obviously want the audio to sound good on the cheapest speakers, you (and your audience) will be much happier if you use headphones to check for quality. Remember, many of your viewers will probably listen via headphones, so you want to make sure they have the best possible audio.
Microphone placement
You also want to consider where to place your microphone. If it’s too close to the person speaking, it will pick up all kinds of weird mouth noises and air puffs. However, if it’s too far away you might sound lost in a large room.
Ideally, place the microphone about six to eight inches from your mouth, and slightly below your chin. If you’re using an LAV (clip-on mic), make sure it’s about six to eight inches below your mouth.
You should also be mindful of the surface where you place your mic. Some microphone stands will be susceptible to picking up noises from the desk or table they’re sitting on, so be sure to listen for those types of sounds on your test recording.
Check your volume levels
Getting the volume level right for your audio ensures that it’s easily heard and not distorted. If the volume is too low, your audience will have trouble hearing what you say. If it’s too high, you risk garbled audio or blowing out your people’s ear drums.
While you can always make a video louder and adjust levels when you edit, starting with the best possible audio level as you record is always your best bet.
The folks over at Premium Beat have a great post on recommended audio level settings , but here are a few basics.
- Audio levels are measured in decibels (dB).
- In audio editing, 0db is actually the maximum you want to achieve. It sounds weird, but trust us.
- For the most part, your ideal audio level is between -10db to -20db. Your audio should peak around -6db.
- Never go above 0db, as your audio will distort or “clip.”
Most audio recording software will have indicators that let you know when your audio is in danger of being too loud and clipping.
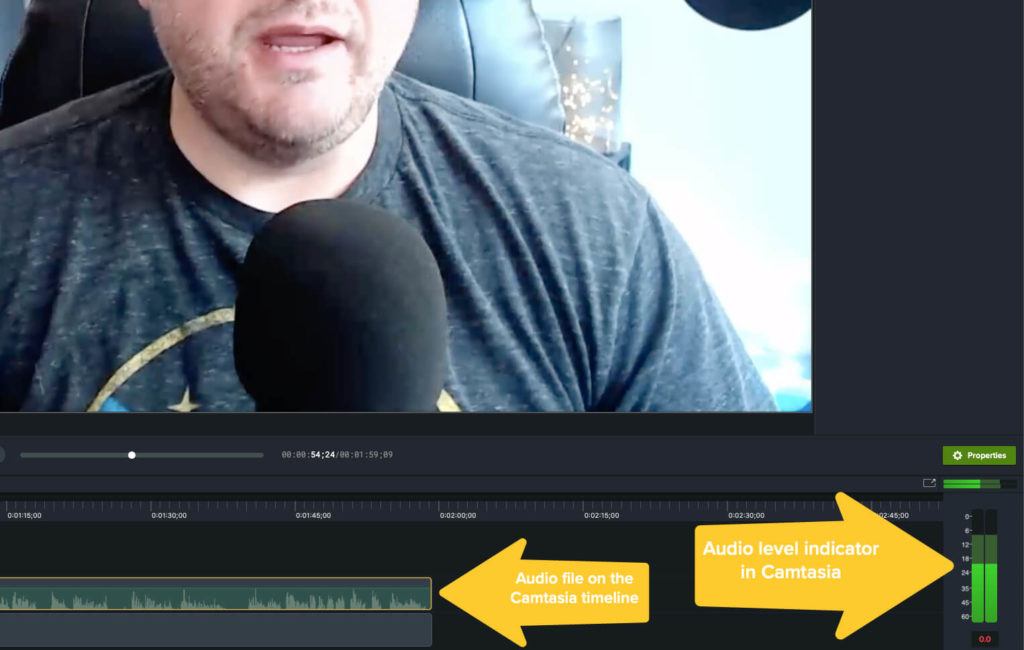
The image above shows TechSmith’s Camtasia interface with the waveform (a graphical representation of your audio recording) on the left and the level indicator on the right. The indicator shows that the audio peaked at just under -6db and is well within the acceptable levels.
4. Record your voice over
Once you’re satisfied with your microphone placement and audio levels, you’re ready to record your voice over! With Audiate, it’s as simple as clicking the record button and speaking.
As you record your script, remember these key tips for ensuring a great voice over:
- Speak slowly and clearly : Enunciate each word, but don’t concentrate on it to such an extent that you sound like a robot.
- Pro Tip : Smiling while you read your script can help you sound happier and more natural.
- Pro Tip : With Audiate, you’ll be able to see and edit your voice over’s text, so you can easily go back and fix any mistakes when you’re done.
- Take breaks : If you struggle with the script or it just gets too hard to keep going, pause your recording and take a break. Rewrite any parts of the script that may be giving you too much trouble and try again.
- Practice makes perfect : As with anything, voice overs get easier the more you do them. Don’t give up if it’s not perfect the first time!
5. Edit your audio
When you finish recording, it’s time to edit. Even if you didn’t make any mistakes, there’s a good chance there’ll be a few things that need fixing. At the very least, you’ll want to trim the beginning and end to remove any dead space.
However, Audiate makes it so easy to edit that you’ll barely have to lift a finger. The video below gives a great overview of how to work in Audiate.
With traditional audio software, you have to hunt through your recording to find your mistakes and edit them individually. Even a short video could take an hour or more to edit depending on how complicated your edits were.
But with Audiate, you can just read the text before highlighting and deleting any mistakes you find. You might also notice that the Audiate interface (below) is much less complicated than the software shown in the screenshot above.
When editing a voice over, it’s always worth listening to the entire recording from start to finish, before making any changes.
While you might find it useful to make some notes to remind yourself of something you want to edit later on, you should try and focus on listening to the overall pacing and tone of your recording on the first listen.
Does it sound like you hoped? Are there any parts that sound rushed, or too slow? Are any words unclear? Did you mumble? Are there weird silences or strange sounds? There’s no better time to answer these questions than on your first listen.
Once you’ve listened o your voice over all the way through you can go back to the beginning and start editing and reducing audio noise . You might also want to cut out any abnormally long silences between sentences or statements.
But remember, pauses are ok! In fact, they’re necessary to help break up the audio and make it feel more natural and conversational.
6. Import your audio into your video editor
In Camtasia, importing and working with audio only takes a couple of clicks and with Audiate, it’s even easier. You might also want to check out this post on syncing audio and video in Camtasia, but for the most part that’s it! You have just successfully recorded your voice over!
It’s worth remembering that Camtasia can also be used to add music to your video , trim your footage and even crop the frames of your videos .
We’ve already mentioned that a large portion of your audience will probably listen to your video via headphones. But, what if we told you that there’s also a high chance that many people will watch your video with no sound at all?
This is why adding captions and subtitles to your video , as well as providing an audio transcription, are so important. For those who can’t, or otherwise won’t, listen to the audio elements of your video, captions allow them to digest all of the information your video provides.
This is another reason why Audiate is so incredibly helpful.
With most other audio tools, you would have to send your audio out to a professional transcription service to have an audio file transcribed and timestamped. Even if you typed out a full script, it won’t have the necessary time stamps to be used as a captions file.
But with Audiate, the transcription happens automatically, complete with time stamps that can be used as captions.
Once you’ve recorded and edited your voice over, you can export that transcription as a caption file (and SRT file) and import it directly into Camtasia. Then, Camtasia will automatically insert the captions into your video. It’s practically magic!
Recording a voice over like a pro is easy when you know what you’re doing, and you have the right tools at your disposal.
However, taking the proper steps before you hit the record button — and then taking the time to edit your audio appropriately — will go a long way to ensure your voice overs sound professional and engaging.
And remember, practice makes perfect! The more you do it, the more natural it will become.
No! You can do great voice over work with minimal investment. All you need to get started is a microphone and audio recording software.
The short answer is you just have to get used to it. But, there are a few things you can do to improve the overall sound of your voice, including speaking from your diaphragm rather than at the top of your throat. Also, be sure to have some water handy for when you’re recording. It’s important to keep your vocal cords hydrated!
There are many options available for audio recording, but if you only need to record voice overs, TechSmith Audiate is your best bet.
Probably not. While a laptop mic is fine for calling into a Zoom meeting, you’ll want an external microphone for your voice over recording. Fortunately, you can pick up a good microphone for between $50-$100.
No! You can do it yourself with great results. You just need the right tools and a little practice.
Note: This post was updated in July 2023 to include new information.
Additional Resources
How to generate ai voice: enhancing your workflow with ai, the easiest way to shorten a video for social media, how to get good audio recordings from your home office.
Home Blog Google Slides Tutorials How to do a Voiceover on Google Slides
How to do a Voiceover on Google Slides
Google Slides is often used to share presentations online. Sometimes, these presentations can be confusing for the recipient unless there is additional information that can help elaborate each slide. While Google Slides, unlike PowerPoint, does not allow recording a voiceover to narrate your slides, you can insert separately recorded audio files to your slides to generate a narration.

Google Slides Voice-Over Recording
You can record your voice-over recordings and save them to a folder in Google Drive to insert in slides via New > File Upload. Google Slides does not support many audio formats, so make sure your narration is in MP3 or WAV format. Otherwise, the file will not show up when you try to insert it in Google Slides.

We recommend that you keep a naming convention for your files that makes them easy to identify so that you can conveniently incorporate them for relevant slides later on.
It is necessary to ensure that your audio files are not restricted. Select one or more files and select Share via right-click context menu.

Ensure all files are accessible via the link for recipients with at least View Only privileges. This will ensure that your audience is able to play the audio from within the Google Slides file. Otherwise, the audio icon will show a message asking the viewer to request access to the audio file.

How to Narrate Google Slides
Once your audio files have been uploaded to Google Slides, and you have unrestricted the sharing of those files, go to your Google Slides Theme and add audio for each slide via Insert > Audio .

Select the audio file with the narration to insert into the current slide and drag it to place it in the desired location on the slide.

After the audio file has been added, you can click to preview the sound. Furthermore, you can customize audio playback options to play the audio automatically or manually, in a loop, and to stop the audio when the slide changes.

To customize the look of the way your audio icon appears on the slide, see the menus below the Audio playback menu on the right sidebar. Using these options, you can adjust the audio icon’s size, position, and color and add a drop shadow and reflection.
Once your narrations are added to respective slides, you can share your presentation and enable the recipients to listen to the narration on each slide automatically or manually (based on your playback settings).

Audio narrations can only be helpful if they are clear and concise, with good voice quality. If you are struggling with context, you can write a script for each slide and read from it to make your narrative more focused.
Make sure you record your narrations in a place where there isn’t any background noise, or you have a noise cancellation headset to cancel out unwanted sounds in the background. It’s always a good idea to playback and check the voice narrations for sound and contextual clarity.
Since Google Slides supports only MP3 or WAV audio formats, you might need to convert your audio narrations to another format before uploading them to Google Drive. You can also use CloudConvert or other Google Drive-supported apps to make conversions from the cloud.

Like this article? Please share
Google Slides, Presentation Approaches, Presentation Ideas, Presentation Skills Filed under Google Slides Tutorials
Related Articles

Filed under Design , Presentation Ideas • May 1st, 2024
The Power of Mind Map Note Taking for Presenters
Add a new tool to your repertoire of presentation skills by mastering the art of mind map note taking. An ideal process to facilitate content retention.

Filed under Google Slides Tutorials • April 29th, 2024
Best Google Slides Add-Ons
Optimize your Google Slides experience by installing the best Google Slides add-ons available in the market. Full list with photos.

Filed under Google Slides Tutorials • April 26th, 2024
How to Print Multiple Slides on One Page in Google Slides
Discover how to print multiple slides on one page in Google Slides to optimize your presentation handouts.
Leave a Reply
Animoto Blog
- Video Marketing
- Video Ideas
- News & Features
How to Create Video Voice Over Presentations (With Templates!)
Mar 14, 2023
Presentation videos allow you to make your pitch to anyone, from anywhere. With the right combination of text, music, visuals, and voice over, you can engage and persuade any audience. With a voice over video, you can create a presentation that sparks emotions and helps you connect with everyone who watches.
In this blog, we’ll show you how to do a voiceover on a video and share tips to create impactful video voice over presentations.
The benefits of adding voice overs to presentation videos
Presentation videos can be leveraged throughout your entire organization. Any department, from sales to marketing, customer support, and HR can create a voice over video to share information in an engaging way.
Many of today’s top hybrid companies are already using videos in meetings to inform their teams, clients, and online audiences. Just last year, in fact, presentation videos were among the most commonly-made videos by businesses. Here are just a few reasons why they are becoming such a popular communication tool.
- Improves information retention: Video appeals to a wide variety of learning styles by using both audio and visual storytelling. When you share information in a way that resonates with your audience, their recall and retention rates will surely improve. Some studies have even shown that viewers retain 95% of a message after watching it in a video, compared to only 10% when reading it.
- Adds personalization: Voice over narration adds a unique element that only you have – your voice! These recordings add a personal touch to your videos that draws viewers in. A little personalization can go a long way for attracting and retaining attention!
- Complements your on-screen visuals: Voice overs actually complement and add value to your visuals. Rather than overloading your video with text, you can use voice over narration to go into more detail. Then, the text can be used to summarize main points and key takeaways.
How to make video voice over presentation with Animoto
Animoto makes it easy to create video voice over presentations! Just follow the steps below to record your custom voice over narration and create a polished presentation video that can engage any audience.
1. Choose a video template or start from scratch
First things first, choose a template! Use one of the free presentation templates below, or browse through our template library for a great starting point. You can also create your own voice over video from scratch for the perfect fit!
2. Customize your video with text, photos, and more
Now it’s time to make your video your own! Apply different themes to transform the design of your video with a single click. Or, make your video on-brand by adding your logo and brand colors. Then add supporting text, photos, video clips, and screen recordings to create a engaging and easy-to-follow business presentation .
You can even use music and voice overs together to craft a compelling story! Just remember to choose a neutral music track that won’t compete with your voice over tracks, and adjust the volume of your music to play quietly in the background.
3. Record or upload your voice over tracks
Next, create your voice over. You can either record a voice over track from scratch or upload existing voice overs right into Animoto. Just follow these simple instructions or dive into our [complete guide to voice over narration]( https://animoto.com/blog/video-marketing/voice over-animoto-guide) to learn how:
- Click on the “Audio” icon at the top of the page to open the audio menu.
- Click the microphone button below your video preview.
- Click “Upload voice over” and select your track or click on “Record voice over”
- Click the red button to record. You’ll see a three-second countdown, after which your recording will begin. Click the stop button to end your recording.
4. Trim or reposition your voice over tracks
Now it’s time to edit your voice overs. You can drag the buffers on either end of the recording to trim off any unwanted sound. Then, drag and drop the recording throughout your audio timeline to align with the visuals on screen.
5. Adjust the volume of your voice over tracks
Select on your voice over track and click the volume button. Then, increase or decrease the volume of your track to help it shine over any background music.
6. Download and present your voice over presentation
Finally, your presentation is ready to share! Download your presentation video to your device for easy sharing and storage. You can then add your presentation to a portable USB to present it in person. Alternatively, you can embed your presentation in an email or share it directly to social media to connect with your online audiences.
Tips for creating professional voice over presentation videos
If you don’t have much experience with voice over narration, it can be hard to know where to start. That’s why we’ve put together some tips to help you record great voice overs in fewer tries!
Write a voice over script
Scripts can save you a lot of time! Instead of having to cut out pauses and “umms” from your voice overs, try writing a script so you can stay on track. This will boost your confidence, help you sync your voice over with your video, and ensure that you know exactly what to say and when.
Find a quiet place to record
Cut down on background noise to create more professional and crisp-sounding recordings. Small confined spaces like closets are great at filtering out background noises. Even recording in a room away from windows can eliminate unwanted outside noises and let your voice shine through.
Practice first before hitting record
Go through a practice run before the “real deal”. This will help you feel more comfortable and confident once you click the record button. Practice makes perfect, you know!
Don't record everything all at once
Recording a long voice over presentation can be quite the mouthful. Instead of worrying about saying everything all at once, record multiple voice over tracks and piece them together! Doing so makes it easier to trim bit by bit and drag your recordings throughout the video so they align perfectly with your visuals.
Use a good microphone
Last but not least, use a good microphone. Even using the microphone on your headphones will provide you with crisper audio than your computer’s mic. But if you’re creating a series of video voice over presentations, you may want to consider using a high-quality external microphone like the ones on this list .
Types of presentation videos you can make (plus templates)
Presentation videos can be made for virtually any topic! From recapping a meeting, to sharing quarterly results and making a sales pitch, you can personalize any presentation with voice over. Here are some video ideas and templates you can use for free to start off on the right foot.
Presentation
This template is a great place to start for your next presentation. Simply record your screen as you run through your presentation slides and speak through them as you go. You can create this video with voice over narration or turn on your webcam and speak directly to your audience!
Educational presentation
Present to your peers, board members, or classroom with a voice over video! This template brings topics to life with simple text boxes, animations, pictures, and video clips.
Team update
Keep the teams across your organization up-to-date and engaged with a voice over video! Use this presentation to share your progress, hurdles, and next steps with any audience. In addition to voice over, you can also include screen and webcam recordings to help tell your story!
Workplace explainer
Explain the importance of new workplace policies with a business presentation ! These are great assets for managers, HR professionals, and anyone who wants to educate their teams.
Meeting recap
Recap the best parts of your latest in-person and online meetings in an engaging way. With meeting recap videos, you can make sure your key takeaways are front and center. It’s also an impressive delivery method for sharing findings and results with clients!
Customer onboarding
Make sure new customers hit the ground running by creating an engaging onboarding video! This can be used to get new clients setup with a new product or make sure that they know where to go for help. It’s a great touchpoint to include right at the start of your relationship.
Training videos can also come to life with a lively voice over track! Check out this Manager Training video that outlines an upcoming training course. Just add the details of your own training program, including due dates, add your branding, and make it your own with voice over narration.
Make a personal connection through video voice over presentations
Whether you want to make personal connections online or build excitement for your next presentation, you can do so with voice over! And with professional templates at your fingertips, you can create a voice over video in less time with double the impact. All you need is an idea and your voice!
Voice over video presentation video FAQ
How long should a video presentation be.
Video presentations should be around thirty to sixty seconds for maximum engagement. These presentations engage your audience through visuals and audio to engage viewers with multiple learning styles.
What tools do I need to record a voice over?
All you need is a [voice over recorder]( https://animoto.com/features/voice over-video) and a microphone to record voice overs! As a bonus, you can use an integrated recorder and video-maker to turn your recordings into engaging presentation videos.
Are USB microphones good for voice overs?
External USB microphones can make your voice overs sound more crisp and professional. Oftentimes, even using the mic on your headphones provides better quality than computer microphones.
- Marketing video
- How-to video
- Slideshow video
- Social media
- Promo video
- Birthday video
- Intro / Outro videos
- Explainer video
- Email marketing
- Training video
- Internal communications video
- Presentation video
- Photography
- Real Estate
- Marketing Agency
- HR / People Ops
- Video commenting tool
- Screen recorder
- Photo video maker
- Music library
- Online video editor
- Video trimming
- Stock library
- Privacy policy
- Terms of use
- Animoto Tutorials
© 2024 Animoto Inc. All Rights Reserved.
We explain and teach technology, solve tech problems and help you make gadget buying decisions.
How to Add Voice-Overs to Canva Presentations

Namrata Gogoi is an author covering Buying Guides and device-related tips and tricks. She loves learning and writing about gadgets and accessories that are functional, innovative, and have a positive impact on people's lives. Since 2016, she has covered smartphones, computer accessories, household electric appliances, and any product that helps bring convenience to one's life. Previously, she worked as an IT Analyst at TCS but found her calling at Guiding Tech.

Ashish, Computer Engineer by profession, has been writing about tech for 16 years, with a primary focus on Windows and Smartphones. He has a keen interest in writing about social media, as it constantly evolves, introducing new features to explore.
- You cannot edit uploaded audio files in Canva.
- Present and Record may be unavailable in every country.
- AI Voice-over apps will have limitations on the number of minutes in the free version.
Method 1: Add Audio Files
Since Canva has limited customization options, you must ensure the audio files are trimmed before uploading. Also, all your files must be appropriately named and uploaded to avoid confusion later.
Step 1: Open the presentation and select the slide where you want to add the voice-over.
Step 2: Click the Uploads section on the left and switch to the Audio tab to reveal all the audio files.
Step 3: Drag and drop the audio at the bottom of the selected slide, and position it appropriately using drag.

Repeat the above steps for all the slides. Once everything is in place, tap the Play button to view and hear your voice-overs. If you have missed uploading an audio file, you can manually do it when editing the presentation.
This method comes in handy when you cannot access the Present and Record option, which we have explained next.
Method 2: Present and Record
Canva has a built-in method—Present and Record—for adding voice-overs to already-made presentations. One of the most significant drawbacks is that you need a quiet room and don’t have the option to trim the recorded audio.
Step 1 : Open the presentation and click on the three-dot menu at the extreme right corner.
Step 2 : Select Present and Record from the list of options > Start Recording.

Step 3: It will prompt you to allow access to the camera and microphone. Since you only need to perform a voice-over, skip the camera permission and give access to your microphone. Once done, click on the Start recording button.

Step 4: Now, record your voice for all the slides. The slides with recorded audio are marked in red. Remember to move along the slides as the presentation asks.

When you need to pause, click on Pause . This way, you can also skip a few slides where you do not want any voice-overs.
Step 5 : Once the recording is complete, click on Done at the top right corner.

Depending on the length of the audio and the presentation’s content, the download might take time.

In addition to the direct download, Canva allows you to copy and share the link to the presentation directly.
Method 3: Using AI
Many voice-over AI apps can connect to Canva and help you convert text to voice using multiple voice profiles. Here, we are using Murf AI.
Step 1: Open Canva, go to Apps , and search for Murf AI .
Step 2: Click on it, sign in using your existing account, or sign up.
Step 3: Once done, it will prompt you to use it in the existing or new design .

Step 4: In the Canva presentation editor, you will have access to Murif AI on the left , where you can select language , a voice profile , and a text box where you can type the text and choose style , speed , and pitch.

Step 5: Select the slide where you want to add the voice-over, click on Generate voiceover , and Add to the design .

It’s easy to add voice-over using AI apps, but there are limitations when using a free account. For example, Murf AI limits voice-over time to 12-15 minutes.
Was this helpful?
Last updated on 29 April, 2024
The above article may contain affiliate links which help support Guiding Tech. However, it does not affect our editorial integrity. The content remains unbiased and authentic.
Leave a Reply Cancel reply
Your email address will not be published. Required fields are marked *

The article above may contain affiliate links which help support Guiding Tech. The content remains unbiased and authentic and will never affect our editorial integrity.
DID YOU KNOW

Namrata Gogoi
More in internet and social.

How to Set Custom Profile Picture on Netflix

How to Get Someone off Your Best Friends’ List on Snapchat
Join the newsletter.
Get Guiding Tech articles delivered to your inbox.
eLearning Voice Over: A Comprehensive Guide Everything to know about eLearning voice over.
By Hammad Syed in Voiceover
Share this post

Generate AI Voices, Indistinguishable from Humans
Table of contents, present like a pro: how to add voiceovers on google slides and powerpoint.
Imagine teaching an online course to a packed room without having to do it live. How convenient is that?
Instead of lecturing in real-time, you can prepare your slides beforehand, add a voiceover to them, then present them as usual with your discussion already incorporated into them. You can even use artificial intelligence (AI) voiceovers.
AI voiceovers for eLearning can be particularly useful if you don’t have the time or energy to do them yourself. AI can also be practical if you think a different voice will do a better job at making your presentation more effective or interesting. Or perhaps you feel your accent may be too heavy for most of your audience to understand.
Before you proceed any further, prepare your presentation (i.e., your deck) and create your voiceover script. You need to write a script for every slide. Once you have those ready, follow the steps below.
Adding a Voiceover to a Google Slide Presentation
If you are using Google Slides , do the following:
1. Prepare Your Voiceover Audio
You can record the audio yourself using your computer. Taking the script you prepared beforehand, use your computer’s native sound recording app or a professional program like Audacity, Ardour, or Adobe Audition to record your voiceover.
You may also hire a professional and do it in a studio. You may hire a voice talent, rent a studio, record your voiceover using professional equipment and, in the presence of and with guidance from a sound engineer, have the resulting audio recording post-processed.
The latter method will give you great results with lots of investment. However, it is more expensive and time-consuming. Moreover, if you need to make changes to your script later on, there’s no quick and easy remedy. You may have to re-record the erroneous audio, which will cost you more in studio time and service fees.
Alternatively, you can use an AI text-to-speech program. Just plug your well-written (and correctly punctuated) speech into your choice of AI text-to-speech generator, choose your preferred speaking voice (no need to hire a voice talent), and let the program do its magic.
Changing your script is a lot easier too. After making the changes to your text, rerun the AI text-to-speech generator and get an updated voiceover audio file in minutes.
Important Note: Create a separate voiceover audio file for every slide and be precise about file-naming to prevent confusion. For instance, you can name the audio file for slide one as “slide-1.wav.”
By the way, Google Slides will only accept MP3 and WAV files, so make sure to use either of these formats when you save or export your voiceover audio.
2. Upload Your Audio File to Your Google Drive
Once your audio files are prepped and ready, upload them to your Google Drive to make them accessible to your Google Slides presentation.
3. Add Your Voiceover Audio to Your Slides
Open your Google Slides file, then click “Insert>Audio” on the menu to bring up the insert audio interface.
You will see all the audio files you uploaded in the preceding step. Choose the correct audio file and click “Select” to insert that audio into its corresponding slide.
After inserting the voiceover audio file into the correct slide, make the necessary adjustments to its format options . You can set it so the voiceover plays automatically on slide load, and you can adjust the audio volume. You can also choose to hide the audio file icon in the presentation view and force the audio to stop playing upon slide change.
Adding a Voiceover to a PowerPoint Presentation
There are two ways you can add voiceovers to a PowerPoint deck: by inserting pre-recorded audio files into the PowerPoint slides or by recording the voiceovers directly onto the slides.
Insert Audio File
If you choose to prepare the audio file beforehand, follow step one of the preceding section. You can record your voiceovers yourself on your computer or hire a voice talent and record and post-process in a studio.
Using AI is a practical alternative , however. You can simply plug your script into an text to speech software or voice over app to get your professional-sounding voiceover in minutes.
Once your audio files are ready, open your PowerPoint file and insert them into their corresponding slides. Do this by clicking “Insert>Audio>Audio on My PC” from the program’s toolbar menu.
PowerPoint supports audio files with the following extensions:
Record Audio File
Microsoft PowerPoint also lets you record your voiceover directly onto the slide. To do this, open your PowerPoint file, navigate to the correct slide, click “Insert>Audio>Record Audio,” and then record your voiceover.
This method is somewhat limited, however, as it doesn’t leave you a lot of options for audio recording. You may use an interface program to clean up your mic’s sound output, but you won’t have post-processing options. It won’t even allow you to utilize AI voice directly.
Playback Settings
Whichever method you choose — whether you insert pre-recorded audio files or record audio directly onto your slides — you can trim the audio, add fade-in and fade-out transitions, and choose to play it in the background.
If you choose to play the audio in the background, uncheck the play across slides option to ensure the voiceover does not extend to the next slide, and untick the loop until stopped option so your voiceover plays only once.
Use Voiceovers to Enhance Your Presentations
Add voiceovers to your Google Slides and PowerPoint presentations and give your audience a richer experience. Instead of recording your voiceovers yourself, you can use an AI text-to-speech generator to produce your voiceover audio.
Here’s another alternative. You can run your presentation as you would for a live audience but record it without audio using a tool like Open Broadcast Software (OBS). Then, you can add a voiceover to your recorded presentation video directly. You can also use AI voiceovers for videos instead of your own voice or a voice talent for your narration.
Play.ht is a leading AI voice generator and AI text-to-speech platform with hundreds of AI voices you can use to add natural and realistic-sounding voices to your presentations.
Try Play.ht now!
Recent Posts

Hammad Syed
Hammad Syed holds a Bachelor of Engineering - BE, Electrical, Electronics and Communications and is one of the leading voices in the AI voice revolution. He is the co-founder and CEO of PlayHT, now known as PlayAI.
Similar articles

How to Avoid AI Voice Scams

Murf AI Alternatives to Consider Before You Commit

Best AI Voice Generators You Should Check Out

AI Voice Over Tips and Tricks to Up Your Game

How To Do A Voice over On Google Slides

How to do a Voiceover on Powerpoint

How to do a Voiceover on TikTok

How To Do A Voiceover On Instagram Reels

How to add Voiceover to a Video

How to Voice Over a Video?
Best Voice Over Apps: Top Picks for Seamless Narration
Voice Acting Scripts for Clients
Writing to Sell: Crafting Commercial Scripts that Convert

YouTube Text to Speech : Top Recommendations
What is Phonetic Transcription?

How to Do TikTok Text To Speech? (With Examples)
Get started with the best ai voice generator today.
How-To Geek
6 ways to create more interactive powerpoint presentations.
Engage your audience with cool, actionable features.
Quick Links
- Add a QR code
- Embed Microsoft Forms (Education or Business Only)
- Embed a Live Web Page
- Add Links and Menus
- Add Clickable Images to Give More Info
- Add a Countdown Timer
We've all been to a presentation where the speaker bores you to death with a mundane PowerPoint presentation. Actually, the speaker could have kept you much more engaged by adding some interactive features to their slideshow. Let's look into some of these options.
1. Add a QR code
Adding a QR code can be particularly useful if you want to direct your audience to an online form, website, or video.
Some websites have in-built ways to create a QR code. For example, on Microsoft Forms , when you click "Collect Responses," you'll see the QR code option via the icon highlighted in the screenshot below. You can either right-click the QR code to copy and paste it into your presentation, or click "Download" to add it to your device gallery to insert the QR code as a picture.
In fact, you can easily add a QR code to take your viewer to any website. On Microsoft Edge, right-click anywhere on a web page where there isn't already a link, and left-click "Create QR Code For This Page."
You can also create QR codes in other browsers, such as Chrome.
You can then copy or download the QR code to use wherever you like in your presentation.
2. Embed Microsoft Forms (Education or Business Only)
If you plan to send your PPT presentation to others—for example, if you're a trainer sending step-by-step instruction presentation, a teacher sending an independent learning task to your students, or a campaigner for your local councilor sending a persuasive PPT to constituents—you might want to embed a quiz, questionnaire, pole, or feedback survey in your presentation.
In PowerPoint, open the "Insert" tab on the ribbon, and in the Forms group, click "Forms". If you cannot see this option, you can add new buttons to the ribbon .
As at April 2024, this feature is only available for those using their work or school account. We're using a Microsoft 365 Personal account in the screenshot below, which is why the Forms icon is grayed out.
Then, a sidebar will appear on the right-hand side of your screen, where you can either choose a form you have already created or opt to craft a new form.
Now, you can share your PPT presentation with others , who can click the fields and submit their responses when they view the presentation.
3. Embed a Live Web Page
You could always screenshot a web page and paste that into your PPT, but that's not a very interactive addition to your presentation. Instead, you can embed a live web page into your PPT so that people with access to your presentation can interact actively with its contents.
To do this, we will need to add an add-in to our PPT account .
Add-ins are not always reliable or secure. Before installing an add-in to your Microsoft account, check that the author is a reputable company, and type the add-in's name into a search engine to read reviews and other users' experiences.
To embed a web page, add the Web Viewer add-in ( this is an add-in created by Microsoft ).
Go to the relevant slide and open the Web Viewer add-in. Then, copy and paste the secure URL into the field box, and remove https:// from the start of the address. In our example, we will add a selector wheel to our slide. Click "Preview" to see a sample of the web page's appearance in your presentation.
This is how ours will look.
When you or someone with access to your presentation views the slideshow, this web page will be live and interactive.
4. Add Links and Menus
As well as moving from one slide to the next through a keyboard action or mouse click, you can create links within your presentation to direct the audience to specific locations.
To create a link, right-click the outline of the clickable object, and click "Link."
In the Insert Hyperlink dialog box, click "Place In This Document," choose the landing destination, and click "OK."
What's more, to make it clear that an object is clickable, you can use action buttons. Open the "Insert" tab on the ribbon, click "Shape," and then choose an appropriate action button. Usefully, PPT will automatically prompt you to add a link to these shapes.
You might also want a menu that displays on every slide. Once you have created the menu, add the links using the method outlined above. Then, select all the items, press Ctrl+C (copy), and then use Ctrl+V to paste them in your other slides.
5. Add Clickable Images to Give More Info
Through PowerPoint's animations, you can give your viewer the power to choose what they see and when they see it. This works nicely whether you're planning to send your presentation to others to run through independently or whether you're presenting in front of a group and want your audience to decide which action they want to take.
Start by creating the objects that will be clickable (trigger) and the items that will appear (pop-up).
Then, select all the pop-ups together. When you click "Animations" on the ribbon and choose an appropriate animation for the effect you want to achieve, this will be applied to all objects you have selected.
The next step is to rename the triggers in your presentation. To do this, open the "Home" tab, and in the Editing group, click "Select", and then "Selection Pane."
With the Selection Pane open, select each trigger on your slide individually, and rename them in the Selection Pane, so that they can be easily linked to in the next step.
Finally, go back to the first pop-up. Open the "Animations" tab, and in the Advanced Animation group, click the "Trigger" drop-down arrow. Then, you can set the item to appear when a trigger is clicked in your presentation.
If you want your item to disappear when the trigger is clicked again, select the pop-up, click "Add Animation" in the Advanced Animation group, choose an Exit animation, and follow the same step to link that animation to the trigger button.
6. Add a Countdown Timer
A great way to get your audience to engage with your PPT presentation is to keep them on edge by adding a countdown timer. Whether you're leading a presentation and want to let your audience stop to discuss a topic, or running an online quiz with time-limit questions, having a countdown timer means your audience will keep their eye on your slide throughout.
To do this, you need to animate text boxes or shapes containing your countdown numbers. Choose and format a shape and type the highest number that your countdown clock will need. In our case, we're creating a 10-second timer.
Now, with your shape selected, open the "Animations" tab on the ribbon and click the animation drop-down arrow. Then, in the Exit menu, click "Disappear."
Open the Animation Pane, and click the drop-down arrow next to the animation you've just added. From there, choose "Timing."
Make sure "On Click" is selected in the Start menu, and change the Delay option to "1 second," before clicking "OK."
Then, with this shape still selected, press Ctrl+C (copy), and then Ctrl+V (paste). In the second box, type 9 . With the Animation Pane still open and this second shape selected, click the drop-down arrow and choose "Timing" again. Change the Start option to "After Previous," and make sure the Delay option is 1 second. Then, click "OK."
We can now use this second shape as our template, as when we copy and paste it again, the animations will also duplicate. With this second shape selected, press Ctrl+C and Ctrl+V, type 8 into the box, and continue to do the same until you get to 0 .
Next, remove the animations from the "0" box, as you don't want this to disappear. To do this, click the shape, and in the Animation Pane drop-down, click "Remove."
You now need to layer them in order. Right-click the box containing number 1, and click "Bring To Front." You will now see that box on the top. Do the same with the other numbers in ascending order.
Finally, you need to align the objects together. Click anywhere on your slide and press Ctrl+A. Then, in the Home tab on the ribbon, click "Arrange." First click "Align Center," and then bring the menu up again, so that you can click "Align Middle."
Press Ctrl+A again to select your timer, and you can then move your timer or copy and paste it elsewhere.
Press F5 to see the presentation in action, and when you get to the slide containing the timer, click anywhere on the slide to see your countdown timer in action!
Now that your PPT presentation is more interactive, make sure you've avoided these eight common presentational mistakes before you present your slides.
How to Do a Voice Over on Windows PC

Using voiceovers in videos can add a professional touch and enhance the overall quality of the content. In this guide, we delve into the details of footage production, from explaining how to voice over a video to perfecting your delivery technique.
Whether you're a novice looking to dip your toes into the world of voice acting or a seasoned pro seeking to enhance your skills, join us on this journey as we uncover the secrets of creating compelling voice overs that captivate and engage audiences.
What is a voice over?
A voice over (often abbreviated as VO) is a production technique where a voice, typically that of a narrator, actor, or presenter, is recorded and overlaid onto a video, film, commercial, or other animation.
Voice overs are commonly used to provide commentary, explanation, or dialogue that complements or improves the visual content. This feature is employed across various mediums, including movies, television shows, documentaries, advertisements, animations, video games, and educational videos .
How to do a voice over?
Looking for a simple way to record an audio narration for your footage? With a wide range of features, Icecream Video Editor lets you add voice overs to your videos effortlessly. The interface is intuitive and easy to navigate, making it perfect even for beginners.
Step 1. Install and launch Icecream Video Editor
If you haven't already, download and install free video editor on PC on your computer from its official website. Open the video editing software to proceed.

Step 2. Import the video
Click the "Add video" button or drag and drop your file into the video editor's interface to upload it.

Step 3. Record the voiceover
Find the "Voiceover" button within the video editing toolbar, situated on the right-hand side of the screen. Look for the microphone icon to identify the tool. Press it to dub over the video.

Once the button is clicked, a new window will emerge, granting you access to adjust your microphone settings and commence creating your voiceover. Ensure to toggle "Voiceover ON" for activation.

After recording your voiceover, preview it alongside the video to verify it aligns correctly. You can trim, adjust the volume, or make any other necessary edits to the voice over using the tools provided.
Step 4. Save Your Project
When you're satisfied with the narrator's voice hit "Close" .
Finally, export your video with the newly added voiceover recording. Choose the desired output format, quality, resolution and FPS before downloading the video. Alternatively, you can further refine your clip using additional editing features provided by the free video editor for Windows.

Other features of the video editing software:
- Trim. Cut unwanted parts from your video to trim it down to the desired length.
- Split. Divide a single video into multiple segments.
- Rotate. If your video was recorded in the wrong orientation, change it, ensuring everything displays correctly.
- Crop. Remove extra areas from the edges of your video, allowing you to focus on the essential content.
- Speed Change. Speed up or slow down the video to create various effects or fit within a specific timeframe.
- Audio. Incorporate background music or other audio tracks. You can import audio files and edit them as needed.
- Text. Enhance your video with text overlays . You can customize the font, size, color, and position of the text to suit your preferences.
- Effects. It offers a variety of video effects, such as filters, and transitions, to enhance the visual appeal.
- Picture-in-Picture. Overlay a smaller video or image onto the main video, creating a PiP effect.
- Subtitles. Add captions or subtitles to your videos, enhancing accessibility and comprehension for viewers.

Icecream Video Editor offers a seamless solution for recording audio narrations and adding voice overs to your videos. Its user-friendly interface and intuitive navigation make it an ideal choice for both beginners and experienced users alike.
Powerful video editor to tune up your media content. All the most popular features (crop, rotate, merge, video effects, trim, etc.) at your service.

Voice over tips
A good voiceover recording can significantly enhance the impact and effectiveness of a video.
Here are the essential points:
- Clarity. The voiceover should be clear and easy to understand. The narrator should enunciate each word clearly, with proper pronunciation and articulation.
- Emotion. The tone of voice should match the mood and content of the clip. Whether it's informative, persuasive, or playful, the author should convey the appropriate emotion.
- Pacing. It should not be too fast or too slow, but rather at a pace that allows the audience to absorb the information comfortably.
- Consistency. The narration should maintain consistency in volume, tone, and delivery throughout the video. Sudden changes can be distracting.
- Engagement. A perfect voiceover captivates the audience and holds their attention. The person should speak with enthusiasm and energy, drawing the viewers into the content.
- Timing. It should be synchronized with the visuals to create a seamless and cohesive viewing experience.
Why is a good voiceover important?
The success or failure of your podcast videos relies heavily on the quality of the voiceover. It is the narrator's voice that guides the people through the visuals, sets the tone, and conveys the message effectively.
- With a carefully chosen narration, your video can evoke emotion and depth , making it all the more relatable and impactful.
- It also has the potential to aid in establishing your brand's identity and fostering a connection with your audience.
- A clear and articulate voice over is also crucial for ensuring that your viewer understands the information being presented in your video.
Ultimately, a well-done voice over is essential for creating a successful video . It has the ability to improve the overall excellence of your content and foster a stronger bond with your fans.
FAQ on video voice over
By following the steps outlined in this guide, you can effectively add voice to video to convey your message, engage your audience, and enhance the overall quality of your video productions.
Remember to prioritize clarity, tone, and pacing to ensure your voice over resonates with others. Continuously refining your skills through practice and seeking feedback will help you become a confident and compelling artist.
So, whether you're narrating a documentary, explaining a complex concept, or adding depth to a character, let your voice be the guiding force that captivates and inspires your viewers.
Expert Tech Writer
Like the article? Share it!
IMAGES
VIDEO
COMMENTS
In this step-by-step tutorial, learn how to add a voice over / narration to a PowerPoint slide presentation. You'll learn three different methods to adding a...
Open the PowerPoint presentation in which you would like to record a voiceover narration. Head over to the "Slide Show" tab and, in the "Set Up" group, select "Record Slide Show.". Once selected, a drop-down menu will appear. Here, you can choose to start the narration from the beginning or from the current slide.
How to record a voiceover for PowerPoint on a PC. 1. Open a new or existing or presentation in PowerPoint. 2. From the top toolbar, select "Insert." 3. Toward the far right side, click "Audio ...
In the Options dialog box, click the Customize Ribbon tab on the left. Then, in the right-hand box that lists the available ribbon tabs, select the Recording check box. Click OK. To get ready to record, select Record on either the Recording tab or the Slide Show tab of the ribbon.
Go to Insert > Audio > Record Audio. Type a name, select Record, then read your script. Select Stop. Entire slideshow: Select View > Normal and choose the first slide. Select Slide Show > Record Slide Show > Record from Current Slide. To review the recording, click the sound indicator (it looks like a speaker) and then select Play to hear your ...
In this you will learn how to record a voice over a PowerPoint presentation, how to edit that audio snippet in PowerPoint and how to save the presentation ...
Add your slides to the timeline. Once your slides and audio are in the Media Bin, drag the audio over to the Timeline. Then, simply add your slides to the Timeline as needed. Now you can adjust the slide timing and the amount of time they're visible to ensure they correlate with what's being said in your voice over.
Tutorial. Open your PowerPoint presentation or create a new one. In the taskbar, select Slide Show. Then click Record Slide Show. Choose the option Record from Beginning. You'll now get to a different view, which we'll call "Recorder View". Here's an overview: In the bottom right corner, you'll see three icons.
To add audio to your presentation, find the Insert menu at the top of your Google Slides window. Click on it, and you'll see a dropdown menu appear with a list of options. From here, select the third option from the top: Audio. Go to the Insert > Audio menu to find your uploaded MP3 recorded voiceover.
Step 4 - Add a voice-over to slides. As with the Windows version, add voice-over to the slides one by one, and add notes if you wish. Step 5 - Complete recording. Once done, click on the large red button to start recording. Once your voice-over is complete, click the same button to stop recording. Again, add notes if you wish to.
Change playback options. Select the audio icon and then select the Playback tab. Then select which options you'd like to use: To trim the audio, select Trim and then use the red and green sliders to trim the audio file accordingly.
This video will show you how to create a voice over PowerPoint presentation. This PowerPoint slideshow can be uploaded online and made accessible to the virt...
Upload the audio files to your Google Drive. Open your Google Slides presentation. Select the slide you want to add the voice over to. Click on 'Insert' > 'Audio'. This will open a window showing your Google Drive files. Select the relevant audio file for the slide. Once inserted, an audio icon will appear on your slide.
Step 2- Start recording. Once you select which recording you'd like to do, you'll be in full-screen mode with options to record, stop, and replay. Once you click record, there will be a countdown timer from 3. Anything you type in the notes section of the PowerPoint can be viewed by clicking on the notes button at the top.
The indicator shows that the audio peaked at just under -6db and is well within the acceptable levels. 4. Record your voice over. Once you're satisfied with your microphone placement and audio levels, you're ready to record your voice over! With Audiate, it's as simple as clicking the record button and speaking.
Select the audio file with the narration to insert into the current slide and drag it to place it in the desired location on the slide. After the audio file has been added, you can click to preview the sound. Furthermore, you can customize audio playback options to play the audio automatically or manually, in a loop, and to stop the audio when ...
Here's how to do a presentation with voice over using Visme. Record your own audio by clicking on the "Record" option to the top right of the "Add Audio" tab. Once chosen, you will see a red record button appear below your slide. To start recording your own narration within Visme, simply click on the red button and speak into your microphone.
Click the microphone button below your video preview. Click "Upload voice over" and select your track or click on "Record voice over". Click the red button to record. You'll see a three-second countdown, after which your recording will begin. Click the stop button to end your recording. 4.
Learn how to easily add voice over narration to Google Slides with this simple and clear tutorial. Watch the video and follow the steps.
Adding narration to your presentation with the Prezi Video desktop app. 1. Open the desktop app and click Import in the side panel. 👋. You should know: You can also return to the Import sidebar from the dropdown menu under the three dots in the top right corner of the side panel or from the dropdown menu in the top left corner of the online ...
Step 1: Open the presentation and select the slide where you want to add the voice-over. Step 2: Click the Uploads section on the left and switch to the Audio tab to reveal all the audio files ...
AI can also be practical if you think a different voice will do a better job at making your presentation more effective or interesting. Or perhaps you feel your accent may be too heavy for most of your audience to understand. Before you proceed any further, prepare your presentation (i.e., your deck) and create your voiceover script.
How to create voice-over narration for your PowerPoint Presentation in Microsoft Office Professional 2010Instructional Technology Training Video Tutorial by:...
To do this, click the shape, and in the Animation Pane drop-down, click "Remove." You now need to layer them in order. Right-click the box containing number 1, and click "Bring To Front." You will now see that box on the top. Do the same with the other numbers in ascending order.
Using voiceovers in videos can add a professional touch and enhance the overall quality of the content. In this guide, we delve into the details of footage production, from explaining how to voice over a video to perfecting your delivery technique.. Whether you're a novice looking to dip your toes into the world of voice acting or a seasoned pro seeking to enhance your skills, join us on this ...