Using Graphic Organizers for Writing Essays, Summaries and Research

Ask any student – essay writing is one of the most despised tasks of their educational career. Perhaps there is so much displeasure associated with the task because it’s perceived as too linear – there isn’t enough visual and creative appeal. But if you use graphic organizer for writing essays then you can make writing enjoyable – or at least less terrible.
Not only enjoyable but graphic organizers (or diagrams) can make the writing process a snap. They’ll help you think outside the box, draw conclusions you wouldn’t normally observe, and make the entire process faster and more efficient.

Why Use Graphic Organizers for Writing
The phrase “graphic organizer” is just a fancy way of saying “diagram” or “visual aid.” Basically, they are a visual representation of the information you’ve acquired in the research process. There are quite a few reasons why you should use them when writing essays or summaries.
- Helps you visualize your research and how elements connect with each other
- Enhance your essays, summaries and research papers with visual elements
- Track correlations between your thoughts, observations, facts or general ideas
When it comes to essay writing, the most common graphic organizers are webs, mind maps, and concept maps .
Using Webs for Brainstorming
Webbing is a great way to see how various topics are interrelated. This graphic organizer is particularly useful during the brainstorming step of the writing process.
A web can sometimes get a bit messy. Usually, there are lots of arrows to connect overlapping ideas. However, even with lines crisscrossing every which way, it is still a great way to visualize your thoughts. If you’re using an online diagramming software like Creately you can overcome some of this because we automatically arrange the object for you.
Once you’ve created a map to document all your ideas and establish connections, you can easily transition to other forms of diagramming to better organize the information.
For example if you’re writing a research paper about the food web of the Australian bushes you can start creating a food web diagram similar to the one below. This way you can easily visualize the web while writing the paper. This is a simple example but graphic organizers become even more important when the subject gets complex.

Although simple this example shows the importance of using graphic organizers for writing summaries. A comprehensive diagram pretty much does the summation for you.
Using Mind Maps as Graphic Organizers
Mind maps are a great way to depict a hierarchy. What is hierarchical organization ? The concept is simple: a singular topic dominates with each subsequent idea decreasing in importance.
Usually, the mind map starts with the thesis (or main idea) at the center. From there, you can branch out with your supporting evidence.
Use this process to replace your traditional note taking technique – note cards, outlines, whatever. You’ll quickly realize a mind map is a great way to formulate the structure of your essay. The thing to note here is that the nature of the mind maps force you think about sub topics and how to organize your ideas. And once the ideas are organized writing the essay become very easy.

Above is a mind map of a research proposal. Click on it to see the full image or you can see the fully editable template via this link . As you can see in this mind map the difference areas of the research proposal is highlighted. Similarly when your writing the research paper you can use a mind map to break it down to sub topics. We have more mind map templates for you to get started.
Concept Maps
A concept map will help you visualize the connection between ideas. You can easily see cause and effect – how one concept leads to another. Often times, concept mapping includes the use of short words or phrases to depict the budding relationship between these concepts.
If you look closely you can see that its very similar to a mind map. But a concept maps gives more of a free reign compares to the rigid topic structure of a mind map. I’d say it’s the perfect graphic organizer for writing research papers where you have the license to explore.
By creating a concept map , you can also see how a broad subject can be narrowed down into specific ideas. This is a great way to counter writers block. Often, we look at the big picture and fail to see the specifics that lead to it. Identifying contributing factors and supporting evidence is difficult. But with a concept map, you can easily see how the smaller parts add up to the whole.

Why Bother With Graphic Organizers?
If you already detest the writing process, adding another step might seem insane. However, there really are several advantages of using them. If you haven’t already accepted the benefits of each individual diagram style, here are some more perks of graphic organizers in general:
- Quality essays are based on detail. No one is going to accept your opinions and reasoning just because you say so. You’ll need proof. And organizing that proof will require attention to detail. Graphic organizers can help you see that detail and how it contributes to the overall concept.
- Graphic organizers are flexible. You don’t need one of those giant pink erasers. You don’t need to restructure your outline. All you have to do is draw a few arrows and bam – the relationship has totally changed.
- No matter what you are writing about, a graphic organizer can help. They can be used to structure an essay on the Great Wall, theoretical physics, or Spanish speaking countries.
- If you write an outline, can you easily see how point A influences point X? Probably not. But if little thought bubble A is sitting out there all by itself, you can visualize the way it ties into point R, T and X.
- Some of us find it difficult to put our opinions, thoughts, and ideas into writing. However, communicating our feelings with little doodles and sketches is far less threatening.
- As a writer, our brain often feels like a 2-year-old’s toy box – a big jumbled mess. Taking that mess and putting it onto paper with some semblance of organization is challenging. Rather than trying to take your thoughts from total chaos to a perfectly structured list, just try to get them out of your brain and onto paper in the form of a diagram.
- A graphic organizer helps you establish validity and relevance. You can easily nix the ideas that don’t support or enhance your thesis.
The next time you are faced with a writing project, take a few minutes to explore the efficiency of graphic organizers. You can find a wealth of templates here.
Have you ever used a graphic organizer to structure an essay? How did it go? Do you have a diagram suggestion for the writing process that wasn’t mentioned here? Let us know!
Join over thousands of organizations that use Creately to brainstorm, plan, analyze, and execute their projects successfully.
More Related Articles

These are awesome guest posts contributed by our users and technology enthusiasts. Do you have something interesting to share? Want to get exposed to a massive tech audience? Check out our Guest Posting Guidelines to how to proceed.
- Grades 6-12
- School Leaders
Win Big in Our Teacher Appreciation Giveaway 🎁!
Graphic Organizers 101: Why and How To Use Them
An incredibly valuable tool for every student, every subject.

Even if you’ve never heard of graphic organizers, chances are good you’ve been using them in one form or another all your life. That pros and cons list you made before making a big purchase? The family tree you’re working on? Your school’s org chart? They’re all graphic organizers. Here’s what you need to know about using this powerful tool with students of all ages.
What are graphic organizers?

Source: @thecomfortableclassroom
Put simply, graphic organizers are a way of organizing information visually to help students understand and remember it. They’re tools that let kids make connections, create a plan, and communicate effectively. A good organizer simplifies complex information and lays it out in a way that makes it easier for a learner to digest. Graphic organizers may include text and images, depending on the purpose and student’s learning style.
[contextly_auto_sidebar]
How do I use them?

Source: @yourteacherbestie
You can provide students with pre-printed organizers or encourage them to draw their own. Either way, teach students how to use them by modeling the behavior first. Consider making anchor charts for commonly used types so students can refer back to them as they work.
With younger students, work to help them understand how to choose certain types of organizers depending on their goals. For instance, students taking notes while they study may find a concept map most helpful. When comparing two topics, a Venn diagram or T chart is probably the best choice. Here are some ways to use graphic organizers in various subjects (and explanations of them below).
Language Arts
- Use a story map or story mountain to diagram the characters, setting, and key plot points.
- Try a web organizer to keep track of character relations and connections.
- Learn vocabulary words with a Frayer model that lays out meaning, synonyms, examples, and illustrations.
- Map out the topic, main ideas, and supporting facts of an essay before you start writing.
- Use a story map or mountain to plan creative writing.
Math and Science
- Use a Frayer model to define and understand terms and formulas.
- Compare two or more concepts with a Venn diagram (like area and perimeter).
- Create a visual representation to solve a story problem.
- Plan an experiment with a sequence organizer.
- Start the exploration of a new topic with a KWL organizer to understand what students already know, what they want to learn, and what they do learn.
- Draw a timeline to understand the order of events in history.
- Use idea webs or concept maps to keep track of information as you read and help you study.
- Dig deeper into a topic with a cause and effect organizer.
What types of graphic organizers should I use in my classroom?
Graphic organizers come in a wide array of styles. Here are some of the most common types to try with your students.

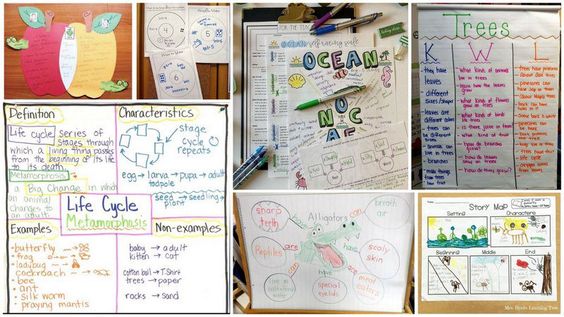
Source: Mrs. Byrd’s Learning Tree
This is one of the first organizers many kids learn to use. For little ones, story maps are simple, laying out the setting, characters, and beginning, middle, and end. Older students can expand the map to take in more details.
Timeline and Sequence of Events

Source: Growing Kinders
Here are two more common organizers kids will recognize. Timelines are generally used in history and social studies classes, though they can be helpful when reading books too. Use sequencing organizers to lay out the steps of a procedure or science experiment.
Story Mountain

Source: @goodmorningmissbagge
A story mountain is helpful both when reading and preparing to write. Students map out a story from start to finish, building up to a climax and back down to the conclusion.

Source: Mrs. Kurt’s All Star Kindergarten Blog
KWL (What I K now, What I W onder, What I L earned) charts are a terrific way to help kids think about what they want to learn about a topic and hold them responsible for actually finding out that information. The first column is a list of everything they already know. The second column lists what they’d like to learn, and the third one provides new information acquired along the way.

Source: Krazy for Kindergarten Goes to Third Grade
When there’s a lot of information to remember about a subject, idea webs are a terrific way to organize it all. It’s a more interesting way to explore a subject than just making a list or taking notes and one that’s more likely to help kids actually remember the information.
Concept Map

Source: Evidence-Based Teaching
A concept map takes an idea web to the next level. It’s really a series of idea webs, with connections drawn between. These can get very large, so encourage older students to explore online programs that can help them create useful diagrams.

Source: Joyful Learning in KC
Circle maps are terrific for brainstorming or thoroughly understanding a specific concept. In some cases, circles can continue to expand outward. For instance, a circle map could begin with your hometown in the middle, with a larger circle for your state, another for your country, then your continent, and so on. Inside each circle, students write info relevant to that subject.

Source: A Learning Journey
Graphic organizers are especially useful when planning any kind of writing. OREO and Hamburger models are common, but you’ll find a lot of other options out there too. The key is to make sure the organizer helps students define their main idea, gather supporting evidence, and draw a conclusion supported by the facts.
Frayer Model (Vocabulary)

Source: What I Have Learned
The Frayer model has a lot of uses but is most often applied to vocabulary. The term goes in the middle, with four sections surrounding it for definition, characteristics, examples, and non-examples. Another version has sections for definition, synonym, an illustration, and using the term in a sentence.
Cause and Effect Graphic Organizer

Source: Around the Kampfire
When you want students to dig deeper into the material, try a cause and effect organizer. You can use it in pretty much any subject to make connections between actions and results.

Source: @ducksntigers13
A T chart is a very simple way to compare two related subjects. Many people use these all the time, especially when writing pros and cons lists.
Venn Diagram

Source: Teach With Me
A Venn diagram is another way to compare and contrast material, looking for similarities and differences. The simplest version has two overlapping circles, with more overlapping circles added for more complex subjects.
Where can I find free graphic organizer printables?
While you don’t need to use a pre-printed organizer every time, they can be especially helpful with younger students as they learn how this valuable tool works. The internet is full of graphic organizer printables, both free and for purchase on sites like Teachers Pay Teachers. Here are some free options we’ve created for teachers to try.
- Summary Graphic Organizer
- Summarizing Graphic Organizers (Grades 2-4)
- Predictions and Inferences Organizer
- Scientific Method Graphic Organizer
- Continents Graphic Organizer
Get all the latest free printables and teaching ideas when you sign up for our newsletters .
Plus, anchor charts 101: why and how to use them ..

You Might Also Like

11 Helpful Note-Taking Strategies Your Students Should Know
It's a skill they can use later in life too. Continue Reading
Copyright © 2024. All rights reserved. 5335 Gate Parkway, Jacksonville, FL 32256
- Our Mission
Using Graphic Organizers Correctly
It’s much more important for a student to practice writing — the only way to build writing fluency — than to fill in a graphic organizer completely or perfectly.

What is a graphic organizer? A graphic organizer is a visual display or chart that shows the relationship between ideas, facts, and information.

It can allow a third-grade student, for example, to chart out chronologically a summer vacation by writing specific information in each box in a connected series. Another graphic organizer might have three columns and require a seventh-grade student in a world history class to list the causes of WWII. Those causes are listed in the far left column, then, the middle column asks for effects, while the far right column requires the student to write in evidence or a source to accompany each cause and related effect.

A Pre-Writing Tool
Teachers carefully select a graphic organizer after deciding what type of writing they want their students to engage in -- narrative, argumentative, or informational. They then select specific skills for development in that type of writing. In a narrative writing assignment, does the teacher wish the child to develop sequential writing, or perhaps the focus will be on description and details? Determining this will help a teacher select the appropriate graphic organizer.
The ultimate purpose of utilizing a graphic organizer as a tool is to prepare students for writing. Simply put, a graphic organizer assists a student with thinking and is a pre-writing tool -- not the end product. Some young writers may need this thinking tool more than others. That said, a writer in your classroom might want to skip using a graphic organizer and be ready to dive into the writing. Let her.
Teachers need to remember they are not developing charters of information, but they are developing writers . The only way to build fluency in writing is to write.
Improve Writing by Writing
As I’ve seen in my many classroom observations, we teachers can get caught up with treating the graphic organizer as The Assignment , especially with struggling students. At some point, with learners who are struggling, we need to stop encouraging them to finish filling in those boxes or columns on the graphic organizer and move into what matters: the writing.
It’s much more important for a student to practice writing -- the only way to build writing fluency -- and stumble through stringing thoughts together this way than to fill in a graphic organizer completely or perfectly.
Lastly, grade only the writing and not the graphic organizer. This will help keep the focus where it really matters: on our students as writers.
What are your experiences with using graphic organizers in your classroom? What suggestions or tips can you offer, especially for novice teachers? Please share in the comments section below.
- WordPress.org
- Documentation
- Learn WordPress
- Members Newsfeed
Graphic Organizers 101: Why and How To Use Them
- EdTech & Innovation
Introduction:
Visual learning has gained significant attention over the past few years, especially in the education sector. One such visual learning tool is a “graphic organizer.” This article will explore what graphic organizers are, why they are an essential learning tool, and how to use them effectively.
What are Graphic Organizers?
Simply put, graphic organizers are visual aids that help learners organize and present information visibly. They make use of diagrams, charts, mind maps, or other graphical elements to represent concepts and ideas in a structured manner. By doing so, graphic organizers enable learners to gain a deeper understanding of the subject matter by uncovering connections and relationships between various pieces of information.
Why Use Graphic Organizers?
1. Enhance Understanding: The human brain can process visual content more efficiently than textual data. Graphic organizers capitalize on this by visually representing complex ideas or concepts that might be difficult to understand through text alone.
2. Foster Critical Thinking: By breaking down complex ideas into smaller components, graphic organizers encourage learners to analyze each aspect individually and identify connections between them.
3. Improve Memory Retention: Studies show that information presented visually is retained better than verbal-only material. Thus, using graphic organizers can significantly improve memory retention and recall.
4. Aid in Organization and Planning: Graphic organizers offer an excellent way for students to structure their thoughts and ideas as they plan out essays, projects, or presentations.
5. Facilitate Differentiated Instruction: Since students learn at different paces and with varied styles, graphic organizers serve as a versatile learning tool that can be adapted to suit individual needs.
How To Use Graphic Organizers:
1. Choose the Right Organizer: Begin by selecting a graphic organizer suitable for your specific learning objectives. Some common types include Venn diagrams for comparing/contrasting ideas, timelines for chronological events, or flowcharts for processes.
2. Gather Your Material: Collect the necessary information related to your topic. This might include relevant facts, figures, quotes, or other critical pieces of data.
3. Break Down the Information: Analyze the gathered material and divide it into smaller components or subtopics. These will correspond to individual sections or elements of your graphic organizer.
4. Organize and Represent: Start building your graphic organizer by placing key ideas within their designated sections or boxes. Next, create connections and relationships using arrows, lines, or other visual aids.
5. Simplify and Refine: Finally, review your graphic organizer and simplify or refine the content wherever possible. Ensure that your final result is visually appealing and easy to read.
Conclusion:
Graphic organizers are a powerful tool that can enhance both teaching and learning. By incorporating these aids into classrooms, students can efficiently process information, improve critical thinking skills, memory retention, organizational skills, and cater to different learning styles. Start harnessing the power of these versatile tools today, and witness the positive impact they can have on your educational journey.
Related Articles

Incorporating technology in the classroom is an effective way to engage students…

In the educational arena, Bump It Up walls have become a popular…

Decision making is a critical life skill that allows individuals to navigate…
Pedagogue is a social media network where educators can learn and grow. It's a safe space where they can share advice, strategies, tools, hacks, resources, etc., and work together to improve their teaching skills and the academic performance of the students in their charge.
If you want to collaborate with educators from around the globe, facilitate remote learning, etc., sign up for a free account today and start making connections.
Pedagogue is Free Now, and Free Forever!
- New? Start Here
- Frequently Asked Questions
- Privacy Policy
- Terms of Service
- Registration
Don't you have an account? Register Now! it's really simple and you can start enjoying all the benefits!
We just sent you an Email. Please Open it up to activate your account.
I allow this website to collect and store submitted data.
K-12 Resources By Teachers, For Teachers Provided by the K-12 Teachers Alliance
- Teaching Strategies
- Classroom Activities
- Classroom Management
- Technology in the Classroom
- Professional Development
- Lesson Plans
- Writing Prompts
- Graduate Programs
What is a Graphic Organizer and How to Use it Effectively
Janelle cox.
- September 16, 2020

As educators, we’re always looking for new ways to help students classify and communicate their ideas more effectively. A visual guide, such as a graphic organizer, can do just that, as well as help students plan and structure their ideas in an organized manner. Here we will take a brief look at what a graphic organizer is, the different types of graphic organizers that you can use, as well as how you can use them effectively in the classroom.
What is a Graphic Organizer?
A graphic organizer is a powerful, visual learning tool that teachers like to use to help students organize their ideas. They can also be used to clarify or simplify complex concepts, help with problem solving or decision making , or be used to plan research or brainstorm ideas.
What are the Different Types of Graphic Organizers?
While there are several types of graphic organizers, each with a specific purpose, we will briefly go over the top five most popular used in the classroom.
Venn Diagram
A Venn diagram is a graphic organizer that has two interlocking circles. This type of organizer is used to identify differences and similarities. Students write details about how the topics are different in the outer parts of the circles and how they are the same in the shared inner space of circles.
Venn diagrams can be used to compare and contrast two characters. For example, students would write how each character is different in the outer spaces and how they are the same in the overlapping space in the middle. Then, students can use this graphic organizer to help them write an essay about each character.
Concept Map
A concept map is a graphic organizer that looks like a web with arrows connecting each circle. This type of map helps students identify a main concept as well as sub-concepts. It can be used to help visually organize thoughts as well as illustrate hierarchical information.
There are a variety of ways this type of organizer can be used in the classroom. Students can show relationships between specific concepts, characters in a story, or even vocabulary words. Many teachers like to use it to assess students’ prior knowledge on a topic.
A T-chart is a graphic organizer that is used to compare and contrast two different things. Students can use a T-chart to make comparisons related to a variety of topics or subjects; they can also be used in any content area or genre. For example, in social studies students can compare two different political candidates, then use the chart to help them in a class debate.
An idea web is a graphic organizer that is used for brainstorming and helps students organize ideas or concepts. Much like a concept map, an idea web is comprised of circles that are connected. This type of organizer is mainly used to help students brainstorm story ideas. For example, a topic is written in the center circle and students write in the details in the surrounding smaller circles.
A KWL chart is another popular graphic organizer, especially in the elementary classroom. This visual learning tool consists of three questions, each in their own column (‘what I K now’, ‘what I W ant to know’, and ‘what I L earned’). This is a great graphic organizer for activating prior knowledge.
This organizer is used both before and after learning a concept. Before learning, students write down “what they want to know” and “what they already know” about the topic. Then, after the concept is learned, students write down “what they learned” in the third column of the chart. This three-step process is great for developing a sense of purpose and helps students become more engaged in the topic they are learning.
How to Use Graphic Organizers Effectively
Graphic organizers can be a helpful learning tool, especially when they can guide students to a deeper understanding of what they are learning. To effectively support student learning, it’s important to always model how to use the organizer, as well as instruct students on why you choose the graphic organizer that you did for that specific topic.
For example, explain to students that you choose a Venn diagram as a starting point for an essay they will be writing because it will help them compare two characters in an organized manner before they begin writing their essay. When students understand what they are doing and why they are doing it, it will give them a sense of purpose.
Graphic organizers are great tools to meet the needs of all learners . By presenting information in a graphic format, you can easily make a lesson accessible to all students. To increase the effectiveness of a graphic organizer, always make sure to model beforehand and explain why you are using it and what you are using it for. Also, make sure that each graphic organizer that you choose is aligned with your learning goal; this will ensure that students will apply the information learned and develop a deeper understanding of the concept.
- #GraphicOrganizer
More in Classroom Management

Brain Breaks: The Science Behind it and the Benefits
The Science Behind Brain Breaks Most educators experience students’ glazed eyes, heads down,…

Classroom Attention-Getters to Use for Engaging Students
For many teachers, classroom management is a challenge. Without various strategies in your…

Unmute the Classroom: Unleashing the Power of Student Participation
The silence of unengaged students who are hesitant to raise their hands or…

Empathy Vs. Sympathy: What’s the Difference?
Throughout one’s teaching career, there may be several times for which an educator…

How to Use Graphic Organizers to Write Better Essays
Lucid Content
Reading time: about 6 min
If you’re a student, there’s no way around the inevitable: You’re going to have to write essays. Lots of essays. In fact, the five-paragraph essay is so fundamental to the high school curriculum that it’s still used on the ACTs, and knowing how to recognize the organizational structure of essays will help you score higher on the SATs.
Even though it seems like a chore, knowing how to organize and write an essay can have a lasting effect on your life, from getting into a better college to scoring a better job to performing better in that job long after your high school days are over.
Here’s a secret: Using graphic organizers for writing essays can help you write better essays faster. (And don’t count yourself out if you’re an educator—you can offer these tools to help your students succeed.) We’ll show you exactly how to do it.
Why use graphic organizers
When ACT graders or teachers are looking your essay, they’re looking for very specific criteria; essentially, they’re looking at how well you’ve organized your thoughts. Many students don’t take the time to outline their essay structure before writing, and that always means a lower score on a test and a lower grade on the essay in class.
Using a writing template can feel like an unnecessary step in an already complicated process. If you need extra motivation to implement these organizers into your writing routine, consider all of their benefits. Graphic organizers can help you:
- Save time by showing you where each piece of the essay “lives.”
- Have more productive brainstorming sessions, either by yourself or with a group.
- Make connections between ideas and create a more cohesive argument.
- Pinpoint holes in your arguments and either adjust the thesis or find supporting statements.
- Keep track of your research.
- Organize your thoughts and come to interesting, more compelling conclusions.
- Stay in the right direction when you feel lost in a sea of words.
- Manage anxiety by converting the fear of a blank assignment into an action plan with a clear map.
With all those benefits, it’s hard to ignore how useful and vital graphic organizers are to writing. And once you’ve become adept at organizing your thoughts for something like a school essay, you’ll find that skill carries with you throughout your life, whether you’re trying to become a more intelligent debater to negotiate prices. It goes beyond just the essay to becoming a better thinker. And it starts with a simple template.
We’ll walk you through several use cases for graphic organizers and provide templates for you to download and fill in when you’re ready to write.
Brainstorming graphic organizers
Brainstorming is important, not only to come up with ideas for topics but to determine what information you need to include in the essay once you’ve determined your topic. Though many think of brainstorming as just freeflow thinking, brainstorming is most productive when you work within specific parameters.
That’s why essay brainstorming graphic organizers are useful, whether you’re using one to brainstorm on your own or you’re working with a group.
In Lucidchart, our mind map shapes and templates double as brainstorming graphic organizers. Start with an essay prompt as your central shape and then fill in the shapes that branch off your prompt with topic ideas. Alternatively, you can add your selected topic to the center and start brainstorming the different ideas you need to cover in your paper.
When the template is filled in, you’ll have a clear starting point for your essay or research paper.
Research paper graphic organizers
Nothing paralyzes students with fear quite like a research paper. These long-form papers require—as the name implies—quite a bit of research, and their purpose is to teach students how to look for valid sources to support their arguments.
But keeping track of all those sources and tying them into your argument can be tricky. That’s where a research paper graphic organizer can be a student’s greatest ally.

This template lays out the writing process itself. After you come up with a general topic, like “the disappearance of honey bees,” fill in the “Research Paper Topic” box.
Then, start looking for reputable sources (Wikipedia doesn’t count) and use the five sources boxes to hold the most relevant quotes and statistics you find. Using those quotes and statistics, you can then fill out a thesis statement that is supported by the research.
Then, you’ll be able to focus your paragraphs on a single topic each that supports the thesis statement and your overarching argument. After you’ve filled out the template, the backbone of the research paper is complete: All that’s left to do is fill in the spaces between sources and arguments.
5-paragraph essay graphic organizer
When it comes to writing the five-paragraph essay, writing diagrams are key. By using graphic organizers for writing, you’re no longer staring at a giant blank piece of paper with no idea how or where to begin. Your graphic organizer is your map.
Although using writing diagrams may seem time-consuming, the fact is that taking the time to fill a graphic organizer in before writing actually saves time. If there’s a problem with the argument, it will show up on the diagram, or if there’s not enough evidence to support your argument, you’ll know before you’ve wasted time writing the paper. And, as we said before, even if your writing is terrible, if your argument is sound, you’ll still score a decent grade.
Try this 5-paragraph essay template to get you started.

Don’t feel pressured to come up with a compelling title right away. Instead, it’s more important that you come up with a thesis statement that can be supported by three solid arguments. Fill in that thesis statement and your arguments. Then, for each argument, figure out three supporting details to support your case.
That’s it! You’ve got the most essential parts of your 5-paragraph essay completed.
Now, come up with an introduction that sets the stage for your argument and a conclusion that wraps up and restates your thesis and supporting arguments in a compelling way. Now you have a solid plan for your paper and can approach it with confidence.
If you’d like a more linear graphic that exactly follows the structure of the 5-paragraph, use the writing template below and follow the same process.

Visuals, such as graphic organizers for writing, can help you better understand concepts, think creatively, and collaborate with your classmates—and there are plenty of other templates where these came from.
Lucidchart offers hundreds of templates to help you through your studies, including timelines, Venn diagrams, word maps, and more. Sign up for Lucidchart and upgrade to an Educational account for free.
Resources for teachers
Providing graphic resources to students is essential; after all, many of your students will be visual learners, so while you may beautifully explain how the process works, there will be some who won’t understand until they see a template of the essay itself.
Lucidchart has many resources for teachers, from lesson plans to writing templates. While you’re teaching your students how to write essays or research papers, it’s useful to print out the templates and fill them out together (even using a completed template as a separate assignment with a separate grade) so that your students can get a feel for properly filling out graphic organizers before attempting it on their own.
About Lucidchart
Lucidchart, a cloud-based intelligent diagramming application, is a core component of Lucid Software's Visual Collaboration Suite. This intuitive, cloud-based solution empowers teams to collaborate in real-time to build flowcharts, mockups, UML diagrams, customer journey maps, and more. Lucidchart propels teams forward to build the future faster. Lucid is proud to serve top businesses around the world, including customers such as Google, GE, and NBC Universal, and 99% of the Fortune 500. Lucid partners with industry leaders, including Google, Atlassian, and Microsoft. Since its founding, Lucid has received numerous awards for its products, business, and workplace culture. For more information, visit lucidchart.com.
Related articles

Check out how Annika, a recent English graduate of the University of Michigan, used mind mapping in Lucidchart to develop her honors thesis.
Bring your bright ideas to life.
or continue with
- PRO Courses Guides New Tech Help Pro Expert Videos About wikiHow Pro Upgrade Sign In
- EDIT Edit this Article
- EXPLORE Tech Help Pro About Us Random Article Quizzes Request a New Article Community Dashboard This Or That Game Popular Categories Arts and Entertainment Artwork Books Movies Computers and Electronics Computers Phone Skills Technology Hacks Health Men's Health Mental Health Women's Health Relationships Dating Love Relationship Issues Hobbies and Crafts Crafts Drawing Games Education & Communication Communication Skills Personal Development Studying Personal Care and Style Fashion Hair Care Personal Hygiene Youth Personal Care School Stuff Dating All Categories Arts and Entertainment Finance and Business Home and Garden Relationship Quizzes Cars & Other Vehicles Food and Entertaining Personal Care and Style Sports and Fitness Computers and Electronics Health Pets and Animals Travel Education & Communication Hobbies and Crafts Philosophy and Religion Work World Family Life Holidays and Traditions Relationships Youth
- Browse Articles
- Learn Something New
- Quizzes Hot
- This Or That Game
- Train Your Brain
- Explore More
- Support wikiHow
- About wikiHow
- Log in / Sign up
- Education and Communications
- Presentations
How to Make a Graphic Organizer
Last Updated: February 15, 2022
wikiHow is a “wiki,” similar to Wikipedia, which means that many of our articles are co-written by multiple authors. To create this article, 9 people, some anonymous, worked to edit and improve it over time. This article has been viewed 89,152 times. Learn more...
Graphic organizers are tools utilized to help understand information. They are commonly used in schools to teach concepts. Graphic organizers help compare and contrast, summarize information, build timelines, and show relationships. There are a few common graphic organizers that are more general and more widely used.
Making a Venn Diagram

- Using a compass to help you draw the circle will make sure that it is evenly sized and neat. If using a compass, gently hold both legs of the compass to avoid having the pencil end push out, enlarging your circle and making it uneven.
- Draw the circle to one side, not in the middle.

- Keep your compass at the same setting so that your two circles are the same size.

Making a T-Chart

- It does not matter if your paper is vertical or horizontal; it is your preference based on how much room you would like to have for writing from side-to-side.

- Smartphones

- There is no column or space to write what the two things have in common, like in the Venn diagram above. You will simply list how the two things differ from one another.
- For example, you might list how the United States is different from Australia. Under the “United States” heading, you would list information such as population size, number of states, the Constitution, and other pertinent information. Then, under the “Australia” heading, you would list the corresponding information about Australia.
Making a Flow Chart

- Write the numbers in one of the corners of the boxes, such as the top left corner. You can put an additional small box around the numbers to separate them from the text that will be written in them.

- Again, you can draw small boxes around the numbers to separate them from the text that will be written inside them.
- Write the numbers in the same corner that you chose for the top row so that the chart is consistent.
- The top row should read “1” to “3” from left to right, and the bottom row should read “4” to “6” from right to left.

- Plot events in a story, such as the events leading up to the climax
- How to do something, in the order of “First, you do this...” and “Next, you do that...”
- Significant events in a war or historical moment, like the major events of the American Revolution that led to its conclusion
Making a Summary Chart

- You can draw your rectangle just inside the edges of the paper, so that it is almost the same size as the paper. This will allow you to have nice, large boxes in which to write summary information from a story, book, textbook, or other reading passage.
- Use a ruler to help you make the rectangle so that the edges are straight.

- For example, if your paper is vertical, then 11” divided by 5 equals 2.2” (or approximately 2 ¼”) for the height of your rows. If your paper is horizontal, then 8.5” divided by 5 equals 1.7” (or approximately 1 2/3”) for the height of each row.

- Then, you need to turn your ruler horizontally, so that it is parallel with the top of the large rectangle, and draw a line across the width of your rectangle. It should be perpendicular to the sides of the rectangle.

- You now have two of the five rows that you need for your summary chart.

- This last line separates row 4 and row 5. You should now have five same-sized rows across the width of your rectangle.
- Do your best to measure each row to the correct size with your ruler.

- For example, next to “Who,” you will write the person, people, or characters who are involved. Then, next to “Where,” you would write the setting of the story or where the article takes place. After that, you would answer “When” by writing the date or time period. Next, you can answer “What” by describing what happened, like a major plot event or the topic of a news article. Lastly, you will answer “Why” by explaining why that event happened, according to the details given in the story, article, et cetera.
Making a Cycle Organizer

- Use a ruler to help you draw straight, even lines.

- Draw another box of the same dimensions (i.e. 3 inches square) in this new location.
- This box should sit just to the right and down a bit from the first box, as if it is a step leading up to the first box.

- This box should also be just offset from the left side of the first box, also like a step leading up to the first box. Together, the three boxes should resemble a pyramid shape.

- The three boxes should now be connected in a “circle” by the three curved arrows between them. All arrows of the circle should point in a clockwise direction.

- Water cycle
- Human body cycles (e.g. circadian rhythm)
- Animal migrations
- Solar system cycles [1] X Research source
Community Q&A
- Have a purpose in mind for your graphic organizer before creating it. Each type of graphic organizer is used for a specific purpose, so be sure that you draw the correct one for what you need to analyze or learn. Thanks Helpful 1 Not Helpful 0

Things You'll Need
You might also like.

- ↑ http://theorderoftime.com/politics/cemetery/stout/h/cycles.htm
About This Article
- Send fan mail to authors
Reader Success Stories
Jaquavious Jenkins
Oct 16, 2019
Did this article help you?
Aug 10, 2022

Featured Articles

Trending Articles

Watch Articles

- Terms of Use
- Privacy Policy
- Do Not Sell or Share My Info
- Not Selling Info
wikiHow Tech Help Pro:
Develop the tech skills you need for work and life
Essay Papers Writing Online
Effective essay writing graphic organizers to enhance your academic writing skills.

Are you looking for ways to enhance your essay writing skills? Do you struggle to organize your thoughts and ideas effectively? Utilizing graphic organizers can be the key to improving your writing process and producing more cohesive and structured essays.
Graphic organizers are visual tools that help writers brainstorm, plan, and organize their writing. They provide a visual representation of the relationships between ideas, making it easier to see the big picture and the flow of your essay. By using graphic organizers, you can break down complex topics into manageable chunks and create a roadmap for your writing.
Whether you’re a student working on academic essays or a professional writer crafting articles, utilizing graphic organizers can make a significant difference in the clarity and coherence of your writing. In this article, we will explore the benefits of using graphic organizers, discuss different types of organizers, and provide tips on how to effectively incorporate them into your writing process.
Master the Basics
Before delving into the complexities of essay writing, it is crucial to master the basics. Understanding the fundamental elements of an essay, such as the introduction, body paragraphs, and conclusion, is essential for crafting a coherent and compelling piece of writing.
- Start with a strong introduction that grabs the reader’s attention and clearly states your main argument.
- Develop your ideas in the body paragraphs with supporting evidence and analysis.
- Conclude your essay by summarizing your key points and reinforcing your main thesis.
By mastering these basic components of essay writing, you can better structure your ideas and effectively communicate your thoughts to your audience.
Understanding the Essay Structure
When it comes to writing an effective essay, understanding the structure is crucial. An essay typically consists of three main parts: an introduction, body paragraphs, and a conclusion.
Introduction: This is where you grab the reader’s attention and provide a brief overview of what your essay will be about. The introduction should also include a thesis statement, which is the main point or argument of your essay.
Body paragraphs: The body of your essay is where you develop your argument and provide supporting evidence. Each paragraph should focus on a single point and include detailed explanations and examples to support your thesis.
Conclusion: The conclusion is where you wrap up your essay by summarizing your main points and restating your thesis. It’s also a good place to leave the reader with a thought-provoking idea or call to action.
By understanding and utilizing this basic essay structure, you can ensure that your writing is clear, organized, and effective.
Choose the Right Organizer
When it comes to effective essay writing, choosing the right graphic organizer can make a significant difference in organizing your thoughts and boosting your writing skills. There are various types of organizers to choose from, such as the outline, Venn diagram, flowchart, concept map, and more. It’s essential to select an organizer that best fits the structure of your essay and helps you clearly outline your ideas.
Outlining: If you prefer a straightforward approach, an outline organizer can help you create a clear and organized structure for your essay. Use headings and subheadings to categorize your main points and supporting details.
Venn Diagram: A Venn diagram can be useful when comparing and contrasting ideas or topics. It allows you to visually represent the similarities and differences between two or more concepts.
Flowchart: For essays with a sequential flow of ideas, a flowchart organizer is ideal. Create a visual representation of the sequence of events or steps in your essay to ensure a logical progression of ideas.
Concept Map: If you want to explore the relationships between different concepts in your essay, a concept map can help you visualize the connections between ideas and brainstorm new insights.
Choosing the right organizer is crucial to effectively structure your essay and enhance your writing skills. Experiment with different types of organizers to find the one that best suits your writing style and helps you convey your ideas clearly and cohesively.
Selecting the Best Graphic Tool
When choosing a graphic organizer tool for your essay writing process, it is essential to consider various factors to ensure its effectiveness. Here are some key points to keep in mind:
- Type of Essay: Consider the type of essay you are writing and choose a graphic organizer that best fits the structure and organization needed for that particular essay type.
- Complexity: Evaluate the complexity of your ideas and arguments to determine the level of detail and hierarchy required in the graphic organizer.
- Visual Appeal: Look for a tool that is visually appealing and easy to comprehend, as this will help you better visualize and organize your thoughts.
- Flexibility: Opt for a tool that offers flexibility in terms of customization, allowing you to adjust the layout and structure based on your specific needs.
- Accessibility: Ensure that the graphic organizer tool you choose is accessible and easy to use on your preferred devices and platforms.
By carefully considering these factors, you can select the best graphic tool that will enhance your essay writing process and improve the clarity and coherence of your ideas.
Organize Your Ideas

Before diving into writing your essay, it’s crucial to organize your ideas to ensure a clear and coherent flow of information. Using graphic organizers can help you visually map out your thoughts and easily see how they connect. Here are some effective ways to organize your ideas:
- Outline: Create a detailed outline with main points, subpoints, and supporting evidence to structure your essay.
- Brainstorming: Brainstorm ideas and jot them down on a mind map to see relationships between different concepts.
- Cluster/Spider Diagrams: Use cluster or spider diagrams to group related ideas together and visualize the structure of your essay.
- Storyboard: Create a storyboard with key events or arguments to plan out the sequence of your essay.
By organizing your ideas using graphic organizers, you can enhance the clarity and coherence of your essay, making it easier for readers to follow your argument.
Mapping Out Your Thoughts

One of the most effective tools for organizing your thoughts and ideas before starting to write an essay is a graphic organizer. By using a graphic organizer, you can visually map out your thoughts, main points, and supporting details. This helps you clarify your ideas and ensure that your essay has a logical structure.
There are various types of graphic organizers you can use, such as mind maps, concept maps, Venn diagrams, and flowcharts. Choose the one that best suits your writing style and the topic of your essay. Once you have selected a graphic organizer, start by jotting down your main idea in the center and then branch out to include your supporting points and details.
Mapping out your thoughts using a graphic organizer will not only help you stay focused and organized but also make the writing process smoother and more efficient. It can serve as a roadmap for your essay, guiding you through each section and ensuring that your ideas flow cohesively.
Develop Strong Arguments
Effective essay writing requires the development of strong arguments to persuade the reader of your perspective. To create compelling arguments, follow these key strategies:
- Research: Conduct thorough research to gather credible evidence and support for your arguments. Use reliable sources to strengthen your points.
- Structure: Organize your arguments logically and coherently. Start with a clear thesis statement and build each argument in a structured manner.
- Counterarguments: Anticipate counterarguments and address them in your essay. This shows that you have considered different viewpoints and strengthens your own position.
- Evidence: Support your arguments with relevant evidence, such as examples, statistics, and expert opinions. This adds credibility and persuasiveness to your essay.
- Clarity: Clearly articulate your arguments and provide explanations to ensure that your points are easily understood by the reader.
- Consistency: Ensure that your arguments are consistent throughout the essay. Avoid contradictions or inconsistencies that may weaken your overall argument.
By developing strong arguments with these key strategies, you can enhance the effectiveness of your essay writing and convey your ideas convincingly to your audience.
Building a Persuasive Case
When writing a persuasive essay, it is crucial to build a compelling case to persuade your audience to agree with your viewpoint. Here are some key steps to help you construct a persuasive case:
- Clear Thesis Statement: Start by clearly stating your position or argument in a concise thesis statement. This statement should clearly convey what you are trying to persuade your readers to believe or do.
- Supporting Evidence: Back up your thesis statement with strong evidence, facts, statistics, examples, and expert opinions. Providing solid evidence can make your case more convincing and credible.
- Logical Organization: Structure your essay in a logical and coherent manner. Develop your arguments in a clear sequence, with each point building upon the previous one to strengthen your case.
- Address Counterarguments: Anticipate potential counterarguments and address them in your essay. Acknowledging opposing viewpoints and refuting them can make your argument more persuasive.
- Emotional Appeal: Use emotional appeals, anecdotes, and narratives to connect with your audience on a personal level. Appeal to the emotions of your readers to make them more likely to empathize with your argument.
- Call to Action: End your essay with a strong call to action that urges your audience to take a specific course of action or consider your perspective. Encouraging your readers to act can motivate them to support your cause.
By following these steps and building a persuasive case in your essay, you can effectively convince your audience to embrace your ideas and opinions.
Enhance Your Writing Flow
One of the key elements in effective essay writing is maintaining a smooth and consistent flow throughout your piece. A well-structured essay should lead the reader from one point to the next seamlessly, with each paragraph naturally transitioning into the next.
To enhance your writing flow, consider using transitional words and phrases such as “furthermore,” “however,” “in addition,” and “conversely” to connect your ideas and guide the reader through your argument. These transitions help establish logical connections between your thoughts and make your writing more coherent.
Additionally, vary your sentence structure and length to create a dynamic rhythm in your writing. Mixing short, punchy sentences with longer, more elaborate ones can keep your reader engaged and prevent your writing from feeling monotonous.
Finally, don’t be afraid to revise and reorganize your essay to ensure a smooth and consistent flow. Take the time to read your work aloud or have someone else review it to identify any awkward or disjointed sections that may disrupt the flow of your writing.
By paying attention to these techniques and practicing them regularly, you can enhance your writing flow and take your essay writing skills to the next level.
Related Post
How to master the art of writing expository essays and captivate your audience, convenient and reliable source to purchase college essays online, step-by-step guide to crafting a powerful literary analysis essay, tips and techniques for crafting compelling narrative essays.
IMAGES
VIDEO
COMMENTS
The phrase "graphic organizer" is just a fancy way of saying "diagram" or "visual aid.". Basically, they are a visual representation of the information you've acquired in the research process. There are quite a few reasons why you should use them when writing essays or summaries. Helps you visualize your research and how elements ...
Put simply, graphic organizers are a way of organizing information visually to help students understand and remember it. They're tools that let kids make connections, create a plan, and communicate effectively. A good organizer simplifies complex information and lays it out in a way that makes it easier for a learner to digest.
The ultimate purpose of utilizing a graphic organizer as a tool is to prepare students for writing. Simply put, a graphic organizer assists a student with thinking and is a pre-writing tool -- not the end product. Some young writers may need this thinking tool more than others. That said, a writer in your classroom might want to skip using a ...
Simply put, graphic organizers are visual aids that help learners organize and present information visibly. They make use of diagrams, charts, mind maps, or other graphical elements to represent concepts and ideas in a structured manner. By doing so, graphic organizers enable learners to gain a deeper understanding of the subject matter by ...
Graphic organizers are great tools to meet the needs of all learners. By presenting information in a graphic format, you can easily make a lesson accessible to all students. To increase the effectiveness of a graphic organizer, always make sure to model beforehand and explain why you are using it and what you are using it for.
In Lucidchart, our mind map shapes and templates double as brainstorming graphic organizers. Start with an essay prompt as your central shape and then fill in the shapes that branch off your prompt with topic ideas. Alternatively, you can add your selected topic to the center and start brainstorming the different ideas you need to cover in your ...
Create a new blank spreadsheet by clicking on the "+ New/Blank" button in the upper-left corner of the screen. Step 2: Create Your Columns. Begin adding your categories to the first row or column. These categories will serve as the column headers for your graphic organizer. Step 3: Adjust the Formatting.
Draw a box that is 3 inches square on your paper, which should be laid horizontally. Set the box about 1-2 inches down from the top of the paper, and place it in the middle of the paper's width (i.e. there should be 4 inches on either side of the box). Use a ruler to help you draw straight, even lines. 2.
Graphic Organizer Definition & Purpose. The definition of a graphic organizer is a pedagogical tool used to visually convey information. Graphic organizers help students understand complex ideas ...
Written by: Orana Velarde. Sep 12, 2019. In this guide, you will find 15 different types of graphic organizers: Type #1: Circle Map Graphic Organizer. Type #2: Spider Map Graphic Organizer. Type #3: Idea Wheel Graphic Organizer. Type #4: Idea Web Graphic Organizer. Type #5: Concept Map Graphic Organizer.
AI-generated answer. A graphic organizer is a visual tool that helps organize information or ideas in a clear and structured way. It can be used to visually represent relationships between different concepts or to organize thoughts and details about a specific topic. There are many different types of graphic organizers, each with its own ...
Create a graphic organizer online. Canva's online graphic organizer creator makes it super easy to make a custom chart or diagram. With beautiful templates, you don't have to start from scratch. Busy educators will quickly finish a graphic organizer for the day's lesson. Create engaging worksheets for your students or turn them into fun ...
By using a graphic organizer, you can visually map out your thoughts, main points, and supporting details. This helps you clarify your ideas and ensure that your essay has a logical structure. There are various types of graphic organizers you can use, such as mind maps, concept maps, Venn diagrams, and flowcharts.
Our Mission; Using Graphic Organizers Correctly. It's much more important for a student to practice writing — the only way to build writing fluency — than to fill in a graph
A graphic organizer is a teaching and learning tool that is used to organize information and ideas in a way that is easy to comprehend and internalize. By integrating text and visuals, graphic organizers show relationships and connections between concepts, terms, and facts.
Step 1: Select a subject of interest for your essay/debate. Do good research about it to gather sufficient details. Step 2: Describe the claim that you want to create with your essay. Create your persuasion map by writing this down first. Step 3: Following it, note down the reasons for creating that claim.
Activity 2. Directions. Identify what graphic organizer is to be used in the given situation 1. The teacher asked you to make a graphic organizer that shows the similarities and differences of the two or more concepts. 2. Your project in Science subject is to draw the life cycle of a frog. 3.
The thesis statement is a crucial element of an informative essay, and it is typically included in the introduction paragraph.The correct answer is option A. . The purpose of the thesis statement is to clearly state the main idea or central argument of the essay, providing a roadmap for the reader to understand what will be discussed in the subsequent body paragraphs.
We can complete the sentence as follows; "i think a mind map is the most appropriate graphic organizer to use because it addresses related ideas.. What is a graphic organizer? A graphic organizer is a visual representation of information that can be used to organize thoughts and understand complex concepts.. There are a variety of graphic organizers some of which include the concept maps, mind ...