How to use speech to text in Microsoft Word
Speech to text in Microsoft Word is a hidden gem that is powerful and easy to use. We show you how to do it in five quick and simple steps

Master the skill of speech to text in Microsoft Word and you'll be dictating documents with ease before you know it. Developed and refined over many years, Microsoft's speech recognition and voice typing technology is an efficient way to get your thoughts out, create drafts and make notes.
Just like the best speech to text apps that make life easier for us when we're using our phones, Microsoft's offering is ideal for those of us who spend a lot of time using Word and don't want to wear out our fingers or the keyboard with all that typing. While speech to text in Microsoft Word used to be prone to errors which you'd then have to go back and correct, the technology has come a long way in recent years and is now amongst the best text-to-speech software .
Regardless of whether you have the best computer or the best Windows laptop , speech to text in Microsoft Word is easy to access and a breeze to use. From connecting your microphone to inserting punctuation, you'll find everything you need to know right here in this guide. Let's take a look...

How to use speech to text in Microsoft Word: Preparation
The most important thing to check is whether you have a valid Microsoft 365 subscription, as voice typing is only available to paying customers. If you’re reading this article, it’s likely your business already has a Microsoft 365 enterprise subscription. If you don’t, however, find out more about Microsoft 365 for business via this link .
The second thing you’ll need before you start voice typing is a stable internet connection. This is because Microsoft Word’s dictation software processes your speech on external servers. These huge servers and lighting-fast processors use vast amounts of speech data to transcribe your text. In fact, they make use of advanced neural networks and deep learning technology, which enables the software to learn about human speech and continuously improve its accuracy.
These two technologies are the key reason why voice typing technology has improved so much in recent years, and why you should be happy that Microsoft dictation software requires an internet connection.
Once you’ve got a valid Microsoft 365 subscription and an internet connection, you’re ready to go!
Are you a pro? Subscribe to our newsletter
Sign up to the TechRadar Pro newsletter to get all the top news, opinion, features and guidance your business needs to succeed!
Step 1: Open Microsoft Word
Simple but crucial. Open the Microsoft Word application on your device and create a new, blank document. We named our test document “How to use speech to text in Microsoft Word - Test” and saved it to the desktop so we could easily find it later.
Step 2: Click on the Dictate button
Once you’ve created a blank document, you’ll see a Dictate button and drop-down menu on the top right-hand corner of the Home menu. It has a microphone symbol above it. From here, open the drop-down menu and double-check that the language is set to English.
One of the best parts of Microsoft Word’s speech to text software is its support for multiple languages. At the time of writing, nine languages were supported, with several others listed as preview languages. Preview languages have lower accuracy and limited punctuation support.
Step 3: Allow Microsoft Word access to the Microphone
If you haven’t used Microsoft Word’s speech to text software before, you’ll need to grant the application access to your microphone. This can be done at the click of a button when prompted.
It’s worth considering using an external microphone for your dictation, particularly if you plan on regularly using voice to text software within your organization. While built-in microphones will suffice for most general purposes, an external microphone can improve accuracy due to higher quality components and optimized placement of the microphone itself.
Step 4: Begin voice typing
Now we get to the fun stuff. After completing all of the above steps, click once again on the dictate button. The blue symbol will change to white, and a red recording symbol will appear. This means Microsoft Word has begun listening for your voice. If you have your sound turned up, a chime will also indicate that transcription has started.
Using voice typing is as simple as saying aloud the words you would like Microsoft to transcribe. It might seem a little strange at first, but you’ll soon develop a bit of flow, and everyone finds their strategies and style for getting the most out of the software.
These four steps alone will allow you to begin transcribing your voice to text. However, if you want to elevate your speech to text software skills, our fifth step is for you.
Step 5: Incorporate punctuation commands
Microsoft Word’s speech to text software goes well beyond simply converting spoken words to text. With the introduction and improvement of artificial neural networks, Microsoft’s voice typing technology listens not only to single words but to the phrase as a whole. This has enabled the company to introduce an extensive list of voice commands that allow you to insert punctuation marks and other formatting effects while speaking.
We can’t mention all of the punctuation commands here, but we’ll name some of the most useful. Saying the command “period” will insert a period, while the command “comma” will insert, unsurprisingly, a comma. The same rule applies for exclamation marks, colons, and quotations. If you’d like to finish a paragraph and leave a line break, you can say the command “new line.”
These tools are easy to use. In our testing, the software was consistently accurate in discerning words versus punctuation commands.
Microsoft’s speech to text software is powerful. Having tested most of the major platforms, we can say that Microsoft offers arguably the best product when balancing cost versus performance. This is because the software is built directly into Microsoft 365, which many businesses already use. If this applies to your business, you can begin using Microsoft’s voice typing technology straight away, with no additional costs.
We hope this article has taught you how to use speech to text software in Microsoft Word, and that you’ll now be able to apply these skills within your organization.

Allyant review: a document accessibility partner that looks good on paper
Adobe Acrobat Pro (2024) review
These are my top picks for Black Friday-beating laptop deals in Amazon’s Spring sale
Most Popular
By Charlotte Henry March 21, 2024
By Aatif Sulleyman March 21, 2024
By Will Hall March 21, 2024
By Jennifer Allen March 21, 2024
By Tom Wiggins March 21, 2024
By Andy Murray March 21, 2024
By Daniel Pateman March 19, 2024
By Will Hall March 19, 2024
By Aatif Sulleyman March 17, 2024
By Emma Street March 17, 2024
By Sofia Elizabella Wyciślik-Wilson March 16, 2024
- 2 Apple iPhone is not a monopoly – and you really don't want the US Government to win its antitrust suit
- 3 Windows 11 is getting a controversial Windows 10 feature that some people accuse of being pointless bloat
- 4 IKEA’s super-cheap fast chargers look a bargain for your iPhone 15 or Android phone
- 5 Netflix's Succession-esque new show, A Man in Full, gets its first mysterious trailer
- 2 Buying a new TV in 2024? Make it a Sony
- 3 Nvidia has virtually recreated the entire planet — and now it wants to use its digital twin to crack weather forecasting for good
- 4 Windows 11 gets new features for Settings app as Microsoft continues with its ‘death by a thousand cuts’ for Control Panel
- 5 Another Microsoft vulnerability is being used to spread malware
How to use speech-to-text on Microsoft Word to write and edit with your voice
- You can use speech-to-text on Microsoft Word through the "Dictate" feature.
- With Microsoft Word's "Dictate" feature, you can write using a microphone and your own voice.
- When you use Dictate, you can say "new line" to create a new paragraph and add punctuation simply by saying the punctuation aloud.
- If you're not satisfied with Word's built-in speech-to-text feature, you can use a third-party program like Dragon Home.
- Visit Business Insider's Tech Reference library for more stories.
While typing is certainly the most common way to create and edit documents in Microsoft Word , you're not limited to using a keyboard.
Word supports speech-to-text, which lets you dictate your writing using voice recognition.
Speech-to-text in Word is convenient and surprisingly accurate, and can help anyone who has issues typing with a typical keyboard.
You can use speech-to-text in Microsoft Word in the same way on both Mac and PC.
Check out the products mentioned in this article:
Apple macbook pro (from $1,299.00 at apple), acer chromebook 15 (from $179.99 at walmart), how to use speech-to-text on word using dictate.
Make sure you have a microphone connected to your computer. This can be built-in, like on a laptop, or a separate mic that you plug into the USB or audio jack.
It doesn't matter which type you use, though the best kind of mic to use is a headset, as it won't need to compete with as much background noise as a built-in microphone.
1. In Microsoft Word, make sure you're in the "Home" tab at the top of the screen, and then click "Dictate."
2. You should hear a beep, and the dictate button will change to include a red recording light. It's now listening for your dictation.
3. Speak clearly, and Word should transcribe everything you say in the current document. Speak punctuation aloud as you go. You can also say "New line," which has the same effect as pressing the Enter or Return key on the keyboard.
4. When you're done dictating, click "Dictate" a second time or turn it off using your voice by saying, "Turn the dictate feature off."
You can still type with the keyboard while Dictate is on, but if you click outside of Word or switch to another program, Dictate will turn itself off.
Want to change languages? You can click the downward arrow on the Dictate button to choose which of nine or so languages you want to speak. You might also see additional "Preview Languages," which are still in beta and may have lower accuracy.
Speech-to-text alternatives
You're not limited to using the Dictate feature built into Word. While not as popular as they once were, there are several commercial speech-to-text apps available which you can use with Word.
The most popular of these, Dragon Home , performs the same kind of voice recognition as Word's Dictate, but it also lets you control Word, format text, and make edits to your text using your voice. It works with nearly any program, not just Word.
Related coverage from Tech Reference :
How to use speech-to-text on a windows computer to quickly dictate text without typing, you can use text-to-speech in the kindle app on an ipad using an accessibility feature— here's how to turn it on, how to use text-to-speech on discord, and have the desktop app read your messages aloud, how to use google text-to-speech on your android phone to hear text instead of reading it, 2 ways to lock a windows computer from your keyboard and quickly secure your data.
Insider Inc. receives a commission when you buy through our links.
Watch: Why Americans throw 'like' in the middle of sentences
- Main content
How to Dictate Documents in Microsoft Word
Great for writing speeches or your autobiography
Most people can speak faster than they can type. Take advantage of this superpower by dictating your documents! Using speech-to-text is a great way to quickly get your thoughts down in writing. We’ll show you how to dictate documents in Microsoft Word on a computer or your smartphone.
If you use the Mac or Windows desktop version of Word, you won’t find the dictate button unless you subscribe to Microsoft 365. However, you can use the free Microsoft Word web app or smartphone apps to dictate to your heart’s desire. We’ll assume you have a good internet connection and a device with a microphone enabled.

How to Use Dictation in Word on Macs, PCs, or the Web
The steps for dictating documents in Word are largely the same, no matter whether you’re using the desktop app or the browser-based version.
- Launch the Word app, either the desktop app on your Mac or PC or the web app in Chrome, Firefox, or Edge.

- In the Home menu, select the microphone icon.

- If prompted, select the button to Allow the use of your microphone.

- Web app users will see a toolbar with controls for your microphone. Select the microphone icon to begin dictating.

- Once the microphone icon is activated, you can begin speaking, and you’ll see your words appear in the Word document.

- Web users can select the gear icon on the dictation toolbar to choose the spoken language, select which microphone device they want to use, and toggle auto-punctuation and the profanity filter on or off.

- You can use your keyboard or Word’s suggestions to edit your document without needing to turn the microphone off.
- When you’re finished, you can exit dictation by selecting Close ( X ) in the dictation toolbar or pressing the microphone button on the ribbon again.
That’s enough to get started with dictating a Word document on a computer. But keep reading for some expert tips and tricks.
How to Use Dictation on Your Smartphone’s Word App
Smartphones are made for dictation. You might feel strange talking to yourself, but it’s certainly faster than using your phone’s tiny keyboard.

Start with a new Word document or open an existing one. Tap the screen where you want to start dictating, and then select the microphone icon. You can choose the microphone icon inside the Word app itself or the icon on your soft keyboard. Either one will work.

The benefit of using the Word app’s microphone icon is that you’ll have access to some other dictation tools. You’ll see a toolbar with standard punctuation, a spacebar, and a carriage return (new line) button. Sometimes it’s easier to tap those buttons than it is to use voice commands.

You’ll also have access to the gear icon to adjust the settings like the spoken language, auto punctuation, and the profanity filter.

The first time you select the microphone icon in the Word app, you may be prompted to grant Word permission to record audio on your phone. You can choose to either allow it every time you use the app or only this time.

At any point, you can always select the Help button, where you’ll find information on all the voice commands you can use.
Tips and Tricks for Dictating in Microsoft Word
Sure, you can dictate the text of a Word document, but did you know about all the other things you can do in Word with voice commands? You can use your voice to edit, format, create lists, and add a comment.
Punctuation Tips & Tricks
You’ll get used to saying the names of punctuation marks and symbols when you dictate.

- Add punctuation simply by saying the name of the punctuation mark you want to insert. You can say things like period , comma , new line , and apostrophe .
- Say open quotes and close quotes .
- You can say ellipsis or dot dot dot … it’s up to you!
- For punctuation like parentheses, brackets, and braces, you can say either left or open bracket (or parentheses or brace) and either right or close bracket (or parentheses or brace).
- If it’s a character, you can probably dictate it. Try commands like asterisk , m-dash , copyright sign , and degree symbol .
Editing Tips & Tricks
Think of it this way. You’re the boss and Word is your employee. Just tell Word what you want it to do.

- If you say delete , Word will delete the last word or punctuation mark that appears before the cursor.
- If you say delete that , it’ll remove the last thing you said.
- You can tell Word to delete a specific word in the middle of a sentence. For example, let’s say you dictated, “You can’t judge a book by its awful cover.” You could say delete awful , and then you’d be left with “You can’t judge a book by its cover.”
- Rather than saying backspace repeatedly to go back several spaces, you can just say backspace [1-100] . In other words, you can say backspace twenty .
- If you make a mistake, you can always say undo .
Formatting Tips & Tricks
Like the editing tips, you can use voice commands to add formatting to specific words or phrases.

- For simple formatting like bold , italics , underline , and strikethrough , you can pair those commands with words or phrases in your document. For example, in the screencap below, we said, “ bold phrases ,” and it did!
- To undo all the formatting from the document, say clear all formatting .
- Use the align command to align your text left, right, or center.
- If you’re not sure a particular command exists, try it and find out. For example, you can say, underline last sentence , and Word will know exactly what you mean.
- Creating lists is easy with commands like start list , start numbered list , and exit list .
Bonus Dictation Tips & Tricks
Before you go, check out these final dictation tips and tricks.

- Say add comment to create a blank comment box that you can type into.
- Even better, say something like add comment I love this paragraph period , and it will insert a comment with the text “I love this paragraph.”
- Dictate currency symbols. You can say dollar sign , pound sterling sign (don’t forget the “sterling” or it will insert the # sign), euro sign , or yen sign .
- Insert common emojis like smiley face , winky face , heart emoji , or frowny face .
If you know of any more dictation commands in Microsoft Word, leave them in the comments!

Maggie Marystone is a freelance technology writer, human rights worker, and storyteller based in Chicago. Read Maggie's Full Bio
Read More Posts:

Leave a Reply
Your email address will not be published. Required fields are marked *
How-To Geek
How to transcribe audio in microsoft word.
Microsoft recently rolled out a new feature for Word online that allows you to transcribe audio. Here's how to use it.
Quick Links
Record and transcribe live audio, upload and transcribe an audio file.
Microsoft debuted in August 2020 an audio transcription feature for the online version of Word that converts audio (recorded or uploaded from a file) directly to text, and even separates the text based on the speaker. Here's how to use the feature.
To transcribe audio with Word, you must be a Microsoft 365 premium subscriber . If you have the free version and you try to use the feature, you'll be met with a message asking you to subscribe.
You can have Word transcribe audio that you record directly within Word. Sign in to Microsoft 365, and open Word. In the "Home" tab, click the arrow next to "Dictate" and then select "Transcribe" from the menu that appears.
If this is your first time using the feature, you'll need to give Microsoft permission to access your microphone .
The "Transcribe" pane will open in the right-hand side of the window. Select "Start Recording."
Once selected, the timer will start. Now, you'll want to begin speaking. You won't see the transcription happen live as you're speaking because Microsoft found that to be a bit too distracting during its testing.
After you're finished, click the "Pause" button and then select "Save and Transcribe Now."
It may take a few minutes for Word to finish transcribing the audio recording and uploading it to OneDrive .
Once this is done, you'll see the transcription appear in the same pane you recorded the audio. Each section will have a timestamp, the speaker's name, and the transcribed text. Microsoft automatically separates the text by the speaker.
If Word detects multiple speakers, you'll see "Speaker 1," Speaker 2," and so on. If Word can't detect multiple speakers, you'll just see "Speaker."
You might notice that the transcript doesn't perfectly reflect the recorded audio accurately. You can edit a section of the transcript by hovering your mouse over the incorrect text and then selecting the pen icon.
Now you can edit the transcription found in this section. You can also edit the name of the speaker, as well as every instance where the speaker (i.e., Speaker 1 or Speaker 2) appears by ticking the box next to "Change All Speaker." When you're finished, click the checkmark.
If necessary, you can use the playback controls to revisit the audio recording. This is necessary if the transcript is long, and you can't remember exactly who said what. Here's the function of each button, from left to right:
- Playback speed
- Fast forward
When you're finished editing the transcript, you can add it to the document by selecting the "Add All To Document" button at the bottom of the pane.
Once selected, the audio recording and the content of the transcript will appear in the document.
If you already have an audio file that you want to transcribe, you can upload it to Word. Sign in to Microsoft 365, and open Word. In the "Home" tab, click the arrow next to "Dictate" and then select "Transcribe" from the menu that appears.
The "Transcribe" pane will open in the right-hand side of the window. Select "Upload Audio." You can upload these audio file types:
File Explorer (Finder for Mac) will open. Navigate to the location of the audio file, select it, and then click "Open."
Microsoft will begin transcribing the audio file. Depending on the size of the file, this could take quite a bit of time.
Once Microsoft finishes transcribing the audio file, the text will appear in the pane.
If you face the same issue with your audio file, you can edit the text by hovering over the section and clicking the "Pen" icon. If you need to hear the audio again, you can do so by using the audio controls.
Next, edit the name of the speaker (and each instance that the speaker appears by ticking the "Change All Speaker" box) and the text from that section. When finished, click the "Checkmark."
Once you've edited the content of the transcript, click "Add All To Document."
The audio file and text of the transcript will be added to the Word document.
While not perfect, this feature can potentially save you a lot of time, especially if the speaker in the audio is speaking clearly.
How to Use Microsoft Word Text-to-Speech to Read Out Loud

Several programs in Microsoft Office 2013 have built-in text-to-speech functionality designed to read the contents of your documents aloud. This feature is called Speak. In order to have Speak read text out loud in Microsoft Word 2013, first add the Speak button to the Quick Access Toolbar, then simply click the Speak button to initiate text-to-speech functionality at any time.
Advertisement
Open Word, then click the "Customize Quick Access Toolbar" button located to the right of the Quick Access Toolbar and select "More Commands." The Quick Access Toolbar is located above the row of tabs that includes File, Home, Insert and Page Layout.
Video of the Day
Select the "Choose Commands From" drop-down menu, then "Commands not in the Ribbon." Click "Speak" and then "Add" to add the Speak button to the Quick Access Toolbar. Click "OK" when you are finished.
Highlight the text you want Word to read aloud. If you want Word to read your entire document out loud, press "Ctrl-A" to select all of the text.
Click the "Speak" button on the Quick Access Toolbar to have Word start reading your text. The Speak button is identified by a little speech bubble with an arrow.
- Office: Using the Speak Text-to-Speech Feature
- Tech Republic: Quick Tip -- Add Speak to the Word Quick Access Bar
- Microsoft Accessibility: Accessibility in Microsoft Office 2013
- Office: Using the Speak Feature with Multilingual TTS
- Microsoft Download Center: Microsoft Speech Platform
Report an Issue
Screenshot loading...

Use the Speak text-to-speech feature to read text aloud
Speak is a built-in feature of Word, Outlook, PowerPoint, and OneNote. You can use Speak to have text read aloud in the language of your version of Office.
Text-to-speech (TTS) is the ability of your computer to play back written text as spoken words. Depending upon your configuration and installed TTS engines, you can hear most text that appears on your screen in Word, Outlook, PowerPoint, and OneNote. For example, if you're using the English version of Office, the English TTS engine is automatically installed. To use text-to-speech in different languages, see Using the Speak feature with Multilingual TTS .
To learn how to configure Excel for text-to-speech, see Converting text to speech in Excel .
Add Speak to the Quick Access Toolbar
You can add the Speak command to your Quick Access Toolbar by doing the following in Word, Outlook, PowerPoint, and OneNote:
Next to the Quick Access Toolbar, click Customize Quick Access Toolbar .

Click More Commands .
In the Choose commands from list, select All Commands .
Scroll down to the Speak command, select it, and then click Add .
Use Speak to read text aloud
After you have added the Speak command to your Quick Access Toolbar, you can hear single words or blocks of text read aloud by selecting the text you want to hear and then clicking the Speak icon on the Quick Access Toolbar.
Listen to your Word documents with Read Aloud
Listen to your Outlook email messages with Read Aloud
Converting text to speech in Excel
Dictate text using Speech Recognition
Learning Tools in Word
Hear text read aloud with Narrator
Using the Save as Daisy add-in for Word

Need more help?
Want more options.
Explore subscription benefits, browse training courses, learn how to secure your device, and more.

Microsoft 365 subscription benefits

Microsoft 365 training

Microsoft security

Accessibility center
Communities help you ask and answer questions, give feedback, and hear from experts with rich knowledge.

Ask the Microsoft Community

Microsoft Tech Community

Windows Insiders
Microsoft 365 Insiders
Was this information helpful?
Thank you for your feedback.

Try Process AI free
How to use speech-to-text on microsoft word 2013.
In the digital age, technology is a huge part of our lives. It makes tasks simpler and more efficient. For example, Microsoft Word 2013 has a speech-to-text feature. This lets users turn spoken words into written text quickly and easily.
Imagine a world where you can dictate your words, ideas and documents into Microsoft Word without typing. With its cutting-edge voice recognition technology, speech-to-text on Microsoft Word 2013 makes this possible.
No more struggling with typing speed or spending hours crafting documents. Just speak your mind and watch it appear on the screen. This saves time and allows ideas to flow freely.
To get started, you need a microphone connected to your computer. Go to the “Insert” tab in Microsoft Word 2013 , click on “Speech” and select “Start Speech Recognition”. Then, follow the prompts to calibrate the microphone.
Once it’s set up, you can click the microphone icon in the toolbar and start using speech-to-text. Your words will be turned into text with great accuracy. You can also use traditional keyboard input to make corrections or edit the text.
The speech-to-text feature on Microsoft Word 2013 has many benefits. For people with disabilities or those who have difficulty typing, it removes barriers and helps them express themselves more easily. Professionals can also benefit from it, as they can dictate their thoughts while focusing on other tasks. This increases efficiency and makes work processes smoother.
Understanding Speech to Text Technology
Speech to Text technology has changed the way we interact with our devices. It converts spoken words to written text, providing efficient communication and data entry. Knowing how to use Speech to Text on Microsoft Word 2013 can boost productivity, even if you have a physical disability or simply prefer speaking.
The Speech to Text feature on Microsoft Word 2013 means no more typing. Just speak into the mic and watch your words appear on the screen. Advanced algorithms accurately transcribe your speech and reduce errors.
To use it, open a document, click the “Dictation” button in the “Home” tab, click the mic icon and start talking. Speak clearly and use commands like “new paragraph” or “comma” for formatting. Click the mic icon or say “stop dictating” to end the session.
Speech to Text technology has been around for decades. Early attempts were unsuccessful due to technical challenges. But, machine learning algorithms and data processing have made it incredibly accurate and accessible.
Enabling Speech to Text on Microsoft Word 2013
Speech to text is a cool feature on Microsoft Word 2013 ! To get started, do these steps:
- Open Microsoft Word 2013 .
- Click the “File” tab in the top left corner.
- Choose “Options” from the drop-down menu.
- In the Word Options window, click on “Customize Ribbon”.
- Next to “Dictation”, check the box and then click “OK”.
You can now use speech to text on Microsoft Word 2013 . Plus, you can customize the language settings to match your accent for more accurate transcription.
Fun fact: According to the Royal National Institute for Deaf People (RNID) , speech recognition software like Microsoft Word 2013’s speech to text can help those with hearing impairments.
Why not give it a go and make your writing easier with speech to text on Microsoft Word 2013 ?
Using Speech to Text on Microsoft Word 2013
To use speech recognition in Microsoft Word 2013, follow these steps:
- Open Microsoft Word 2013.
- Click the “Review” tab.
- In the “Speech” section, click “Start Speech Recognition” .
- A window with a mic icon will appear; click the mic icon to start listening.
- Enunciate each word as you speak clearly into the microphone.
- Word will transcribe your words in real-time.
- Save time and effort using speech recognition for written text!
- Keep in mind accuracy may not be perfect; you may need to correct words/phrases.
- Thanks to research and development, speech recognition technology has made great strides!
Tips for Efficiently Using Speech to Text on Microsoft Word 2013
Speech to Text is a great feature from Microsoft Word 2013. To get the most out of it, here are some tips:
- Invest in a good microphone. This will give you clear and noise-free audio input.
- Speak clearly and enunciate each word.
- Use the voice commands for formatting.
- Remember to proofread and edit afterwards.
- Speech to Text supports multiple languages.
- You can train the software to learn your voice patterns and pronunciation.
Troubleshooting Common Issues with Speech to Text on Microsoft Word 2013
Sarah had a mission: to use Speech to Text on Microsoft Word 2013 for increased productivity. But, obstacles arose, like low accuracy and misinterpreted words. She asked for help from IT support who advised her to change the settings of her mic and invest in a noise-canceling headset. This worked! Sarah could now easily transcribe documents with Speech to Text tech.
You too can overcome issues with Speech to Text and Microsoft Word 2013 . First, ensure your mic is connected and functioning properly. Then, adjust settings in Word to select the correct input device. If accuracy is low, try changing the mic’s placement or speaking more clearly and slowly. Additionally, train the software by reading out passages from books or articles. Finally, minimize noise distractions or use noise-canceling headphones.
It’s also essential to note that updating your version of Microsoft Word 2013 may help resolve certain problems, and checking for any conflicting applications running in the background. Take cues from Sarah’s story, and you’ll be able to troubleshoot common Speech to Text issues like a pro!
Wrapping up, speech-to-text on Microsoft Word 2013 is a great way to create documents. It helps you to dictate your thoughts and the software will turn them into text. This feature saves time and effort as it eliminates manual typing.
It also benefits those with disabilities or those who prefer dictation. It encourages inclusivity and accessibility.
Moreover, MS Word 2013’s speech-to-text offers customization options. You can choose language preferences and train the software to recognize your voice.
This function is powered by Microsoft Research’s advanced voice recognition tech. They strive to improve their algorithms for better accuracy in capturing words.

No credit card required
Your projects are processes, Take control of them today.
- Copilot Studio
Building your own copilot with Copilot Studio

Richard Riley , , Tuesday, March 19, 2024

Learn how you can use Copilot Studio to build your own copilot, available on multiple channels, designed for your audiences, and tailored specifically to your business processes and workflows.
In November, we introduced Microsoft Copilot Studio , a conversational AI platform that allows you to customize Copilot for Microsoft 365 and build your own copilot.
Copilot for Microsoft 365 offers AI assistance to create, find, and ask for information across Microsoft 365 apps and provides a Copilot chat available across several employee experiences like Microsoft Teams, Windows, and Bing. However, sometimes you may want generative AI assistants that can reach users on multiple channels outside of those, like embedding on your internal websites, mobile apps, and social channels. You may want to design individual AI assistants that can serve employees, customers, and partners. Or you might want a custom copilot that you can tailor to specific roles and functions, where you can control the orchestration of your large language model using the dialog manager for managed topics with specific workflows.
When you create your own copilot with Copilot Studio, you are building intelligent chat experiences using ready-made large language models, a dialog manager, 1200+ data connectors, and more within a low code SaaS. These custom copilots are AI assistants that help humans with complex cognitive tasks using your organization’s knowledge, connectors to LOB applications, and your own custom topics. For example, a copilot for IT support, a copilot to help your customers choose the right product, or even help your suppliers track the status of orders.
How Copilot Studio works
Let’s talk through the steps to building your own copilot. You can start by logging in to Copilot Studio which will spin up all of the required services for you so it’s ready for building in a matter of minutes.
Imagine you wanted to create a custom copilot to serve customers on your website, for example assisting with product knowledge questions and order management.
First, start by grounding your copilot in your data. Using generative answers , you can enable multi-turn chat over your organizations real-time data—from local files to SharePoint sites, from public websites to data in your own custom backends creating the ability to chat over a wide set of topics within minutes. For this scenario, you would use your public website including your product information.
For critical topics such as account management, which involves handling customer details, you can design the specific conversational flow that you want Copilot to follow. You have the option to use visual authoring or natural language to design these prioritized topics before proceeding to generative AI. For instance, consider a topic that collects user details, authenticates the user, and interacts with your order management systems following a specific sequence of steps. Another example of a managed topic is discounting, where responses may involve legal and compliance matters, and therefore, you provide the managed response.
With generative actions , you can now provide a list of plugins to the copilot, selecting from 1200+ data connectors like SAP, Workday, Salesforce etc, and these will be dynamically executed to help the copilot take action. This allows copilot to effortlessly handle complex queries that were unforeseen or not previously constructed.
For developers that want more custom development, you can use Azure models and services with Copilot Studio. This hybrid approach of low code with custom pro code integration allows you to bring custom language models , Azure OpenAI on your data , knowledge bases , image generation with DALL-E, telemetry, and more into your Copilot Studio copilot.
When you’re ready, you can publish your copilot to multiple channels which can be internal or external facing to interact with users across different platforms, such as websites, Microsoft Teams, social apps, mobile apps, Azure Bot Service channels and more. You can also escalate the conversation to 1st party Dynamics 365 and 3rd party tools like Genesys, LivePerson, Salesforce and ServiceNow when the copilot requires human assistance.
Once the copilot is live, be sure to review the copilot performance with the built-in analytics dashboard that helps makers monitor key metrics, evaluate performance, and find new copilot topics. Secure and manage your copilot with governance and control features with the central admin center to protect copilot data with data loss prevention policies, role-based access control, environment management and more.
These are just some of the foundational steps to getting started, but there are many other features you can include in your copilot.
How Copilot Studio will evolve in the future
When you build custom copilots using Copilot Studio today, you are designing chat-based experiences to support users with knowledge discovery, such as finding answers to their queries, and task/business process completion, such as calling APIs and following workflows.
We are continuously enhancing the capabilities of Copilot Studio in the upcoming months through several key areas of focus:
- Generative AI knowledge sources– Generative Answers currently supports several data sources to ground your Copilot. Today, you can chat over unstructured data by providing your URLs and data sources. We are expanding both the number of sources and sizes over time. Learn about the existing capabilities today .
- Multi-modality – You can design powerful text-based Copilots today, and even create copilots optimized for speech , which can be used with Dynamics 365 or Interactive Voice Response (IVR) ISVs. Over time, we will provide even more ways to interact with your chat-based experiences.
- Generative AI availability – Copilot Studio is available across several regions, languages, and data centers which we are expanding here .
Be sure to read the Copilot Studio in Copilot for Microsoft 365 blog for information on plugins .
We appreciate your ongoing feedback and suggestions as we continue to improve the experience. Stay tuned for more updates at Microsoft Build.
What else can you do with Copilot Studio
Copilot Studio offers features that can be consumed both within your custom copilots and Copilot for Microsoft 365 via plugins, such as 1200+ data connectors, workflow design, and generative answers all through the low code authoring canvas. The difference is in the channel and audience in which the copilot/plugin is consumed.
If you have invested in Copilot for Microsoft 365 today, you may look to use Copilot Studio to bring in your data outside of Copilot for Microsoft 365 into the Copilot chat, design custom workflows or help control the conversation for specific topics. You would achieve this by designing plugins in Copilot Studio which is included in the Copilot for Microsoft 365 user license for customization of Copilot for Microsoft 365 only. Custom copilot development requires a standalone license . There is no dependency to purchase Copilot for Microsoft 365 to make your own custom copilot.
With Copilot Studio in Copilot for Microsoft 365, you can create plugins for various transactional scenarios. For example, if you want to know how much travel budget is left for the rest of the quarter, you can design a plugin to query a SAP connector to retrieve the information. For sales data, you could ask “What are the sales targets for the fiscal?” querying a data source like Salesforce or Dynamics 365, or even query HR data in Workday and ask questions like “How many vacation days do I have left?”.
And the best part is, you only need to build your plugin once, and it can be reused across your organization after being approved by IT in the admin center.
Get inspired with use cases
Copilot Studio provides you with the platform to build a copilot for your specific needs, for your industry, department, with your data. These custom copilots can cover Business to Employee (B2E) Business to Business (B2B) and Business to Consumer (B2C).

- Copilot for IT Service Management: “Check the progress of my current IT ticket” or “Initiate a request for device upgrades” connected to ServiceNow.
- Copilot for Human Resources: “Start the onboarding sequence for our new team member” or “Show me the remaining training budget for this quarter.” Using your HRM systems like Workday.
- Copilot for Frontline workers : “How do I find the manual for Contoso Blender” or “How do I fix the printing machine model XB100”
- Copilot for Legal and Compliance: “Summarize the latest updates to our brand usage guidelines” or “Explain the company’s stance on intellectual property rights.”
Business to business examples:
- Copilot for Project Management: “Give me a summary of completed tasks for Project X’s second phase” or “List the pending deliverables for phase two.”
- Copilot for Supplier Management: “Show the fulfillment status of purchase order #452” or “Track the shipment of our recent bulk order.”
- Copilot for Sales Enablement: “Generate a quote for a large-scale supply of office essentials” helping your business assess the lead potential for a prospective client.
Business to consumer examples:
- Copilot for Customer Support: Guide a customer through the product return process or requests like “Help me with account recovery.”
- Copilot for Product Consultation: “Recommend the best laptop for travel-intensive users” or “Compare the latest smartphone models for photography enthusiasts.”
- Copilot for Service Booking: Navigate a customer through scheduling a service appointment with queries like “Check availability for in-store consultations next Thursday.”
- Copilot for Travel Assistance: “Help me book a trip for a family of four with top-rated family resorts for this summer” connected to your travel booking system.
Check out some of the use cases from customers such as Paypal, AnPost, HP and more .
Get started with Copilot Studio today
We are eager to keep delivering the newest advances to Copilot Studio and we can’t wait to see the amazing solutions you create. Be sure to take advantage of the training content like Copilot Studio in a day and the learning paths to begin your skilling journey.
To learn more about Copilot Studio, visit aka.ms/copilotstudio . To try it for yourself, go to aka.ms/trycopilotstudio . And don’t miss out Microsoft Build , where we’ll share more announcements and demos.
Additional Resources:
- Copilot Studio website: https://aka.ms/copilotstudio
- Blog: https://aka.ms/copilotstudioblog
- Demo: https://aka.ms/copilotstudiodemo
- Product documentation: https://aka.ms/copilotstudiodocs
- Community page: https://aka.ms/copilotstudiocommunity
- Implementation guide: https://aka.ms/CopilotStudioImplement
- Responsible AI: https://aka.ms/CopilotStudioResponsibleAI
- Analyst report: https://aka.ms/CopilotStudioIDC
- Learning resources: https://aka.ms/CopilotStudioLearn
Transcribe your recordings

Note: This feature is currently available in Word for the web and Word for Windows.
The transcribe feature converts speech to a text transcript with each speaker individually separated. After your conversation, interview, or meeting, you can revisit parts of the recording by playing back the timestamped audio and edit the transcription to make corrections. You can save the full transcript as a Word document or insert snippets of it into existing documents.
You can transcribe speech in two ways:
Record directly in Word
Upload an audio file
Record in word.
You can record directly in Word while taking notes in the canvas and then transcribe the recording. Word transcribes in the background as you record; you won't see text on the page as you would when dictating. You'll see the transcript after you save and transcribe the recording.
Make sure you’re signed into Microsoft 365, using the new Microsoft Edge or Chrome.
Go to Home > Dictate > Transcribe .

If it’s your first time to transcribe, give the browser permission to use your mic. There might be a dialog that pops up in the browser or you may have to go to the browser settings.

Be careful to set the correct microphone input on your device, otherwise results may be disappointing. For example, if your computer's microphone input is set to your headset mic based on the last time you used it, it won't work well for picking up an in-person meeting.
If you want to record and transcribe a virtual call, don't use your headset. That way, the recording can pick up the sound coming out of your device.
Wait for the pause icon to be outlined in blue and the timestamp to start incrementing to let you know that recording has begun.
Start talking or begin a conversation with another person. Speak clearly.
Leave the Transcribe pane open while recording.

When finished, select Save and transcribe now to save your recording to OneDrive and start the transcription process.
Transcription may take a while depending on your internet speed. Keep the Transcribe pane open while the transcription is being made. Feel free to do other work or switch browser tabs or applications and come back later.
Note: The recordings will be stored in the Transcribed Files folder on OneDrive. You can delete them there. Learn more about privacy at Microsoft.
You can upload a pre-recorded audio file and then transcribe the recording.
Make sure you’re signed into Microsoft 365, using the new Microsoft Edge or Chrome.
Go to Home > Dictate dropdown > Transcribe .

Choose an audio file from the file picker. Transcribe currently supports .wav, .mp4, .m4a, .mp3 formats.
Transcription may take a while depending on your internet speed, up to about the length of the audio file. Be sure to keep the Transcribe pane open while the transcription is happening, but feel free to do other work or switch browser tabs or applications and come back later.
Note: Recordings are stored in the Transcribed Files folder on OneDrive. You can delete them there. Learn more about privacy at Microsoft.
Note: Users with a Microsoft 365 subscription can transcribe a maximum of 300 minutes of uploaded audio per month.
Interact with the transcript
Your transcript is associated with the document it’s attached to until you remove it. If you close and reopen the pane or close and reopen the document, the transcript remains saved with the document.
You can interact with the transcript in a few different ways.
Access the audio file

Play back the audio
Use the controls at the top of the Transcribe pane to play back your audio. The relevant transcript section highlights as it plays.

Select the timestamp of any transcript section to play that portion of audio.
Change the playback speed up to 2x .
Relabel a speaker or edit a section
The transcription service identifies and separates different speakers and labels them "Speaker 1," "Speaker 2," etc. You can edit the speaker label and change all occurrences of it to something else. You can also edit the content of a section to correct any issues in transcription.
In the Transcribe pane, hover over a section you want to edit.

Add a transcript to the document
Unlike Dictate, Transcribe doesn't automatically add the audio to the document. Instead, from the Transcribe pane, you can add the entire transcript, or specific sections of it, to the document.

To delete the transcript or create a new one, select New transcription . You can only store one transcript per document; if you create a new transcript for the document, the current transcript will be deleted. However, any transcript sections you've added to the document remain in the document, but not in the Transcribe pane.
Rename a recorded audio file
You can rename an audio file that has been recorded.
Go to the Transcribed Files folder in OneDrive, or at the top of the Transcribe pane, click the name of the recording. When the audio player interface appears, close it to return to the Transcribed Files folder.

Note: TheTranscribed Files folder looks different depending on whether your OneDrive account is for a business or personal.
Close the Transcribe pane in Word and then reopen it to see the name update.
Share the transcript and recording
You can share the transcript with someone in two ways:
Select Add all to document to add the entire transcript to your document, then share the Word document as usual. The transcript will appear as regular text in the document and there will be a hyperlink to the audio file in the document.
Share the Word document as usual. The recipient can open the Transcribe pane to interact with the transcript. To protect your privacy, playback of the audio file is by default not available in the Transcribe pane for anyone that you share the Word document with.
You can also share the transcript and enable playback of the audio file in the Transcribe pane:
On your version of the Word document, click the filename at the top of the Transcribe pane to go to where the audio file is saved in OneDrive.
The Transcribed Files folder in OneDrive opens.
Find your recording, then select Actions > Share and add the email address of the person you want to share the recording with.
Share the Word document as usual.
The person that you shared both the Word document and audio file with will be able to open the Word document, open the Transcribe pane, and interact with both the transcript and audio file.
System requirements and language availability
System requirements are:
Transcribe only works on the new Microsoft Edge and Chrome.
Transcribe requires an Internet connection.
Transcribe experience works with 80+ locales:
Arabic (Bahrain), modern standard
Arabic (Egypt)
Arabic (Iraq)
Arabic (Jordan)
Arabic (Kuwait)
Arabic (Lebanon)
Arabic (Oman)
Arabic (Qatar)
Arabic (Saudi Arabia)
Arabic (Syria)
Arabic (United Arab Emirates)
Bulgarian (Bulgaria)
Chinese (Cantonese, Traditional)
Chinese (Mandarin, Simplified)
Chinese (Taiwanese Mandarin)
Croatian (Croatia)
Czech (Czech Republic)
Danish (Denmark)
Dutch (Netherlands)
English (Australia)
English (Canada)
English (Hong Kong SAR)
English (India)
English (Ireland)
English (New Zealand)
English (Philippines)
English (Singapore)
English (South Africa)
English (United Kingdom)
English (United States)
Estonian (Estonia)
Finnish (Finland)
French (Canada)
French (France)
German (Germany)
Greek (Greece)
Gujarati (Indian)
Hindi (India)
Hungarian (Hungary)
Irish (Ireland)
Italian (Italy)
Japanese (Japan)
Korean (Korea)
Latvian (Latvia)
Lithuanian (Lithuania)
Maltese (Malta)
Marathi (India)
Norwegian (Bokmål, Norway)
Polish (Poland)
Portuguese (Brazil)
Portuguese (Portugal)
Romanian (Romania)
Russian (Russia)
Slovak (Slovakia)
Slovenian (Slovenia)
Spanish (Argentina)
Spanish (Bolivia)
Spanish (Chile)
Spanish (Colombia)
Spanish (Costa Rica)
Spanish (Cuba)
Spanish (Dominican Republic)
Spanish (Ecuador)
Spanish (El Salvador)
Spanish (Guatemala)
Spanish (Honduras)
Spanish (Mexico)
Spanish (Nicaragua)
Spanish (Panama)
Spanish (Paraguay)
Spanish (Peru)
Spanish (Puerto Rico)
Spanish (Spain)
Spanish (Uruguay)
Spanish (USA)
Spanish (Venezuela)
Swedish (Sweden)
Tamil (India)
Telugu (India)
Thai (Thailand)
Turkish (Turkey)
Note: This feature is currently available only on the Windows platform in OneNote for Microsoft 365.
Voice and Ink are a powerful combination. Together for the first time in Office, transcription and ink makes it easier than ever to take notes, focus on what’s important, and review your content later. With transcription on, you can record what you hear. You’re free to annotate, write notes, or highlight what’s important. When you’re ready to review, your ink will play back in lockstep with the recording. You can easily jump to a specific moment by tapping on any annotation to recall more context.
Note: Transcribe is not available for GCC/GCC-H/DoD customers.
You can transcribe speech in two ways:
Record directly in OneNote.
Upload an audio file.
Note: When you play back the audio, you can see the ink strokes that you made during the recording.
Record in OneNote
You can record directly in OneNote while taking notes in the canvas and then transcribe the recording. OneNote transcribes in the background as you record; you won't see text on the page as you would when dictating. You'll see the transcript after you save and transcribe the recording. The ink strokes you make while recording it will be captured and replayed.
Make sure you’re signed into Microsoft 365 and using the latest version on OneNote.
Be careful to set the correct microphone input on your device for the best result. For example, if your computer's microphone input is set to your headset mic based on the last time you used it, it won't work well for picking up an in-person meeting.
If you want to record and transcribe a virtual call, don't use your headset. That way, the recording can pick up the sound coming out of your device.

If it’s your first-time transcribing, give the OneNote app permission to use your mic: How to set up and test microphones in Windows (microsoft.com) .
Tip: When the pause icon is outlined in purple and the timestamp starts to change, the recording has started and you can speak, have a conversation, or record a lecture. Speak clearly or make sure the incoming audio is clear.

Note: The recordings are stored in the Transcribed Files folder on OneDrive. You can delete them there. Learn more about privacy at Microsoft.
You can upload a pre-recorded audio file and then transcribe the recording. Make sure you’re signed into Microsoft 365 and using the latest version on OneNote.

Choose an audio file from the file picker. Transcribe currently supports .wav, .mp4, .m4a, .mp3 formats.
Transcription may take a while depending on your internet speed, up to the length of the audio file. Be certain to keep the Transcribe pane open while the transcription is happening, but feel free to do other work, switch browser tabs or applications, and come back later.
You can delete stored recordings in the Transcribed Files folder on OneDrive. Learn more about privacy at Microsoft.
Use Ink while recording

Note: Inking strokes made during the paused state replay at the same time.
Interact with the transcript
Your transcript is associated with the OneNote page it’s attached to, until you remove it from that document. If you close and reopen the pane or the document, the transcript remains saved with the document.
You can interact with the transcript these different ways.
Access the audio file

Play back the audio
Use the controls at the top of the Transcribe pane to play back your audio. The relevant transcript section highlights as it plays.

Relabel a speaker or edit a section
The transcription service identifies and separates different speakers and labels them "Speaker 1," "Speaker 2," etc. You can edit the speaker label and change all occurrences of it to something else. You can also edit the content of a section to correct any issues in transcription.

Add a transcript to the document
Unlike Dictate, Transcribe doesn't automatically add audio to the document. Instead, from the Transcribe pane, you can add the entire transcript, or specific sections of it, to the document.

Note: You can only store one transcript per document; if you create a new transcript for the document, the current transcript will be deleted. However, any transcript sections you've added to the document remain in the document, but not in the Transcribe pane.
Rename a recorded audio file
You can rename an audio file that has been recorded.
Go to the Transcribed Files folder in OneDrive, or at the top of the Transcribe pane. Select the name of the recording. When the audio player interface appears, close it to return to the Transcribed Files folder.

Close the Transcribe pane in OneNote and then reopen it to see the name update.
Note: The Transcribed Files folder looks different depending on whether your OneDrive account is for a business or personal.
Share the transcript and recording
Select the Add all to document button to add the entire transcript to your OneNote page, then share the OneNote page as usual. The transcript displays as regular text in the page with a hyperlink to the audio file in the document.
Share the OneNote page as usual. The recipient can open the Transcribe pane to interact with the transcript. To protect your privacy, playback of the audio file is, by default, not available in the Transcribe pane for anyone that you share the OneNote page with.
On your version of the OneNote page, click the filename at the top of the Transcribe pane to go to where the audio file is saved in OneDrive.
Also share the OneNote page as usual.
The person that you shared both the OneNote page and the audio file with will be able to open the OneNote page, open the Transcribe pane, and interact with both the transcript and audio file.
Transcribe + Ink only works on version 2211 Build 16.0.15819.20000 or later.
Transcribe + Ink requires an Internet connection.
Transcribe + Ink experience works with 80+ locales:
Spanish (Puerto Rico)
Troubleshooting
Can't find the Transcribe button
If you can't see the button to start Transcription, make sure you're signed in with an active Microsoft 365 subscription.
Switch accounts
Note: If you see the message “Switch account to transcribe on this notebook”, you need to switch your active account to the identity that has the required edit permissions. This message displays when you try to transcribe a page of the notebook where you don’t have the edit permission.

Select the user profile currently displayed on the top right corner.
Select the user profile that has edit permissions for that page.
About Transcribe
Transcribe is one of the Office Intelligent Services, bringing the power of the cloud to Office apps to help save you time and produce better results.
Your audio files are sent to Microsoft and used only to provide you with this service. When the transcription is done your audio and transcription results are not stored by our service. For more information see Connected Experiences in Office.

Need more help?
Want more options.
Explore subscription benefits, browse training courses, learn how to secure your device, and more.
Microsoft 365 subscription benefits
Microsoft 365 training
Microsoft security
Accessibility center
Communities help you ask and answer questions, give feedback, and hear from experts with rich knowledge.
Ask the Microsoft Community
Microsoft Tech Community
Windows Insiders
Microsoft 365 Insiders
Was this information helpful?
Thank you for your feedback.
We explain and teach technology, solve tech problems and help you make gadget buying decisions.
How to Put Different Headers and Footers on Different Pages in Word
Headers and footers are the bread and butter of professional-looking documents. However, sometimes, you need to customize them beyond the standard repetition. Whether you’re managing page numbers in a complex report or creating a title page without headers, it’s time to break free from the one-size-fits-all headers and footers. This guide will show you how to put different headers and footers on different pages in Word.

Ever found yourself frustrated by a header or footer that won’t behave across different pages of your Word document? You may want a title page without any headers or change the page numbering style midway through your report. Let’s check how to do so.
How to Add a Basic Header or Footer
Before creating different headers or footers for sections of your document, it’s better to know how to add them in the first place. Follow the instructions below to add a basic header or footer to your Word document:
Step 1: Click the Windows icon, type Word , and click Open.
Step 2: Locate the Word document to edit and open it.

Step 3: Head to the Insert tab. Locate the Header & Footer section and press the drop-down button beneath the Header or Footer.
Step 4: Choose a predefined header or footer template or select Blank.

Step 5: Edit the header and footer section.
Step 6: Finally, click the ‘Close Header and Footer’ button on the Design tab to return to the main document.
Note: You can double-click on the document’s main body to exit the header or footer.

Also Read: How to fix Microsoft Word not responding on Windows
Prerequisites to Create Different Headers and Footers on Specific Pages
Creating different headers and footers on specific pages is easy, but before that, you’ll need to break your document into sections and unlink the header and footer from the previous page. Adhere to the steps below:
1. Inserting a Section Break
A section break is an invisible marker in your Word document that allows you to divide your content into separate sections. Here’s how you can break the section in your Word file:
Step 1: Navigate to the Word file to which you want to add a header and footer and double-click on it to open the file.

Step 2: Place your cursor at the point in your document where you’d like the new section to begin.
Step 3: Head to the Layout tab in the ribbon and click the downward arrow next to the Breaks button.
Step 4: Choose one of the below-mentioned breaks:
- Next Page: Initiates a new section on the next page. Use this to divide major portions of your document (e.g., chapters, significant topic shifts).
- Continuous: Starts a new section on the same page. This helps change page formatting elements (e.g., column layouts or page orientation).
- Even Page: It starts a new section on the next even-numbered page. Use this when formatting for printing or book-style layouts.
- Odd Page: This starts a new section on the next odd-numbered page. It is used similarly to the even page break.

2. Unlinking Headers and Footers From the Previous Section
Once you’ve inserted a section break in the Word document, you can follow the steps below to unlink the header and footer from the previous section:
Step 1: Double-click the header or footer area in the new section you created.

Step 2: Locate the Navigation section and click the Link to Previous button.
Note: Ensure that Link to Previous button is not grayed out.

Also Read: Best Microsoft Word tips and tricks to improve productivity
How to Create Different Headers and Footers on Specific Pages
Now that you’ve inserted section breaks and unlinked your sections, you’re ready to customize. Here’s how to change header and footer on specific pages you want:
Step 1: Press your keyboard’s Windows + S keys, type Word , and click Open.
Step 2: Launch the Word file you wish to edit.
Step 3: Double-click on the header or footers section to select it.
Step 4: Write the details you want to enter in the header or footer section.

How to Have a Different Header on Odd and Even Pages in Word
Step 1: Find the Word file you want to edit and double-click to open it.
Step 2: Click on Insert in the top menu and press the drop-down button under Header or Footer.
Step 3: Choose Edit Header or Edit Footer, depending on what you want to modify.

Step 4: Check the box next to ‘Different Odd & Even Pages’.

Step 5: Edit the header or footer for odd and even pages.
Step 6: Once done, press Ctrl + S to save your changes to the document.

Also Read: How to duplicate a Word document on any device
How to Add a Header or Footer on the First Page
When working on documents with distinct title pages or transitioning between different sections, adhere to the steps below to add a header or footer on the first page:
Step 1: Press Windows + S, type Word , and click Open.
Step 2: Launch the Word document you wish to edit.
Step 3: Navigate to the Insert tab and click on the drop-down icon under Header or Footer.
Step 4: Choose Edit Header or Edit Footer, respectively.
Step 5: Check the box next to the Different First Page.

Step 6: Now, type your first-page header or footer and other headers and footers on the rest of the pages.
Step 7: Finally, press Ctrl + S to save the changes to your document.

Also Read: How to make all pictures of same size in Microsoft Word
FAQs on Header and Footer
No, you can’t have different headers and footers within a single section in a Word document. Headers and footers are tied to sections, so you must divide your document into multiple sections.
No, changing the headers and footers on your Word document doesn’t affect its alignment, as they reside in separate margins from the main body of your document.
Header and Footer Added
That’s how you get different headers and footers on separate pages in the Word document. Also, if you want to keep a complete list of the changes you make to your document, remember to turn on the track changes feature in Word .
Last updated on 16 March, 2024
The above article may contain affiliate links which help support Guiding Tech. However, it does not affect our editorial integrity. The content remains unbiased and authentic.

DID YOU KNOW

Bhaskar Sharma
Meet Bhaskar, your friendly neighborhood tech enthusiast-turned-wordsmith. For the past few years, he's been your go-to guide for demystifying iOS, Android, macOS, and Windows platforms. While he holds a B.Tech degree, he has dedicated himself to simplifying tech complexities for all and has lent his expertise to publications like iGeeksBlog, The Writing Paradigm, and more. His forte lies in crafting easy-to-follow how-to guides and in-depth articles, making the intricate world of technology accessible to all. When not immersed in the tech world, you'll find him enjoying music or sports.
More in Mac

How to Lock an Image in Microsoft Word

5 Best Fixes for Calculator App Not Working on Mac
Join the newsletter.
Get Guiding Tech articles delivered to your inbox.

10 Word Shortcuts to Select Text Using a Keyboard

10 Timesaving Shortcuts to Select Text in Word Using Only a Keyboard
by Avantix Learning Team | Updated March 21, 2024
Applies to: Microsoft ® Word ® 2013, 2016, 2019, 2021 or 365 (Windows)
You can use several shortcuts in Word to select text in your documents using only your keyboard. When you select text, it will typically be highlighted in grey. After you select text, you can cut, copy, or delete the selected text or apply character or paragraph formatting.
Recommended article: 10+ Great Microsoft Word Navigation Shortcuts for Moving Around Quickly in Your Documents
Do you want to learn more about Microsoft Word? Check out our virtual classroom or in-person classroom Word courses >
To easily position your cursor, you can use the arrow keys on your keyboard.
Note: For shortcuts that include Home, End, PgUp or PgDn, you may need to press Num Lock or the Fn key on your keyboard in conjunction with the other keys.
1. Select an entire document
Position your cursor anywhere in your document and then press Ctrl + A to select the entire document.
2. Select one or more characters
To select one or more characters, position the cursor where you want to start the selection and then press Shift + right arrow or Shift + left arrow. Repeat as required.
3. Select one or more words
To select a word from the position of the cursor, press Ctrl + Shift + right arrow to select a word to the right. Press Ctrl + Shift + left arrow to select a word to the left of the cursor. Repeat as required.
4. Select one or more lines of text
To select one or more lines, position the cursor where you want to start the selection and then press Shift + down arrow or Shift + up arrow.
5. Select one or more paragraphs
To select one or more paragraphs, position the cursor at the beginning of a paragraph and then press Ctrl + Shift – down arrow. Repeat as required.
6. Select from the cursor to the end or beginning of a line
Press Shift + End to select from the cursor to the end of the line. If you press Shift + Home, Word will select from the cursor to the beginning of the line.
7. Select by screen
To select by screen, position the cursor where you want to start the selection and then press Ctrl + Shift + PgUp or Ctrl + Shift + PgDn. Repeat as required.
8. Select from the cursor to the beginning of the document
To select from the cursor to the beginning of the document, press Ctrl + Shift + Home.
9. Select from the cursor to the end of the document
To select from the cursor to the beginning of the document, press Ctrl + Shift + End.
10. Select a table
To select an entire table, position the cursor in the first cell of the table. Press Alt + Shift + End to select to the end of the first row and then press Alt + Shift + PgDn to select to the last cell. You can also press Shift + down arrow repetitively instead of Alt + Shift + PgDn.
Subscribe to get more articles like this one
Did you find this article helpful? If you would like to receive new articles, JOIN our email list.
More resources
How to Double Space in Word (4 Ways)
How to Clear Formatting in Word (with Shortcuts)
21 Microsoft Word Shortcuts for Faster Formatting
How to Check Word Count inn Microsoft Word (4 Ways)
10 Microsoft Word Tips, Tricks and Shortcuts for Selecting in Tables
Related courses
Microsoft Word: Intermediate / Advanced
Microsoft Excel: Intermediate / Advanced
Microsoft PowerPoint: Intermediate / Advanced
Microsoft Word: Long Documents Master Class
Microsoft Word: Styles, Templates and Tables of Contents
Microsoft Word: Designing Dynamic Word Documents Using Fields
VIEW MORE COURSES >
Our instructor-led courses are delivered in virtual classroom format or at our downtown Toronto location at 18 King Street East, Suite 1400, Toronto, Ontario, Canada (some in-person classroom courses may also be delivered at an alternate downtown Toronto location). Contact us at [email protected] if you'd like to arrange custom instructor-led virtual classroom or onsite training on a date that's convenient for you.
Copyright 2024 Avantix ® Learning
You may also like

How to Generate Random Text in Word
If you are creating a Microsoft Word document, template or mockup and you want to create placeholder text, you can generate random text using the built-in RAND function or LOREM function (which generates Latin or Lorem ipsum text).

How to Center Text Vertically in a Word Table (and Fix Common Issues)
You can center or align text vertically in cells in a Word table using commands in the Table Design or Table Tools Design tab in the Ribbon. If the text doesn't seem to align correctly, there are several common issues that may be affecting the alignment including extra blank paragraphs, paragraph spacing and cell margins.

How to Insert a Watermark in Word (like DRAFT)
You can insert a watermark in the background of one or more pages in a Microsoft Word document. Common watermarks are text such as DRAFT or CONFIDENTIAL but you can also add a picture watermark.
Microsoft, the Microsoft logo, Microsoft Office and related Microsoft applications and logos are registered trademarks of Microsoft Corporation in Canada, US and other countries. All other trademarks are the property of the registered owners.
Avantix Learning |18 King Street East, Suite 1400, Toronto, Ontario, Canada M5C 1C4 | Contact us at [email protected]

Our Courses
Avantix Learning courses are offered online in virtual classroom format or as in-person classroom training. Our hands-on, instructor-led courses are available both as public scheduled courses or on demand as a custom training solution.
All Avantix Learning courses include a comprehensive course manual including tips, tricks and shortcuts as well as sample and exercise files.
VIEW COURSES >
Contact us at [email protected] for more information about any of our courses or to arrange custom training.
Privacy Overview
Pin it on pinterest.
- Print Friendly

Trump’s ‘Bloodbath’ Comment
By Robert Farley
Posted on March 18, 2024
Para leer en español, vea esta traducción de Google Translate.
While speaking about the potential loss of U.S. auto manufacturing jobs to foreign countries, former President Donald Trump said if he isn’t elected, “it’s going to be a bloodbath for the country.”
President Joe Biden’s campaign quickly accused Trump of fomenting “political violence.” The Trump campaign said Trump was clearly using the term in the context of an economic bloodbath.
“If you actually watch and listen to the section, he was talking about the auto industry and tariffs,” Steven Cheung, a spokesman for Trump’s campaign, told the Washington Post , adding that “Biden’s policies will create an economic bloodbath for the auto industry and autoworkers.”
That explanation seems the most plausible, given the context of Trump’s comments.
Speaking at a rally on the grounds of the Dayton International Airport in Ohio, Trump said that over the last three decades, Mexico has siphoned off U.S. auto manufacturing jobs, and he accused China of building car manufacturing plants in Mexico that will cost U.S. autoworkers their jobs.
Trump, March 16 : China now is building a couple of massive plants where they’re going to build the cars in Mexico and think, they think, that they’re going to sell those cars into the United States with no tax at the border. Let me tell you something to China, if you’re listening President Xi, and you and I are friends, but he understands the way I deal. Those big monster car manufacturing plants that you’re building in Mexico right now, and you think you’re going to get that, you’re going to not hire Americans, and you’re going to sell the cars to us? No. We’re going to put a 100% tariff on every single car that comes across the line, and you’re not going to be able to sell those cars. If I get elected. Now, if I don’t get elected, it’s going to be a bloodbath, for the whole — that’s going to be the least of it. It’s going to be a bloodbath for the country. That’ll be the least of it. But they’re not going to sell those cars.
The Chinese electric vehicle company BYD says it is planning to build an EV plant in Mexico. But the company says it intends to sell the cars locally to consumers in Mexico and has no plans to sell any across the border in the U.S.
On Truth Social on March 18, Trump wrote that his words were being purposely misconstrued.
“The Fake News Media, and their Democrat Partners in the destruction of our Nation, pretended to be shocked at my use of the word BLOODBATH, even though they fully understood that I was simply referring to imports allowed by Crooked Joe Biden, which are killing the automobile industry,” Trump wrote, promising that if elected U.S. auto manufacturing “WILL THRIVE LIKE NEVER BEFORE.”
(An aside: When Trump was president, auto manufacturing jobs rose about 5.8% to 1,012,500 in his first two years, according to the Bureau of Labor Statistics, but dipped in his third year, and then again sharply during the pandemic. There were 949,300 auto manufacturing jobs in the U.S. when Trump left office. Under Biden, the number of auto manufacturing jobs has increased about 12.2% to 1,065,100 in February, the most recent data available.)
The Trump campaign also noted — rightly — that one of the definitions of “bloodbath,” according to the Merriam-Webster dictionary , is “a major economic disaster.” We did a Nexis search of TV news transcripts and found numerous instances of bloodbath being used in that way.
Another definition provided by Merriam-Webster is “a notably fierce, violent, or destructive contest or struggle,” which is how Biden, his campaign and others viewed the former president’s “bloodbath” comment.
In a post on X, Biden posted a clip of Trump saying, “Now, if I don’t get elected, it’s going to be a bloodbath, for the whole — that’s going to be the least of it. It’s going to be a bloodbath for the country. That’ll be the least of it.” Biden commented, “It’s clear this guy wants another January 6.”
At the start of his speech in Ohio, Trump saluted as the sound system played a recording of the so-called J6 Prison Choir singing its song “Justice for All.” The song is a mashup of the choir — featuring people incarcerated for their role in the attack on the Capitol — singing the “Star Spangled Banner” as Trump recites the Pledge of Allegiance.
After the song finished, Trump praised the “spirit” of the “hostages,” a word he has repeatedly used to describe those convicted of various crimes for their roles in the Jan. 6 riot.
“They’ve been treated terribly and very unfairly, and you know that and everybody knows that,” Trump said, vowing that once elected, he would work on their behalf to free them.
“And we’re going to be working on that, soon as — the first day we get into office,” Trump said. “We’re going to save our country, and we’re going to work with the people to treat those unbelievable patriots, and they were unbelievable patriots, and are. You see the spirit, this cheering. They’re cheering while they’re doing that, and they did that in prison. And it’s a disgrace, in my opinion.”
Asked on NBC’s “Meet the Press” on March 17 about Trump’s “bloodbath” comments, Republican Sen. Bill Cassidy said Trump’s rhetoric often “walks up to the edge,” allowing people on both sides of the political aisle to interpret his meaning.
“That kind of rhetoric, it’s always on the edge, maybe doesn’t cross, maybe does, depending upon your perspective,” Cassidy said. “I also think, though, that the mainstream media contributes to it. If you take the one about the bloodbath, which arguably could be about an economic bloodbath not about kind of street violence related to the election, then it gives his defenders something to focus on, something – which was distorted. So, yes, he always walks up to the edge on that rhetoric. And again, that’s why people are concerned. But sometimes the mainstream media, whether they want to or not, can’t resist, and they go just a little bit too far, which distracts from what could be the impact.”
Cassidy noted that the definition of bloodbath includes an economic disaster.
“And so if he’s speaking about the auto industry in particular in Ohio, then you can take it with a little bit more context,” Cassidy said. “That’s why I say you walk up to the line. Depending upon the perspective, somebody is going to interpret it. He’s running against Biden, so Biden’s going to say it’s about political violence. His defenders want to defend him, and so they’re going to say it’s about economic disaster. There’s always just that little bit of tension there, which allows the dispute about the interpretation as opposed to the kind of general sort of, ‘Is this a person we want to have in office?'”
Editor’s note: FactCheck.org does not accept advertising. We rely on grants and individual donations from people like you. Please consider a donation. Credit card donations may be made through our “ Donate ” page. If you prefer to give by check, send to: FactCheck.org, Annenberg Public Policy Center, 202 S. 36th St., Philadelphia, PA 19104.
Watch CBS News
In Ohio campaign rally, Trump says there will be a "bloodbath" if he loses November election
Updated on: March 18, 2024 / 10:37 AM EDT / CBS/AP
Former President Donald Trump claimed that he — not President Biden — will protect Social Security and warned of a "bloodbath" if he loses in November as he campaigned for Senate candidate Bernie Moreno in Ohio over the weekend.
Trump, speaking on a wind-whipped airfield outside of Dayton Saturday, praised his chosen candidate in the race as an "America first champion" and "political outsider who has spent his entire life building up Ohio communities."
"He's going to be a warrior in Washington," Trump said, days after securing enough delegates to clinch the 2024 Republican nomination.
Trump used the stage to deliver a profanity-filled version of his usual rally speech that again painted an apocalyptic picture of the country if Biden wins a second term.
"If I don't get elected, it's going to be a bloodbath. ... It's going to be a bloodbath for the country," he warned, while talking about the impact of offshoring on the country's auto industry and his plan to impose a 100% tariff on foreign-made cars.
Later, Trump said, "If this election isn't won, I'm not sure that you'll ever have another election in this country."
Trump repeatedly noted his difficulty reading from his teleprompters, which could be seen visibly whipping in 35-mile-per-hour wind gusts.
In a statement in response to Trump's "bloodbath" comments Saturday, James Singer, spokesperson for the Biden presidential campaign, said that Trump "wants another January 6, but the American people are going to give him another electoral defeat this November because they continue to reject his extremism, his affection for violence, and his thirst for revenge."
When reached by CBS News in an attempt to clarify Trump's "bloodbath" remark, Jason Miller, senior adviser for the Trump campaign, responded that "any reporter that falls for this Biden camp spin is stupid."
In a social media post on Monday, Trump said the media "pretended to be shocked at my use of the word BLOODBATH, even though they fully understood that I was simply referring to imports."
In that full portion of his remarks, he said: "Let me tell you something, to China, if you're listening, President Xi, and you and I are friends, but he understands the way I deal, those big monster car manufacturing plants that you're building in Mexico right now. And you think you're going to get that, you're going to not hire Americans and you're going to sell the cars us, no. We're going to put a 100% tariff on every single car that comes across the line and you're not going to be able to sell those cars if I get elected. Now if I don't get elected, it's gonna be a bloodbath for the whole — that's gonna be the least of it. It's going to be a bloodbath for the country. That will be the least of it."
Saturday's rally was hosted by Buckeye Values PAC, a group backing Moreno's Senate candidacy against Ohio Secretary of State Frank LaRose and Ohio state Sen. Matt Dolan in Tuesday's GOP primary. LaRose and Moreno have aligned themselves with the pro-Trump faction of the party, while Dolan is backed by more establishment Republicans, including Gov. Mike DeWine and former Sen. Rob Portman.
Trump also dismissed recent allegations against Moreno, comparing them to attacks he has faced through the years, including his criminal indictments . Trump has been charged in four separate cases that span his handling of classified documents to his efforts to overturn the results of the 2020 election.
"He's getting some very tough Democrat fake treatment right now," Trump said. "And we're not going to stand for it because I know this man. We all know this man. He's a hero, he's a winner. And we're not going to let these people — these people are sick."
The Associated Press reported on Thursday that in 2008, someone with access to Moreno's work email account created a profile on an adult website. The AP could not definitively confirm that it was created by Moreno himself. Moreno's lawyer said a former intern created the account and provided a statement from the intern, Dan Ricci, who said he created the account as "part of a juvenile prank."
Questions about the profile have circulated in GOP circles for the past month, sparking frustration among senior Republican operatives about Moreno's potential vulnerability in a general election, according to seven people who are directly familiar with conversations about how to address the matter. They requested anonymity to avoid running afoul of Trump and his allies.
Trump, in his remarks, also accused Mr. Biden of posing a threat to Social Security as he continued to clean up comments from an interview earlier this week in which he appeared to voice openness to cuts.
"Your Social Security is going to be gone," he warned of a Biden second term, even though Biden has pledged to protect and strengthen Social Security as it faces a projected budget shortfall. "You will not be able to have Social Security with this guy in office because he's destroying the economics of our country. And that includes Medicare, by the way, and American seniors are gong to be in big trouble."
"I made a promise that I will always keep Social Security, Medicare. We always will keep it. We never will cut it," he said.
The comments came after Trump, in an interview with CNBC, answered a question about Social Security, Medicare and Medicaid by saying that, "there is a lot you can do in terms of entitlements, in terms of cutting and in terms of also the theft and the bad management of entitlements, tremendous bad management of entitlements. There's tremendous amounts of things and numbers of things you can do."
Trump also continued to criticize Biden over his handling of the border, and the migrant crisis. And he laced into Dolan, calling him a "weak RINO" — a Republican in name only — and accused him of "trying to become the next Mitt Romney." He also criticized the Dolan family, which owns Cleveland's baseball team, for changing its name from the Cleveland Indians to the Cleveland Guardians.
Trump was joined at the rally by Ohio Sen. JD Vance and South Dakota Gov. Kristi Noem, who have both stumped with Moreno and are considered potential vice-presidential candidates.
- Donald Trump
More from CBS News

Trump's campaign spends on legal fees in 2024, as Biden spends on ads, staffing

Judge says Trump can appeal decision keeping Willis on Georgia 2020 election case

Trump invitation to big donors prioritizes his legal bills over RNC

Biden and Trump vie for Latino support with very different pitches
Mastering Text to Speech in Word: A Comprehensive Guide
Table of contents, understanding text to speech in microsoft word.
Text to speech in Microsoft Word allows users to convert their written text into spoken words. This functionality is pivotal for users with visual impairments or learning disabilities, as well as for those who prefer auditory learning or need to multitask.
Native TTS Capabilities in Microsoft Word
Both the installable and online versions of Microsoft Word boast native TTS capabilities. These features are readily available to users without the need for additional software, providing a seamless experience within the Microsoft Office ecosystem.
Activating Read Aloud in Microsoft Word
Getting Microsoft Word to read aloud is straightforward. Users can easily access the ‘Read Aloud’ feature from the ‘Review’ tab or add it to the ‘Quick Access Toolbar’ for convenience. A simple click can bring text to life with spoken words.
Top 10 Use Cases of Text to Speech in Word
Assisting Those with Disabilities.
Text to speech is invaluable for individuals with disabilities that affect reading. It enables equal access to information, supporting independent living.
Multitasking Efficiency
Listening to documents while performing other tasks can significantly boost productivity and time management.
Proofreading Aid
TTS allows for an additional proofreading method, catching errors that might be missed when reading visually.
Language Learning
Listening to correct pronunciation and intonation in various languages supports language acquisition.
Reading Assistance
For those who face challenges in reading large blocks of text, TTS can alleviate the strain and enhance comprehension.
Auditory Learning Enhancement
Auditory learners can benefit from listening to text, reinforcing their understanding and retention of information.
Document Accessibility
TTS makes documents more accessible to a wider audience, including those who are on the go or have visual impairments.
Entertainment
Turning stories or novels into audiobooks can be an enjoyable way to experience literature.
Workflows for Professionals
Professionals can listen to reports or documents while commuting, optimizing their work schedules.
Tech Integration
Developers and tech enthusiasts can integrate Word’s TTS functionality into custom applications for diverse uses.
Text to Speech Transformation in Word
Microsoft Word is capable of converting text to speech, thus transforming the static pages of a document into an interactive auditory experience.
How to Bring Your Text to Audible Life
To have your text read aloud in Word, simply use the ‘Read Aloud’ feature found in the ‘Review’ tab or by using the keyboard shortcut ‘Ctrl + Alt + Space’.
Utilizing Word’s TTS Capabilities
Yes, anyone can use the text to speech feature in Word to enhance their document interaction, whether for personal or professional use.
Decoding the Text-to-Speech Function
The text-to-speech function in Word is an accessibility feature designed to read text on the screen out loud, utilizing synthesized voices.
Words to Voices: The Speed of TTS in Word
Microsoft Word’s text to speech can typically read at an adjustable pace, often ranging from 100 to 200 words per minute, catering to the listener’s preference.
Try Speechify Text to Speech
Cost : Free to try
Speechify Text to Speech is a groundbreaking tool that has revolutionized the way individuals consume text-based content. By leveraging advanced text-to-speech technology, Speechify transforms written text into lifelike spoken words, making it incredibly useful for those with reading disabilities, visual impairments, or simply those who prefer auditory learning. Its adaptive capabilities ensure seamless integration with a wide range of devices and platforms, offering users the flexibility to listen on-the-go.
Top 5 Speechify TTS Features:
High-Quality Voices : Speechify offers a variety of high-quality, lifelike voices across multiple languages. This ensures that users have a natural listening experience, making it easier to understand and engage with the content.
Seamless Integration : Speechify can integrate with various platforms and devices, including web browsers, smartphones, and more. This means users can easily convert text from websites, emails, PDFs, and other sources into speech almost instantly.
Speed Control : Users have the ability to adjust the playback speed according to their preference, making it possible to either quickly skim through content or delve deep into it at a slower pace.
Offline Listening : One of the significant features of Speechify is the ability to save and listen to converted text offline, ensuring uninterrupted access to content even without an internet connection.
Highlighting Text : As the text is read aloud, Speechify highlights the corresponding section, allowing users to visually track the content being spoken. This simultaneous visual and auditory input can enhance comprehension and retention for many users.
Frequently Asked Questions
What is text to speech.
Text to Speech (TTS) is a type of assistive technology that reads digital text aloud. It’s a valuable tool for those with certain disabilities or for situations where reading text isn’t possible.
What are the disadvantages of text to speech?
Some disadvantages include a lack of emotional intonation, potential mispronunciations, and the impersonal nature of synthesized voices.
What is the best way to get my text to read aloud?
The best way is to utilize the native ‘Read Aloud’ feature in Microsoft Word, accessible from the ‘Review’ tab or the ‘Quick Access Toolbar’.
How do I turn on text-to-speech in Word?
You can turn it on by selecting ‘Read Aloud’ from the ‘Review’ tab or by pressing ‘Ctrl + Alt + Space’ on your keyboard.
What are the benefits of using text to speech?
Benefits include enhanced accessibility, improved proofreading, support for auditory learning, multitasking, and assistance for those with reading difficulties.
- Previous Harnessing Technology for Language: Text to Speech ImTranslator.net
- Next Unlocking the Power of Voice: Text to Speech in TikTok

Cliff Weitzman
Cliff Weitzman is a dyslexia advocate and the CEO and founder of Speechify, the #1 text-to-speech app in the world, totaling over 100,000 5-star reviews and ranking first place in the App Store for the News & Magazines category. In 2017, Weitzman was named to the Forbes 30 under 30 list for his work making the internet more accessible to people with learning disabilities. Cliff Weitzman has been featured in EdSurge, Inc., PC Mag, Entrepreneur, Mashable, among other leading outlets.
Recent Blogs

Ultimate guide to ElevenLabs

Voice changer for Discord

How to download YouTube audio

Speechify 3.0 is the Best Text to Speech App Yet.

Voice API: Everything You Need to Know

Best text to speech generator apps

The best AI tools other than ChatGPT

Top voice over marketplaces reviewed
Speechify Studio vs. Descript

Everything to Know About Google Cloud Text to Speech API

Source of Joe Biden deepfake revealed after election interference

How to listen to scientific papers
How to add music to CapCut

What is CapCut?
VEED vs. InVideo

Speechify Studio vs. Kapwing
Voices.com vs. Voice123
Voices.com vs. Fiverr Voice Over
Fiverr voice overs vs. Speechify Voice Over Studio
Voices.com vs. Speechify Voice Over Studio

Voice123 vs. Speechify Voice Over Studio
Voice123 vs. Fiverr voice overs
HeyGen vs. Synthesia
Hour One vs. Synthesia
HeyGen vs. Hour One
Speechify makes Google’s Favorite Chrome Extensions of 2023 list
How to Add a Voice Over to Vimeo Video: A Comprehensive Guide
How to Add a Voice Over to Canva Video: A Comprehensive Guide
What is Speech AI: Explained
How to Add a Voice Over to Canva Video
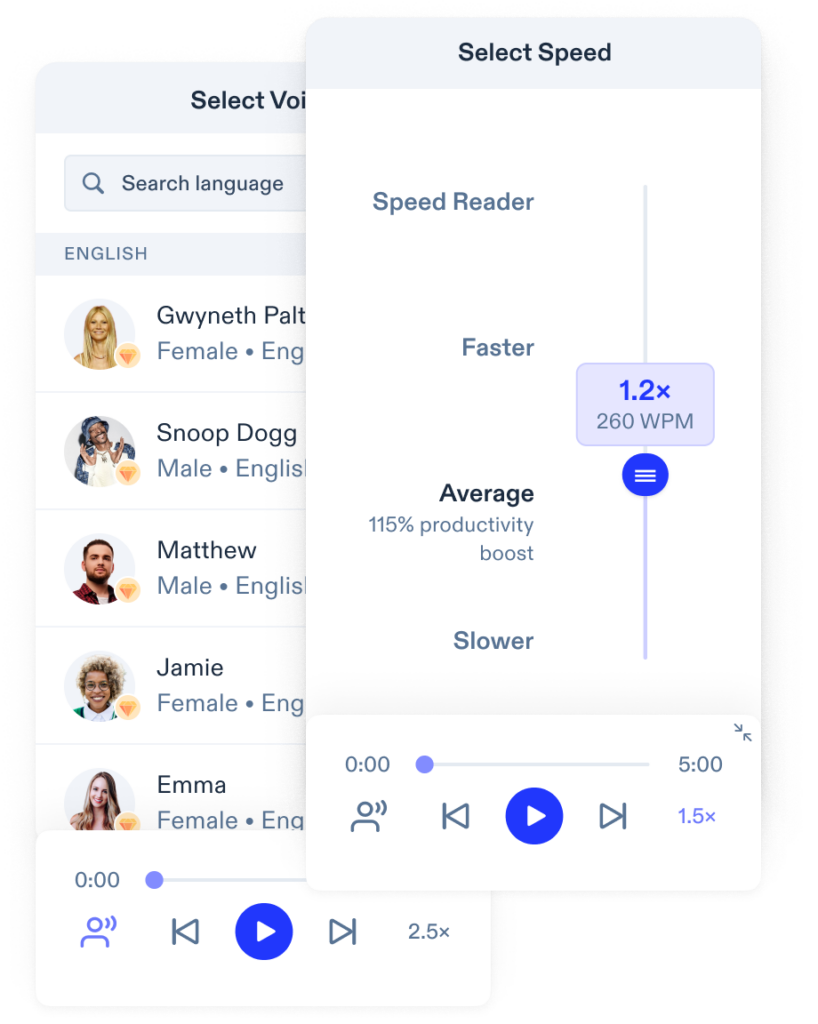
Speechify text to speech helps you save time
Popular blogs.
The Best Celebrity Voice Generators in 2024
YouTube Text to Speech: Elevating Your Video Content with Speechify
The 7 best alternatives to Synthesia.io
Everything you need to know about text to speech on tiktok, the 10 best text-to-speech apps for android.
How to convert a PDF to speech
The top girl voice changers
How to use siri text to speech.
Obama text to speech
Robot voice generators: the futuristic frontier of audio creation, pdf read aloud: free & paid options, alternatives to fakeyou text to speech.
All About Deepfake Voices
Tiktok voice generator, text to speech goanimate, the best celebrity text to speech voice generators, pdf audio reader.
How to get text to speech Indian voices
Only available on iPhone and iPad
To access our catalog of 100,000+ audiobooks, you need to use an iOS device.
Coming to Android soon...
Join the waitlist
Enter your email and we will notify you as soon as Speechify Audiobooks is available for you.
You’ve been added to the waitlist. We will notify you as soon as Speechify Audiobooks is available for you.
IMAGES
VIDEO
COMMENTS
You can add the Speak command to your Quick Access Toolbar by doing the following in Word, Outlook, PowerPoint, and OneNote: Next to the Quick Access Toolbar, click Customize Quick Access Toolbar. Click More Commands. In the Choose commands from list, select All Commands. Scroll down to the Speak command, select it, and then click Add.
Step 1: Open Microsoft Word. Simple but crucial. Open the Microsoft Word application on your device and create a new, blank document. We named our test document "How to use speech to text in ...
It's a quick and easy way to get your thoughts out, create drafts or outlines, and capture notes. Windows Mac. Open a new or existing document and go to Home > Dictate while signed into Microsoft 365 on a mic-enabled device. Wait for the Dictate button to turn on and start listening. Start speaking to see text appear on the screen.
Change Read Aloud settings. Select the gear icon in the controls at the top right. Use the Reading speed slider to change the reading speed. Under Voice Selection, select the voice you want. Listen to selected text with Read Aloud. Select the text to be read aloud. Start Read Aloud from Review tab or shortcut or select play on Read Aloud UI.
Want to use your voice to type in Microsoft Word rather than your keyboard? Using dictation, or commonly known as "speech-to-text", is a simple feature offe...
Speaking selected text. To speak selected text: Select the text you want to be read aloud. To select the entire document, press Ctrl + A to select all. Click Speak on the Quick Access Toolbar. Word will read the selected text (your sound must be turned on for your device). To turn off Speak, click the Speak again.
Open your document and tap the microphone icon. Begin speaking, tap the icon to pause or stop, or say "Pause dictation" or "Stop dictation" just like the desktop and web applications. To change the settings, tap the gear icon. Make your adjustments and tap the X to save them and return to your document. For additional help with dictation on ...
Speak punctuation aloud as you go. You can also say "New line," which has the same effect as pressing the Enter or Return key on the keyboard. 4. When you're done dictating, click "Dictate" a ...
Microsoft Word - How to Have Word Read Your Text Aloud (Text To Speech)Speak is a built-in feature of Word, Outlook, PowerPoint, and OneNote. You can use Spe...
Launch the Word app, either the desktop app on your Mac or PC or the web app in Chrome, Firefox, or Edge. In the Home menu, select the microphone icon. If prompted, select the button to Allow the use of your microphone. Web app users will see a toolbar with controls for your microphone. Select the microphone icon to begin dictating.
A step-by-step tutorial on how to use the updated Dictation and voice commands in Microsoft Word for the web. Dictation in Microsoft Word is a useful way to ...
Go to 'Control Panel' > 'Ease of Access'. Choose 'Speech Recognition'. Select 'Text to Speech' to change the voice settings. Previous How to Dub a Podcast: The Ultimate Guide for High-Quality Audio Production. Next Easy Video Editor: Simplifying Your Video Editing Journey.
Click on the Review tab in the menu bar. Select Read Aloud. You can have MS Word read your text back to you using the Read Aloud feature. Once you click on the Read Aloud button, a popup appears with the Play, Previous, Next, and Settings icons. To have the text be read aloud, press the Play icon.
Dictate in Word for the Web. To use Microsoft Office on the web, sign in with your Microsoft Account. At the main Office screen, click the icon for Word. Open a document and click the Dictate icon ...
Sign in to Microsoft 365, and open Word. In the "Home" tab, click the arrow next to "Dictate" and then select "Transcribe" from the menu that appears. The "Transcribe" pane will open in the right-hand side of the window. Select "Upload Audio." You can upload these audio file types:
Step 1. Open Word, then click the "Customize Quick Access Toolbar" button located to the right of the Quick Access Toolbar and select "More Commands." The Quick Access Toolbar is located above the row of tabs that includes File, Home, Insert and Page Layout. Video of the Day.
Listen to text in your documents, messages, presentations, or notes using the Speak command.
Microsoft have introduced some exciting new accessibility tools. In this video Caroline shows how to use Read Aloud functionality. Instructions for adding R...
To get started, do these steps: Open Microsoft Word 2013. Click the "File" tab in the top left corner. Choose "Options" from the drop-down menu. In the Word Options window, click on "Customize Ribbon". Next to "Dictation", check the box and then click "OK". You can now use speech to text on Microsoft Word 2013.
Step 3: Start dictating the words, and Google Docs will convert the speech to text. If you don't see the Microphone icon, check if Voice Dictation has been enabled. Here's how you can go about ...
First, start by grounding your copilot in your data. Using generative answers, you can enable multi-turn chat over your organizations real-time data—from local files to SharePoint sites, from public websites to data in your own custom backends creating the ability to chat over a wide set of topics within minutes. For this scenario, you would ...
The transcribe feature converts speech to a text transcript with each speaker individually separated. After your conversation, interview, or meeting, you can revisit parts of the recording by playing back the timestamped audio and edit the transcription to make corrections. You can save the full transcript as a Word document or insert snippets ...
Step 2: Place your cursor at the point in your document where you'd like the new section to begin. Step 3: Head to the Layout tab in the ribbon and click the downward arrow next to the Breaks ...
Applies to: Microsoft ® Word ® 2013, 2016, 2019, 2021 or 365 (Windows) You can use several shortcuts in Word to select text in your documents using only your keyboard. When you select text, it will typically be highlighted in grey. After you select text, you can cut, copy, or delete the selected text or apply character or paragraph formatting.
Learn how to use voice typing and dictation speech-to-text technology to type without using your hands in Google Docs and Microsoft Office apps like Word, Ou...
The Trump campaign said Trump was clearly using the term in the context of an economic bloodbath. "If you actually watch and listen to the section, ... At the start of his speech in Ohio, ...
Trump used the stage to deliver a profanity-filled version of his usual rally speech that again painted an apocalyptic picture of the country if Biden wins a second term. "If I don't get elected ...
To have your text read aloud in Word, simply use the 'Read Aloud' feature found in the 'Review' tab or by using the keyboard shortcut 'Ctrl + Alt + Space'. Utilizing Word's TTS Capabilities. Yes, anyone can use the text to speech feature in Word to enhance their document interaction, whether for personal or professional use.
In Microsoft Word you have 2 different ways to read your document out loud: There are many reasons to listen to a document, such as proofreading, multitaskin...
It was a freewheeling speech, which he blamed on being unable to use the teleprompter due to strong winds. ... President Joe Biden's campaign latched on to Trump's use of the word "bloodbath ...