
How to Use Presentation Mode in Microsoft Word

Microsoft Word’s presentation mode is an excellent feature for collaborating on documents in real-time. This mode allows presenters to walk meeting attendees through a Word document, enabling remote collaboration.
In this comprehensive guide, we’ll cover everything you need to know to use presentation mode effectively, including:
Enabling Presentation Mode
The first step is enabling presentation mode within Word:
- Open the Word document you wish to present. Ensure all attendees have access to this file.
- Navigate to the Share tab on the ribbon.
- Click Present Online .
- Select Office Presentation Service from the dropdown menu.
- Check the box to Enable remote viewers to download the document if desired. This allows attendees to save a copy of the document locally if needed.
- Click Present Online to begin the presentation.
Once enabled, Microsoft Word will provide a meeting link that presenters can send to attendees. When attendees access this link, they’ll be able to follow along in real-time as the presenter navigates through the document.
Enabling presentation mode in Word
Presenting with Word’s Collaboration Tools
With presentation mode enabled, Microsoft Word unlocks powerful real-time collaboration tools:
Communicating with Attendees
The presenter can communicate with attendees using the built-in Send In Email and Send In IM options. This opens up communication channels, allowing the presenter to field questions and feedback during the presentation.
Presenters should monitor these communication channels closely during the presentation to identify and respond to attendee questions promptly.
Viewing Attendee Status
Microsoft Word provides attendee status updates in real-time so presenters can track whether attendees are actively following the presentation. If an attendee loses their place in the document, status indicators will show:
- Following Presenter – The attendee is viewing the same content as the presenter currently.
- Viewing Slide X – The attendee has navigated away from the content the presenter is actively viewing.
If the status shows attendees are not following along, presenters can pause and allow attendees to catch up before continuing.
Controlling Attendee Views
Beyond monitoring status, Microsoft Word also allows presenters to control attendee views to ensure everyone is seeing the same content during the presentation.
Presenters can enable Follow Presenter through the collaboration toolbar. This automatically syncs an attendee’s view to match the presenter’s location within the document.
With Follow Presenter enabled, attendees cannot scroll away or lose their place. Their view is controlled completely by the presenter.
Annotating Content During Presentations
Presenters can also annotate document content in real-time during the presentation, highlighting or calling out important information for attendees:
- Draw tab – Enables pen and highlighter markup options
- Type tab – Adds text boxes for callouts/annotations
Annotations appear for all attendees, allowing the presenter to guide the audience’s attention effectively.
Wrapping Up the Presentation
Once a presentation is complete, presenters should conclude the session:
- Navigate to the Present Online tab
- Click End Online Presentation
Ending the session closes collaboration channels and attendee access to the document.
Following this simple process allows presenters to enable and leverage Microsoft Word’s excellent built-in presentation mode during meetings and remote collaboration sessions. The powerful tools help presenters guide and collaborate with audiences in real-time.
Key Takeaways:
- Access presentation mode under the Share tab
- Communicate with attendees via email/IM
- Track attendee status
- Control attendee views
- Annotate content during the presentation
- Conclude the session when finished
With these steps, anyone can master Microsoft Word’s robust presentation capabilities for impactful remote collaboration.
About The Author
Vegadocs Staff
Related posts.

How to Open PDFs in Microsoft Word
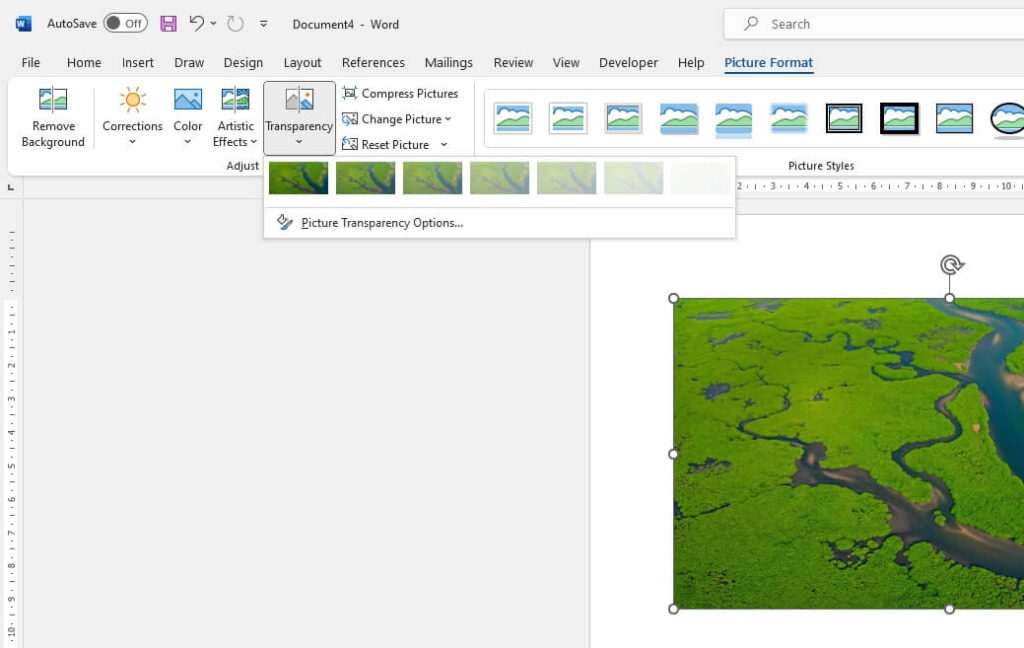
How to Fade Pictures in Microsoft Word

How to Change a Page to Landscape Mode in Microsoft Word

How to Put Borders Around Images in Microsoft Word
- Hot Tech Deals at Target Right Now
- The Best Noise-Canceling Headphones to Buy
How to Add PowerPoint Slides Into a Word Document
Insert PowerPoint slides as individual images
- Brock University
What to Know
- In Word, go to Insert > Add from Files and select the PowerPoint file. Choose Insert Slide for each slide you want to add.
Use the Picture Format menu to adjust each inserted slide.
When you want to use PowerPoint slides in a Microsoft Word document, use the Add from Files tool to import one or more slides from a PowerPoint presentation as images to the Word file. We show you how to do it using Microsoft Word for Microsoft 365, Word 2019, Word 2016, and Word for Mac.
How to Insert PowerPoint Slides Into a Word Document
Slides from an existing PowerPoint presentation can be inserted as an image into a blank document or an existing document.
Open an existing or blank Word document, then position the cursor where you want to insert the PowerPoint slide.
Go to the Insert tab and select Add from Files .
Select the PowerPoint file that contains the slides you want to add to the Word document.
If the file isn't listed, select Show More Files to browse the filesystem and choose a file.
In the Insert From File panel, find the slide you want to insert as an image and select Insert Slide to insert it into the document.
The slide appears as an image. It can only be edited with photo tools.
Considerations
In old versions of Microsoft Office , it sometimes made sense to export PowerPoint content into Word to mark it up with the speaker's notes and other information. However, PowerPoint has advanced such that these workarounds no longer prove as helpful.
PowerPoint presentations can be exported in different formats including PDF, several image formats, several movie formats, and a rich-text outliner format. Use these export formats as an alternative to a multi-step Word process.
Get the Latest Tech News Delivered Every Day
- Converting PowerPoint Presentations to Word Documents
- How to Merge PowerPoints
- Converting PowerPoint Slides to Word Documents
- How to Link or Insert Excel Files to Word Documents
- Create Pictures From PowerPoint Slides
- How to Add a Background Picture to PowerPoint Slides
- How to Add Page Numbers in PowerPoint
- How to Print PowerPoint Slides With Notes
- A Beginner's Guide to Text Wrap in PowerPoint
- How to Insert PDF Files Into PowerPoint Presentations
- How to Make a PowerPoint Presentation
- 3 Ways to Delete a Blank Page in Word
- Copy Slides to Another PowerPoint Presentation
- How to Add Pages to a PDF
- Use PowerPoint Slide Finder
- Insert a Picture Inside Text on a PowerPoint Slide
How-To Geek
How to link or embed a powerpoint slide in a word document.
You can reference a PowerPoint slide in a Word document by linking or embedding it as an object. Here's how.
Quick Links
Linking vs. embedding, link or embed a powerpoint slide in a word document.
The good thing about the Microsoft Office suite is all the programs in the collection work pretty well together. One example is the ability to link or embed Microsoft PowerPoint slides in a Microsoft Word document. Here's how it's done.
Whether you link or embed the PowerPoint slide in the Word document, the goal is always the same: providing an external reference that compliments the content within the document. However, there are some subtle differences between linking and embedding that you should be aware of.
The difference between linking and embedding an object is how the object's data is stored and how the content within the object is updated. Since the data is stored differently between the two methods, the process of updating the content will also be different when that time comes.
Related: How to Link or Embed an Excel Worksheet in a Word Document
If you link an object, then that link simply sends the reader to the location of the source object when clicked. The file itself doesn't actually store any data from the linked object to the file. This is advantageous if the object you're linking to is large in size and you need to reduce the file size of your Word document . The downside is that if the location of the linked object changes, the link in your Word document will break.
If you embed an object, then you don't need to worry about whether the location of the object changes, as it becomes part of the document itself. That is, Word stores the object data in the actual Word file. The good news is that you don't have to worry about broken links in your document. The downside is that when the object is updated, those updates aren't reflected in your embedded object because there's no link connecting it to the source. Also, you'll need to consider that the file size increases with embedded objects.
The difference between being able to link or embed a Microsoft PowerPoint slide in a Microsoft Word document is only one click.
First, open the PowerPoint presentation that contains the slide you want to link or embed. From there, select the desired file by clicking its preview thumbnail.
Next, copy the slide to your clipboard by using the Ctrl+c (Cmd+c on Mac) keyboard shortcut, or by right-clicking the slide and selecting "Copy" from the context menu.
Now, open the Word document you would like to link or embed the slide to. In the "Clipboard" group of the "Home" tab, click the down arrow under "Paste."
In the drop-down menu, click "Paste Special."
The "Paste Special" window will appear. If you've copied the PowerPoint slide to your clipboard, you'll see a "Microsoft PowerPoint Slide Object" option in the box under "As." Click it to select the option. Next, to embed the slide, click the bubble next to "Paste." To link the slide, click the bubble next to "Paste Link." Select "OK" to insert the linked or embedded object.
The Microsoft PowerPoint slide is now linked or embedded in your Microsoft Word document.

Feb 23, 2021
Export Word documents into PowerPoint presentations
Mohit Anand
- Add our blog to your RSS feed reader" href="/rss/blog.xml" data-bi-name="RSS Subscription" data-bi-id="rss_feed" data-bi-bhvr="120" data-bi-socchn="RSSSubscription" title="Microsoft 365 Insider Blog RSS" target="blank" class="d-inline-block">
Hi, Office Insiders, my name is Mohit Anand, and I’m a Program Manager on the PowerPoint team. I’m glad to share that a new scenario is now available in Word for the web . You can now export Word document s in to PowerPoint presentation s .
Word document s to PowerPoint presentation s
Have you ever wished you could easily export an existing Word document into a great PowerPoint presentation? If so, the wait is over!
When you use the Export command, it creates a presentation based on all the summarized sections of the document. It also adds imagery, icons, videos, themes, and fonts using AI.
How it works
To turn your Word document into a PowerPoint presentation:
- Open any document you want to convert into a presentation in Word for the web.
- Click File > Export > Export to PowerPoint presentation .
- When prompted , choose a design theme for your presentation.
- Click Open presentation to re view the results in PowerPoint for the w eb.
- The presentation w ill be created in the OneDrive root folder of the user who used this option.
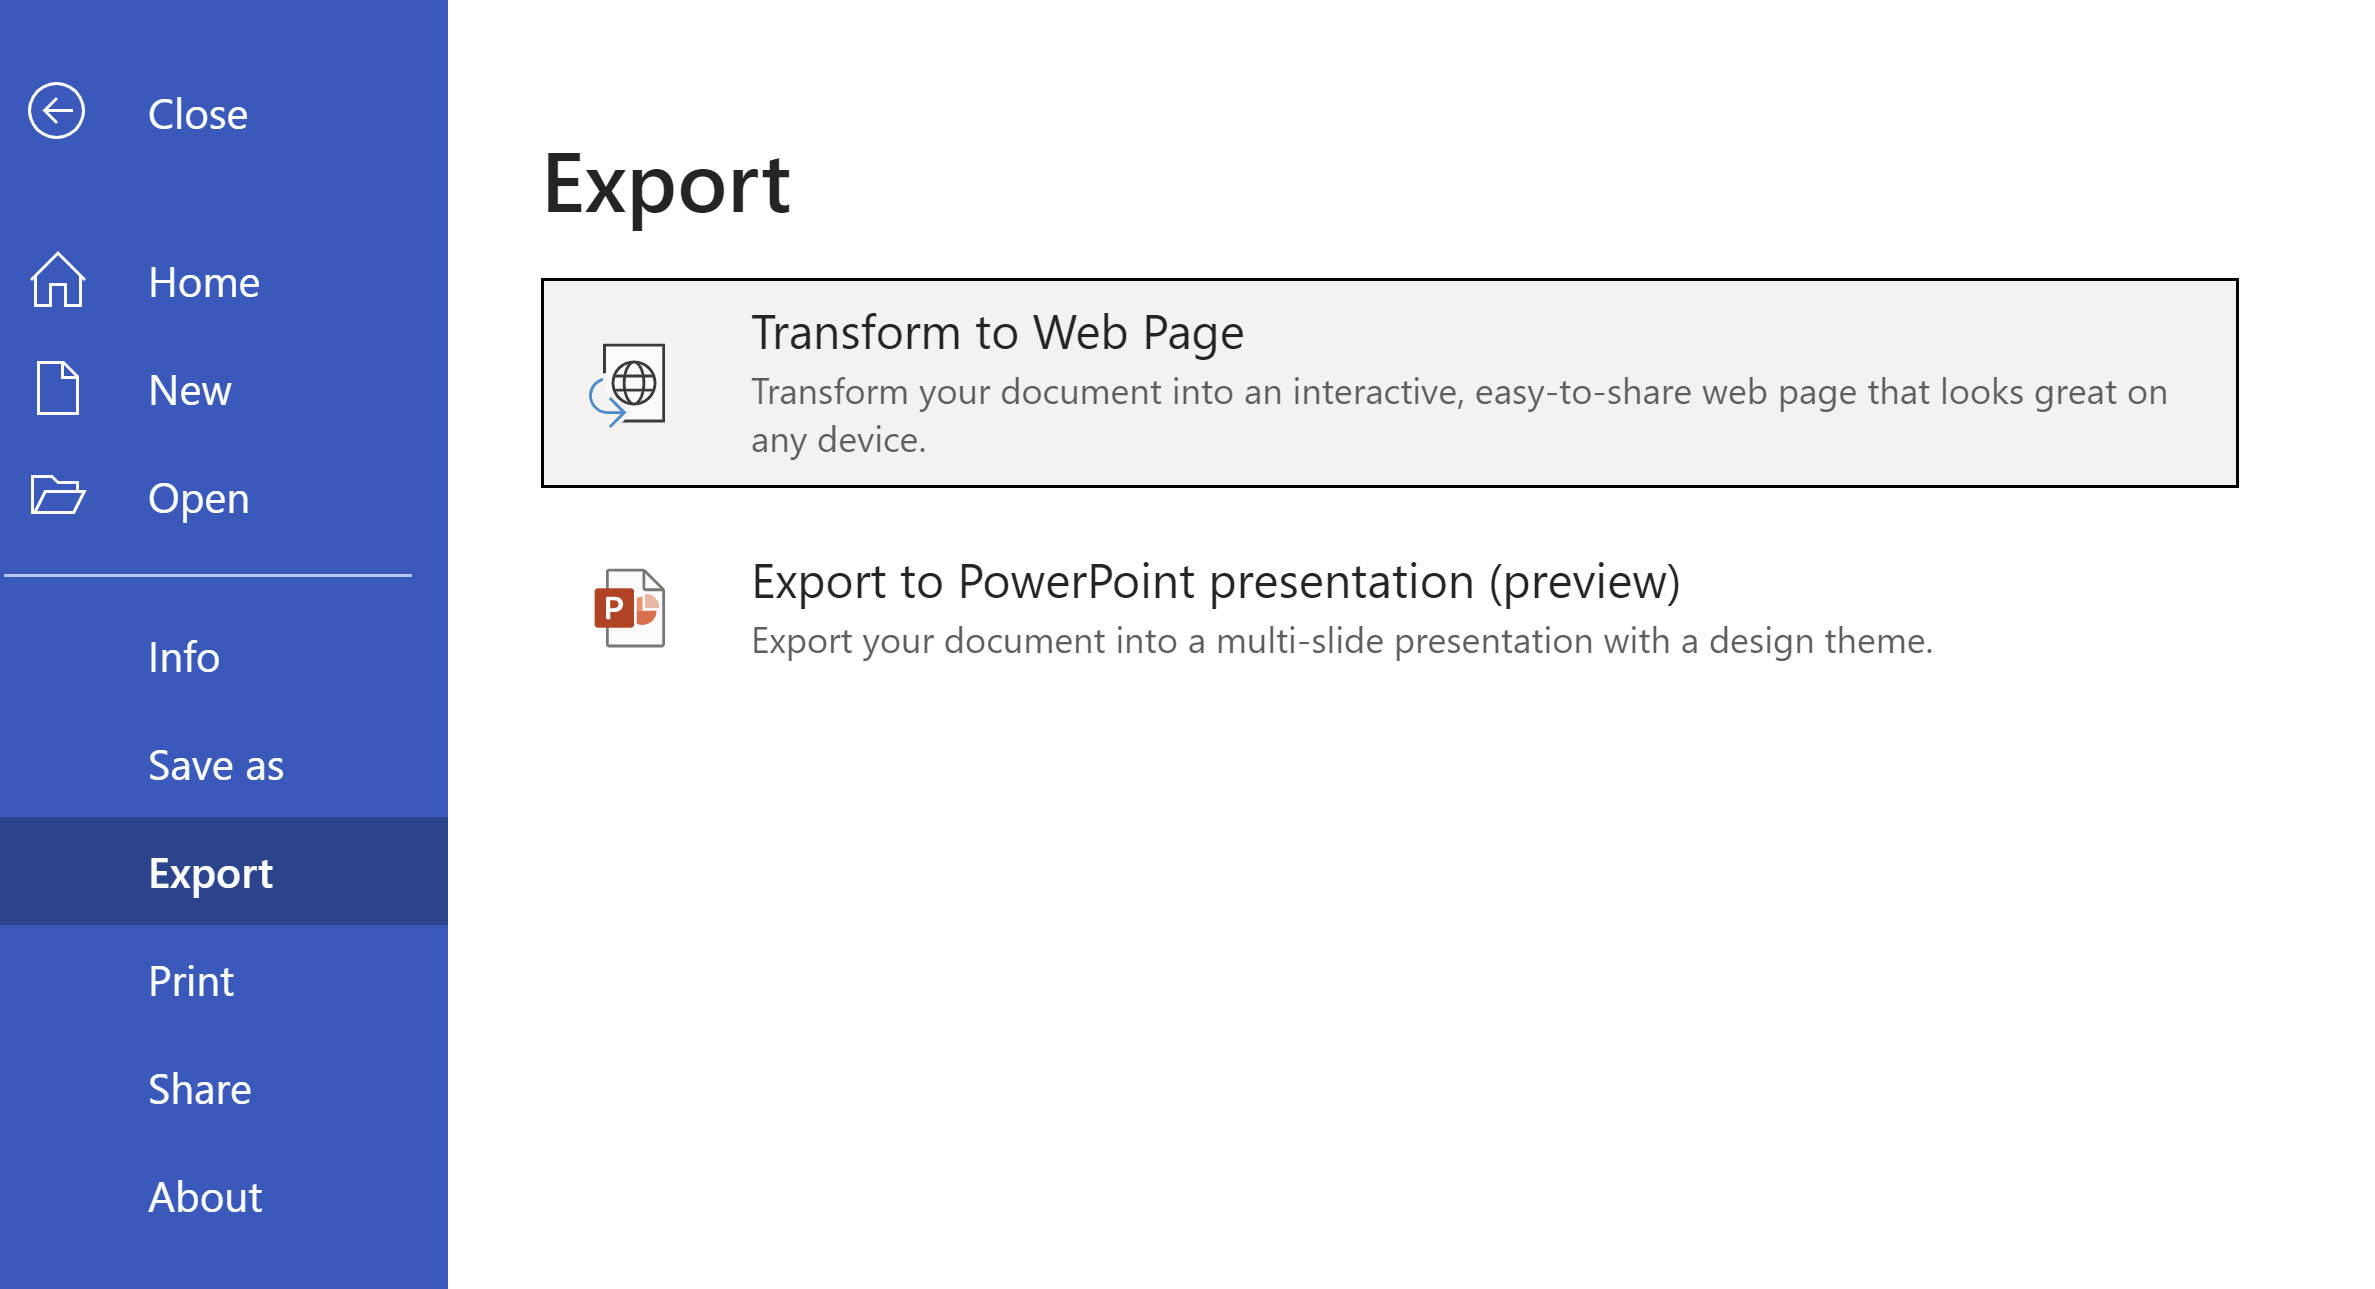
Scenarios to try
- Open a Word document and explore the available PowerPoint themes.
- Open a Word document that is mostly text and see which AI-backed assets are added by clicking on Export .
Known Issues
- This feature is currently only available in English.
- It is not available in the Internet Explorer and Safari browser.
- We only support text content for the transformation to presentation, other media content support is not currently available. You can add your own media to the presentation after you have exported your Word document.
Availability
Export your document to PowerPoint presentation is rolling out to all Word for the web users shortly .
Features are released over some time to ensure that things are working smoothly. Therefore, we highlight features that you may not have because they’re slowly releasing to larger numbers of Insiders. Additionally, sometimes we remove elements to further improve them based on your feedback. Though this is rare, we also reserve the option to pull a feature entirely out of the product, even if you, as Insiders, have had the opportunity to try them.
Feedback
If you have any feedback or suggestions, you can submit them by clicking Help > Feedback.
Learn more about what other information you should include in your feedback to ensure it’s actionable and reaches the right people.
We’re excited to hear from you! Sign up for the Office Insider newsletter , and you’ll get the latest information about Insider features in your inbox once a month.
Sorry, JavaScript must be enabled to use this app.
Presentation templates
Captivate your audience with customizable business presentation templates. whether you're pitching clients, wooing investors, or showing off your latest wins, there are presentation templates that'll suit your next meeting..

Free slide templates for presentations
Presentation decks can make or break your speech—don't risk boring or unprofessional slides distracting from your message. Set yourself up for success with free, eye-catching presentation templates that don't require graphic design skills to use. Whether you're pitching to investors or sharing a class project, using presentation templates allows you to focus on the content of your work without worrying about the design. Explore presentation templates for pitch decks, annual reviews, and conference slides, and get ready to wow your audience. Choose a presentation template and customize it with your business's branding and logo. If you work in a creative field, don't shy away from bold designs and vivid colors . Presentation templates offer versatile options for personalizing—get creative by customizing your template or opt for adding your own text to existing designs. When you use a template at your next meeting, you'll turn a simple presentation into an opportunity to impress. To make presenting even easier, you can download your template in a variety of formats, like PowerPoint and PDF, or share it digitally with your colleagues.
- Presentation
- Presentation Agenda
- Presentation Design
- Presentation Outline
- Promotion Presentation
- Project Presentation
- Professional Presentation
- Process Presentation
- Organization Presentation
- Minimalist Presentation
Presentation Template in Word
Download Numerous Templates In Different File Formats Such As Microsoft Word Or Pdf. Use Template.net You Can Create Outputs Such As Marketing Templates To Word Cloud Handouts. These Are Templates That You Can Easily Edit And Use Even If You Do Not Have Any Adobe Illustrator Or Photoshop Experience.
Get Access to All MS Word Templates
- Marketing Presentation
- Infographic Presentation
- Event Presentation
- Business Presentation
- Business Plan Presentation
- Basic Presentation
- Presentation Roadmap
There's nothing better than to have the perfect presentation to impress your audience. Create a professionally made presentations with our equally well-written presentation templates. We offer you 100% customizable documents with different designs and formats. All editable templates are suitable for any business and academic purposes—whether for company meetings, restaurant sales, research studies, thesis presentations, insurance agencies, etc. You will have our printable templates downloaded in your devices within minutes! These ready-made templates are made available for personalizing in any device you have with all versions of Microsoft Word. Stop wasting time and get your presentations done without any hassle with our presentation templates today!
How to Prepare Presentations with Microsoft Word
A presentation is a process of presenting a product or topic to an audience intended to inform and demonstrate that particular subject. Creating the perfect presentations will support your pitch and could get you to the next level of your objectives. Presentation materials could be a series of creative slides, brochures , flyers , or posters . The document is your key to impress your viewers. Don't have any idea on how to start one? Feel free to read further to find tips and steps on how to create a presentation effectively.
1. Determine the Presentation's Purpose
First and foremost, you should know the purpose of your presentation materials. Are you using it to present new products or project proposals ? Do you want to show annual sales? You need to consider your intentions to deliver precise information to your audiences.
2. Choose a Layout Design
Presentations come in different layouts. You need to incorporate your design into the purpose of your material. Most presentation materials have simple arrangements with minimal designs. Others prefer their content to have beautiful backgrounds and a clean layout that makes it look appealing. For example, you are doing a presentation for annual sales report. You can choose designs that help you emphasize datasheets and numbers for your material to be readable.
3. Pick a Presentation Template
If you don't want to waste time creating presentations from scratch, look for presentation templates on our site that fits your preferences well. These ready-made templates come with unique and aesthetic designs that you can freely adjust. You will find different styles and themed materials to suit any field you are assigned. The editable templates are downloadable in any device you have, along with its graphic designs in file formats like Microsoft Word.
4. Come Up with Essential Details
Once you have your presentation templates with you, start filling in the details you need. Presentations need to be short and precise. You have to summarize your topics no matter how broad it is. Even if it's an annual business report or proposals , your audiences won't be interested in it if you have wordy slides to present. Make sure you have displayed the critical areas of your topic and have it straightforward.
5. Finalize Infographics
It is better to add infographics like charts , timelines, and illustrations on your presentation to avoid making your material dull and boring. Audiences prefer visual content than texts. They take in more information expressed through figures and images than have it in paragraphs. Infographics will also help you summarize your topics and allow you to squeeze them in one graph or chart.
6. Make your Presentation Engaging
Presentations are more fun and enjoyable if you often interact with your viewers. Get your audience to participate in your discussion as much as possible—it prevents your viewers from getting bored. If you are doing a presentation for a product, it is better to bring in a prop like a physical sample, to entertain your viewers more. It's also the same if you are presenting services. Try handing our marketing brochures and flyers to your audiences to have them more engaged.
Get Instant Access to 50,000+ MS Word Templates
- Access to 1 Million+ Templates & Tools
- 500,000+ Microsoft 365 Templates including Excel, Powerpoint, Publisher, Outlook & PDF
- Unlimited access to Design & Documents AI editors
- Professionally Made Content and Beautifully Designed
- Instant Download & 100% Customizable
- Generative AI
- Office Suites
- Collaboration Software
- Productivity Software
- Augmented Reality
- Emerging Technology
- Remote Work
- Artificial Intelligence
- Operating Systems
- IT Leadership
- IT Management
- IT Operations
- Cloud Computing
- Computers and Peripherals
- Data Center
- Enterprise Applications
- Vendors and Providers
- United States
- Netherlands
- United Kingdom
- New Zealand
- Newsletters
- Foundry Careers
- Terms of Service
- Privacy Policy
- Cookie Policy
- Copyright Notice
- Member Preferences
- About AdChoices
- E-commerce Affiliate Relationships
- Your California Privacy Rights
Our Network
- Network World

PowerPoint for Microsoft 365 cheat sheet
Are you getting the most from powerpoint for microsoft 365/office 365 in windows learn about the key new features in microsoft’s powerful presentation app..
![what are presentation in ms word Computerworld Cheat Sheet > Microsoft > PowerPoint [Office 365]](https://www.computerworld.com/wp-content/uploads/2024/03/cw_microsoft_office_365_powerpoint_cheat_sheet-100787158-orig.jpg?quality=50&strip=all&w=900)
Need to create and share a presentation? If so, you probably turn to the most popular presentation application in the world, Microsoft PowerPoint for Windows.
Microsoft sells Office under two models: Individuals and businesses can pay for the software license up front and own it forever (what the company calls the “perpetual” version of the suite), or they can purchase a Microsoft 365 or Office 365 subscription, which means they have access to the software for only as long as they keep paying the subscription fee.
When you purchase a perpetual version of the suite — say, Office 2019 or Office 2021 — its applications will never get new features, whereas apps in the “365” subscriptions are continually updated with new features. For more details, see “Microsoft Office 2021 vs. Microsoft 365: How to choose ” Confusing matters even more, Microsoft has renamed most, but not all, of its Office 365 subscriptions under the “Microsoft 365” moniker, which generally means the plan includes everything from the old Office 365 plans plus some additional features and apps.
This cheat sheet gets you up to speed on the features that have been introduced in the Windows desktop client for PowerPoint in Office 365 and Microsoft 365 since 2015. We’ll periodically update this story as new features roll out. (If you’re using the perpetual-license PowerPoint 2016 or 2019, see our separate PowerPoint 2016 and 2019 cheat sheet .)
Use the Ribbon
The Ribbon interface that you came to know and love (or perhaps hate) in earlier versions of PowerPoint hasn’t changed much in Microsoft 365/Office 365. Because the Ribbon has been included in Office suite applications since Office 2007, we assume you’re familiar with how it works. If you need a refresher, see our PowerPoint 2010 cheat sheet.
Over the years, Microsoft has tweaked the way the Ribbon looks several times, including a recent facelift that aligns with the look of Windows 11. It has a flattened look that’s cleaner and less cluttered than in previous versions of PowerPoint, and its high-contrast colors make the icons and text easier to see. But it still works in the same way, and you’ll find most of the commands in the same locations as in earlier versions.

The Ribbon in PowerPoint for Microsoft 365/Office 365 has been cleaned up, with text and icons that are easier to see. (Click image to enlarge it.)
To find out which commands live on which tabs on the Ribbon, download our PowerPoint for Microsoft 365 Ribbon quick reference. Also note that you can use the search bar on the Ribbon to find commands.
As in previous versions of PowerPoint, if you want the Ribbon commands to go away, press Ctrl-F1. (Note that the tabs above the Ribbon — File, Home, Insert, and so on — stay visible.) To make them appear again, press Ctrl-F1. You can also make the commands on the Ribbon go away by clicking the name of the tab you’re currently on. To make the commands reappear, click any tab.
You’ve got other options for displaying the Ribbon as well. To get to them, click the down arrow at the bottom right of the Ribbon. A drop-down menu appears with these four options:
- Full-screen mode: This maximizes the content portion of PowerPoint, which now takes up the entire screen, eliminating the entire Ribbon as well as the Quick Access toolbar. To show the Ribbon again, click at the top of PowerPoint.
- Show tabs only: This shows the tabs but hides the commands underneath them. It’s the same as pressing Ctrl-F1. To display the commands underneath the tabs when they’re hidden, press Ctrl-F1 or click a tab.
- Always show Ribbon: Selecting this shows both the tabs and the commands.
- Hide/Show Quick Access toolbar: This hides or shows the Quick Access toolbar, which gives you fast access to PowerPoint features you want to have always available, such as New, Undo, Repeat, and so on. It can appear above or below the Ribbon. To customize the toolbar, click the small down arrow at its right, and from the drop-down menu that appears, choose which features to put on it. If you don’t see a command you want, click More Commands , find the command you want on the left, and click Add .
To customize the title bar above the Ribbon, select File > Options > General . In the “Personalize your copy of Microsoft Office” section, click the down arrow next to Office Theme and select Dark Gray , Black , or White from the drop-down menu. To make the title bar red again, instead choose the Colorful option from the drop-down list. Just above the Office Theme menu is an Office Background drop-down menu — here you can choose to display a pattern such as a circuit board in the title bar.
When you click the File tab on the Ribbon, you get sent to a useful area that Microsoft calls backstage. If you click Open , Save a Copy , or Save As from the menu on the left, you can see the cloud-based services you’ve connected to your Office account, such as SharePoint and OneDrive. Each location now displays its associated email address underneath it. This is quite helpful if you use a cloud service with more than one account, such as if you have one OneDrive account for personal use and another one for business. You’ll be able to see at a glance which is which.
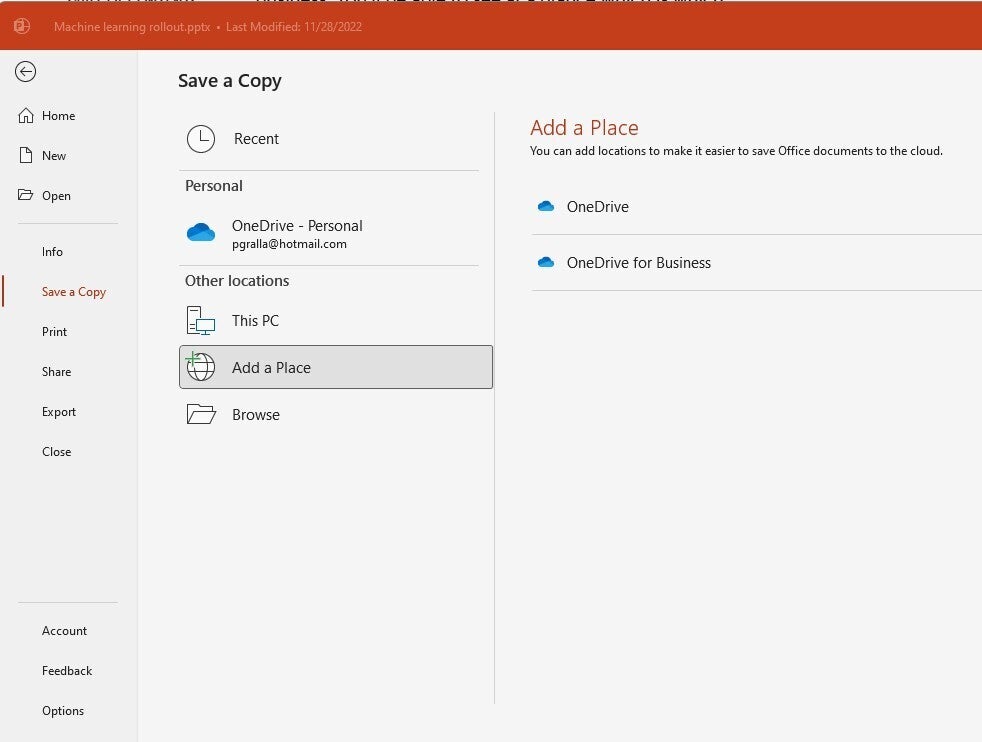
The backstage area (under the File tab) shows which cloud-based services you’ve connected to your Office account and lets you connect to additional ones. (Click image to enlarge it.)
You can also easily add new cloud-based services. From the screen that shows you your online locations, click Add a Place and choose which service to add. Note, though, that you’re limited to SharePoint and OneDrive.
Possibly in the works: A simplified Ribbon
Microsoft has been working for some time on a simplified version of the Ribbon for all Office applications. Like the existing Ribbon, it will have tabs across the top, and each tab will have commands on it. But it’s more streamlined and uses less space than the existing Ribbon.
For now, only Outlook for Windows is the only Microsoft 365 desktop app that uses the simplified Ribbon. However, you can get a preview of what it will look like in PowerPoint by going to the online version of PowerPoint. Click the down arrow at the bottom right of the Ribbon and choose Single Line Ribbon . To revert to the regular Ribbon, choose Classic Ribbon .

A cleaner, simpler Ribbon will be available in PowerPoint at some point. To try it now, head to the online version of PowerPoint, pictured here. (Click image to enlarge it.)
In the simplified Ribbon, all the commands are still there for each tab, but only the most commonly used are visible. Click the three-dot icon at the far right end of the Ribbon to show the rest of the commands in a drop-down menu.
All that said, the simplified version of the Ribbon has been in the works for years and still hasn’t made an appearance in the desktop app. We’re eagerly awaiting its appearance but are beginning to lose faith that it will ever arrive.
Use the Search bar to accomplish tasks quickly
PowerPoint is so chock-full of powerful features that it can be tough to remember where to find them all. Microsoft 365/Office 365 has made it easier via the Search bar, which can put even buried tools or those you rarely use in easy reach. (Note that at one point, the feature was called Tell Me.)
To use it, click in the Search bar — it’s above the Ribbon in the title area. (Keyboard fans can instead press Alt-Q to go to the Search box.) Type in a task you want to do, such as change handout orientation . You’ll get a menu showing potential matches for the task.
In this instance, the top result is a Handout Orientation listing that when clicked gives you two options — one to set the orientation to horizontal and the other to vertical. Just click the one you want to use. If you’d like more information about your task, the last items that appear in the menu let you select from related Help topics or display additional search results.
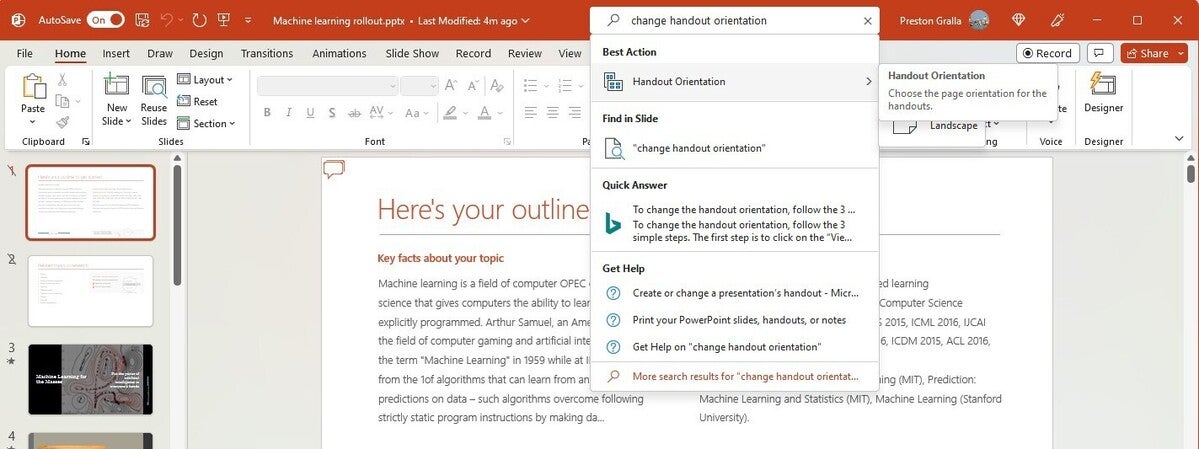
The Search bar gives advice on changing the handout orientation (or any other task you query). (Click image to enlarge it.)
Even if you consider yourself a PowerPoint pro, give Search a try. It’ll save you lots of time and is much more efficient than hunting through the Ribbon to find a command. It also remembers the features you’ve previously clicked on in the box, so when you click in it, you first see a list of previous tasks you’ve searched for. That makes sure that tasks that you frequently perform are always within easy reach, while at the same time making tasks you rarely do easily accessible.
Search is gaining more capabilities, too. Some users of enterprise and education editions of the subscription version of Office are now able to use the Search box to find people in their organization, SharePoint resources, and other personalized results from within PowerPoint. (These features are being rolled out in stages, so you might not have them yet.)
Get a jump-start on your presentations
QuickStarter is a great tool for anyone who hates being confronted with a blank slate when starting a presentation. It jump-starts your presentation by helping you with research and outline creation.
To use it, when you create a new presentation, select QuickStarter, type in the topic of your presentation, and then choose from a list of subtopics. QuickStarter suggests a set of slides you might want to use, based on Bing searches and information from Wikipedia. Choose which slide(s) to keep, and then select a look for your slides, including a theme complete with background graphics. You’ve now got a good start on your presentation.
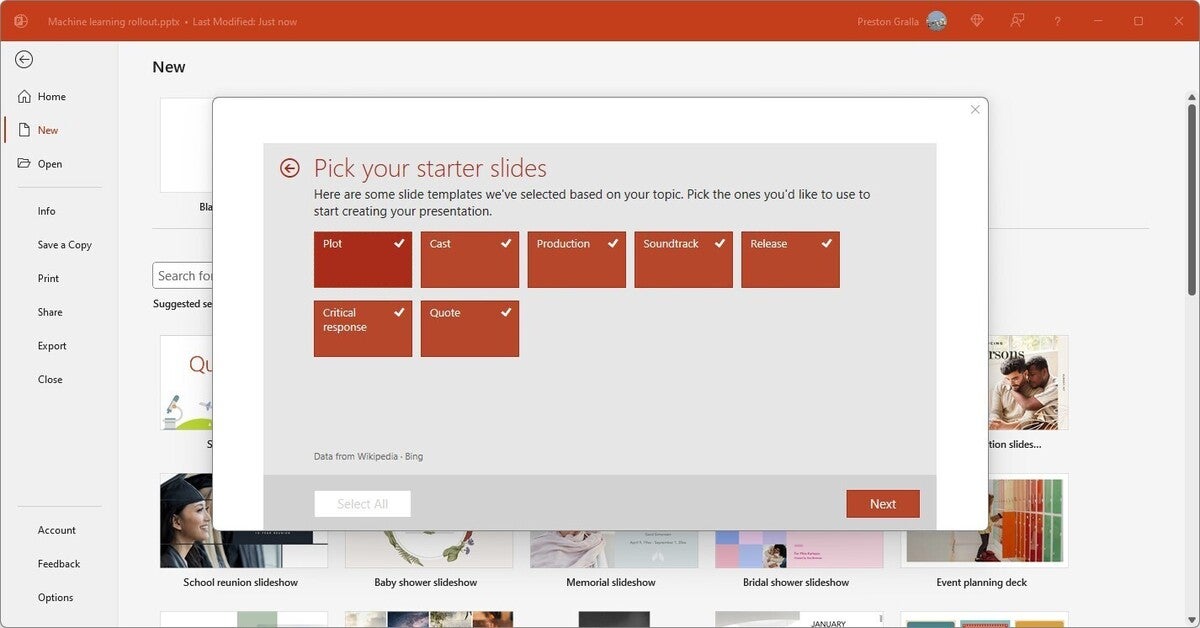
QuickStarter recommends slides you might want to use for your presentation, based on Bing searches and information from Wikipedia. (Click image to enlarge it.)
When Microsoft releases its AI assistant Microsoft 365 Copilot this fall, you may get a far more powerful tool than QuickStarter to help create presentations. Microsoft claims that Copilot will be able create entire presentations from scratch, using your existing documents. It says you’ll be able to “create beautiful presentations with a simple prompt, adding relevant content from a document you made last week or last year.”
Try Smart Lookup for online research
If you do research to gather information for presentations, you’ll want to check out another useful feature, Smart Lookup. It lets you do online research from right within PowerPoint while you’re working on a presentation, so there’s no need to fire up your browser, search the web, and then copy the information to your presentation.
To use Smart Lookup, right-click a word or group of words and select Search xxx (where xxx is the word or words you’ve highlighted) from the menu that appears. PowerPoint then uses Bing to do a web search on the word or phrase and displays definitions, any related Wikipedia entries, related media, and other results from the web in the pane that appears on the right.
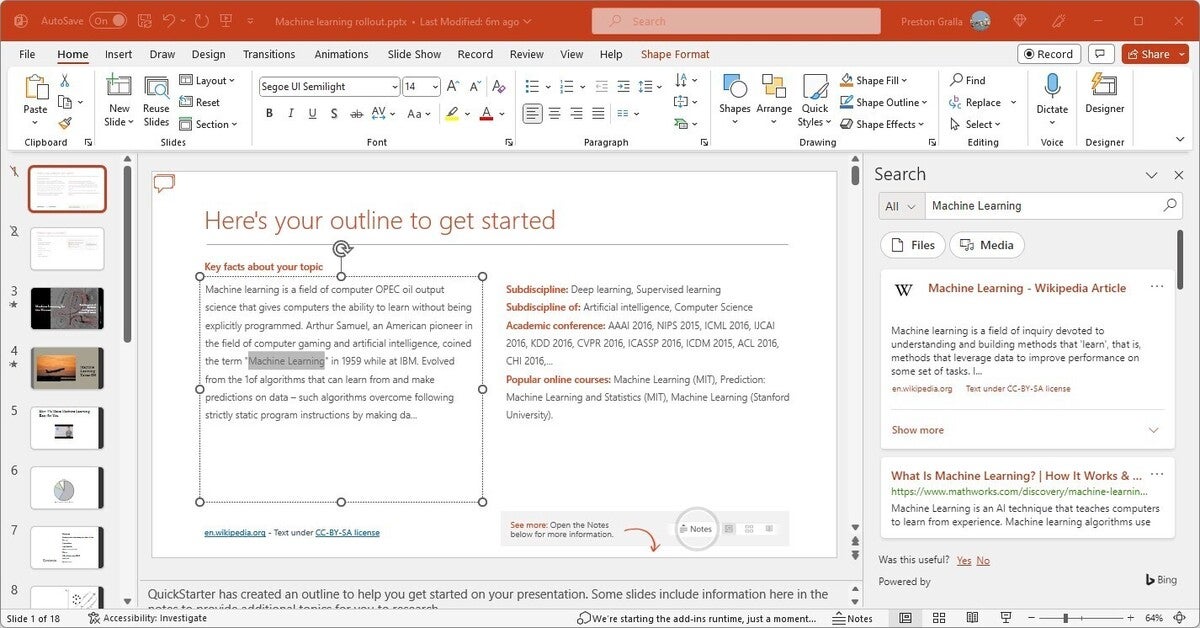
You can do web research from right within PowerPoint. (Click image to enlarge it.)
Smart Lookup has been getting smarter over time. When the feature first launched, it wasn’t very good at finding specific, timely information such as the current inflation rate in the United States. It was much better at finding more general information, such as a biography of the artificial intelligence pioneer Arthur Samuel. But Microsoft has done a lot of work on it, and it now works well when finding granular information as well.
Keep in mind that in order to use Smart Lookup in PowerPoint or any other Microsoft 365/Office 365 app, you might first need to enable Microsoft’s intelligent services feature, which collects your search terms and some content from your presentations and other documents. (If you’re concerned about privacy, you’ll need to decide whether the privacy hit is worth the convenience of doing research from right within the app.) If you haven’t enabled it, you’ll see a screen when you click Smart Lookup asking you to turn it on. Once you do so, it will be turned on across all your Microsoft 365/Office 365 applications.
Also note that there’s a reasonably high likelihood that Smart Lookup (and all search functions in Office and Windows) will get a serious makeover when Microsoft 365 Copilot is released. Microsoft has indicated that Copilot’s features will generally live in the right pane of its apps and Windows itself. We’ll keep you updated when that happens and include all the details you need to know about how to use it.
Tap Designer for slide design ideas
PowerPoint’s Designer feature makes it easy to quickly create high-quality slides without you doing much work. When you insert an image into a slide, the Designer panel opens on the right side of the screen, offering you a choice of multiple layouts for the slide. Choose the layout you want and take it from there.
Microsoft claims the feature was built with the help of graphic designers and takes into account the content of the image. A Microsoft blog post about Designer claims that “if the visual contains a natural scene, Designer can zoom, crop and frame it. But if the image contains a chart, it focuses in on the relevant region to ensure the important data is highlighted.”
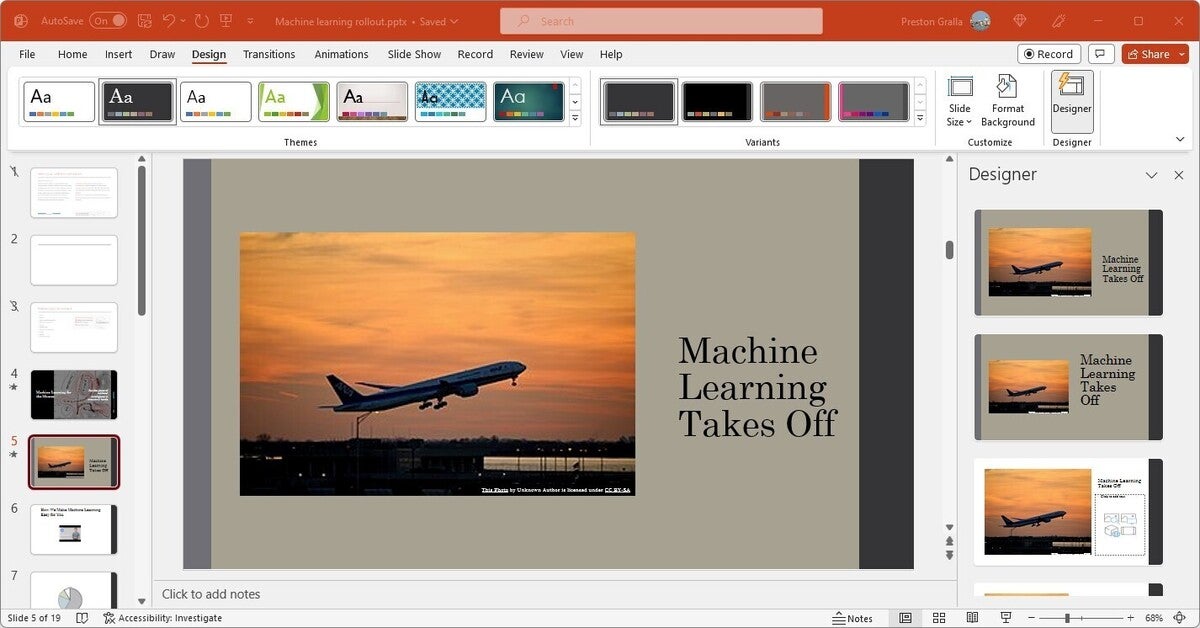
When you insert an image into a slide, the Designer panel offers suggestions for the best layouts to use. (Click image to enlarge it.)
To make sure your version of PowerPoint has enabled Designer, click File > Options , and at the bottom of the screen in the PowerPoint Designer section, click the box next to Automatically show me design ideas , then click OK .
Add new types of charts
In PowerPoint (as well as Excel and Word) for Microsoft 365/Office 365, you get eight new types of charts you can add to documents: Treemap, Sunburst, Waterfall, Histogram, Pareto, Box & Whisker, Funnel, and Map. Each provides a unique way to display data visually. See our Excel for Microsoft 365 cheat sheet for details about the new chart types, including what each one looks like and what type of data it’s best suited for.
To insert any of the new chart types (or any other chart) in a document, select Insert > Chart from the Ribbon or click the chart icon in the area that appears when you create a new slide — it’s in the box that also lets you add text, tables, graphics, and other content. Either way, you’ll be shown the full gallery of charts you can insert. Make a selection and click OK, and it appears in your document with placeholder data; at the same time a pop-up window appears that looks like a mini Excel spreadsheet. Enter or edit the data, or else click the Edit in Excel button to open it up in Excel and edit it there.
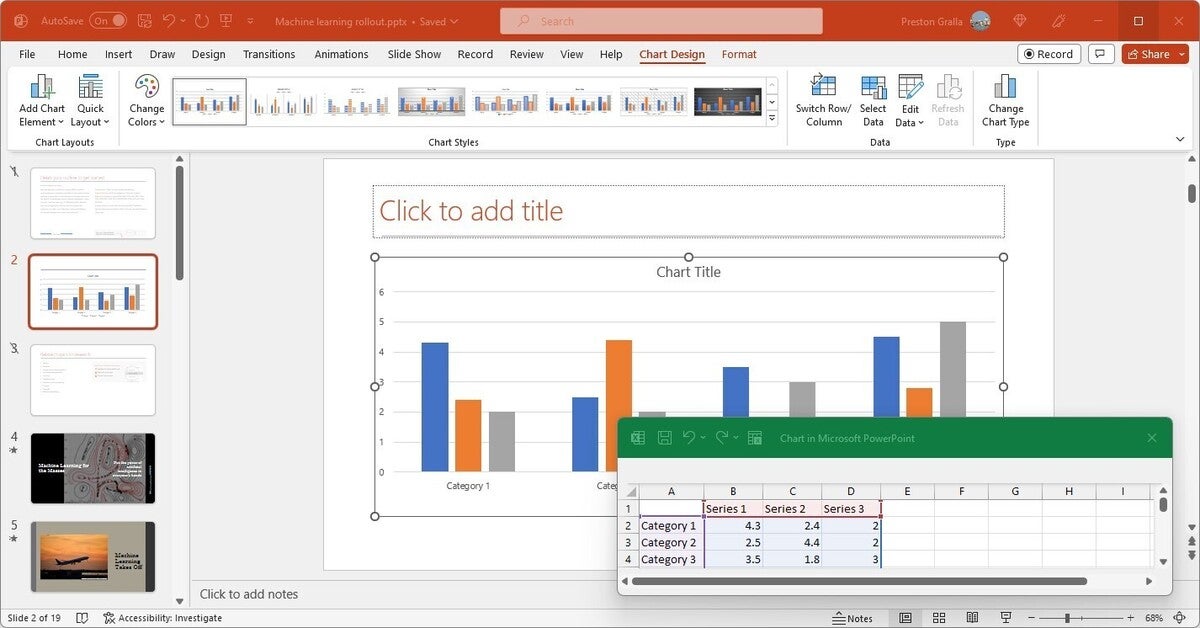
When you insert a chart, a window where you can edit the data pops up. (Click image to enlarge it.)
Note that the Pareto chart does not show up in the main list of chart types. To insert one, you’ll have to first select Histogram from the list of chart types, and at the top of the screen that appears, select the option to the right, Pareto .
Morph from one slide to the next
This feature lets you show motion in transitions and inside slides, but without having to use the Animations tab. To use it, duplicate an existing slide: Select the slide, then, on the Home tab, click the down arrow next to New Slide and select Duplicate Selected Slides .
Then make changes to that duplicate, such as shrinking an element or elements in it, making them bigger, moving them to new locations, and/or rotating them. Now select Morph from the Transitions tab, and PowerPoint automatically creates an animated transition between the slides. Onscreen, they look like a single slide morphing.
Collaborate in real time
An important feature in PowerPoint Microsoft 365/Office 365 for those who work with others is real-time collaboration that lets people work on presentations together from anywhere in the world with an internet connection. Microsoft calls this “co-authoring.”
Note that in order to use co-authoring, the presentation must be stored in OneDrive, OneDrive for Business, or SharePoint Online, and you must be logged into your Microsoft 365/Office 365 account. Also, co-authoring works in PowerPoint only if you have AutoSave turned on. To do it, move the AutoSave slider at the top left of the screen to On.
To collaborate on a document, open it, then click the Share button in the upper-right part of the screen and select Share . The “Send link” window opens. Enter the email addresses of the people with whom you want to collaborate and type in a message if you want.
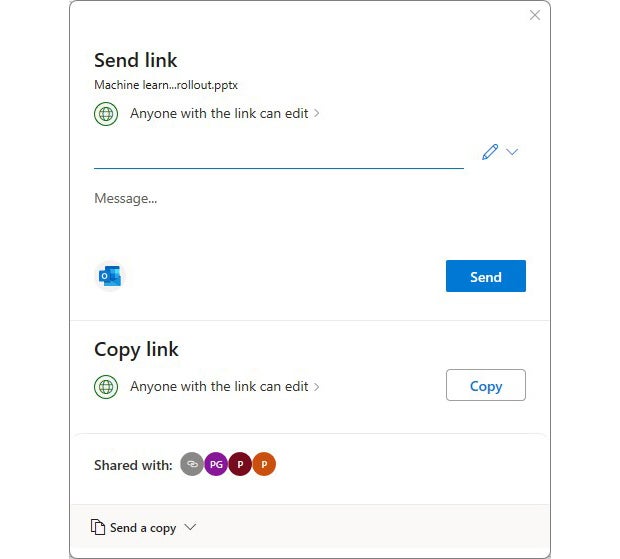
Here’s how you invite others to collaborate in PowerPoint.
By default, the people you share the document with can edit the document, but you can give them read-only access by clicking Anyone with the link can edit just above the input box, and on the “Share settings” screen that appears, select Can edit in the “More settings” area. From that screen you can also set an expiration date for the sharing link and set a password that people to whom you’ve send the link will need to access the spreadsheet. (If you use a business, enterprise, or education edition of Office, your IT department may have set up different default sharing permissions and options.)
In the “Send link” window, you can alternatively copy a link to the file and send that yourself instead of having PowerPoint send it for you, or send the link through Outlook. A final option is to send a copy of the presentation instead of the link, either as a PowerPoint presentation or as a PDF, but that option doesn’t allow live collaboration.
When you’re done, click the Send button.
To begin collaboration: When the email recipient gets your invitation to collaborate, they click a button or link to open the document, which opens in PowerPoint Online in a web browser, rather than in the PowerPoint desktop client. They can either edit or read it in PowerPoint Online, depending on the permissions you granted, or click Open in Desktop App and use it from the PowerPoint desktop client.
Different colored icons identify the different people working on the document. You’ll see all their comments, they’ll see yours, and you can see the changes everyone makes.
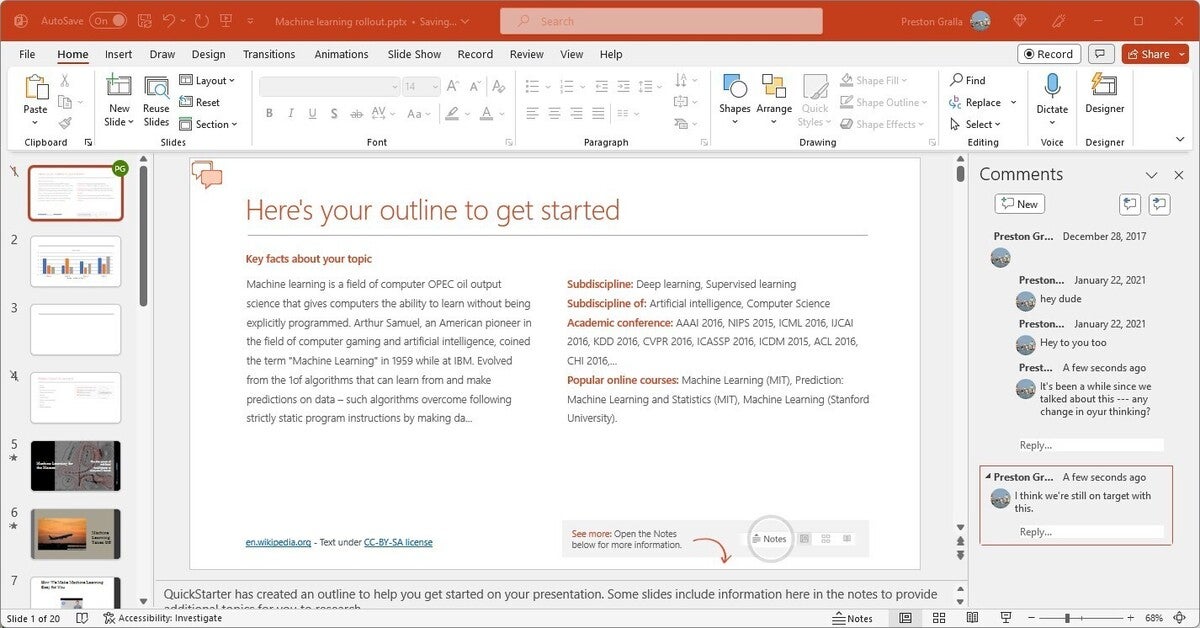
Collaborating on a presentation. (Click image to enlarge it.)
You can do more than see each other’s work. Everyone can make comments, and others can respond to them, live. To make a comment, right-click an area and select Comment from the menu that appears. The Comments pane appears. Type in your comment and click the arrow at the bottom of the comment, and everyone can see it. They can then respond, so that comments are threaded, making it easy to follow conversations.
You can open and close the Comments pane by clicking the Comments button towards the top right of the screen. From the pane, you can review people’s comments and make comments of your own.
If you want a co-worker who isn’t actively collaborating on the presentation to know you need their input on one of your comments, in the comment type @ and the first few letters of the person’s name, then choose their name from the list that appears. When you click the arrow to post the comment, they’ll get an email telling them they were @mentioned and linking to the comment in the presentation.
Be aware that how well real-time collaboration works depends on the strength of your internet connection. On slow or flaky connections, you won’t immediately see edits that other people make and they won’t see yours immediately — there will be a lag. So it’s always best, when possible, to have the strongest connection possible when collaborating.
Use AutoSave as a safety net while you work
Worried about losing your work on a presentation because you forgot to constantly save it? Worry no more. AutoSave automatically saves your files for you, so you won’t have to worry about system crashes, power outages, PowerPoint crashes, and similar problems. Be aware, though, that it works only on documents that are stored in OneDrive, OneDrive for Business, or SharePoint Online.
You may think you’re already protected against these problems because of the AutoRecover feature built into earlier versions of Office. But AutoSave is significantly different and better than AutoRecover. AutoRecover doesn’t save your files in real time, so it’s easy for you to lose work. Instead, every several minutes it saves an AutoRecover file that you can try to recover after a crash. But this feature doesn’t always work — for example, if you don’t properly open Office after the crash, or if the crash doesn’t meet Microsoft’s definition of a crash. And Microsoft notes, “AutoRecover is only effective for unplanned disruptions, such as a power outage or a crash. AutoRecover files are not designed to be saved when a logoff is scheduled or an orderly shutdown occurs.” And the files aren’t saved in real time, so you’ll lose several minutes of work even if all goes as planned.
AutoSave is turned on by default in PowerPoint for Microsoft 365/Office 365 for .pptx files stored in OneDrive, OneDrive for Business, or SharePoint Online. To turn it off (or back on again), use the AutoSave button on the top left of the screen.
Using AutoSave may require some rethinking of your workflow. Many people are used to creating new presentations based on existing ones by opening the existing file, making changes to it, and then using Save As to save the new version under a different name, leaving the original file intact. Be warned that doing this with AutoSave enabled will save your changes in the original file. Instead, Microsoft suggests opening the original file and immediately selecting File > Save a Copy (which replaces Save As when AutoSave is enabled) to create a new version.
If AutoSave does save unwanted changes to a file, you can always use the Version History feature described next to roll back to an earlier version.
Review or restore earlier versions of a presentation
Another useful feature you should know about is Version History, which lets you go back to previous versions of a file, review them, and copy and paste from an older file to your existing one. You can also restore an entire old version.
To use it, with a file open, click the file name at the top of the screen. A drop-down menu appears with the location of the file and a Version History section. Click Version History, and the Version History pane appears on the right side of the screen with a list of the previous versions of the file, including the time and date they were saved.
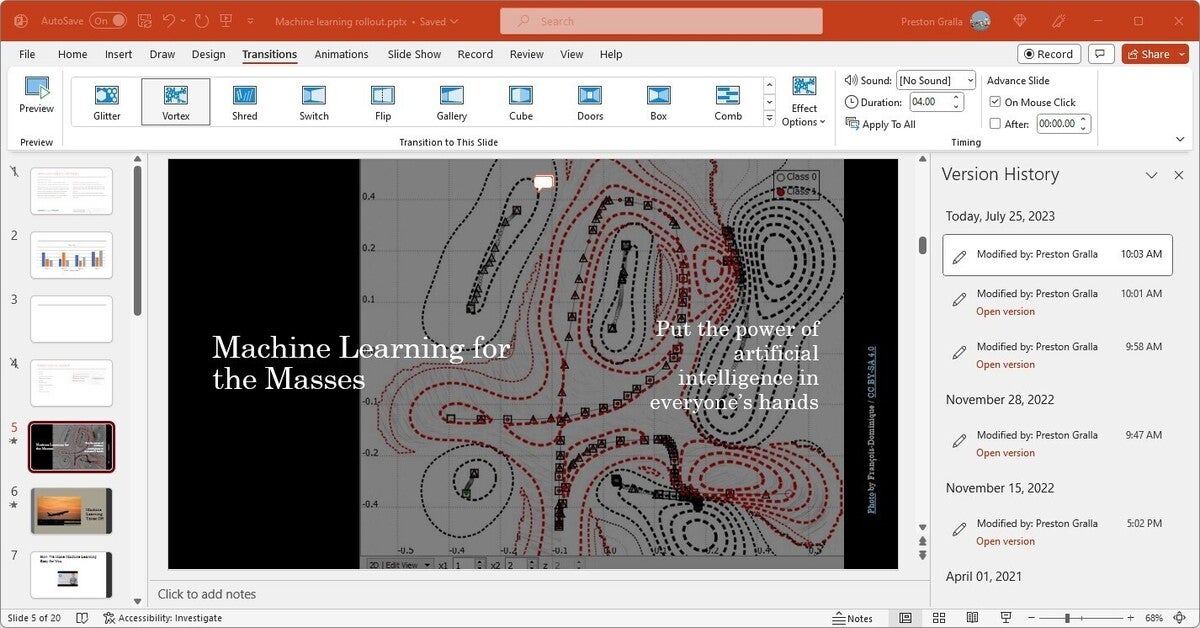
Scrolling through previous versions of a presentation. (Click image to enlarge it.)
Click any older version, and that version appears in a new window. Scroll through the version and copy any content you want. You can also overwrite your existing presentation with the earlier version or save the earlier version in a separate file.
Version History works best when used in conjunction with AutoSave. You can use it without AutoSave, but it’s not as useful because you don’t get as many saved versions to go back to.
Use Zoom to present nonsequentially
Ever wish you could jump around in your presentation, showing your slides in nonsequential order? The Zoom feature does this by creating a kind of visual shortcuts table that lets you quickly zoom from one section to another — handy in case you want to go back to a previous slide or skip over a section of your presentation.
When you’re in a presentation, select Insert > Zoom . You get a choice of three different kinds of Zoom:
- Summary Zoom: This lets you create a visual summary of your presentation. You select the slides you want included in the summary. Each of those slides becomes the beginning of a section of the presentation. When you’re giving a presentation, you can click a thumbnail on the Summary Zoom slide to go to the beginning slide of a section.
- Section Zoom: If you’ve already created sections in your presentation, when you choose Section Zoom you’ll see those sections. Choose which you want to put on your Section Zoom slide. Then when you’re giving a presentation, click any thumbnail to jump to that section.
- Slide Zoom: This lets you jump from a slide to any other slide in the presentation. It’s generally best used for short presentations without many sections. After you click Slide Zoom , you select which slides you want to be able to jump to, and they’ll show up in a Slide Zoom slide. Click any slide to jump to it.
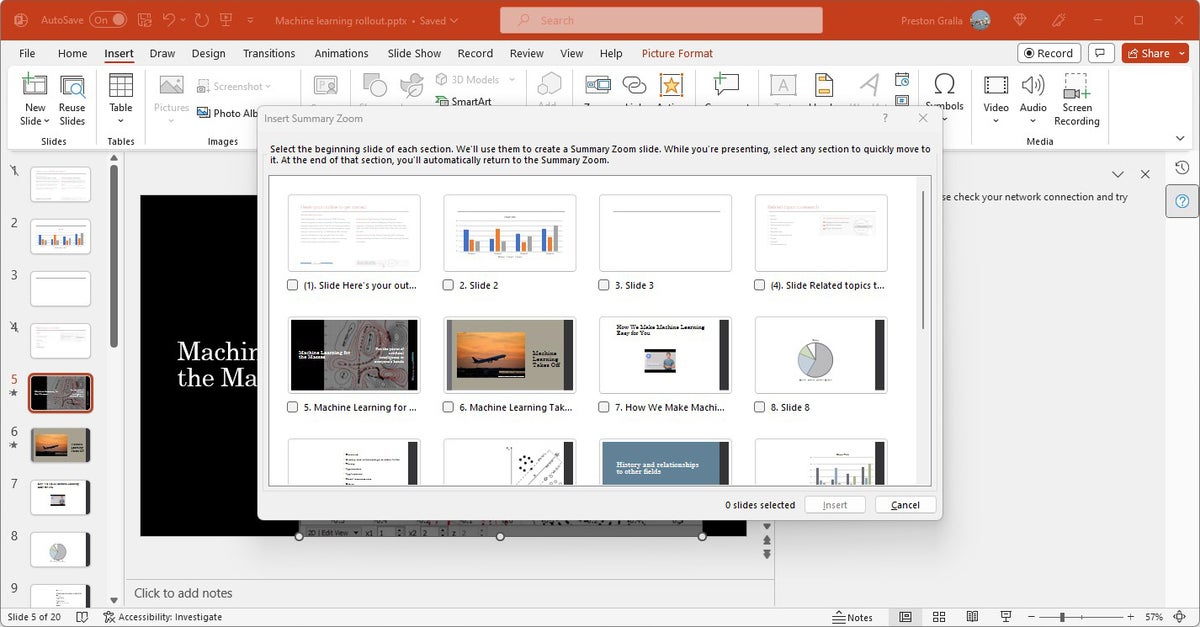
Here’s how to insert a Summary Zoom slide, with thumbnails of your entire presentation. (Click image to enlarge it.)
Other useful PowerPoint for Microsoft 365/Office 365 features
PowerPoint for Microsoft 365/Office 365 has several more useful features. Although they’re not as significant as the other features we’ve covered here, they’re worth knowing about.
Insert 3D models: This visual trick lets you show full three-dimensional details of an object. Select Insert > 3D Models and choose the 3D model you want to insert, either from your computer or from an online Microsoft library. Once it’s inserted, you can tilt or rotate the model any way you want during your presentation.
Text highlighter: Here’s a simple way to draw people’s attention to specific pieces of text: Use the new text highlighter to choose different colors to emphasize different portions of your presentation. It’s the same highlighter that Word has had for some time. To do it, select the text you want to highlight, then choose Home > Text Highlight Color .
Easier background removal: After inserting a picture, you can remove its background as a way to focus more on the photo’s subject or a detail. In earlier versions of PowerPoint you could remove backgrounds but had to use the drawing tools to select and fine-tune the item you wanted to keep; now the process is more automated. To do it, select the picture whose background you want to remove, then select Picture Format > Remove Background .
Royalty-free images: To get access to thousands of royalty-free images, icons, and stickers, go to Insert > Pictures > Stock Images , select the type of image you’re looking for from the top of the screen, and scroll though the images. You can also do a search for images as well.
Use a Bluetooth-enabled pen to control a presentation : If you’ve got a Bluetooth pen like the one that comes with a Surface device, you can use its button as a clicker to move to the next slide or a previous one. First pair the pen with your computer. Then go to the Windows Settings app and select Bluetooth and devices > Pen & Windows Ink . Under Pen Shortcuts, check the box next to Allow apps to override the shortcut button behavior . A single click will now move to the next slide in a presentation, and holding down the button will move one slide backward in the presentation.
Record a presentation: You can record your presentation ahead of time and then share it with others. Click the Record button toward the top right of PowerPoint, then select either From beginning or From Current slide . You can choose from three views: Teleprompter, Presenter, and Slide. You can pause and retake the video as many times as you want. When you’re satisfied, click Export . You can then share the video with anyone you want. See Microsoft’s video recording blog post for details.
Check for the Microsoft 365 Copilot launch
Microsoft has been building generative AI capabilities, called Copilot, into its entire product line. Microsoft 365 Copilot is currently being tested in private trials at 600 enterprises and is scheduled to be launched generally on Nov. 1. Here’s how Microsoft describes what Copilot will do in PowerPoint :
Copilot in PowerPoint helps you turn your ideas into stunning presentations. As your storytelling partner, Copilot can transform existing written documents into decks complete with speaker notes and sources or start a new presentation from a simple prompt or outline. Condense lengthy presentations at the click of a button and use natural language commands to adjust layouts, reformat text, and perfectly time animations.
Note that not everyone will have access to Copilot. The service will be available to Microsoft 365 corporate customers as an add-on , for $30 per user per month.
Use keyboard shortcuts
Using keyboard shortcuts is one of the best ways to accomplish tasks quickly in any version of PowerPoint. See “ Handy PowerPoint keyboard shortcuts for Windows and Mac ” for our favorites.
And don’t forget to download our PowerPoint for Microsoft 365 Ribbon quick reference guide, which explores the most useful commands on each Ribbon tab and provides keyboard shortcuts for each.
This story was originally published in February 2021 and updated in October 2023.
Related content
Windows 11: a guide to the updates, windows 10: a guide to the updates, intel unveils its ai roadmap, chips to rival nvidia, windows 11 insider previews: what’s in the latest build, from our editors straight to your inbox.

Preston Gralla is a contributing editor for Computerworld , a blogger for ITworld, and the author of more than 45 books, including NOOK Tablet: The Missing Manual (O'Reilly 2012) and How the Internet Works (Que, 2006).
More from this author
Feds say microsoft security ‘requires an overhaul’ — but will it listen, will a google-apple deal kill microsoft’s ai dominance, web services in action, it’s time for microsoft to kill the microsoft store — or else fix it, most popular authors.

- Howard Wen Contributing Writer
Show me more
Google sheets power tips: how to use dropdown lists.


Office 365: A guide to the updates

Yes, Apple’s Vision Pro is an enterprise product

Voice cloning, song creation via AI gets even scarier

The link between smartphones and social media addiction

Sam Bankman-Fried gets 25 years in prison

- Billing Plan
- Payment Method
- Notifications
- OCR Converter
- Video Converter
- Audio Converter
- E-book Converter
- Image Converter
- Archive Converter
- Vector Converter
- Document Converter
- Video to MP3
- PDF Converter
- Image to PDF
- Image to Word
- Unit Converter
- Time Converter
- Video Compressor
- Image Compressor
- GIF Compressor
- MP3 Compressor
- WAV Compressor
- Compress PDF
- Compress JPEG
- Compress PNG
- Video to GIF
- WEBM to GIF
- APNG to GIF
- GIF to APNG
- Video Trimmer
- API Job Builder
- API Documentation
- File Conversion API
- Image Conversion API
- Audio Conversion API
- Document Conversion API
- PDF Conversion API
- MP4 Conversion API
- Video Conversion API
- JPG to PDF API
- Video to MP3 API
- HEIC to JPG API
- PDF to JPG API
- Webp to PNG API
- PDF to WORD API
- MP4 to MP3 API
- Webp to JPG API
- WORD to PDF API
- HTML to PDF API
- Website Screenshot API
- Video Compression API
- Compress PDF API
- Image Compression API
PPT to WORD Converter
Convert PPT to WORD online, for free.
- From Device
- From Dropbox
- From Google Drive
- From OneDrive

Drop any files here!
- Apply from Preset
- Save as Preset
How to Convert PPT to WORD?
- Click the “Choose Files” button to select your PPT files.
- Click the “Convert to WORD” button to start the conversion.
- When the status change to “Done” click the “Download WORD” button
Easy to Use
Simply upload your PPT files and click the convert button. You can also batch convert PPT to WORD format.
Best Quality
We use both open source and custom software to make sure our conversions are of the highest quality. In most cases, you can fine-tune conversion parameters using “Advanced Settings” (optional, look for the icon).
Free & Secure
Our PPT to WORD Converter is free and works on any web browser. We guarantee file security and privacy. Files are protected with 256-bit SSL encryption and automatically delete after a few hours.
Convert other files to WORD format
FreeConvert.com can convert your other files to WORD format:
- WORD Converter
- HTM to WORD
- PUB to WORD
- DOCM to WORD
- Webpage to WORD
- DOTX to WORD
- WPS to WORD
- PAGES to WORD
- DOT to WORD
- ODT to WORD
- TEXT to WORD
- TXT to WORD
- PDF to WORD
- HTML to WORD
- RTF to WORD
- PPTX to WORD
- EPUB to WORD
- SVG to WORD
- PSD to WORD
- WebP to WORD
- ODD to WORD
- BMP to WORD
- GIF to WORD
- JPG to WORD
- TIFF to WORD
- PNG to WORD
Convert Your PPT files to other formats
FreeConvert.com can convert your PPT files to these other formats:
- PPT Converter
- PPT to DOCX
- PPT to PPTX
- PPT to JPEG
Want to convert large files without a queue or Ads?
Upgrade Now
- MP4 Converter
- MP3 Converter
- HEIC to JPG
Document & Ebook
- PDF to Word
- EPUB to PDF
- EPUB to Mobi
Archive & Time
- Pound to KG
- KG to Pound
- Feet to Meter
- Collage Maker
- Image Resizer
- Color Picker
Mobile Apps
- Collage Maker Android
- Collage Maker iOS
- Image Converter Android
- Image Converter iOS
© FreeConvert.com v2.23 All rights reserved (2024)
Microsoft Power BI Blog
Supporting continuous slide shows in power bi storytelling add-in.
Reports that track performance data in Power BI are common for many organizations. These reports can cover different aspects of organizational performance, such as production, sales, engineering, and so on. Many organizations want to share these reports with everyone in the organization, and even make them publicly visible , so everyone can see what the leadership cares about and how the organization is doing.
PowerPoint lets you play a presentation continuously. This is handy when you want to show information on public screens without anyone having to control it. You can do it by setting your presentation to run in an infinite loop and set the slides transition.
But up until today, if the Power BI add-in was part of a presentation running in a continuous slide show, the data in the add-in might become outdated, since the add-in only gets the data from Power BI when the slide is loaded, or when the user manually refreshes the data in the add-in.
Therefore, we added a new configuration to the add-in that ensures that you get the latest data from Power BI when running in continuous slide show. When the slide-show configuration is turned on, the add-in automatically pulls data from Power BI, without anyone having to do anything, ensuring that the presentation always has the most recent data.

To enable automatic refresh in slide show, go to the add-in footer, select Add-in options , choose Slide show settings , check Automatic refresh in slide show and set the desired frequency. This will cause the add-in to pulls data from Power BI every given period, when the presentation is in slide show.
The auto refresh only happens in slide show mode and not while you’re editing the presentation, so don’t worry if data does not change we you are still editing the presentation. (If you want the latest data when you are editing, go to Data options and choose Refresh .)
For best performance, the device running the presentation in infinite loop must have Office build 17126.20208 and above .
Let us know your feedback about the new slide show support inPower BI Storytelling add-in at ideas.fabric.microsoft.com . Please add “Storytelling” to the title and give us enough information to make improvements to meet your requirements.
- power bi data storytelling

How To Get Free Access To Microsoft PowerPoint
E very time you need to present an overview of a plan or a report to a whole room of people, chances are you turn to Microsoft PowerPoint. And who doesn't? It's popular for its wide array of features that make creating effective presentations a walk in the park. PowerPoint comes with a host of keyboard shortcuts for easy navigation, subtitles and video recordings for your audience's benefit, and a variety of transitions, animations, and designs for better engagement.
But with these nifty features comes a hefty price tag. At the moment, the personal plan — which includes other Office apps — is at $69.99 a year. This might be the most budget-friendly option, especially if you plan to use the other Microsoft Office apps, too. Unfortunately, you can't buy PowerPoint alone, but there are a few workarounds you can use to get access to PowerPoint at no cost to you at all.
Read more: The 20 Best Mac Apps That Will Improve Your Apple Experience
Method #1: Sign Up For A Free Microsoft Account On The Office Website
Microsoft offers a web-based version of PowerPoint completely free of charge to all users. Here's how you can access it:
- Visit the Microsoft 365 page .
- If you already have a free account with Microsoft, click Sign in. Otherwise, press "Sign up for the free version of Microsoft 365" to create a new account at no cost.
- On the Office home page, select PowerPoint from the side panel on the left.
- Click on "Blank presentation" to create your presentation from scratch, or pick your preferred free PowerPoint template from the options at the top (there's also a host of editable templates you can find on the Microsoft 365 Create site ).
- Create your presentation as normal. Your edits will be saved automatically to your Microsoft OneDrive as long as you're connected to the internet.
It's important to keep in mind, though, that while you're free to use this web version of PowerPoint to create your slides and edit templates, there are certain features it doesn't have that you can find on the paid version. For instance, you can access only a handful of font styles and stock elements like images, videos, icons, and stickers. Designer is also available for use on up to three presentations per month only (it's unlimited for premium subscribers). When presenting, you won't find the Present Live and Always Use Subtitles options present in the paid plans. The biggest caveat of the free version is that it won't get any newly released features, unlike its premium counterparts.
Method #2: Install Microsoft 365 (Office) To Your Windows
Don't fancy working on your presentation in a browser? If you have a Windows computer with the Office 365 apps pre-installed or downloaded from a previous Office 365 trial, you can use the Microsoft 365 (Office) app instead. Unlike the individual Microsoft apps that you need to buy from the Microsoft Store, this one is free to download and use. Here's how to get free PowerPoint on the Microsoft 365 (Office) app:
- Search for Microsoft 365 (Office) on the Microsoft Store app.
- Install and open it.
- Sign in with your Microsoft account. Alternatively, press "Create free account" if you don't have one yet.
- Click on Create on the left side panel.
- Select Presentation.
- In the PowerPoint window that opens, log in using your account.
- Press Accept on the "Free 5-day pass" section. This lets you use PowerPoint (and Word and Excel) for five days — free of charge and without having to input any payment information.
- Create your presentation as usual. As you're using the desktop version, you can access the full features of PowerPoint, including the ability to present in Teams, export the presentation as a video file, translate the slides' content to a different language, and even work offline.
The only downside of this method is the time limit. Once the five days are up, you can no longer open the PowerPoint desktop app. However, all your files will still be accessible to you. If you saved them to OneDrive, you can continue editing them on the web app. If you saved them to your computer, you can upload them to OneDrive and edit them from there.
Method #3: Download The Microsoft PowerPoint App On Your Android Or iOS Device
If you're always on the move and need the flexibility of creating and editing presentations on your Android or iOS device, you'll be glad to know that PowerPoint is free and available for offline use on your mobile phones. But — of course, there's a but — you can only access the free version if your device is under 10.1 inches. Anything bigger than that requires a premium subscription. If your phone fits the bill, then follow these steps to get free PowerPoint on your device:
- Install Microsoft PowerPoint from the App Store or Google Play Store .
- Log in using your existing Microsoft email or enter a new email address to create one if you don't already have an account.
- On the "Get Microsoft 365 Personal Plan" screen, press Skip For Now.
- If you're offered a free trial, select Try later (or enjoy the free 30-day trial if you're interested).
- To make a new presentation, tap the plus sign in the upper right corner.
- Change the "Create in" option from OneDrive - Personal to a folder on your device. This allows you to save the presentation to your local storage and make offline edits.
- Press "Set as default" to set your local folder as the default file storage location.
- Choose your template from the selection or use a blank presentation.
- Edit your presentation as needed.
Do note that PowerPoint mobile comes with some restrictions. There's no option to insert stock elements, change the slide size to a custom size, use the Designer feature, or display the presentation in Immersive Reader mode. However, you can use font styles considered premium on the web app.
Method #4: Use Your School Email Address
Office 365 Education is free for students and teachers, provided they have an email address from an eligible school. To check for your eligibility, here's what you need to do:
- Go to the Office 365 Education page .
- Type in your school email address in the empty text field.
- Press "Get Started."
- On the next screen, verify your eligibility. If you're eligible, you'll be asked to select whether you're a student or a teacher. If your school isn't recognized, however, you'll get a message telling you so.
- For those who are eligible, proceed with creating your Office 365 Education account. Make sure your school email can receive external mail, as Microsoft will send you a verification code for your account.
- Once you're done filling out the form, press "Start." This will open your Office 365 account page.
You can then start making your PowerPoint presentation using the web app. If your school's plan supports it, you can also install the Office 365 apps to your computer by clicking the "Install Office" button on your Office 365 account page and running the downloaded installation file. What sets the Office 365 Education account apart from the regular free account is that you have unlimited personal cloud storage and access to other Office apps like Word, Excel, and Outlook.
Read the original article on SlashGear .

- All about AI
- Google Bard
- Inflection AI Pi Chatbot
- Anthropic Claude
- Generative AI
- AI Image Generation
- AI Regulation
- AI Research
- Large Language Models (LLM)
- Surface Pro
- Surface Laptop
- Surface Book
- Surface Duo
- Surface Neo
- Surface Studio
- Surface Hub
- Surface Pen
- Surface Headphones
- Surface Earbuds
- About WinBuzzer
- Follow Us: PUSH, Feeds, Social
- Write for Us
- Cookie Policy and Privacy Policy
- Terms of Service
How to Password Protect Excel, Word, PowerPoint, or PDF Files with Microsoft Office
We show you how to password protect Excel, Word, PowerPoint and PDF files in Microsoft Office so that you can keep your documents private.

Table of Contents:
While most of us already have login passwords on our PC, at times it’s necessary to go one step further. As well as encrypting individual files , you can use Microsoft Office to password protect an Excel file Word Document, PDF, and more. When you password-protect documents with modern versions of Office, they’re typically encrypted. This means that anybody who tries to read them that doesn’t have your password will just see random strings of letters and numbers. This persists even if you send the document to another person. Here we show you how to password protect Excel, Word, PowerPoint or PDF files.
How to Password Protect a Word Document, Excel File, or PowerPoint Presentation
Securing your Microsoft Office documents with a password is a straightforward process. This method is applicable to Word, Excel, and PowerPoint files, providing an extra layer of security by encrypting your documents. Follow the steps below to protect your Office documents. We use Word as an example but the exact same steps also work for other Office files.

How to Create a Password Protected PDF File with Microsoft Office
Creating a password-protected PDF file is slightly different from encrypting a Word, Excel, or PowerPoint document. This method involves converting your Office document into a PDF format and then securing it with a password. Here’s how to do it.

FAQ – Frequently Asked Questions About Password-Protection for Documents
Password-protected documents maintain their encryption when stored on cloud services..
The document remains encrypted on the server, requiring the password upon opening, regardless of the cloud storage used. It’s crucial to use strong passwords and enable two-factor authentication (2FA) for your cloud storage account for additional security. Be aware of the cloud provider’s encryption in transit and at rest protocols to ensure comprehensive protection of your documents.
What should I do if a password-protected document needs to be accessed by multiple people?
For documents requiring access by multiple users, set a shared password communicated through a secure medium, ensuring all parties understand the importance of keeping the password confidential. Alternatively, consider using document management or collaboration platforms that offer granular access controls and permissions, allowing for better management of who can view or edit the document without relying on a single shared password.
Besides password protection, what other security measures should I consider for sensitive documents?
In addition to password protecting sensitive documents, consider using encryption solutions that secure the entire document beyond the application level. For highly sensitive information, employ data loss prevention (DLP) policies, secure access management (like 2FA ), and regularly audit access logs. Awareness and training on security best practices among users who will access the documents are also vital in ensuring comprehensive protection.
Can editing restrictions be set on a password-protected Word document?
Yes, Word allows you to apply editing restrictions that let users open but not modify a document. This is done by navigating to the Review tab, selecting Restrict Editing, and choosing the editing restrictions. This feature can be applied in conjunction with or separate from password protection, offering flexibility in how you secure and share documents. Engaging both protections enhances document security, especially in collaborative environments.
How can I tell if a PDF file is encrypted and password protected without opening it?
Various PDF readers and file management tools provide visual cues or properties details indicating encryption. For example, attempting to open the file in a PDF reader will prompt for a password if encrypted. In file properties or details pane, look for security settings or encryption status. Advanced PDF management tools may offer more detailed insights into the encryption level and specifics of the protection applied. Always ensure your PDF viewer or editor is up-to-date for accurate detection and handling of encrypted files.
In addition to password protection, consider utilizing encryption solutions that secure the entire document beyond the application level. Implement data loss prevention (DLP) policies, engage secure access management practices such as two-factor authentication (2FA) , and regularly audit access logs. It’s also crucial to promote awareness and training on security best practices among users with access to the documents to ensure comprehensive protection.
Yes, Word allows users to set editing restrictions on a document, enabling viewers to open but not modify the content. This feature is accessible via the Review tab by selecting Restrict Editing and then specifying the desired editing restrictions. This functionality can synergize with or operate independently from password protection, thus offering flexibility in document security and sharing practices. Utilizing both protections can significantly enhance document protection, particularly in collaborative environments.
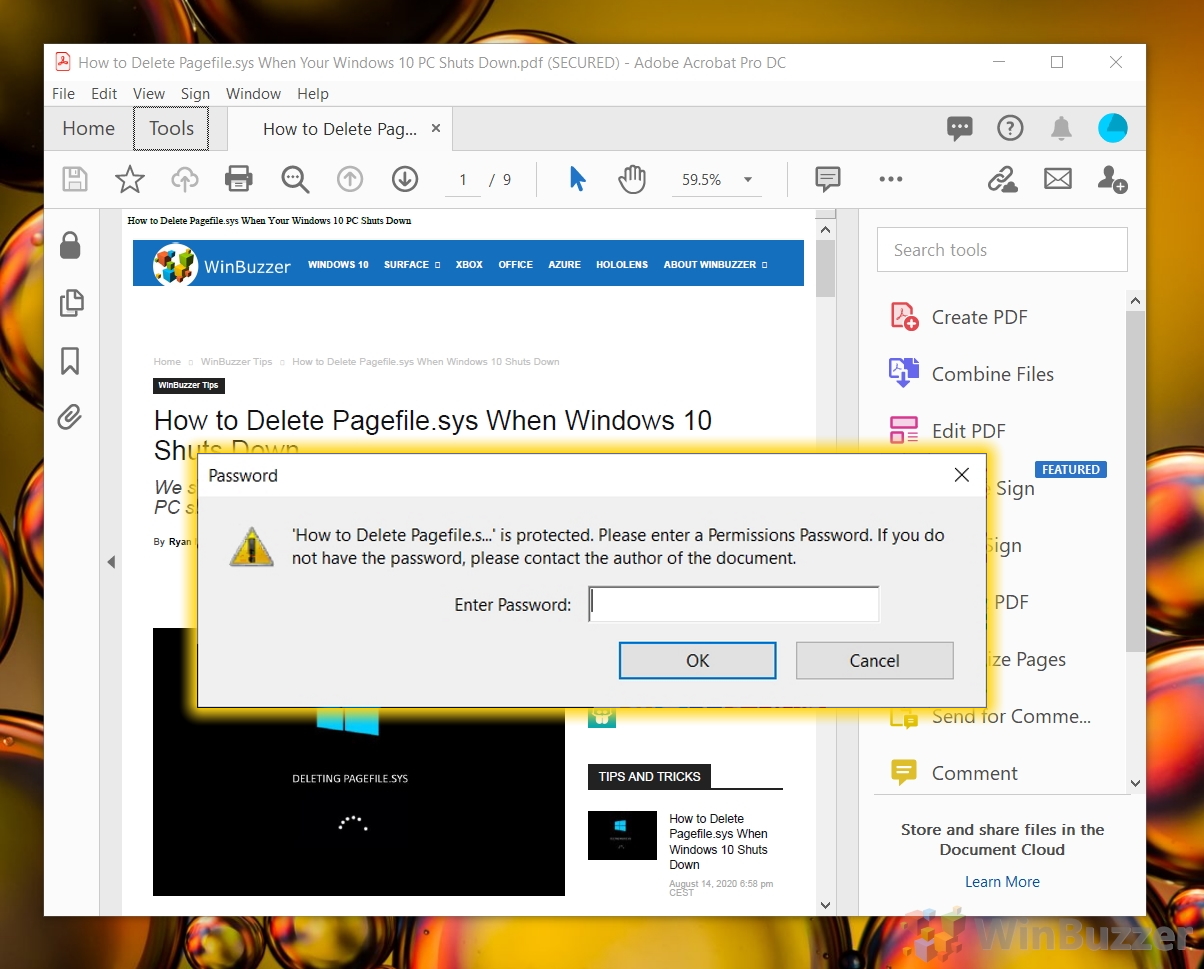
Related: How to Remove Password Protection from a PDF
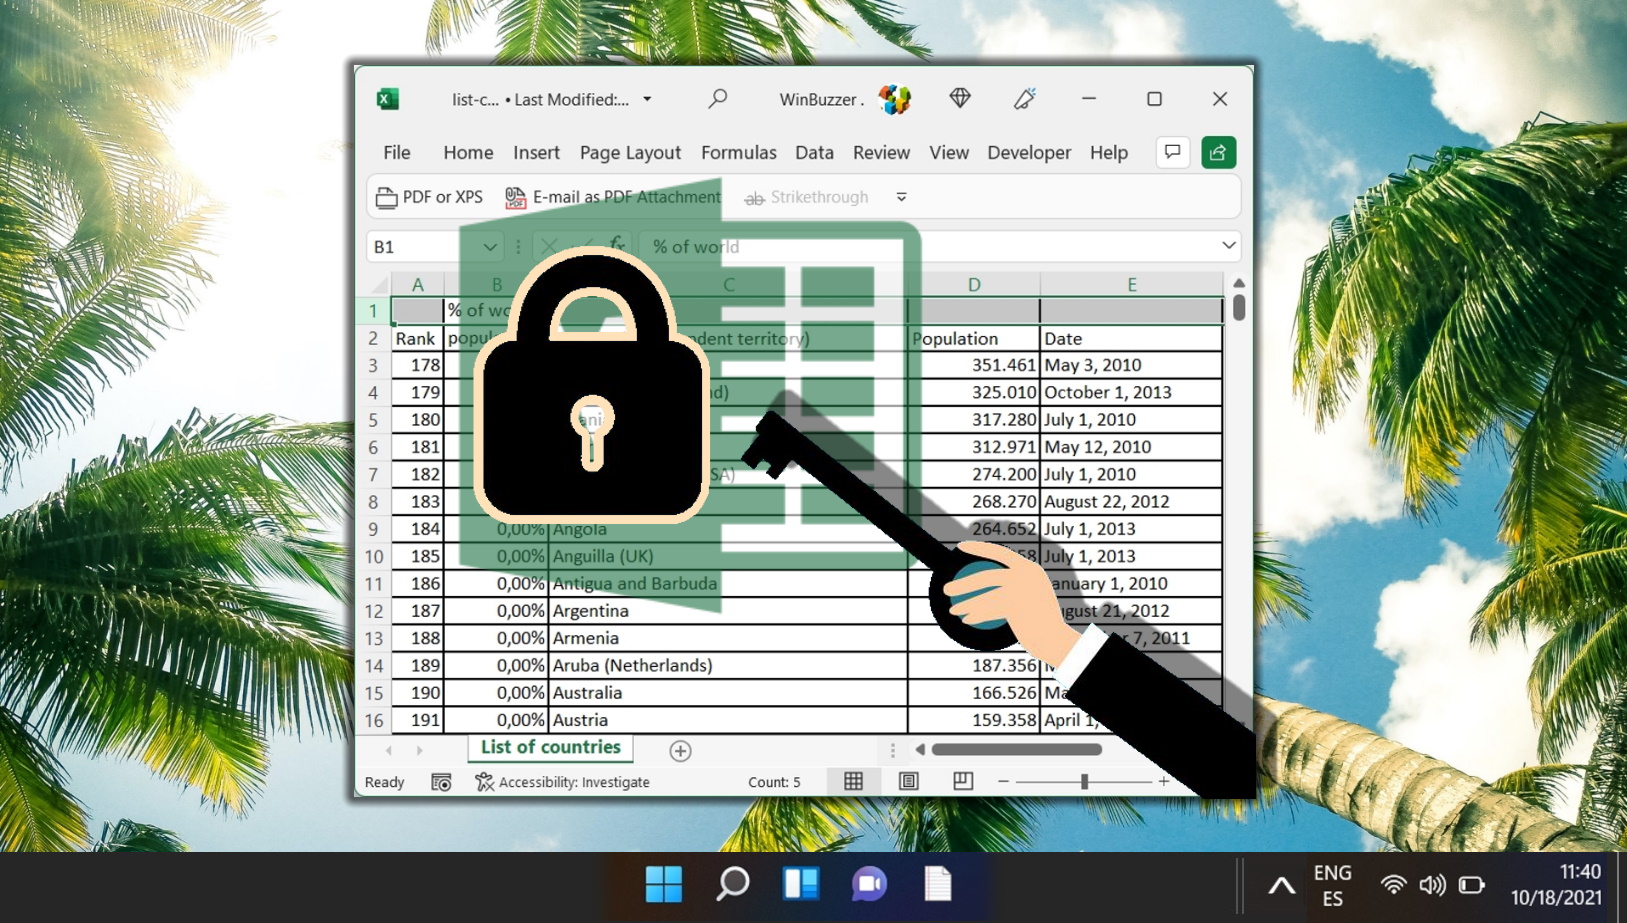
Related: How to Password Protect Excel Files
Related: How to Lock Cells in Excel to Protect Them from Editing

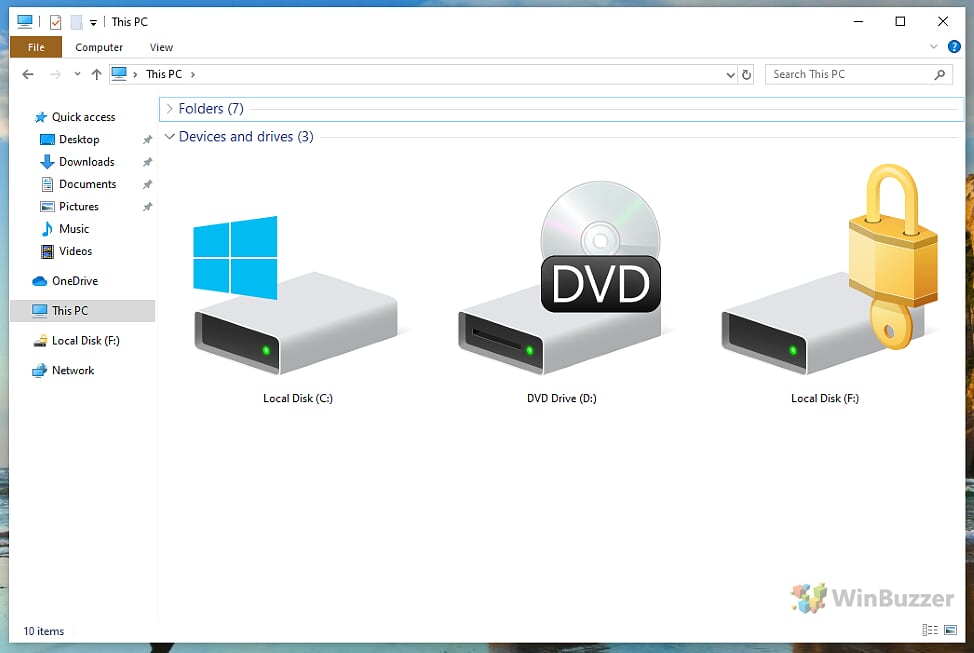
Related: How to Password-Protect a Folder in Windows 11 and Windows 10
- how to password protect a pdf
- how to password protect an excel file
- Microsoft Excel
- Password Protect a PDF
- Password Protect Word Document
- PDF password
- pdf with password
Recent News

Microsoft Announces Establishment of AI Hub in London, Led by AI...

Microsoft to Power Cloud Software Group’s Future with $1.65 Billion Investment
Subscribe to WinBuzzer on Google News


Microsoft 365 Life Hacks > Presentations > How to use AI to help improve your presentations
How to use AI to help improve your presentations
Creating and giving a presentation isn’t always easy, especially if you want to deliver a dynamite lecture. However, by harnessing the power of AI tools, you can elevate your presentations and leave a lasting impression on your audience. See how AI can provide valuable insights and enhancements to make your presentations stand out.

How AI can create structure in your presentation
No matter the subject, every great presentation has a narrative. You begin by introducing yourself and why you’re the best person to present this subject. Then, you mention the general outline and key topics before diving into the details: problems, potential solutions, and calls to action. Finally, you end with a conclusion that wraps up your topics and brings your presentation full circle.
Sometimes, this structure can be hard to define. Asking AI to create an outline for a presentation can be a great time-saving shortcut. If you’re starting with a complex research paper or passage, you can directly copy and paste it into the AI chat window, then ask to summarize it. AI can also extract key points for headings, which can create your outline for slide titles.
Use AI to design visually attractive presentations
You don’t need to be a graphic designer to create presentations that are both striking and easy to follow. With AI tools integrated into Microsoft PowerPoint , you can design slides that consider factors like readable fonts, compatible color schemes, the informational hierarchy , and information spacing that won’t overwhelm the audience with too much to see on each slide.
AI image creators can also translate your text into custom visuals: not only can this bring your slides to life, but it can also save you time from searching through image libraries, stock photos, or visual sources from the Internet.

Tell your story with captivating presentations
Powerpoint empowers you to develop well-designed content across all your devices
AI tools that transcribe recordings into presentations
While the visual presentation is one aspect of your project, your speech and delivery are vital. The key to this is practice. Rehearsing your presentation out loud, and especially multiple times before you go onstage, can aid in balancing when to present new points, ensure smooth transitions between slides, time your overall presentation, and help you refine your text so you can sound clearer.
AI can help! Advanced tools can transcribe your spoken words, both in real-time and through prerecorded clips on your computer or mobile device. This not only assists in creating accurate speaker notes but also provides an opportunity to learn how you sound, allowing you to refine and improve your delivery. In PowerPoint, speaker notes are hidden from the audience during a live presentation, and AI integration can generate live notes from the sound of your voice—which makes it easy to practice and familiarize yourself with your content.
AI tools that can summarize, design, and transcribe your presentations can make it easier to engage with your audience confidently. See more presentation tips to enhance your points, such as how to craft a compelling story or how to overcome public speaking anxiety .
Get started with Microsoft 365
It’s the Office you know, plus the tools to help you work better together, so you can get more done—anytime, anywhere.
Topics in this article
More articles like this one.

How to create an educational presentation
Use PowerPoint to create dynamic and engaging presentations that foster effective learning.

Five tips for choosing the right PowerPoint template
Choose an appropriate PowerPoint template to elevate your presentation’s storytelling. Consider time length, audience and other presentation elements when selecting a template.

How you can use AI to help you make the perfect presentation handouts
Learn how AI can help you organize and create handouts for your next presentation.

How to password protect your PowerPoint presentations
Learn how to password protect your PowerPoint presentations and secure your valuable files.

Everything you need to achieve more in less time
Get powerful productivity and security apps with Microsoft 365

Explore Other Categories
'ZDNET Recommends': What exactly does it mean?
ZDNET's recommendations are based on many hours of testing, research, and comparison shopping. We gather data from the best available sources, including vendor and retailer listings as well as other relevant and independent reviews sites. And we pore over customer reviews to find out what matters to real people who already own and use the products and services we’re assessing.
When you click through from our site to a retailer and buy a product or service, we may earn affiliate commissions. This helps support our work, but does not affect what we cover or how, and it does not affect the price you pay. Neither ZDNET nor the author are compensated for these independent reviews. Indeed, we follow strict guidelines that ensure our editorial content is never influenced by advertisers.
ZDNET's editorial team writes on behalf of you, our reader. Our goal is to deliver the most accurate information and the most knowledgeable advice possible in order to help you make smarter buying decisions on tech gear and a wide array of products and services. Our editors thoroughly review and fact-check every article to ensure that our content meets the highest standards. If we have made an error or published misleading information, we will correct or clarify the article. If you see inaccuracies in our content, please report the mistake via this form .
Buy Microsoft Office Professional for Windows for $56 with this deal

Download a lifetime license to Microsoft Office for a deep discount.
In a subscription-based world, it's hard to come across an app or software package that you can use for life with just a one-time purchase. Thankfully, Microsoft offers a lifetime license to their well-loved app suite where you can do just that.
Right now you can get this lifetime license for your Windows PC for $56 on Stack Social with the code ENJOY20 -- that's over 70% off the regular price. (You can also buy a version for your Mac for a slightly higher price.)
Microsoft Office 2021 Lifetime License
Empower any project with ms office.
This 2021 lifetime license is the latest version offered and includes the biggest apps like Word, PowerPoint, Excel, Outlook, OneNote, and Teams . Windows users also receive Publisher and Access.
With the complete set of apps at your fingertips, you'll be prepared for just about any personal, professional, or creative project. Need to type an essay for class? Open Word. Want to create a budget spreadsheet? Use Excel. Throw together a professional presentation? Check out PowerPoint's preset templates. How about collaborating in real-time? Teams. Whatever you need, Microsoft Office 2021 probably has it.
Own the timeless app suite for life
Unlike Microsoft 365, which charges a yearly subscription fee, this license allows you to download the app suite and use it for life. After purchase, you'll instantly receive a link to download and a key to activate the software.
One caveat to note: While StackSocial is an authorized Microsoft partner and offers "lifetime" access to Microsoft Office, it is possible that Microsoft could end the license. But their Office deal has been running for over a year, and the license that ZDNET's Alison DeNisco Rayome bought through it for a personal MacBook over a year ago is still working.
If you want to use the suite on multiple computers, you'll have to purchase separate licenses. Windows devices should be running on at least Windows 10 or 11, while Mac devices must be updated to macOS Version 11 Big Sur.
Get your lifetime license to Microsoft Office 2021 right now.
ZDNET Recommends
Microsoft office for windows or mac is just $30 right now: last chance, upgrade to windows 11 pro and microsoft office pro for just $60, buy microsoft visual studio pro for $36 with this deal.

Present on multiple monitors (and view speaker notes privately)
You can present with 2 monitors: Using Presenter View is a great way to view your presentation with speaker notes on one monitor (your laptop, for example), while your audience views the notes-free presentation on a different monitor (like a larger screen you're projecting to).
Note: Make sure the device you're using for your presentation supports the use of multiple monitors. Check with your manufacturer for up-to-date information about multiple monitor support.
To do this procedure and split the view between projectors in this way, you must be connected to the second screen.
Set up PowerPoint to use Presenter view with two monitors
On the Slide Show tab, in the Monitors group, select Use Presenter View .

Windows Display Settings should open.
In the Display Settings dialog box, on the Monitor tab, select the monitor icon that you want to use to view your speaker notes, and then select the This is my main monitor check box.
If the This is my main monitor check box is selected and unavailable, the monitor is already designated as the primary monitor.
Select the monitor icon for the second monitor—the one the audience will watch, and then select the Extend my Windows Desktop onto this monitor check box.
Notes: If the Windows Display Settings don't open, do the following:
Windows 10: Click Start > Settings > System > Display . At the top, under Customize your display , is a diagram of the screens connected to your computer, with each screen numbered. If you are connected to a project, typically it will be represented in the diagram as screen 2. Select screen 1 in the diagram, then scroll downward. Ensure that the check box named Make this my main display is selected. Above that check box, in the Multiple displays list, select Extend these displays .
Windows 8: Right-click the Windows Start button, click Control Panel > Display > Adjust resolution . In the Multiple displays list, click Extend these displays . Select the monitor on which you want to view your speaker notes, and click Make this my main display .
You can use PowerPoint on your smartphone as a remote control to run your presentation and view your speaker notes. See Using a laser pointer on your smartphone when presenting in PowerPoint for more information, including a brief video.
Deliver your presentation on two monitors
On the Slide Show tab, in the Set Up group, click Set Up Slide Show .
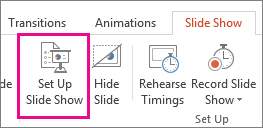
In the Set Up Show dialog box, choose the options that you want, and then click OK . If you choose Automatic , PowerPoint will display speaker notes on the laptop monitor, if available. Otherwise, PowerPoint will display speaker notes on the main display identified in your Display settings ( Settings > Display ).
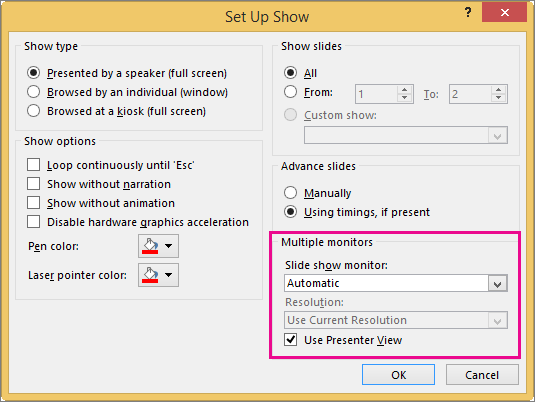
Extend vs. Duplicate: What happens after the slide show ends
PowerPoint does something behind the scenes to make the process of starting a slide show on a second monitor as smooth and quick as possible. When you enter Slide Show, PowerPoint automatically changes your display settings (also known as your display topology) to Extend .
What can be confusing is what happens after your slide show concludes:
In PowerPoint 2013 , when your slide show ends, PowerPoint leaves the display topology as Extend . (The benefit of this approach is that the next time you present on a second monitor, the first slide will appear with minimal delay. The drawback is that PowerPoint may be overriding your preferred display setting of "duplicate". Some people don't like this override.)
In newer versions , in the same end-of-slide-show scenario, PowerPoint reverts to your default setting, returning to Duplicate , if that's what you have chosen.
If you are using PowerPoint 2013 and you want PowerPoint to revert to the default setting, rather than keeping the Extend setting, you can tell it to do that by making a small change to the Windows registry as described below.
In this procedure, you are creating a command that adds a new setting to the Windows Registry for PowerPoint, and then you are running that command:
Create a new file in Notepad.
Copy and paste the following three lines of text into Notepad:
On the File menu in Notepad, click Save As .
Name the file Update.reg . (It's important that the file name extension be .reg ).
In the Save as type box, choose All Files (*.*) .
Take note of the folder in which you are saving the file. Then click Save , and close Notepad.
Open File Explorer from the Start menu and navigate to the folder where you saved Update.reg.
Double-click Update.reg .
Answer "Yes" to the two prompts that ensue.
With that completed, PowerPoint will now revert to your default display topology at the conclusion of a slide show.
(Read more technical details in this community forum post that was answered by a PowerPoint program manager .)
Video: Use Presenter view
View your speaker notes as you deliver your slide show
Video: Rehearse timings for a slide show
Zoom in to part of a slide in Slide Show view
Print your PowerPoint slides, handouts, and notes
Create a self-running presentation
Start the presentation and see your notes in Presenter view
PowerPoint videos not playing on secondary monitor

Need more help?
Want more options.
Explore subscription benefits, browse training courses, learn how to secure your device, and more.

Microsoft 365 subscription benefits

Microsoft 365 training

Microsoft security

Accessibility center
Communities help you ask and answer questions, give feedback, and hear from experts with rich knowledge.

Ask the Microsoft Community

Microsoft Tech Community

Windows Insiders
Microsoft 365 Insiders
Was this information helpful?
Thank you for your feedback.

Contribute to the Microsoft 365 and Office forum! Click here to learn more 💡
April 9, 2024
Contribute to the Microsoft 365 and Office forum!
Click here to learn more 💡
- Search the community and support articles
- Microsoft 365 and Office
- Search Community member
Ask a new question
Microsoft Word,Excel,Powerpoint Certification
Hello, I'm currently trying to find an old Microsoft Certification I had acquired in middle school around 2015. I passed the Excel, Word, and PowerPoint exam. I used to be able to locate the certification platform but maybe since it's been so long ago that it may be an invalid website. I remember i only had to sign in with a username and password at the time. I don't think its linked to any of my personal emails. Is there anyway someone can help access those old certifications. I may be able to use it for my current inquiries. Thank you.
- Subscribe to RSS feed
Report abuse
Replies (1) .
- Microsoft Agent |
Dear Emily,
Sorry for that our category may have limited resources on the Microsoft Certification related issues and question. I suggest you post a new thread on the following specific support channel for further help.
Results in Microsoft Credentials - Training, Certification, and Program Support
Thanks for your understanding.
Cliff | Microsoft Community Moderator
Was this reply helpful? Yes No
Sorry this didn't help.
Great! Thanks for your feedback.
How satisfied are you with this reply?
Thanks for your feedback, it helps us improve the site.
Thanks for your feedback.
Question Info
- For education
- Norsk Bokmål
- Ελληνικά
- Русский
- עברית
- العربية
- ไทย
- 한국어
- 中文(简体)
- 中文(繁體)
- 日本語

IMAGES
VIDEO
COMMENTS
Enabling Presentation Mode. The first step is enabling presentation mode within Word: Open the Word document you wish to present. Ensure all attendees have access to this file. Navigate to the Share tab on the ribbon. Click Present Online. Select Office Presentation Service from the dropdown menu.
Microsoft Word has been specifically built keeping in mind users' needs. As a result, three new presentation features have been included in the Office product. These features allow every Word ...
Make sure that it contains only text. The headings in the document will become the slide headings in the presentation. Go to File > Export > Export to PowerPoint presentation . In the Export to presentation window, choose a design theme for your presentation, and then select Export . Word exports and transforms the document, applying the design ...
Head to the Microsoft Office online website, sign in to your account, and open your document in Word. You do not have to open PowerPoint in another tab or window. Click File > Export and choose the "Export to PowerPoint Presentation" option. You'll see a pop-up window with a collection of themes. Select the theme that you want to use and click ...
In Word, open the document you want to share. Click File > Share > Present Online. Under Present Online, choose Office Presentation Service. If you want attendees to be able to download a copy of the document, click the box next to Enable remote viewers to download the document. Click the Present Online button. When you're ready to present ...
Click File > Export > Export to PowerPoint Presentation (preview), and the presentation window will display a few different design themes. Choose the theme most appropriate to the content. If you ...
Word 2007: How to create a PowerPoint slide or presentation in word In this tutorial, I have shown how to create a powerpoint slide or presentation in Micros...
Change linked or embedded objects. Right-click the linked object, and then click Linked Slide Object or Linked Presentation Object. Click Open or Open Link, depending on whether the object is embedded or linked, and then make the changes that you want. If the object is embedded, the changes are only in the copy that is in the document.
One person. Sharing and real-time collaboration. PowerPoint for the web and PowerPoint desktop app for offline use. Premium templates, fonts, icons, and stickers with thousands of options to choose from. Dictation, voice commands, and transcription. Advanced spelling and grammar, in-app learning tips, use in 20+ languages, and more.
PowerPoint for the web. Turn your ideas into compelling presentations using professional-looking templates. Use animations, transitions, photos, and videos to tell one-of-a-kind stories. Co-author team presentations at the same time, from anywhere. Start using PowerPoint for free Learn more about PowerPoint.
In this tutorial, we will learn the technique of Creating a PowerPoint Presentation from a Word Document in just a couple of clicks. You will learn how to ex...
Insert PowerPoint slides as individual images. In Word, go to Insert > Add from Files and select the PowerPoint file. Choose Insert Slide for each slide you want to add. Use the Picture Format menu to adjust each inserted slide. When you want to use PowerPoint slides in a Microsoft Word document, use the Add from Files tool to import one or ...
If you've copied the PowerPoint slide to your clipboard, you'll see a "Microsoft PowerPoint Slide Object" option in the box under "As." Click it to select the option. Next, to embed the slide, click the bubble next to "Paste." To link the slide, click the bubble next to "Paste Link." Select "OK" to insert the linked or embedded object.
To turn your Word document into a PowerPoint presentation: Open any document you want to convert into a presentation in Word for the web. Click File > Export > Export to PowerPoint presentation. When prompted, choose a design theme for your presentation. Click Open presentation to re view the results in PowerPoint for the w eb.
Set yourself up for success with free, eye-catching presentation templates that don't require graphic design skills to use. Whether you're pitching to investors or sharing a class project, using presentation templates allows you to focus on the content of your work without worrying about the design. Explore presentation templates for pitch ...
Open Microsoft Word and navigate to the document you are working on. Place your cursor where you want to insert the PowerPoint presentation. In the upper left corner, locate the "Insert" option and click on it. Locate the "Text" group and click on the drop-down arrow to the right of "Object."
The editable templates are downloadable in any device you have, along with its graphic designs in file formats like Microsoft Word. 4. Come Up with Essential Details. Once you have your presentation templates with you, start filling in the details you need. Presentations need to be short and precise.
Word for the web and Word desktop app for offline use. Advanced spelling and grammar, in-app learning tips, use in 20+ languages, and more. Premium templates, fonts, icons, and stickers with thousands of options to choose from. Dictation, voice commands, and transcription. Up to 6 TB cloud storage, 1 TB (1000 GB) per person.
Find the most popular commands on the Ribbon in PowerPoint for Microsoft 365/Office 365 in Windows. Computerworld. As in previous versions of PowerPoint, if you want the Ribbon commands to go away ...
Click the "Choose Files" button to select your PPT files. Click the "Convert to WORD" button to start the conversion. When the status change to "Done" click the "Download WORD" button.
Create a presentation. Open PowerPoint. In the left pane, select New. Select an option: To create a presentation from scratch, select Blank Presentation. To use a prepared design, select one of the templates. To see tips for using PowerPoint, select Take a Tour, and then select Create, . Add a slide.
PowerPoint lets you play a presentation continuously. This is handy when you want to show information on public screens without anyone having to control it. In this update, we added a new configuration to Storytelling add-in that ensures that you get the latest data from Power BI when running in a continuous slide show. When enabled, the add-in automatically pulls data from Power BI, without ...
Here's how to get free PowerPoint on the Microsoft 365 (Office) app: Search for Microsoft 365 (Office) on the Microsoft Store app. Install and open it. Sign in with your Microsoft account ...
Tick 'Encrypt the document with a password'. In the options window, find and tick the checkbox labeled " Encrypt the document with a password ". Click " OK " to move to the next step ...
Asking AI to create an outline for a presentation can be a great time-saving shortcut. If you're starting with a complex research paper or passage, you can directly copy and paste it into the AI chat window, then ask to summarize it. AI can also extract key points for headings, which can create your outline for slide titles.
Select the text. Under Drawing Tools, choose Format. Do one of the following: To change the color of your text, choose Text Fill, and then choose a color. To change the outline color of your text, choose Text Outline, and then choose a color. To apply a shadow, reflection, glow, bevel, 3-D rotation, a transform, choose Text Effects, and then ...
Thankfully, Microsoft offers a lifetime license to their well-loved app suite where you can do just that. Right now you can get this lifetime license for your Windows PC for $56 on Stack Social ...
My admin tab label in any browser I choose, across several networks, displays as "Početak - Microsoft 365 admin center" via login through https://portal.microsoft.com. I am not Serbian, my company has no affiliations with Serbia, and our regional settings are not Serbian. Yet, that "Početak" is the word for "beginning" in Serbian.
Deliver your presentation on two monitors. On the Slide Show tab, in the Set Up group, click Set Up Slide Show. In the Set Up Show dialog box, choose the options that you want, and then click OK. If you choose Automatic, PowerPoint will display speaker notes on the laptop monitor, if available. Otherwise, PowerPoint will display speaker notes ...
Microsoft Word,Excel,Powerpoint Certification. Hello, I'm currently trying to find an old Microsoft Certification I had acquired in middle school around 2015. I passed the Excel, Word, and PowerPoint exam. I used to be able to locate the certification platform but maybe since it's been so long ago that it may be an invalid website.